201771010125王瑜《面向物件程式設計(Java)》第十二週學習總結
第十二週學習總結
一 . 理論部分
1.概述:使用者介面,使用者與計算機系統(各種程式)互動的介面
圖形使用者介面,以圖形方式呈現的使用者介面
2.AWT:Java的抽象視窗工具箱,它包含在java.awt包中,提供了許多用來設計GUI的元件類和容器類
AWT庫處理使用者介面元素的方法:把圖形元素的建立和行為委託給本地的GUI工具箱進行處理
3.Swing:在java.swing包中,Swing使用者介面庫是非基於對等體的GUI工具箱
4.AWT與Swing的關係:(1)大部分AWT元件都有其Swing的等價元件
(2)Swing元件的名字一般是在AWT元件名前面新增一個字母“J”,如:JButton,JFrame,JPanel等
5.建立框架:
(1)元件:通常把由Component類的子類或間接子類建立的物件稱為一個元件
(2)容器:Java中呢容納和排列元件的元件,通常的容器是框架
(3)新增元件:Container類提供了一個方法add(),用來在容器類元件物件中新增其他元件
6.框架(Frame)的建立:
(1)建立空框架:在Java中,常採用框架(Frame)建立初始介面,即GUI的頂層視窗;AWT庫中有一個基於對等體的Frame類;該類的Swing版本為JFrame,JFrame是Frame子類
(2)框架定位與框架屬性:
定位:常用Component類的setLocation和setBounds方法
常用屬性:Title(框架標題);IconImage(框架圖示)
(3)確定框架大小:通過呼叫Toolkit類的方法來得到螢幕尺寸資訊
7.在元件中顯示資訊:
(1)在AWT中可呼叫add()方法把元件直接新增到AWTFrame中,在Swing中元件則新增到內容窗格里。其中內容窗格是用來新增元件的,新增程式碼如下:
Container contentPane = getContentPane();
(2)使用者也可以自行建立一個元件類,並在元件上進行繪製,此時需要過載paintComponent(),使用者的自建元件也可新增到內容窗格里
(3)public void setEnabled(boolean b):設定元件是否可被啟用
當引數b取值true時,元件可以被啟用;當引數b取值false 時,元件不可啟用;預設情況下,元件是可以被啟用的
(4)public void setVisible(boolean b):設定元件在該容器中的可見性
當b取值true時,元件在容器中可見;當b取值false時,元件在容器中不可見;除了Window型元件外,其它型別元件預設是可見的
二 .實驗部分
1、實驗目的與要求
(1) 掌握Java GUI中框架建立及屬性設定中常用類的API;
(2) 掌握Java GUI中2D圖形繪製常用類的API;
(3) 瞭解Java GUI中2D圖形中字型與顏色的設定方法;
(4) 瞭解Java GUI中2D影象的載入方法。
2、實驗內容和步驟
實驗1: 匯入第10章示例程式,測試程式並進行程式碼註釋。
測試程式1:
l 執行下列程式,觀察程式執行結果。

import javax.swing.*;
public class SimpleFrameTest
{
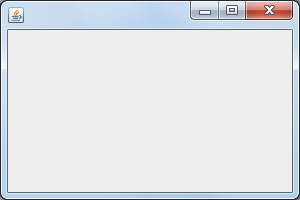
   public static void main(String[] args) { JFrame frame = new JFrame(); //建立一個frame類物件 frame.setBounds(0, 0,300, 200);//定義座標以及寬度和高度 frame.setDefaultCloseOperation(JFrame.EXIT_ON_CLOSE);//視窗關閉操作 frame.setVisible(true);//視窗是否可見  } }

程式執行結果如下: 
在elipse IDE中除錯執行教材407頁程式10-1,結合程式執行結果理解程式;與上面程式對比,思考異同;
l 掌握空框架建立方法;
l 瞭解主執行緒與事件分派執行緒概念;
l 掌握GUI頂層視窗建立技術。
package simpleFrame;

import java.awt.*;
import javax.swing.*;

/**
 * @version 1.33 2015-05-12
 * @author Cay Horstmann
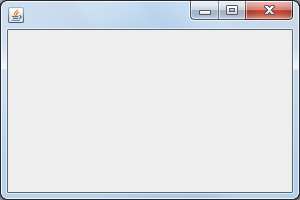
 */ public class SimpleFrameTest { public static void main(String[] args) { EventQueue.invokeLater(() ->//lambda表示式:通過執行緒開啟一個佇列  { SimpleFrame frame = new SimpleFrame();//建立一個類物件 frame.setDefaultCloseOperation(JFrame.EXIT_ON_CLOSE);//設定物件點選關閉操作 frame.setVisible(true);//頁面是否可見  }); } } class SimpleFrame extends JFrame { private static final int DEFAULT_WIDTH = 300; private static final int DEFAULT_HEIGHT = 200; public SimpleFrame()//構造器  { setSize(DEFAULT_WIDTH, DEFAULT_HEIGHT);//設定大小  } }

程式執行結果如下:

測試程式2:
l 在elipse IDE中除錯執行教材412頁程式10-2,結合程式執行結果理解程式;
掌握確定框架常用屬性的設定方法。
package simpleFrame;

import java.awt.*;
import javax.swing.*;

/**
 * @version 1.34 2015-06-16
 * @author Cay Horstmann
 */ public class SizedFrameTest { public static void main(String[] args) { EventQueue.invokeLater(() ->//lambda表示式:通過執行緒開啟一個佇列  { JFrame frame = new SizedFrame();//建立一個frame類物件 frame.setTitle("SizedFrame");//設定標題 frame.setDefaultCloseOperation(JFrame.EXIT_ON_CLOSE);//關閉操作 frame.setVisible(true);//設定可見性  }); } } class SizedFrame extends JFrame//繼承 { public SizedFrame()//構造器  { //得到螢幕維度  Toolkit kit = Toolkit.getDefaultToolkit();//生成Toolkit物件 Dimension screenSize = kit.getScreenSize(); int screenHeight = screenSize.height; int screenWidth = screenSize.width; // set frame width, height and let platform pick screen location  setSize(screenWidth / 2, screenHeight / 2);//尺寸大小 setLocationByPlatform(true); // set frame icon  Image img = new ImageIcon("icon.gif").getImage(); setIconImage(img); } }

程式執行結果如下:
測試程式3:
l 在elipse IDE中除錯執行教材418頁程式10-3,結合執行結果理解程式;
l 掌握在框架中新增元件;
掌握自定義元件的用法。
package notHelloWorld;

import javax.swing.*;
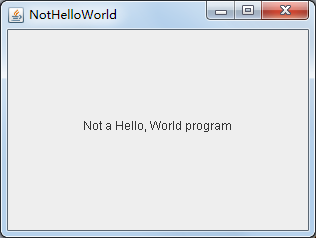
import java.awt.*; /** * @version 1.33 2015-05-12 * @author Cay Horstmann */ public class NotHelloWorld { public static void main(String[] args) { EventQueue.invokeLater(() ->// 表示式  { JFrame frame = new NotHelloWorldFrame(); frame.setTitle("NotHelloWorld"); frame.setDefaultCloseOperation(JFrame.EXIT_ON_CLOSE); frame.setVisible(true); }); } } /** * A frame that contains a message panel */ class NotHelloWorldFrame extends JFrame { public NotHelloWorldFrame() { add(new NotHelloWorldComponent()); pack(); } } /** * A component that displays a message. */ class NotHelloWorldComponent extends JComponent { public static final int MESSAGE_X = 75; public static final int MESSAGE_Y = 100; private static final int DEFAULT_WIDTH = 300; private static final int DEFAULT_HEIGHT = 200; public void paintComponent(Graphics g) { g.drawString("Not a Hello, World program", MESSAGE_X, MESSAGE_Y); } public Dimension getPreferredSize() { return new Dimension(DEFAULT_WIDTH, DEFAULT_HEIGHT); } }

程式執行結果如下:

測試程式4:
l 在elipse IDE中除錯執行教材424 -425頁程式10-4,結合程式執行結果理解程式;
l 掌握2D圖形的繪製方法。
package simpleFrame;

import java.awt.*;
import java.awt.geom.*;
import javax.swing.*;

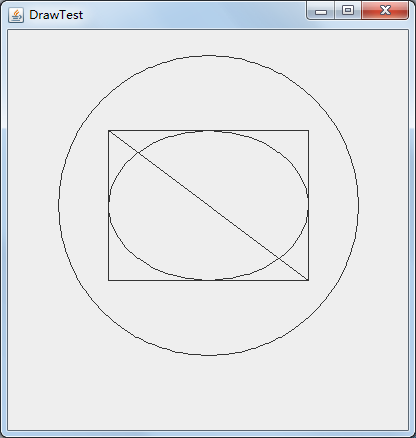
/** * @version 1.33 2007-05-12 * @author Cay Horstmann */ public class DrawTest { public static void main(String[] args) { EventQueue.invokeLater(() ->//lambda表示式  { JFrame frame = new DrawFrame(); frame.setTitle("DrawTest"); frame.setDefaultCloseOperation(JFrame.EXIT_ON_CLOSE); frame.setVisible(true); }); } } /** * A frame that contains a panel with drawings */ class DrawFrame extends JFrame//繼承 { public DrawFrame()//構造器  { add(new DrawComponent());//新增視窗  pack(); } } /** * A component that displays rectangles and ellipses. */ class DrawComponent extends JComponent//繼承 { private static final int DEFAULT_WIDTH = 400; private static final int DEFAULT_HEIGHT = 400; public void paintComponent(Graphics g)//繪圖  { Graphics2D g2 = (Graphics2D) g; //繪製一個長方形 double leftX = 100; double topY = 100; double width = 200; double height = 150; Rectangle2D rect = new Rectangle2D.Double(leftX, topY, width, height); g2.draw(rect); //畫封閉橢圓  Ellipse2D ellipse = new Ellipse2D.Double(); ellipse.setFrame(rect); g2.draw(ellipse); //畫一條對角線  g2.draw(new Line2D.Double(leftX, topY, leftX + width, topY + height)); //用同一個中心畫一個圓 double centerX = rect.getCenterX(); double centerY = rect.getCenterY(); double radius = 150;//半徑  Ellipse2D circle = new Ellipse2D.Double(); circle.setFrameFromCenter(centerX, centerY, centerX + radius, centerY + radius); g2.draw(circle); } public Dimension getPreferredSize() { return new Dimension(DEFAULT_WIDTH, DEFAULT_HEIGHT); } }

程式執行結果如下: 
測試程式5:
l 在elipse IDE中除錯執行教材432頁-433程式10-5,結合程式執行結果理解程式;
l 瞭解2D圖形中字型的設定的方法;

package simpleFrame;

import java.awt.*;
import java.awt.font.*;
import java.awt.geom.*;
import javax.swing.*;

/** * @version 1.34 2015-05-12 * @author Cay Horstmann */ public class FontTest { public static void main(String[] args) { EventQueue.invokeLater(() ->//lambda表示式:通過執行緒開啟一個佇列  { JFrame frame = new FontFrame(); frame.setTitle("FontTest");//標題  frame.setDefaultCloseOperation(JFrame.EXIT_ON_CLOSE); frame.setVisible(true); }); } } /** * A frame with a text message component */ class FontFrame extends JFrame { public FontFrame()//構造器  { add(new FontComponent());//新增視窗  pack(); } } /** * A component that shows a centered message in a box. */ class FontComponent extends JComponent { private static final int DEFAULT_WIDTH = 300; private static final int DEFAULT_HEIGHT = 200;//常量 public void paintComponent(Graphics g)//繪製容器方法  { Graphics2D g2 = (Graphics2D) g; String message = "Hello, World!";//字串  Font f = new Font("Serif", Font.BOLD, 36); g2.setFont(f); //測量訊息的大小  FontRenderContext context = g2.getFontRenderContext(); Rectangle2D bounds = f.getStringBounds(message, context); //設定(x,y)=文字左上角 double x = (getWidth() - bounds.getWidth()) / 2; double y = (getHeight() - bounds.getHeight()) / 2; //增加到Y到達基線 double ascent = -bounds.getY(); double baseY = y + ascent; // draw the message  g2.drawString(message, (int) x, (int) baseY); g2.setPaint(Color.LIGHT_GRAY); // draw the baseline  g2.draw(new Line2D.Double(x, baseY, x + bounds.getWidth(), baseY)); //繪製封閉矩形  Rectangle2D rect = new Rectangle2D.Double(x, y, bounds.getWidth(), bounds.getHeight()); g2.draw(rect); } public Dimension getPreferredSize() { return new Dimension(DEFAULT_WIDTH, DEFAULT_HEIGHT); } }

程式執行如下:

測試程式6:
l 在elipse IDE中除錯執行教材436頁-437程式10-6,結合程式執行結果理解程式;
l 瞭解2D圖形影象的顯示方法。
package image;

import java.awt.*;
import javax.swing.*; /** * @version 1.34 2015-05-12 * @author Cay Horstmann */ public class ImageTest { public static void main(String[] args) { EventQueue.invokeLater(() -> { JFrame frame = new ImageFrame(); frame.setTitle("ImageTest"); frame.setDefaultCloseOperation(JFrame.EXIT_ON_CLOSE); frame.setVisible(true); }); } } /** * A frame with an image component */ class ImageFrame extends JFrame { public ImageFrame() { add(new ImageComponent()); pack(); } } /** * A component that displays a tiled image */ class ImageComponent extends JComponent { private static final int DEFAULT_WIDTH = 300; private static final int DEFAULT_HEIGHT = 200; private Image image; public ImageComponent() { image = new ImageIcon("blue-ball.gif").getImage(); } public void paintComponent(Graphics g) { if (image == null) return; int imageWidth = image.getWidth(null); int imageHeight = image.getHeight(null); // draw the image in the upper-left corner  g.drawImage(image, 0, 0, null); // tile the image across the component for (int i = 0; i * imageWidth <= getWidth(); i++) for (int j = 0; j * imageHeight <= getHeight(); j++) if (i + j > 0) g.copyArea(0, 0, imageWidth, imageHeight, i * imageWidth, j * imageHeight); } public Dimension getPreferredSize() { return new Dimension(DEFAULT_WIDTH, DEFAULT_HEIGHT); } }
 三.實驗總結
在本章學習中,以圖形介面的知識為主,學到了建立框架的基本操作,在最後也瞭解了繪製製圖形的常用API以及如何設定字型和顏色,在PTA中的習題還沒有完成,但總體上已經對本章的主要知識都有了瞭解並且掌握了一些基本操作
