Docker資源限制
阿新 • • 發佈:2018-11-19
一、基礎知識
blkio: 這個subsystem可以為塊裝置設定輸入/輸出限制,比如物理驅動裝置(包括磁碟、固態硬碟、USB等)。
cpu: 這個subsystem使用排程程式控制task對CPU的使用。
cpuacct: 這個subsystem自動生成cgroup中task對CPU資源使用情況的報告。
cpuset: 這個subsystem可以為cgroup中的task分配獨立的CPU(此處針對多處理器系統)和記憶體。
devices 這個subsystem可以開啟或關閉cgroup中task對裝置的訪問。
freezer 這個subsystem可以掛起或恢復cgroup中的task。
memory
perfevent 這個subsystem使用後使得cgroup中的task可以進行統一的效能測試。{![perf: Linux CPU效能探測器,詳見https://perf.wiki.kernel.org/index.php/MainPage]}
*net_cls 這個subsystem Docker沒有直接使用,它通過使用等級識別符(classid)標記網路資料包,從而允許 Linux 流量.
二、Docker資源限制
環境部署:
Redhat6.5版本
CPU個數=2
具體部署:
- unlimit -m 對最大記憶體不進行限制

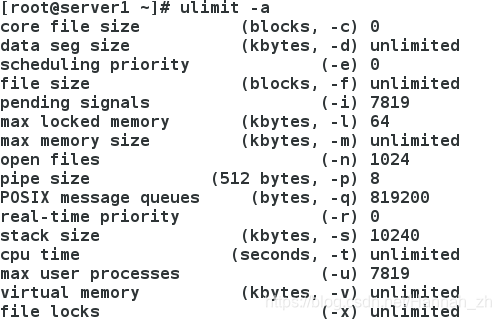
- ulimit – a 顯示當前所有的 limit 資訊

一、無限佔用記憶體
[[email protected] ~]# useradd zh   ##新建使用者zh
[[email protected] ~]# su - zh
[[email protected] ~]$ ulimit -m
unlimited
[[email protected] ~]$ :(){ :|:& };:   ##shell記憶體炸彈,無限制開啟shell
- 無限制開啟shell

二、設定 記憶體+交換分割槽 < = 200M
1、安裝cgroup服務
[[email protected] ~]# yum search cgroup
[[email protected] ~]# yum install -y libcgroup.x86_64
[[email protected] ~]# /etc/init.d/cgconfig start
[[email protected] ~]# cd /cgroup/memory/
[[email protected] memory]# cat memory.limit_in_bytes   ##檢視配置檔案可知,記憶體未做限制
9223372036854775807
- 記憶體限制檔案

2、設定資源限制引數:記憶體+交換分割槽<=200M
[[email protected] ~]# vim /etc/cgconfig.conf
 28 group x1 {
 29         memory {
 30                 memory.limit_in_bytes = 209715200;
 31                 memory.memsw.limit_in_bytes = 209715200; ##完全限制記憶體
 32                 }
 33 }
[[email protected] ~]# /etc/init.d/cgconfig restart
[[email protected] ~]# cd /cgroup/memory/x1/
[[email protected] x1]# ls
cgroup.event_control       memory.memsw.limit_in_bytes      memory.swappiness
cgroup.procs               memory.memsw.max_usage_in_bytes  memory.usage_in_bytes
memory.failcnt             memory.memsw.usage_in_bytes      memory.use_hierarchy
memory.force_empty         memory.move_charge_at_immigrate  notify_on_release
memory.limit_in_bytes      memory.oom_control               tasks
memory.max_usage_in_bytes  memory.soft_limit_in_bytes
memory.memsw.failcnt       memory.stat
[[email protected] x1]# cat memory.limit_in_bytes
209715200
[[email protected] x1]# cat memory.memsw.limit_in_bytes
209715200
- Mem used : 419

3、測試
[[email protected] ~]# cd /dev/shm/
[[email protected] shm]# cgexec -g memory:x1 dd if=/dev/zero of=file bs=1M count=100
100+0 records in
100+0 records out
104857600 bytes (105 MB) copied, 0.073585 s, 1.4 GB/s
[[email protected] shm]# cgexec -g memory:x1 dd if=/dev/zero of=file bs=1M count=200
Killed
- Mem used : 619 = 419 +200


三、針對使用者的記憶體資源限制
[[email protected] ~]# vim /etc/cgrules.conf
 11 zh              memory          x1/
[[email protected] ~]# /etc/init.d/cgred start
[[email protected] ~]# cd /dev/shm/
[[email protected] shm]# ls
file
[[email protected] shm]# rm -fr file      ##刪除200M的file檔案
測試:
[[email protected] shm]# su - zh
[[email protected] ~]$ cd /dev/shm/
[[email protected] shm]$ dd if=/dev/zero of=file bs=1M count=300
Killed
[[email protected] shm]$ logout

四、針對cpu的限制
對cpu.shares寫入整數值可以控制該cgroup獲得的時間片
[[email protected] ~]# vim /etc/cgconfig.conf
 34 group x2 {
 35          cpu {
 36                  cpu.shares = 100;
 37              }
 38 }
[[email protected] ~]# /etc/init.d/cgconfig restart
[[email protected] ~]# cd /cgroup/cpu/x2/          ##檢視cpu的限制
[[email protected] x2]# cat cpu.shares
100
測試:
[[email protected] ~]# cgexec -g cpu:x2 dd if=/dev/zero of=/dev/null &
[1] 6299
[[email protected] ~]# dd if=/dev/zero of=/dev/null &
[2] 6394
- top 鍵 檢視cpu接近100%

- top鍵 再按 1 出現兩個cpu(只有cpu1可改,cpu0不可改)

- 更改cpu1
[[email protected] ~]# cd /sys/devices/system/cpu/cpu1
[[email protected] cpu1]# cat online    ##cpu1線上
1
[[email protected] cpu1]# echo 0 > online    ##使cpu1下線
[[email protected] cpu1]# top
示圖:cpu1下線,只有cpu0線上,兩個程序的cpu之和為100%

五、針對io的限制
[[email protected] ~]# cat /cgroup/blkio/blkio.throttle.read_bps_device     ##無io限制
[[email protected] ~]# vim /etc/cgconfig.conf
 39 group x3 {
 40          blkio {
 41                  blkio.throttle.read_bps_device ="252:0 1000000";    #設定io輸入、輸出速率為1M
 42              }
 43 }
 [[email protected] ~]# /etc/init.d/cgconfig restart
測試:
[[email protected] ~]# cgexec -g blkio:x3 dd if=/dev/vda of=/dev/null &
[1] 10424
[[email protected] ~]# yum install -y iotop
[[email protected] ~]# iotop
- io輸入、輸出基本穩定1M左右

六、程序凍結(程序中止,但依舊存在)
[[email protected] ~]# cat /cgroup/freezer/x4/tasks    ##無程序任務
[[email protected] ~]# vim /etc/cgconfig.conf
group x4 {
        freezer {}
}
[[email protected] ~]# /etc/init.d/cgconfig restart
[[email protected] ~]# cgexec -g blkio:x3 dd if=/dev/vda of=/dev/null &
[1] 2313
[[email protected] ~]# cd /cgroup/freezer/x4/
[[email protected] x4]# echo 2313 > tasks
[[email protected] x4]# cat freezer.state
THAWED                        ##程序解凍
測試:
- 程序凍結
[[email protected] x4]# echo FROZEN > freezer.state
示圖: ps命令檢視程序,程序存在

示圖: iotop檢視程序,程序不存在,程序凍結

- 程序解凍
[[email protected] x4]# echo THAWED > freezer.state
示圖: ps命令檢視程序,程序存在

示圖: iotop檢視程序,程序存在,程序解凍

七、CPU繫結
所謂的cpu繫結,其實將當前程序或執行緒繫結到固定的CPU核心或者執行緒繫結到固定的CPU核心來提高系統排程程式的效率來提高程式執行的效率。
[[email protected] ~]# vim /etc/cgconfig.conf
group x5 {
        cpuset {
                cpuset.cpus = 1;          ##2號cpu
                cpuset.mems = 0;          ##記憶體片
        }
}
[[email protected] ~]# /etc/init.d/cgconfig restart
測試:
當執行x5時,佔用cpu1;
[[email protected] ~]# cgexec -g cpuset:x5 dd if=/dev/vda of=/dev/null &
[1] 2285
[[email protected] ~]# top
- 資源優先執行在cpu1上

正常執行dd命令,佔用Cpu0(Maybe:Cpu1)
[[email protected] ~]# dd if=/dev/zero of=/dev/null &
[1] 2708
