
使用Python+OpenCV構建文件掃描程式
阿新 • • 發佈:2018-11-27
首先給各位展示原始圖片:

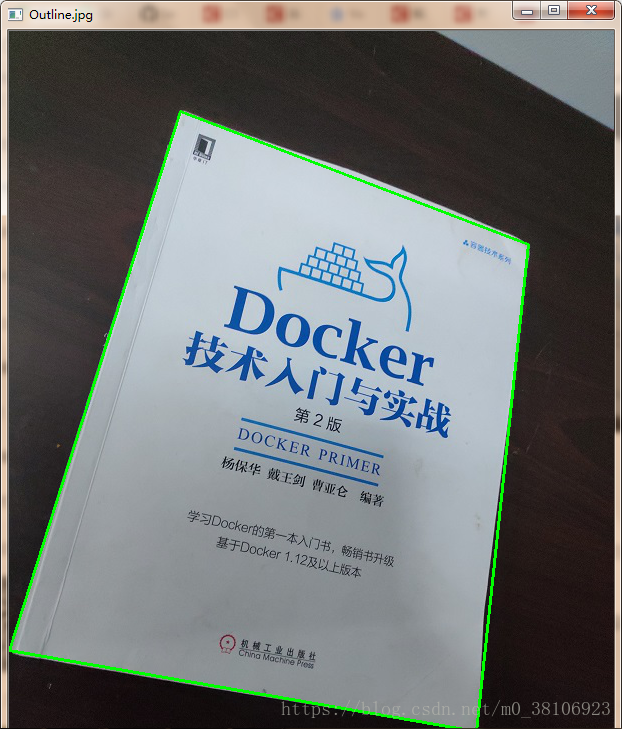
使用自己搭建的文件掃描程式掃描效果如下圖:
圖一:查詢輪廓
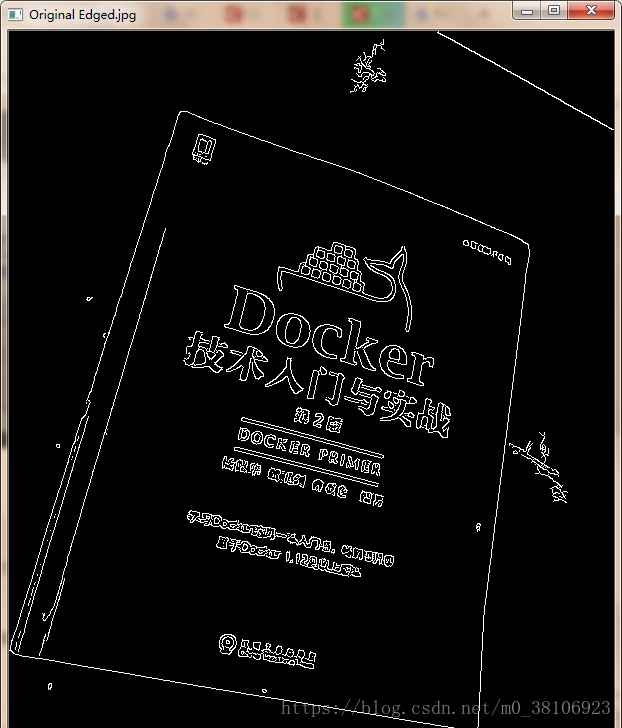
圖二:邊緣檢測
圖三:應用透視變換和閾值


使用OpenCV構建文件掃描程式只需三個簡單步驟即可完成:
- 第1步: 檢測邊緣。
- 第2步: 使用影象中的邊緣找到表示正在掃描的紙張的輪廓(輪廓)。
- 第3步: 應用透視變換獲取文件的自上而下檢視。
下面建立自己的移動掃描器應用程式吧~
import cv2
import numpy as np
import rect

##這裡新增影象。
##如果解析度足夠好,我們也可以使用膝上型電腦的攝像頭。
image = cv2.imread('./1.jpg')

##調整影象大小以便處理
##選擇最佳維度,以便不丟失重要內容
image = cv2.resize(image, (605, 807))

#建立原始影象拷貝
orig = image.copy()

#轉換成灰度和模糊到平滑
gray = cv2.cvtColor(image, cv2.COLOR_BGR2GRAY)
blurred = cv2.GaussianBlur(gray, (5, 5), 0)
#blurred = cv2.medianBlur(gray, 5)

#應用Canny邊緣檢測
edged = cv2.Canny(blurred, 0, 50)
orig_edged = edged.copy()

##找到邊緣影象中的輪廓,只保留最大的輪廓,並初始化螢幕輪廓
(_,contours, _) = cv2.findContours(edged, cv2.RETR_LIST, cv2.CHAIN_APPROX_NONE)
contours = sorted(contours, key=cv2.contourArea, reverse=True)

#x,y,w,h = cv2.boundingRect(contours[0])
#cv2.rectangle(image,(x,y),(x+w,y+h),(0,0,255),0)

#得到近似輪廓
for c in contours:
    p = cv2.arcLength(c, True)
    approx = cv2.approxPolyDP(c, 0.02 * p, True)

    if len(approx) == 4:
        target = approx
        break


#目標點對映到800×800四邊形
approx = rect.rectify(target)
pts2 = np.float32([[0,0],[800,0],[800,800],[0,800]])

M = cv2.getPerspectiveTransform(approx,pts2)
dst = cv2.warpPerspective(orig,M,(800,800))

cv2.drawContours(image, [target], -1, (0, 255, 0), 2)
dst = cv2.cvtColor(dst, cv2.COLOR_BGR2GRAY)


#利用扭曲影象上的閾值進行掃描效果(如果需要)
ret,th1 = cv2.threshold(dst,127,255,cv2.THRESH_BINARY)
th2 = cv2.adaptiveThreshold(dst,255,cv2.ADAPTIVE_THRESH_MEAN_C,\
            cv2.THRESH_BINARY,11,2)
th3 = cv2.adaptiveThreshold(dst,255,cv2.ADAPTIVE_THRESH_GAUSSIAN_C,\
            cv2.THRESH_BINARY,11,2)
ret2,th4 = cv2.threshold(dst,0,255,cv2.THRESH_BINARY+cv2.THRESH_OTSU)


cv2.imshow("Original.jpg", orig)
cv2.imshow("Original Gray.jpg", gray)
cv2.imshow("Original Blurred.jpg", blurred)
cv2.imshow("Original Edged.jpg", orig_edged)
cv2.imshow("Outline.jpg", image)
cv2.imshow("Thresh Binary.jpg", th1)
cv2.imshow("Thresh mean.jpg", th2)
cv2.imshow("Thresh gauss.jpg", th3)
cv2.imshow("Otsu's.jpg", th4)
cv2.imshow("dst.jpg", dst)

#其他閾值法
##ret,thresh1 = cv2.threshold(dst,127,255,cv2.THRESH_BINARY)
##ret,thresh2 = cv2.threshold(dst,127,255,cv2.THRESH_BINARY_INV)
##ret,thresh3 = cv2.threshold(dst,127,255,cv2.THRESH_TRUNC)
##ret,thresh4 = cv2.threshold(dst,127,255,cv2.THRESH_TOZERO)
##ret,thresh5 = cv2.threshold(dst,127,255,cv2.THRESH_TOZERO_INV)
##
##cv2.imshow("Thresh Binary", thresh1)
##cv2.imshow("Thresh Binary_INV", thresh2)
##cv2.imshow("Thresh Trunch", thresh3)
##cv2.imshow("Thresh TOZERO", thresh4)
##cv2.imshow("Thresh TOZERO_INV", thresh5)


cv2.waitKey(0)
cv2.destroyAllWindows()
注意Demo中會有一個易錯點!!!
關於解決cv2.findContours返回值too many values to unpack (expected 2)的問題。
根據網上的 教程,Python OpenCV的輪廓提取函式會返回兩個值,第一個為輪廓的點集,第二個是各層輪廓的索引。但是實際呼叫時我的程式報錯了,錯誤內容如下
too many values to unpack (expected 2)
其實是接受返回值不符,如果你僅僅使用一個變數a去接受返回值,呼叫len(a),你會發現長度為3,也就是說這個函式實際上返回了三個值。
第一個,也是最坑爹的一個,它返回了你所處理的影象;
第二個,正是我們要找的,輪廓的點集;
第三個,各層輪廓的索引。