
win7 下anaconda TensorFlow tensorboard使用
第一步在 Spyder(TensorFlow)中輸入一下程式碼:
# View more python learning tutorial on my Youtube and Youku channel!!!
# Youtube video tutorial: https://www.youtube.com/channel/UCdyjiB5H8Pu7aDTNVXTTpcg
# Youku video tutorial: http://i.youku.com/pythontutorial
"""
Please note, this code is only for python 3+. If you are using python 2+, please modify the code accordingly.
"""
from __future__ import print_function
import tensorflow as tf
def add_layer(inputs, in_size, out_size, activation_function=None):
# add one more layer and return the output of this layer
with tf.name_scope('layer'):
with tf.name_scope('weights'):
Weights = tf.Variable(tf.random_normal([in_size, out_size]), name='W')
with tf.name_scope('biases'):
biases = tf.Variable(tf.zeros([1, out_size]) + 0.1, name='b')
with tf.name_scope('Wx_plus_b'):
Wx_plus_b = tf.add(tf.matmul(inputs, Weights), biases)
if activation_function is None:
outputs = Wx_plus_b
else:
outputs = activation_function(Wx_plus_b, )
return outputs
# define placeholder for inputs to network
with tf.name_scope('inputs'):
xs = tf.placeholder(tf.float32, [None, 1], name='x_input')
ys = tf.placeholder(tf.float32, [None, 1], name='y_input')
# add hidden layer
l1 = add_layer(xs, 1, 10, activation_function=tf.nn.relu)
# add output layer
prediction = add_layer(l1, 10, 1, activation_function=None)
# the error between prediciton and real data
with tf.name_scope('loss'):
loss = tf.reduce_mean(tf.reduce_sum(tf.square(ys - prediction),
reduction_indices=[1]))
with tf.name_scope('train'):
train_step = tf.train.GradientDescentOptimizer(0.1).minimize(loss)
sess = tf.Session()
# tf.train.SummaryWriter soon be deprecated, use following
if int((tf.__version__).split('.')[1]) < 12 and int((tf.__version__).split('.')[0]) < 1: # tensorflow version < 0.12
writer = tf.train.SummaryWriter('logs/', sess.graph)
else: # tensorflow version >= 0.12
writer = tf.summary.FileWriter("logs/", sess.graph)
# tf.initialize_all_variables() no long valid from
# 2017-03-02 if using tensorflow >= 0.12
if int((tf.__version__).split('.')[1]) < 12 and int((tf.__version__).split('.')[0]) < 1:
init = tf.initialize_all_variables()
else:
init = tf.global_variables_initializer()
sess.run(init)
# direct to the local dir and run this in terminal:
# $ tensorboard --logdir=logs
第二步執行這裡程式碼,一般人這裡都能成功不是問題。生成logs夾下面有好一個events開頭的檔案,示意圖如下:

第三步安裝一個Chrome瀏覽器,國內瀏覽器好像都不太行,也行我能力不行、Chrome不會安裝的直接用360助手就可以了。
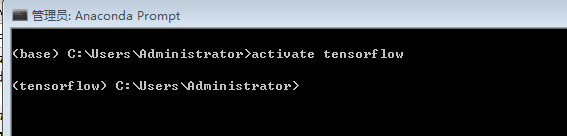
第四步用管理員身份開啟anaconda prompt,在終端輸入activate TensorFlow示意圖如下:
在這裡輸入你logs資料夾目錄
cd /d E:\deep_learing_python_code\tensorflow_mofan\logs
跳入指定檔案目錄示意圖如下:

第五步接下來就是關鍵的一步了,單獨說出來
在終端中輸入tensorboard.exe --logdir=E://deep_learing-python_code//tensorflow_mofan//logs
或者tensorboard--logdir=E:/deep_learing-python_code/tensorflow_mofan/logs
你可以講tensorboard.exe改成tensorboard,我是隻是進去了沒有看到檔案內容
你也可以不用絕對路徑,你可能進入不了網站。
終端示意圖如下

CTRL C不一定能複製到,可能還要自己手動輸入CHROME瀏覽器中。
複製完後示意圖

說明你前面都成功了,恭喜你了進入最後一關了
將http://WIN-20180527QMD:6006
每個人的網站可能不一樣,將上一部複製的網站輸入到Chrome瀏覽器中
就可以看到如下:

可能會遇到防火牆,多試幾次就可以了。
成功後的路徑是這樣的
http://win-20180527qmd:6006/#graphs&run=.