springboot整合jsp檢視
阿新 • • 發佈:2018-12-01
由於springboot內建的tomcat不支援jsp,所以需要引入外部Tomcat的支援。
在建立springboot整合jsp的專案時,需要注意專案型別一定為war型別,否則會找不到頁面。因為JSP需要webapp的支援。二freemarker是在springboot內部已經支援了。
一、新建war型別的maven專案
二、pom檔案中匯入依賴:
    <parent>
		<groupId>org.springframework.boot</groupId>
		<artifactId>spring-boot-starter-parent</artifactId>
		<version>2.0.0.RELEASE</version>
	</parent>

	<dependencies>
		<!-- springboot web核心元件 -->
		<dependency>
			<groupId>org.springframework.boot</groupId>
			<artifactId>spring-boot-starter-web</artifactId>
		</dependency>

		<!-- 引入springboot對Tomcat的支援 -->
		<dependency>
			<groupId>org.springframework.boot</groupId>
			<artifactId>spring-boot-starter-tomcat</artifactId>
		</dependency>

		<!-- springboot  外部tomcat支援,專案中如果使用jsp,就必須在這裡新增此依賴 -->
		<dependency>
			<groupId>org.apache.tomcat.embed</groupId>
			<artifactId>tomcat-embed-jasper</artifactId>
		</dependency>
	</dependencies>
三、在src/main/resources下面新建application.properties檔案並新增配置(springboot預設讀取 名字為application.properties的檔案裡面的配置資訊):

key是不可以自己亂寫的,因為springboot定義好了這些Key,底層就是通過識別這些key去工作的。
注意我們在建立WEB-INF/jsp檔案路徑的時候不要建在resources檔案下面,因為resources是springboot在讀取jar包的時候讀取配置檔案用的,沒有對jsp進行支援,反而會有jsp問價被別人訪問到的風險。所以我們在src/main/webapp下面建立WEB-INF/jsp資料夾。
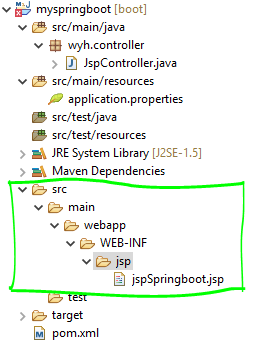
四、編寫Controller程式碼:
/**
* <p>Title: JspController</p>
* <p>Description:JSP整合springboot </p>
* @author wyh
* @date Dec 1, 2018
*/

@Controller//使用Jsp想實現頁面跳轉,不需要返回json,所以此處仍使用@Controller,而不使用@RestController
public class JspController {


	@RequestMapping("jspIndex")
	public String jspIndex() {
		return "jspSpringboot";//在application.properties中已經定義了檢視路徑的字首和字尾,所以此處只需要根據完整路徑及字首和字尾來定義返回檔名
	}

}
五、編寫啟動程式
@SpringBootApplication
public class JspApp {
public static void main(String[] args) {
SpringApplication.run(JspApp.class, args);
}
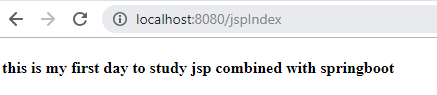
}啟動專案,訪問成功: