openMV使用---找到影象中的圓形
阿新 • • 發佈:2018-12-02
主要想實現一個功能,就是找到影象中固定大小的圓形,然後將其標記出來。
openmv給的示例程式中有相關程式,今天主要對該程式進行講解,並改進。
import sensor, image, time

sensor.reset()#重啟攝像頭
#設定為彩色, 顏色格式為RGB565
# 也就是說,顏色儲存 紅色(5位),綠色(6位), 藍色(5位)
# sensor.GRAYSCALE: 灰度,每個畫素8位。
sensor.set_pixformat(sensor.RGB565) # grayscale is faster
#設定影象的大小
#就是你拍攝的畫面的長和寬分別是多少個畫素點
#sensor.QQQQCIF: 22x18
#sensor.QQQCIF: 44x36
#sensor.QQCIF: 88x72
#sensor.QCIF: 176x144
#sensor.CIF: 352x288
#sensor.QQQQSIF: 22x15
#sensor.QQQSIF: 44x30
#sensor.QQSIF: 88x60
#sensor.QSIF: 176x120
#sensor.SIF: 352x240
#sensor.QQQQVGA: 40x30
#sensor.QQQVGA: 80x60
#sensor.QQVGA: 160x120
#sensor.QVGA: 320x240
#sensor.VGA: 640x480
#sensor.HQQQQVGA: 40x20
#sensor.HQQQVGA: 80x40
#sensor.HQQVGA: 160x80
#sensor.HQVGA: 240x160
#sensor.HVGA: 480x320
#sensor.LCD: 128x160 (for use with the lcd shield)
#sensor.QQVGA2: 128x160 (for use with the lcd shield)
#sensor.B40x30: 160x120 (for use with image.find_displacement)
#sensor.B64x32: 160x120 (for use with image.find_displacement)
#sensor.B64x64: 160x120 (for use with image.find_displacement)
#sensor.SVGA: 800x600 (only in JPEG mode for the OV2640 sensor)
#sensor.SXGA: 1280x1024 (only in JPEG mode for the OV2640 sensor)
#sensor.UXGA: 1600x1200 (only in JPEG mode for the OV2640 sensor)

sensor.set_framesize(sensor.QQVGA)#表示拍攝畫面的大小為160×120畫素
#因為sensor引數設定之後, 影象質量不穩定, 要過一段時間。 跳過n張照片,在更改
#設定後,跳過一些幀,等待感光元件變穩定。這裡是跳過2000毫秒
sensor.skip_frames(time = 2000)
#建立一個時鐘物件來追蹤FPS
#FPS是測量用於儲存、顯示動態視訊的資訊數量。通俗來講就是指每秒變化的畫面數。
clock = time.clock()
while(True):
    clock.tick() #每次迴圈更新時鐘
     # 拍攝一張照片,snapshot()函式返回一個image物件
     #lens_corr函式用於非魚眼畸變矯正,預設設定引數為1.8,
     #然後根據影象情況進行調整
    img = sensor.snapshot().lens_corr(1.8)
   # threshold:設定要找到圓的個數,閾值越大,表示要找的圓越少
   #`x_margin`, `y_margin`, and `r_margin`:控制相似圓的合併,就是說多大範圍的圓,
   #將其認為是同一個圓。
   #r_min, r_max, and r_step:控制圓的大小範圍,就是說我想找半徑在這個範圍內的圓
    for c in img.find_circles(threshold = 2000, x_margin = 10, y_margin = 10, r_margin = 10,
            r_min = 2, r_max = 100, r_step = 2):
        img.draw_circle(c.x(), c.y(), c.r(), color = (255, 0, 0))
        print(c)

    print("FPS %f" % clock.fps())
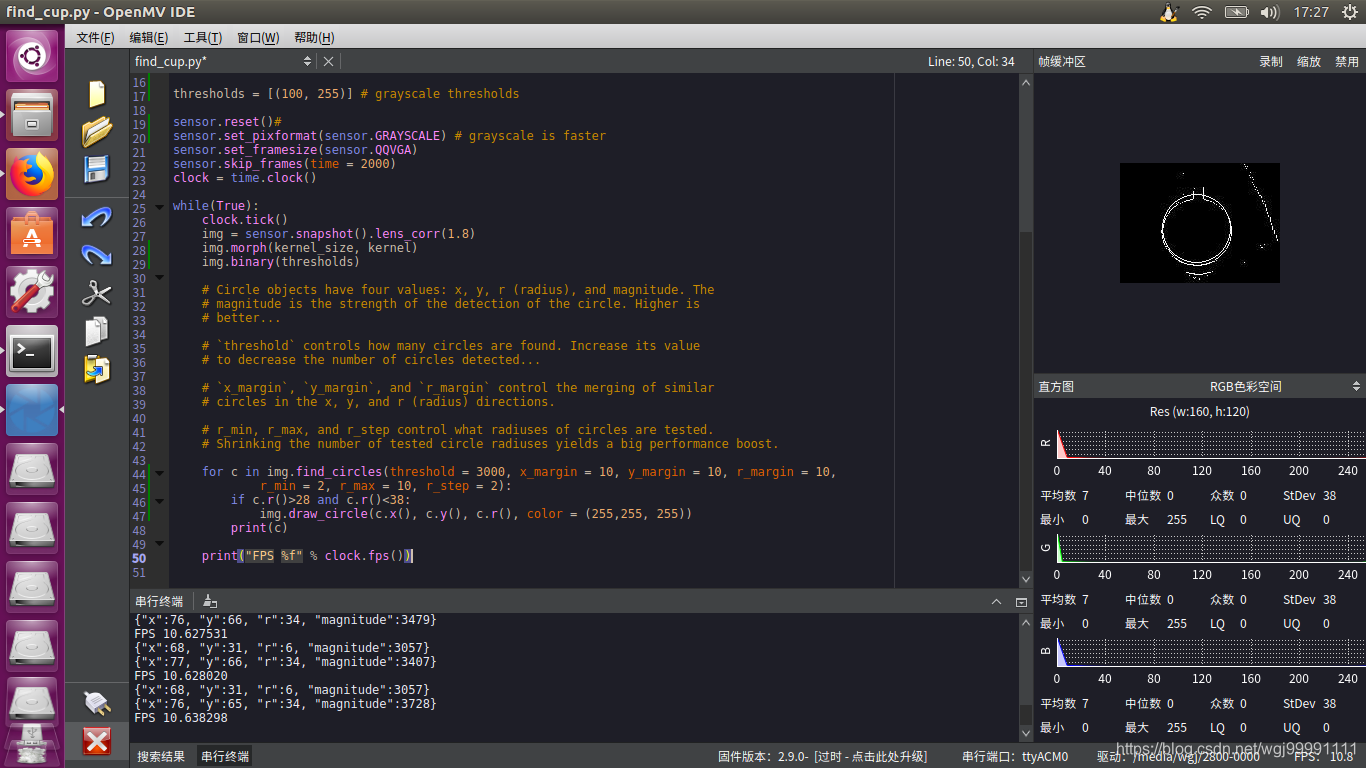
以上程式碼效果不是很好,新增邊緣增強濾波,以及使用灰度影象之後,效果好很多。
import sensor, image, time


kernel_size = 1 # kernel width = (size*2)+1, kernel height = (size*2)+1
kernel = [-1, -1, -1,\
          -1, +8, -1,\
          -1, -1, -1]

thresholds = [(100, 255)] # grayscale thresholds

sensor.reset()#
sensor.set_pixformat(sensor.GRAYSCALE) # grayscale is faster
sensor.set_framesize(sensor.QQVGA)
sensor.skip_frames(time = 2000)
clock = time.clock()

while(True):
    clock.tick()
    img = sensor.snapshot().lens_corr(1.8)
    img.morph(kernel_size, kernel)
    img.binary(thresholds)

    # Circle objects have four values: x, y, r (radius), and magnitude. The
    # magnitude is the strength of the detection of the circle. Higher is
    # better...

    # `threshold` controls how many circles are found. Increase its value
    # to decrease the number of circles detected...

    # `x_margin`, `y_margin`, and `r_margin` control the merging of similar
    # circles in the x, y, and r (radius) directions.

    # r_min, r_max, and r_step control what radiuses of circles are tested.
    # Shrinking the number of tested circle radiuses yields a big performance boost.

    for c in img.find_circles(threshold = 3000, x_margin = 10, y_margin = 10, r_margin = 10,
            r_min = 2, r_max = 10, r_step = 2):
        if c.r()>28 and c.r()<38:
            img.draw_circle(c.x(), c.y(), c.r(), color = (255,255, 255))
        print(c)

    print("FPS %f" % clock.fps())