
OC螢幕手勢解鎖
阿新 • • 發佈:2018-12-05
感覺螢幕解鎖好像很牛的樣子,所以試著寫了一個,程式碼很簡單,手勢用到的也是原生的,如果該程式碼幫助了你,記得點贊,如果該程式碼有任何問題,也可以隨時和我聯絡。改程式碼用到的兩張圖片,是我隨便找的兩張,可以自行找圖片代替
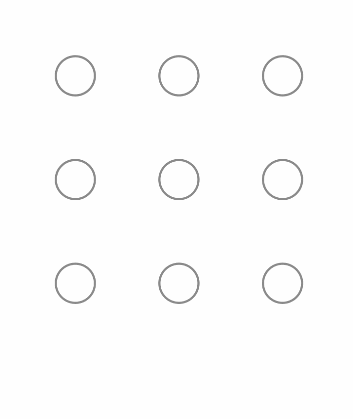
效果圖:
需要用到的程式碼:
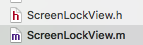
ScreenLockView.h
#import <UIKit/UIKit.h>

@interface ScreenLockView : UIView
@property(nonatomic,copy)void(^blockScreenPas)(NSString *pas);
@end
ScreenLockView.m
#import "ScreenLockView.h"

#define Row 3 //3行
#define Col 3 //3列
#define Width 50 //這邊寬度和高度一樣,都設定為50

@interface ScreenLockView ()
@property(nonatomic,strong)NSMutableArray *choseArr;
@property(nonatomic,assign)CGPoint currPoint;
@end

@implementation ScreenLockView
-(instancetype)initWithFrame:(CGRect)frame{
    self = [super initWithFrame:frame];
    if(self){
        self.backgroundColor = [UIColor whiteColor];

        self.choseArr = [NSMutableArray array];
        for(int i = 0 ; i < 9 ; i++){

            UIButton *btn = [UIButton buttonWithType:UIButtonTypeCustom];
            int row = i / Row;//行
            int col = i % Col;//列

            //行間距
            int rowMargin = (frame.size.width - Width * Row)/(Row-1);
            //列間距
            int colMargin = (frame.size.height - Width * Col)/(Col-1);
            btn.frame = CGRectMake((Width+rowMargin)*col, (colMargin+Width)*row, Width,  Width);

            [btn setImage:[UIImage imageNamed:@"noChose"] forState:UIControlStateNormal];
            [btn setImage:[UIImage imageNamed:@"chose"] forState:UIControlStateSelected];
            btn.tag = i;
            [self addSubview:btn];
            btn.userInteractionEnabled = NO;
        }
    }
    return self;
}
-(void)touchesBegan:(NSSet<UITouch *> *)touches withEvent:(UIEvent *)event{
    UITouch *touch = [touches anyObject];
    CGPoint touchPoine = [touch locationInView:self];
    [self isContainsWithPoint:touchPoine];

}
-(void)touchesMoved:(NSSet<UITouch *> *)touches withEvent:(UIEvent *)event{
    UITouch *touch = [touches anyObject];
    CGPoint touchPoine = [touch locationInView:self];
    [self isContainsWithPoint:touchPoine];
     self.currPoint = touchPoine;
     [self setNeedsDisplay];
}
-(void)touchesEnded:(NSSet<UITouch *> *)touches withEvent:(UIEvent *)event{
    NSString *pas = @"";
    for(UIButton *btn in self.choseArr){
        btn.selected = NO;
        pas = [pas stringByAppendingString:[NSString stringWithFormat:@"%ld",(long)btn.tag]];
    }
    if(self.blockScreenPas){
        self.blockScreenPas(pas);
    }

    [self.choseArr removeAllObjects];
    [self setNeedsDisplay];


}
/**
 判斷point是否被UIButton的frame包含
 */
-(void)isContainsWithPoint:(CGPoint)point{
    for(UIButton *btn in [self subviews]){
        if(CGRectContainsPoint(btn.frame ,point )&& ![self.choseArr containsObject:btn]){
            [self.choseArr addObject:btn];
            btn.selected = YES;

        }
    }

}

- (void)drawRect:(CGRect)rect {
    UIBezierPath * path = [UIBezierPath bezierPath];
    for(int i=0;i<self.choseArr.count;i++){
        UIButton *btn = self.choseArr[i];
        if(i == 0){
            [path moveToPoint:btn.center];//起始點
        }else{
             [path addLineToPoint:btn.center];
        }
    }

    [path addLineToPoint:self.currPoint];

    [path setLineWidth:2.f];
    [[UIColor redColor] set];
    [path stroke];

}


@end
使用:
ScreenLockView *lockView = [[ScreenLockView alloc]initWithFrame:CGRectMake(0, 0, 260, 260)];
    lockView.center = self.view.center;
    [self.view addSubview:lockView];


    UILabel *label = [[UILabel alloc]initWithFrame:CGRectMake(0, 0, 260, 30)];
    label.textAlignment = NSTextAlignmentCenter;
    label.center = CGPointMake(self.view.center.x, lockView.frame.origin.y+lockView.frame.size.height+50);
    [self.view addSubview:label];

    lockView.blockScreenPas = ^(NSString *pas) {
        label.text = pas;
    };