element-ui之scrollbar原始碼解析學習
最近使用vue在做pc端專案,需要處理滾動條樣式外加滾動載入。
使用了betterscroll和perfectscroll發現前者還是更偏向於移動端(也可能我比較著急沒用明白),
後者在ie11上面拖拽滾動條的時候會閃動,會有相容性問題。
經同事點播,最終使用了element-ui裡面的scrollbar,發現還真是不錯,用著簡單而且相容性好。
所以,來看看原始碼是怎麼實現的,學習學習,進步進步。
先看一下怎麼使用,便於理解元件的設計思路
<el-scrollbar class="content-table" :tag="'div'">
	<div v-for="(info, idx) in tab.humanInfo" :key="idx">
		<div></div>
	</div>
</el-scrollbar>
如上圖程式碼,直接把會很長的需要滾動的內容放到el-scrollbar元件裡面就好,其他細節不做贅述。
生成的html程式碼如下,這張圖pic-html的內容後面會多次提及。

根據對照頁面上的效果可知,div.el-scrollbar是最外層的容器,可以通過寫自己的class來添加出現滾動條的高度。
.el-scrollbar{
  overflow: hidden;
  position: relative;
}
div.el-scrollbar__wrap是實際上真正用來包裹內容併產生滾動條的容器,高度100%,div.el-scrollbar__view裡面就是我們自己寫的需要滾動的內容。
.el-scrollbar__wrap{
  overflow: scroll;
  height: 100%;
}
div.el-scrollbar__bar是滾動條的軌道,分為橫向和縱向,橫向為is-horizontal,縱向為is-vertical,兩者其實差不多,就只關注縱向了。滑鼠劃入劃出滾動區域,滾動條會隨之顯示隱藏。
.el-scrollbar__bar {
    position: absolute;
    right: 2px;
    bottom: 2px;
    z-index: 1;
    border-radius: 4px;
    opacity: 0;
    -webkit-transition: opacity 120ms ease-out;
    transition: opacity 120ms ease-out;
}
.el-scrollbar__bar.is-vertical {
    width: 6px;
    top: 2px;
}
div.el-scrollbar__thumb在div.el-scrollbar__bar內部,作為滾動條,hover會產生背景色的變化
.el-scrollbar__thumb {
    position: relative;
    display: block;
    width: 0;
    height: 0;
    cursor: pointer;
    border-radius: inherit;
    background-color: rgba(144,147,153,.3);
    -webkit-transition: .3s background-color;
    transition: .3s background-color;
}
ok,到這裡就把html結構大致分析完了,接著來看原始碼了,看看到底咋回事兒了

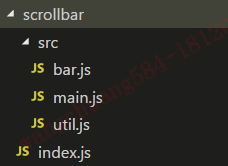
scrollbar/src/main.js就是元件主入口檔案了,首先看一下里面寫了什麼
props: {
    native: Boolean,
    wrapStyle: {},
    wrapClass: {},
    viewClass: {},
    viewStyle: {},
    noresize: Boolean, // 如果 container 尺寸不會發生變化,最好設定它可以優化效能
    tag: {
      type: String,
      default: 'div'
    }
  },
props主要傳入內聯樣式和自定義class,都以預設值來分析程式碼降低不必要的複雜度
data() {
    return {
      sizeWidth: '0',
      sizeHeight: '0',
      moveX: 0,
      moveY: 0
    };
  },
computed: {
    wrap() {
      return this.$refs.wrap;
    }
},
data中存了4個狀態,是用來儲存滾動條長度和滾動條移動距離,滾動條的長度是要隨著滾動內容變長而變短的
computed中儲存了ref=wrap這個dom節點,其實就是div.el-scrollbar__wrap這個產生滾動條的容器
methods: {
    handleScroll() {
      const wrap = this.wrap;

      this.moveY = ((wrap.scrollTop * 100) / wrap.clientHeight);
      this.moveX = ((wrap.scrollLeft * 100) / wrap.clientWidth);
    },

    update() {
      let heightPercentage, widthPercentage;
      const wrap = this.wrap;
      if (!wrap) return;

      heightPercentage = (wrap.clientHeight * 100 / wrap.scrollHeight);
      widthPercentage = (wrap.clientWidth * 100 / wrap.scrollWidth);

      this.sizeHeight = (heightPercentage < 100) ? (heightPercentage + '%') : '';
      this.sizeWidth = (widthPercentage < 100) ? (widthPercentage + '%') : '';
    }
  },
methods中儲存了2個方法,以下均以縱向滾動條分析
handleScroll顧名思義,就是滾動事件的監聽函式。這個函式用 內容的滾動距離/視口高度 算出滾動條滾動的百分比。之所以用滾動距離和視口高度相比,舉例說明一下,假如滾動內容scrollHeight為2個視口高度,那麼滾動距離scrollTop為1個視口高度的時候,滾動條應該是滾到底部,滾動條最上方距離滾動條軌道最上方應該是自身的高度,也就是說moveY為100%,滾動條高度為滾動軌道的50%
update,用於隨著滾動內容的改變,來更新滾動條的高度,滾動條高度的計算方法為,視口高度/滾動區域高度,依舊可以用上面的例子來解釋。
如果所得百分比不小於100%,則滾動條高度為空,即沒有可滾動空間,滾動條不出現
mounted() {
    if (this.native) return;
    this.$nextTick(this.update);
    !this.noresize && addResizeListener(this.$refs.resize, this.update);
  },

beforeDestroy() {
    if (this.native) return;
    !this.noresize && removeResizeListener(this.$refs.resize, this.update);
}
mouted執行了一次update方法,用於初始化滾動條長度,併為div.el-scrollbar__view新增resize事件監聽,只要其中的內容改變引起高度變化,則更新滾動條高度
beforeDestroy用於元件銷燬時幹掉resize事件
下面進入main.js的主要實現邏輯部分,採用了渲染函式和jsx混用的方式實現
render(h) {
 ....
}
由於render函式裡面內容很多,這裡拆開來分析
let gutter = scrollbarWidth();
let style = this.wrapStyle;
if (gutter) {
  const gutterWith = `-${gutter}px`;
  const gutterStyle = `margin-bottom: ${gutterWith}; margin-right: ${gutterWith};`;
  if (Array.isArray(this.wrapStyle)) {
     style = toObject(this.wrapStyle);
     style.marginRight = style.marginBottom = gutterWith;
  } else if (typeof this.wrapStyle === 'string') {
     style += gutterStyle;
  } else {
     style = gutterStyle;
  }
}
gutter獲取了瀏覽器的滾動條寬度,並且對props傳入的樣式進行分情況處理,最終style獲得到一個樣式,其中主要是要包含margin-bottom=橫向滾動條高度;margin-right=縱向滾動條寬度
const view = h(this.tag, {
      class: ['el-scrollbar__view', this.viewClass],
      style: this.viewStyle,
      ref: 'resize'
 }, this.$slots.default);
const wrap = (
    <div
        ref="wrap"
        style={ style }
        onScroll={ this.handleScroll }
        class={ [this.wrapClass, 'el-scrollbar__wrap',
                 gutter ? '' : 'el-scrollbar__wrap--hidden-default'] }>
        { [view] }
    </div>
);
使用渲染函式的方式,拼接出div.el-scrollbar__view,裡面包含滾動的內容,ref=‘resize’,前面提到的resize的監聽函式就綁在這個方法上面
並且將滾動事件綁在wrap上,將refs.resize放在wrap容器的內部,style樣式放在了wrap上面
wrap的樣式並沒有width,而是直接進行流體佈局,這樣的話就可以通過新增style樣式中的margin-right的值來改變wrap的外部尺寸特性,使得wrap的長度向右拉伸一個滾動條的寬度那麼大的距離。而wrap的外部容器的overflow為hidden,所以多出來的距離剛好被外部容器隱藏。那個距離就是原生滾動條產生的位置,這樣就實現了隱藏真正的滾動條。這樣處理的好處是沒有相容性問題。
let nodes;
if (!this.native) {
   nodes = ([
     wrap,
     <Bar
        move={ this.moveX }
        size={ this.sizeWidth }></Bar>,
     <Bar
        vertical
        move={ this.moveY }
        size={ this.sizeHeight }></Bar>
    ]);
} else {
    nodes = ([
      <div
         ref="wrap"
         class={ [this.wrapClass, 'el-scrollbar__wrap'] }
         style={ style }>
         { [view] }
      </div>
    ]);
}
return h('div', { class: 'el-scrollbar' }, nodes);
將wrap和bar元件放在容器div.el-scrollbar中
moveY和sizeHeight的資料傳入到bar元件中,bar元件為滾動條元件,滾動事件通過操作moveY和sizeHeight的值來操作滾動條的位置和長度
下面來看一下bar元件的原始碼
props: {
    vertical: Boolean,
    size: String,
    move: Number
  },
傳入的props上面已經說到了,只是還有一個用來區分橫縱滾動條的一個入參
computed: {
    bar() {
      return BAR_MAP[this.vertical ? 'vertical' : 'horizontal'];
    },

    wrap() {
      return this.$parent.wrap;
    }
},
computed返回了bar,這個主要是一些配置,wrap就還是上面說到的外面的那個wrap容器
export const BAR_MAP = {
  vertical: {
    offset: 'offsetHeight',
    scroll: 'scrollTop',
    scrollSize: 'scrollHeight',
    size: 'height',
    key: 'vertical',
    axis: 'Y',
    client: 'clientY',
    direction: 'top'
  },
  horizontal: {
    offset: 'offsetWidth',
    scroll: 'scrollLeft',
    scrollSize: 'scrollWidth',
    size: 'width',
    key: 'horizontal',
    axis: 'X',
    client: 'clientX',
    direction: 'left'
  }
};
下面我們來看一下bar中的主要邏輯
render(h) {
    const { size, move, bar } = this;
    return (
      <div
        class={ ['el-scrollbar__bar', 'is-' + bar.key] }
        onMousedown={ this.clickTrackHandler } >
        <div
          ref="thumb"
          class="el-scrollbar__thumb"
          onMousedown={ this.clickThumbHandler }
          style={ renderThumbStyle({ size, move, bar }) }>
        </div>
      </div>
    );
},
這段程式碼主要生成了滾動條的html,包含了點選滾動條軌道,拖拽滾動條,改變滾動條位置的邏輯
先來看一下renderThumbStyle函式的作用
export function renderThumbStyle({ move, size, bar }) {
  const style = {};
  const translate = `translate${bar.axis}(${ move }%)`;

  style[bar.size] = size;
  style.transform = translate;
  style.msTransform = translate;
  style.webkitTransform = translate;

  return style;
};
這個函式用來生成一段css樣式,根據size、move的值動態控制滾動條位置。實現原理主要是依靠css的translate根據百分比來調整滾動條位置,調整height來動態改變滾動條的長度。
繼續看一下div.el-scrollbar__bar軌道上繫結的點選事件監聽函式clickTrackHandler
clickTrackHandler(e) {
    const offset = Math.abs(e.target.getBoundingClientRect()[this.bar.direction] -
                      e[this.bar.client]);
    const thumbHalf = (this.$refs.thumb[this.bar.offset] / 2);
    const thumbPositionPercentage = ((offset - thumbHalf) * 100 / this.$el[this.bar.offset]);
    this.wrap[this.bar.scroll] = (thumbPositionPercentage * this.wrap[this.bar.scrollSize] / 100);
},
這裡面的很多變數都是取自上面介紹的那個配置檔案裡面的配置
先獲取點選的軌道div.el-scrollbar__bar距離整個document視口最上方的距離 減去 滑鼠點選的位置距離視口最上方的距離,得到滑鼠點選位置距離滾動條軌道最上方的距離,取絕對值賦值給offset
獲取滾動條的offsetHeight的一半賦值給thumbHalf
offset 減去 thumbHalf可獲取當滾動條中心在滑鼠點選位置時,滾動條最上方距離滾動條軌道最上方的距離,用這個值比上滾動條滾到的長度,獲取一個相對於滾動條軌道長度的百分比,將這個百分比賦值給thumbPositionPercentage
用thumbPositionPercentage乘以wrap的scroolHeight獲取scrollTop的值,賦值給wrap的scrollTop,實現內容的滾動,內容滾動之後觸發滾動事件,執行監聽函式,改變move和size的值執行renderThumbStyle,從而改變滾動條的位置。
下面是div.el-scrollbar__thumb上的點選拖拽滾動條事件監聽函式clickThumbHandler
clickThumbHandler(e) {
      this.startDrag(e);
      this[this.bar.axis] = (e.currentTarget[this.bar.offset] - (e[this.bar.client] -
      e.currentTarget.getBoundingClientRect()[this.bar.direction]));
},
clickThumbHandler中包含一個拖拽函式startDrag,以及一個賦值操作,對於縱向滾動條來講,就是this.Y = 滾動條的高度 減去 滑鼠點選位置距離滾動條最上方位置的距離,即滑鼠點選位置到滾動條最下方位置的距離
startDrag
startDrag(e) {
      e.stopImmediatePropagation();
      this.cursorDown = true;
      on(document, 'mousemove', this.mouseMoveDocumentHandler);
      on(document, 'mouseup', this.mouseUpDocumentHandler);
      document.onselectstart = () => false;
},
阻止事件冒泡,此處的stopImmediatePropagation和stopPropagation不太一樣
-----------------------------------------------------------分割線------------------------------------------------------------------------
1、stopImmediatePropagation方法:stopImmediatePropagation方法作用在當前節點以及事件鏈上的所有後續節點上,目的是在執行完當前事件處理程式之後,停止當前節點以及所有後續節點的事件處理程式的執行
2、stopPropagation方法:stopPropagation方法作用在後續節點上,目的在執行完繫結到當前元素上的所有事件處理程式之後,停止執行所有後續節點的事件處理程式
var div = document.getElementById("div1");
var btn = document.getElementById("button1");
div.addEventListener("click" , function(){alert("第一次執行");} , true);        //1
div.addEventListener("click" , function(){alert("第二次執行");} , true);        //2
btn.addEventListener("click" , function(){alert("button 執行");});            //3
在這裡,給 1 函式alert後加上stopImmediatePropagation, 那麼之後彈出視窗“第一次執行”
但是如果給 1 函式alert後加上stopPropagation , 那麼之後會彈出視窗“第一次執行”,“第二次執行”兩個視窗
----------------------------------------------------------------分割線-----------------------------------------------------------------
拉回來,繼續看這個拖拽函式
阻止冒泡之後,設定滑鼠點選狀態為true,監聽mousemove和mouseup,一般的拖拽邏輯都是這種寫法
document.onselectstart = () => false;是為了在點選頁面時不會選中文字出現藍色選中
mouseMoveDocumentHandler(e) {
      if (this.cursorDown === false) return;
      const prevPage = this[this.bar.axis];
      if (!prevPage) return;
      const offset = ((this.$el.getBoundingClientRect()[this.bar.direction] - e[this.bar.client]) *
                       -1);
      const thumbClickPosition = (this.$refs.thumb[this.bar.offset] - prevPage);
      const thumbPositionPercentage = ((offset - thumbClickPosition) * 100 /
                                         this.$el[this.bar.offset]);
      this.wrap[this.bar.scroll] = (thumbPositionPercentage * this.wrap[this.bar.scrollSize] / 100);
    },
mouseUpDocumentHandler(e) {
      this.cursorDown = false;
      this[this.bar.axis] = 0;
      off(document, 'mousemove', this.mouseMoveDocumentHandler);
      document.onselectstart = null;
}
mouseMoveDocumentHandler為mousemove的監聽函式,其中做了2個判斷,cursorDown === false,this.Y為空的時候不會執行函式,也就是說當沒有點選狀態,沒有識別到滑鼠點到滾動條上的時候不執行程式碼。如果點到滾動條,獲取滑鼠點選位置距離滾動條軌道最上方的距離賦值給offset,將滑鼠點選位置距離滾動條最上方的距離賦值給thumbClickPosition,兩者相減,得到滾動條距離滾動條軌道最上方的距離,將這個距離比上滾動條軌道的長度,獲得一個百分比,將這個百分比賦值給thumbPositionPercentage。用thumbPositionPercentage乘以scrollHeight獲取滾動距離scrollTop,實現內容滾動,滾動條隨之移動,實現拖拽效果。
mouseUpDocumentHandler為mouseup監聽函式,當滑鼠完成拖拽擡起時,執行此函式。將cursorDown,this.Y重置回預設值,解綁mousemove監聽函式,解綁document.onselectstart監聽函式。
destroyed() {
    off(document, 'mouseup', this.mouseUpDocumentHandler);
}
元件銷燬時解綁mouseup事件
將上面的這一大堆的原始碼解讀串起來的整體邏輯是:
滑鼠直接滾動時,觸發滾動事件監聽函式,根據scrollTop、clientHeight、scrollHeigth計算滾動條的滾動距離的百分比,即move。
move作為滾動條元件的props,傳入bar元件,動態計算滾動條的translateY,實現滾動條相對於滾動條軌道的位置改變。
滑鼠直接作用在滾動條軌道和滾動條上時,根據滑鼠位置,滾動條位置計算出滾動距離的百分比,根據百分比計算出scrollTop並賦值給wrap.scrollTop,觸發滾動事件監聽函式改變move,從而改變滾動條的位置。
初始化或者滾動內容改變時,觸發update函式,根據clientHeight、scrollHeight計算出滾動條高度百分比size,傳入bar元件,計算height,進而改變滾動條的高度。
