
SpringBoot專案如何進行打包部署-jar包
阿新 • • 發佈:2018-12-10
springboot的打包方式有很多種。有打成war的,有打成jar的,也有直接提交到github,通過jekins進行打包部署的。這裡主要介紹如何打成jar進行部署。不推薦用war,因為springboot適合前後端分離,打成jar進行部署更合適。首先需要在application.yml當中配置埠
server:
    port: 8080
maven配置檔案
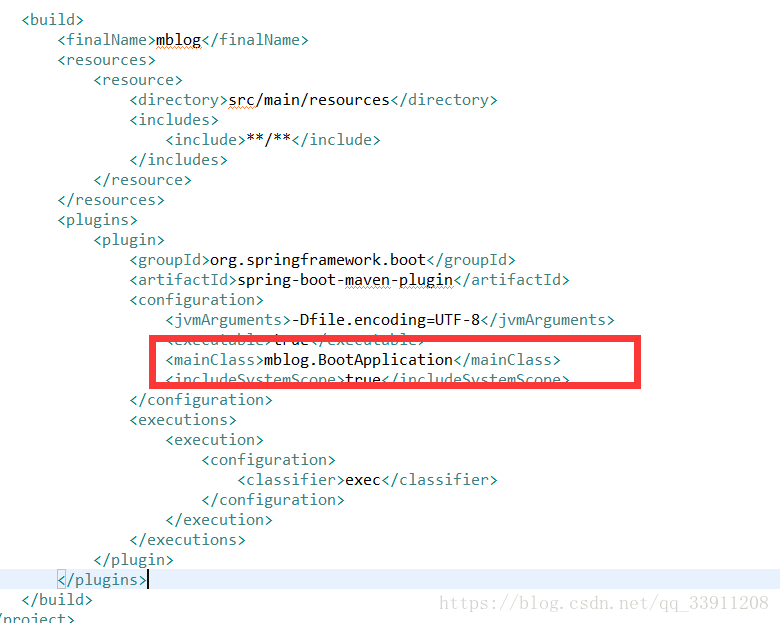
<project xmlns="http://maven.apache.org/POM/4.0.0" xmlns:xsi="http://www.w3.org/2001/XMLSchema-instance"
		 xsi:schemaLocation="http://maven.apache.org/POM/4.0.0 http://maven.apache.org/xsd/maven-4.0.0.xsd">
	<modelVersion>4.0.0</modelVersion>
	<parent>
		<groupId>com.mtons.mblog</groupId>
		<artifactId>mblog</artifactId>
		<version>0.0.1-SNAPSHOT</version>
	</parent>
	<artifactId>web</artifactId>
	<packaging>jar</packaging>

	<dependencies>
		<dependency>
			<groupId>com.mtons.mblog</groupId>
			<artifactId>core</artifactId>
		</dependency>

		<dependency>
			<groupId>com.fasterxml.jackson.core</groupId>
			<artifactId>jackson-core</artifactId>
		</dependency>
		<dependency>
			<groupId>com.fasterxml.jackson.core</groupId>
			<artifactId>jackson-databind</artifactId>
		</dependency>

		<dependency>
			<groupId>org.apache.shiro</groupId>
			<artifactId>shiro-web</artifactId>
		</dependency>
		<dependency>
			<groupId>org.apache.shiro</groupId>
			<artifactId>shiro-spring</artifactId>
		</dependency>
		<dependency>
			<groupId>org.apache.shiro</groupId>
			<artifactId>shiro-ehcache</artifactId>
		</dependency>

	</dependencies>

	<build>
		<finalName>mblog</finalName>
		<resources>
			<resource>
				<directory>src/main/resources</directory>
				<includes>
					<include>**/**</include>
				</includes>
			</resource>
		</resources>
		<plugins>
			<plugin>
				<groupId>org.springframework.boot</groupId>
				<artifactId>spring-boot-maven-plugin</artifactId>
				<configuration>
					<jvmArguments>-Dfile.encoding=UTF-8</jvmArguments>
					<executable>true</executable>
					<mainClass>mblog.BootApplication</mainClass>
					<includeSystemScope>true</includeSystemScope>
				</configuration>
				<executions>
					<execution>
						<configuration>
							<classifier>exec</classifier>
						</configuration>
					</execution>
				</executions>
			</plugin>
		</plugins>
	</build>
</project>
注意最下面的build這塊一定要配置否則打jar的時候會說找不 到主類
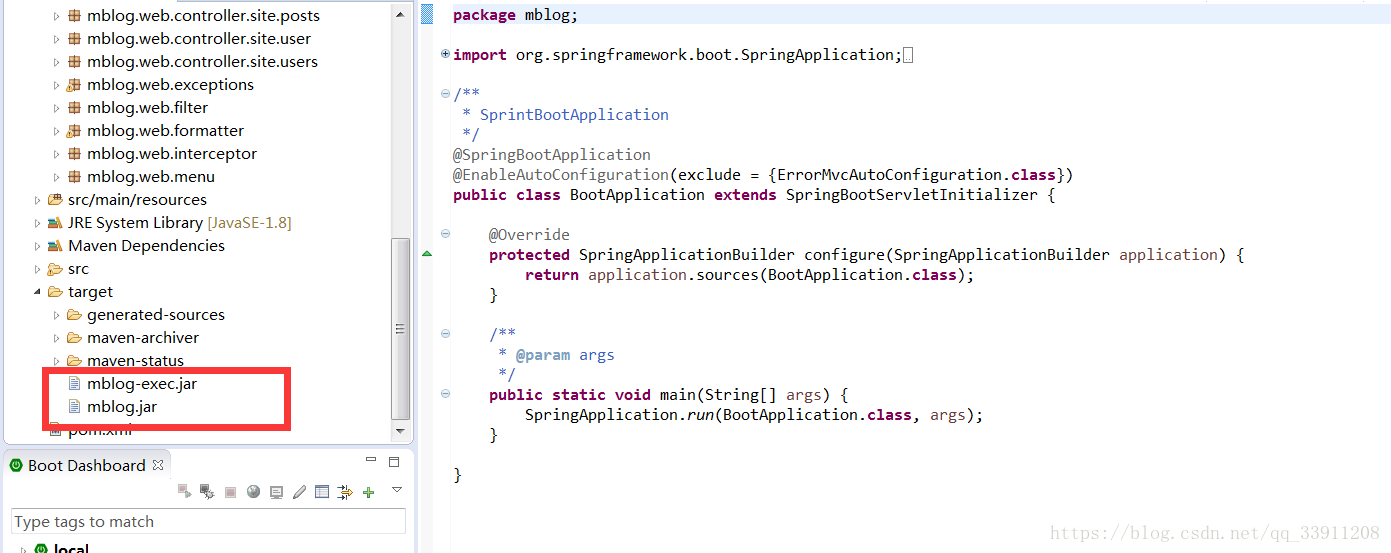
在啟動類當中加上extends SpringBootServletInitializer並重寫configure方法,這是為了打包springboot專案用的。

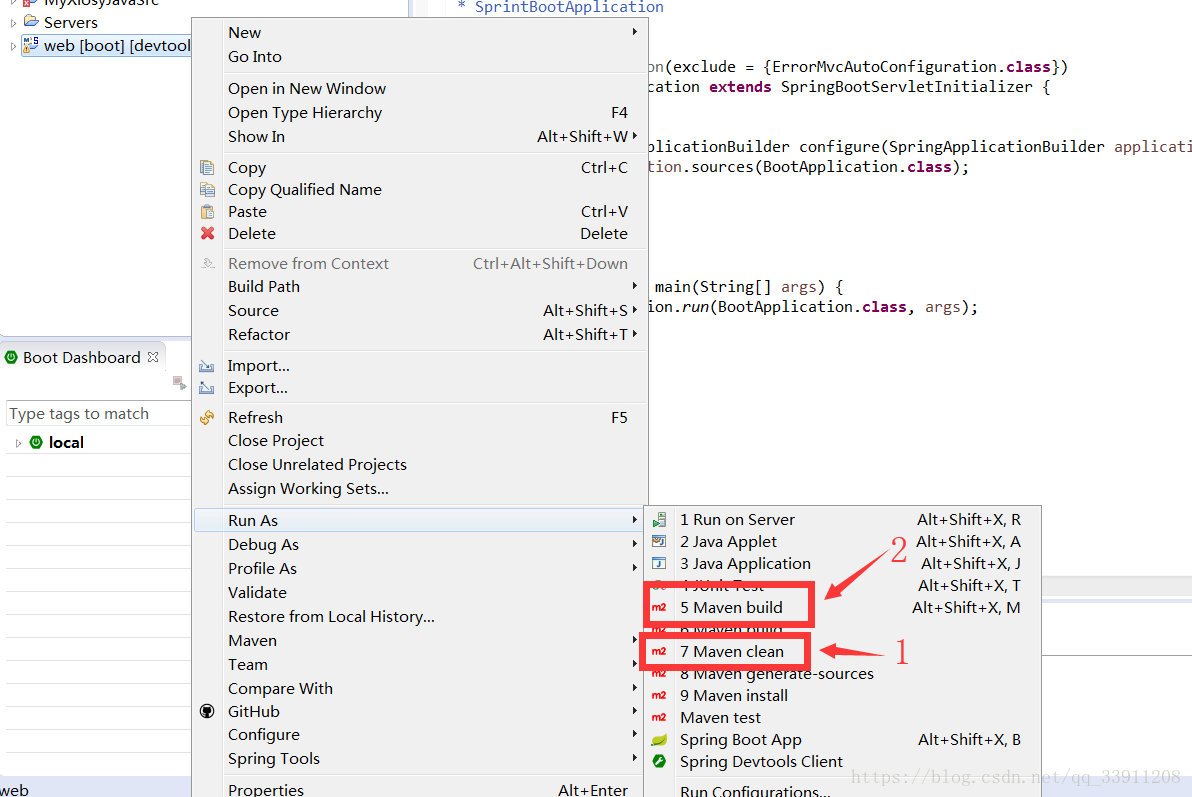
然後按照順序執行clean再build,我是用sts
然後就會出來我們需要的jar
然後到這個jar的根目錄下執行java -jar smallsystem-0.0.1-SNAPSHOT.jar 這個執行方式windows和linux上都一樣
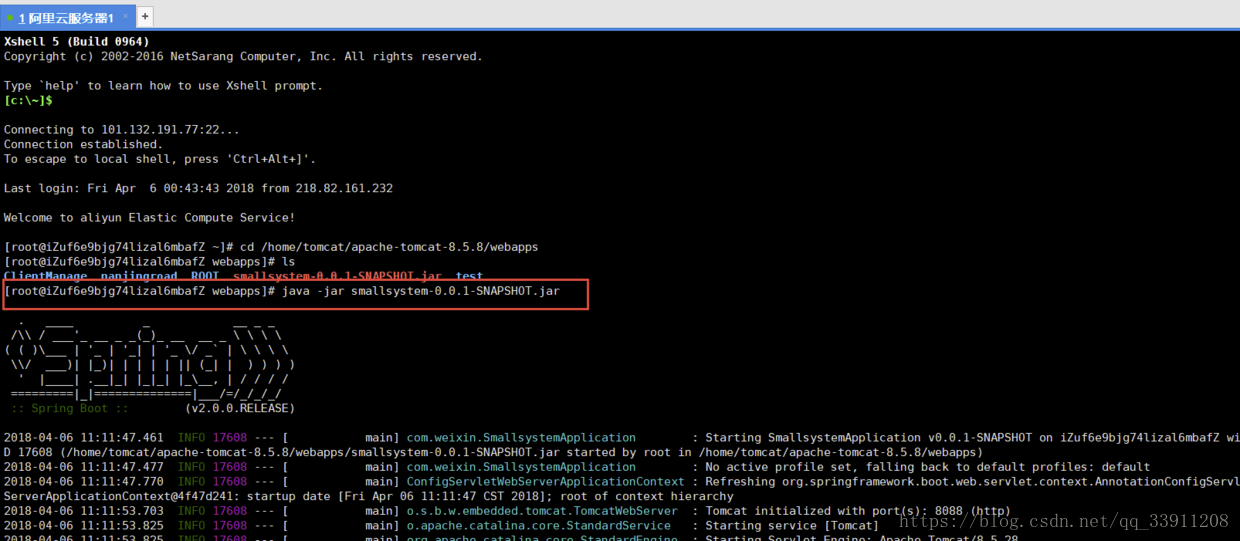
如果是阿里雲上的,需要通過阿里雲把你指定的埠開放,如果是虛擬機器上的,需要把防火牆什麼的關掉,開放埠即可。