
十一:Spring Cloud 之訊息匯流排-
1. 簡介
Spring Cloud Bus links the nodes of a distributed system with a lightweight message broker. This broker can then be used to broadcast state changes (such as configuration changes) or other management instructions. A key idea is that the bus is like a distributed actuator for a Spring Boot application that is scaled out. However, it can also be used as a communication channel between apps. This project provides starters for either an AMQP broker or Kafka as the transport.
事件、訊息匯流排,用於在叢集(例如,配置變化事件)中傳播狀態變化,可與Spring Cloud Config聯合實現熱部署。
基於RabbitMQ實現上一篇筆記中的配置手動重新整理,RabbitMQ的安裝請自行搜尋,本片記錄中的RabbitMQ使用的都是預設配置。
2. 程式碼實現
2.1 涉及的模組及整體步驟
2.1.1 涉及的模組
- eureka-server-singleton:eureka服務釋出註冊中心
- config-server-ha:配置中心服務端,通過指定不同埠啟動兩個例項模擬服務端叢集
- config-client-bus:新建的通過HA版服務配置中心訪問遠端配置資訊模組,也可以使用原有模組
- config-repository:放置於GitHub的配置,
config-client-bus-test.properties是對應的本次測試的儲存配置資訊的檔名稱
2.1.2 整體步驟
- GitHub建立存放配置資訊的config-repository目錄與配置資訊
config-client-bus-test.properties,可通過demo中的config-repository模組關聯GitHub上的配置。 - 實現eureka-server-singleton:eureka服務釋出註冊中心,與前面沒有任何區別
- 實現config-server-ha:關鍵是啟動Spring Cloud Config Server功能,指定配置倉庫的配置資訊
- 實現config-client-bus:從配置倉庫讀取配置資訊,引入spring-boot-starter-actuator,spring-cloud-starter-bus-amqp
- 通過為config-client-bus指定8775、8776埠實現多例項啟動
- 修改Github上遠端配置檔案config-client-bus-test.properties,通過8775或者8776重新整理配置,再次訪問兩個例項讀取的相同配置項的值,觀察修改是否生效
- config-repository中新增
config-client-bus-test.properties:放置4步驟的配置資訊
2.2 原始碼
2.2.1 Github地址
2.2.2 配置資訊地址
2.3 eureka-server-singleton
2.4 config-server-ha
2.5 config-client-bus
2.5.1 整體實現
- pom.xml檔案中引入依賴
spring-cloud-starter-config、spring-cloud-starter-netflix-eureka-client、config-client-bus-test.properties、spring-boot-starter-actuator - bootstrap.yml中指定Config Server連線資訊以及需要訪問配置中心的具體配置資訊
- application-8775.yml、application-8776.yml指定當前模組的配置資訊,通過profile指定不同埠模擬啟動多例項
- ConfigClientBusApplication常規Spring Boot啟動類
2.5.2 pom.xml
<?xml version="1.0" encoding="UTF-8"?>
<project xmlns="http://maven.apache.org/POM/4.0.0"
         xmlns:xsi="http://www.w3.org/2001/XMLSchema-instance"
         xsi:schemaLocation="http://maven.apache.org/POM/4.0.0 http://maven.apache.org/xsd/maven-4.0.0.xsd">
    <parent>
        <artifactId>spring-cloud-finchley-demo</artifactId>
        <groupId>org.oscar.scd</groupId>
        <version>1.0.0</version>
    </parent>
    <modelVersion>4.0.0</modelVersion>

    <artifactId>config-client-bus</artifactId>

    <dependencies>
        <dependency>
            <groupId>org.springframework.boot</groupId>
            <artifactId>spring-boot-starter-web</artifactId>
        </dependency>

        <dependency>
            <groupId>org.springframework.cloud</groupId>
            <artifactId>spring-cloud-starter-config</artifactId>
        </dependency>

        <dependency>
            <groupId>org.springframework.cloud</groupId>
            <artifactId>spring-cloud-starter-netflix-eureka-client</artifactId>
        </dependency>

        <dependency>
            <groupId>org.springframework.cloud</groupId>
            <artifactId>spring-cloud-starter-bus-amqp</artifactId>
        </dependency>

        <dependency>
            <groupId>org.springframework.boot</groupId>
            <artifactId>spring-boot-starter-actuator</artifactId>
        </dependency>
    </dependencies>
</project>
2.5.3 bootstrap.yml
下方資訊與配置中心的配置檔案的對應關係見後續驗證部分
spring:
  application:
    name: config-client-bus
  cloud:
    config:
      label: dev-20180827
      profile: test
      discovery:
        enabled: true
        serviceId: config-server-ha
2.5.4 application-8775.yml
application-8776.yml 只是埠不一樣
spring:
  rabbitmq:
    host: localhost
    port: 5672
    username: guest
    password: guest
  cloud:
    bus:
      enabled: true
      trace:
        enabled: true
management:
  endpoints:
    web:
      exposure:
        include: bus-refresh

server:
  port: 8775
eureka:
  client:
    serviceUrl:
      defaultZone: http://localhost:8761/eureka/
2.6 config-repository
儲存配置檔案
2.6.1 config-client-bus-test.properties配置檔案
foo=config-client-bus foo value updated.
3. 驗證
3.1 建立SpringBoot啟動類
簡單建立Spring Boot啟動類即可
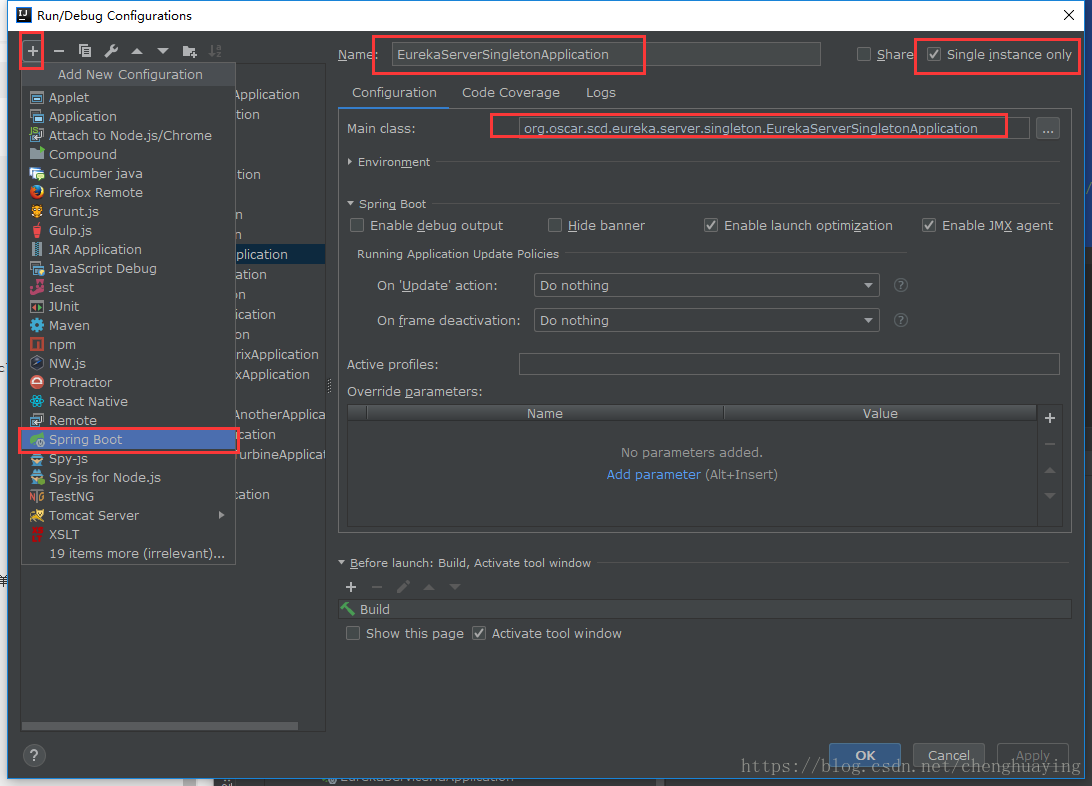
3.1.1 EurekaServerSingletonApplication
最簡單的方式新增一個SpringBoot啟動型別的啟動類就行。
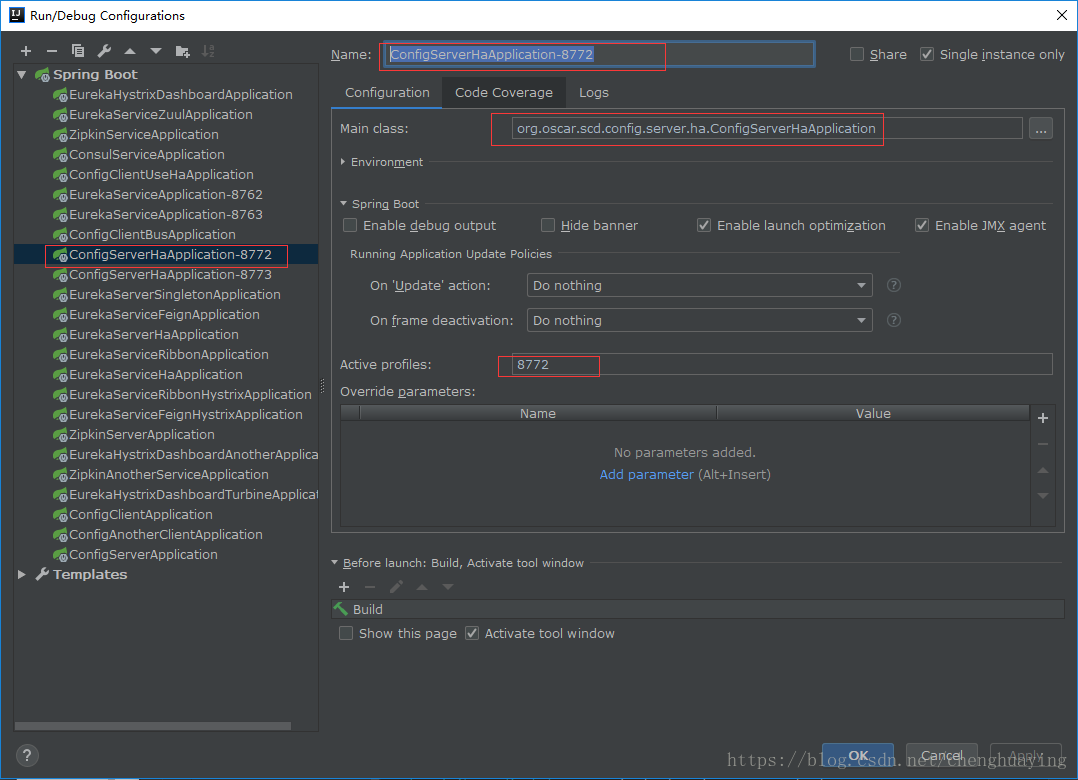
3.1.2 ConfigServerHaApplication-8772
3.1.3 ConfigServerHaApplication-8773
參考上一節,修改Active profiles:8773
3.1.4 ConfigClientBusApplication-8775
參考上一節,指定Active profiles:8775。
3.1.5 ConfigClientBusApplication-8776
參考上一節,指定Active profiles:8776。
3.2 啟動
EurekaServerSingletonApplicationConfigServerHaApplication-8772ConfigServerHaApplication-8773ConfigClientBusApplication-8775ConfigClientBusApplication-8776
3.3檢視eureka服務資訊介面

3.4 讀取遠端配置資訊
3.4.1 檢視指定配置項的值
3.4.2 檢視指定配置項修改後的值
-
訪問http://localhost:8775/actuator/bus-refresh 手動重新整理配置項,可看到後臺重新請求Github地址,拉取配置。注意:這裡需要使用post請求,並且header中的Content-Type值為application/json。可以使用Intellij 的HTTP Client。
-
觀察8775控制檯輸出的日子,發現重新拉取了遠端的配置資訊.
-
再次訪問 http://localhost:8775/readFooProp,返回值變成修改後的值
config-client-bus foo value,說明成功讀取到新配置值再次訪問 http://localhost:8775/readFooProp,返回值變成修改後的值config-client-bus foo value,說明成功讀取到新配置值
-
訪問http://localhost:8776/readFooProp,返回值變成修改後的值
config-client-bus foo value,說明成功讀取到新配置值
-
通過訊息匯流排實現變更配置資訊同步功能生效


4. 思考
- 訊息匯流排是如何接收訊息並廣播的
- SpringCloud訊息匯流排還支援哪些訊息中介軟體
- 如果基於訊息中線設計一套基於事件驅動的系統架構,需要解決哪些核心關鍵點