
backbone.js 教程(1) View & Model & Collection
Backbone.js Overview
- 它由Jeremy Ashkenas開發,最初發行於2010-10-13
- 它是一個輕量的JavaScript類庫,只依賴於underscore.js,非強制依賴於jquery,大小隻有7.6Kb,作為一個框架級的js檔案,它已經非常小了
- 它提供了Model-View-Presenter(MVP)的框架模式,可以幫助前端開發搭建一個層次清晰的Web應用框架
- 它提供了models和collections來封裝資料結構,提供了views來操作DOM,提供了自定義事件將資料結構和DOM操作繫結在一起
Environment Setup
要完整使用BackboneJS,需要引入以下js
- Underscore.js(>= 1.8.3)或者lodash.js
- Jquery.js(>= 1.11.0)
- Json2.js(如果需要支援IE)
在沒有npm的環境下,可以下載壓縮包或者使用CDN。
<script src="https://cdnjs.cloudflare.com/ajax/libs/underscore.js/1.9.0/underscore-min.js"></script>
<script src="https://cdnjs.cloudflare.com/ajax/libs/jquery/3.3.0/jquery.min.js"></script>
<script src="https://cdnjs.cloudflare.com/ajax/libs/backbone.js/1.3.3/backbone-min.js"></script>
Bakbone.js View
負責操作DOM,採用 OO 的思想來操作一個檢視。
Backbone.js View API
- extend 每一個自定義的View都必須由Backbone.View類extend而來,override父類中的屬性
- initialize() View的建構函式,每當new一個例項時,就會呼叫該方法
- render() 通常將view的渲染邏輯寫在此方法中,並在initialize中呼叫它
- template() View渲染時的模板,可以使用underscore的模板,也可以使用其他任意JS模板引擎
- el View對應的DOM物件,可以使用id選擇器,類選擇器來定義
- $el View對應的jQuery物件,方便使用jQuery的方法來操作DOM
- tagName View對應的DOM節點的標籤名稱,預設是“div”
- id View對應的DOM節點的id屬性
- className View對應的DOM節點的class屬性
- events 給View繫結事件
- remove() 移除一個view,其el將從DOM中移出,繫結的事件也將停止監聽
Create a View
只需要擴充套件檢視建構函式 Backbone.View, 傳入Dom相關的屬性。
示例 假如,需要在DOM中動態新增一個id=“root”的div。
不使用backbone.js,我們通常這樣實現。
// app.js
function addRoot() {
  var el = document.createElement('div');
  el.id = 'root';
  el.innerHTML = 'Hello Backbone!!!';
  document.body.appendChild(el);
}
addRoot();
使用backbone.js,我們這樣實現:
// app.js
var AppView = Backbone.View.extend({
  tagName: 'div',
  id: 'root',
  initialize: function () {
    this.render();
  },
  render: function () {
    this.el.innerHTML = 'Hello Backbone!!!';
    return this;
  }
});

var appView = new AppView();
document.body.appendChild(appView.el);
- tagName 指定這個element 是一個div
- id 指定這個div的id屬性值
- 當 呼叫 new AppView() 時,執行initialize() 函式
- render() 函式用於渲染這個element
Get Existed Element
假如,在html中已經定義了div#root這個element,想修改它的內容。
使用Backbone.js怎麼來操作這個element呢?
// index.html
<body>
  <div id="root">loading...</div>
</body>
var AppView = Backbone.View.extend({
  el: '#root',
  initialize: function () {
    this.render();
  },
  render: function () {
    this.el.innerHTML = 'Hello Backbone!!!';
    return this;
  }
});
var appView = new AppView();
Bind events
格式:
events: {
    'event1 selector1': 'function name1',
    'event2 selector2': 'function name2',
        ...
}
示例 有這樣一個小應用,在input中輸入後,回車,新增一個new goal;點選每一個goal後面的remove,移除此專案。
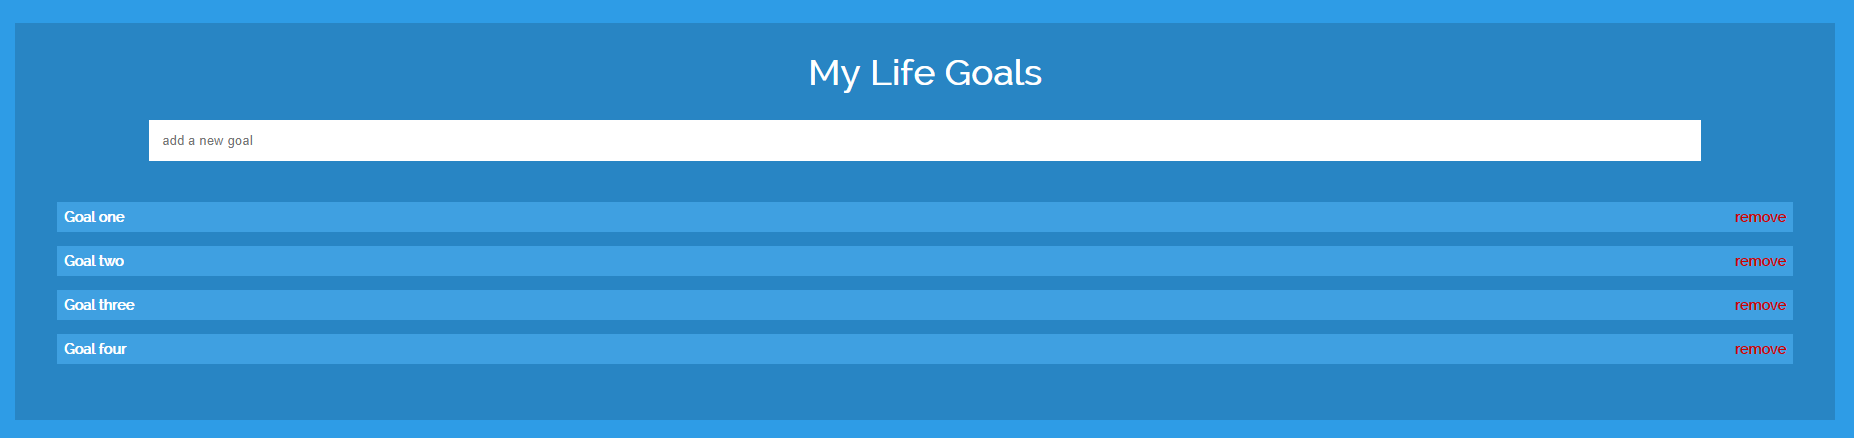
// index.html
<div id="root" class="color-dark">
  <header>
    <h2>My Life Goals</h2>
    <input id="new-goal" type="text" placeholder="add a new goal">
  </header>
  <ul id="goal-list">
    <li class="goal-item">Goal one <a class="btn-remove">remove</a></li>
    <li class="goal-item">Goal two <a class="btn-remove">remove</a></li>
    <li class="goal-item">Goal three <a class="btn-remove">remove</a></li>
    <li class="goal-item">Goal four <a class="btn-remove">remove</a></li>
  </ul>
</div>
- 給input繫結一個 keypress 事件
- 給每一個 .btn-remove 繫結一個click事件
// app.js
var AppView = Backbone.View.extend({
  el: '#root',
  … …
  events: {
    'keypress #new-goal': 'addGoal',
    'click .btn-remove': 'clear',
  },
  addGoal: function(ev) {
    if (ev.keyCode != 13) return;
    console.log('addGoal');
    // To do
  },
  clear: function() {
    // To do
  }
});
var appView = new AppView;
How to change view
在引入Backbone.js的Model之前,我們可以這樣來實現 addGoal 方法。
addGoal: function(ev) {
  if (ev.keyCode != 13) return;
  var newGoal = $('#new-goal').val();
  if(newGoal === '') return;
  var goalHtml = '<li class="goal-item">'+   newGoal +'<a class="btn-remove">remove</a></li>';
  $('#goal-list').append(goalHtml);
  $('#new-goal').val('');
}
在Backbone.js 出現之前,當資料發生變化檢視需要重新渲染時,我們通常使用js或jQuery來進行DOM操作,改變展示的內容。
這樣做data和檢視渲染混在一起,顯得很亂;而且,如果檢視上要顯示的屬性很多,拼接的程式碼就很長很長。
所以,使用Backbone.js 的Model和Collection 將data和View 進行分離。
Bakbone.js Model & Collection
Model的作用
- 封裝資料結構
- 處理業務邏輯
- 從server 載入、儲存資料
- 當data發生變化時觸發事件,比如重新渲染檢視
Collection的作用
Collection是Model的有序集合,和Model一樣用於資料載入、儲存,監聽資料變化,還可以使用 Underscore.js 提供的方法來操作Collection。
主要適用於list、table等檢視的渲染。在本例中,就需要定義一個Collection來渲染列表,並監聽Collection的變化。
定義Model和Collection
// Goal Model
var Goal = Backbone.Model.extend({
  defaults: {
    title: ''
  }
});

// Goal Collection
var GoalCollection = Backbone.Collection.extend({
  model: Goal,
});
使用template
下面這段程式碼,有一些地方是相同的,為了避免重複程式碼,可以使用模板來渲染。
<ul id="goal-list">
    <li class="goal-item">Goal one <a class="btn-remove">remove</a></li>
    <li class="goal-item">Goal two <a class="btn-remove">remove</a></li>
    <li class="goal-item">Goal three <a class="btn-remove">remove</a></li>
    <li class="goal-item">Goal four <a class="btn-remove">remove</a></li>
  </ul>
在html中定義模板
把重複的部分抽出來,定義模板時使用<script>標籤,但這裡的type是text/template,然後給它一個id,用於在View中通過id來獲取它。
<body>
  <div id="root" class="color-dark">
    <header>
      <h2>My Life Goals</h2>
      <input id="new-goal" type="text" placeholder="add a new goal">
    </header>
    <ul id="goal-list">
      <!-- template -->
    </ul>
    </div>

  <script type="text/template" id="item-template">
    <li class="goal-item"><%= title %><a class="btn-remove">remove</a></li>
  </script>
</body>
- <%= %>表示插入變數
- <% %>表示插入任意JS程式碼段
- <%- %>表示插值並進行轉義
View中定義解析函式template()
在js中定義GoalView,用於生成每一個Goal對應的<li>節點。
BackboneJS中的template實際上呼叫的是underscore.js的template方法,該方法可以將 JavaScript 模板編譯為可以用於頁面呈現的函式,它返回的是一個函式。
_.template(templateString, [settings])
render時呼叫template
然後在render中呼叫template方法,把model物件作為引數傳入。
// app.js

// Goal Model
var GoalModel = Backbone.Model.extend({
  defaults: {
    title: '' // 預設屬性值
  }
});

// Goal Collection
var GoalCollection = Backbone.Collection.extend({
  model: GoalModel,
});

var GoalView = Backbone.View.extend({
  tagName: 'li',
  initialize: function () {
    this.render();
  },
  template: function () {
    return _.template($('#item-template').html()); //根據模板的id來獲取模板定義的內容
  },
  render: function () {
    this.$el.html(this.template()(this.model.toJSON()));
  },
  events: {
    'click .btn-remove': 'clear', // 繫結事件
  },
  clear: function() {
    // To do
  }
});

var AppView = Backbone.View.extend({
  el: '#root',
  … …
  events: {
    'keypress #new-goal': 'addGoal',
  },
  addGoal: function(ev) {
    if (ev.keyCode != 13) return;
    console.log('addGoal');
    // To do
  },

});
測試效果:
var view = new GoalView({ model: {title: 'My first goal'} });
this.$("#goal-list").append(view.$el);
bind Collection to View
在AppView中,修改addGoal的新增模式,將原來的直接操作DOM,修改為通過data的變化來觸發DOM的渲染。
- 在AppView中例項化一個GoalCollection,命名為goalList
- Keypress事件觸發時,修改goalList,這裡呼叫了Backbone.Collection中的push()方法
var AppView = Backbone.View.extend({
  el: '#root',
  initialize: function () {
    this.goalList = new GoalCollection();
    this.render();
},
  render: function () {
    return this;
  },
  events: {
   'keypress #new-goal': 'addGoal'
  },
  addGoal: function (ev) {
    if (ev.keyCode != 13) return;
    var inputVal = $('#new-goal').val(); // 獲取輸入的值
    if (inputVal === '') return;
    this.goalList.push({ title: inputVal }); // push到Collection
    $('#new-goal').val('');
  },
});
但是,此時,你會發現雖然goalList發生了變化,但是頁面並沒有跟著渲染。
因為,View並沒有對Collection的變化進行監聽。
Model 和 Collection的事件監聽
View 監聽 Model或Collection的變化
在AppView中,通過listenTo()方法,監聽Collection的變化,當Collection發生變化時,觸發內部的某個方法。
object.listenTo(other, event, callback)
listenTo 用於一個物件,監聽另一個物件的變化
停止監聽使用stopListening
object.stopListening([other], [event], [callback])
監聽add事件
var AppView = Backbone.View.extend({
    el: '#root',
    initialize: function () {
        this.goalList = new GoalCollection();
        this.render();
        this.listenTo(this.goalList, 'add', this.addOne);
        // or
        // this.goalList.on('add', this.addOne, this);
    },
    render: function () {
        return this;
    },
    events: {
        'keypress #new-goal': 'addGoal'
    },
    addGoal: function (ev) {
        if (ev.keyCode != 13) return;
        var inputVal = $('#new-goal').val();
        if (inputVal === '') return;
        this.goalList.push({ title: inputVal });
        // or this.goalList.add({ title: inputVal });

        $('#new-goal').val('');
    },
    addOne: function (goal) {
        var view = new GoalView({ model: goal });
        this.$("#goal-list").append(view.$el);
    }
});
這裡為什麼監聽的event是 add,而不是 push?
因為push()方法底層其實呼叫的是add()方法。
this.goalList.push({ title: inputVal });
修改為
this.goalList.add({ title: inputVal });
效果相同
監聽destroy事件
在上一步中,已經給GoalView綁定了Goal這個Model,那麼在View中就可以使用Model來控制View的渲染。在GoalView中需要監聽GoalModel的變化,goalModel移除時,銷燬檢視。
var GoalView = Backbone.View.extend({
    tagName: 'li',
    initialize: function () {
        this.render();
        this.listenTo(this.model, 'destroy', this.remove);
        //or this.model.on('destroy', this.remove, this);
    },
    template: function () {
        return _.template($('#item-template').html());
    },
    render: function () {
        console.log('model', this.model.toJSON());
        this.$el.html(this.template()(this.model.toJSON()));
    },
    events: {
        'click .btn-remove': 'clear',
    },

    clear: function() {
        this.model.destroy();
    }
});
destroy model後,view 也會從DOM中移除,同時繫結的事件也會停止監聽。
this.remove 是View 內建的函式。
remove()方法不僅可以從DOM中移除view對應的節點,同時還能停止節點上繫結的事件監聽。
Model或Collection 自我監聽變化
在AppView中,還可以通過呼叫on()方法,讓Collection監聽自己的變化。
object.on(event, callback, [context])
這種用法是自己監聽自己。
如果想停止監聽,使用off()方法
object.off([event], [callback], [context])
this.listenTo(this.goalList, 'add', this.addOne);
等效於
this.goalList.on('add', this.addOne, this);
this.listenTo(this.model, 'destroy', this.remove);
等效於
this.model.on('destroy', this.remove, this);
為什麼要傳入context?
因為呼叫on()方法的是this.goalList,如果不傳入context,那麼在addOne()呼叫時,預設的this指代的是this.goalList,而不是AppView的例項了。
因此,為了保證上下文都是View的例項,需要傳入context。
使用 bind() 或 bindAll() 修改context
可以在使用on()時,不傳入context,而使用 .bind() 或 .bindAll() 來繫結context
在使用bind時,必須使用bind返回的函式
// 使用 bind
initialize: function () {
    this.render();
    this.remove = _.bind(this.remove, this); // 返回值是一個函式
    this.model.on('destroy', this.remove);
},
使用bindAll非常方便,不必考慮返回值
// 使用 bindAll
initialize: function () {
    this.render();
    _.bindAll(this, 'remove', 'clear'); // 可以同時改變多個函式的context
    this.model.on('destroy', this.remove);
},