
SpringBoot系列之JPA的使用
JPA的簡單定義
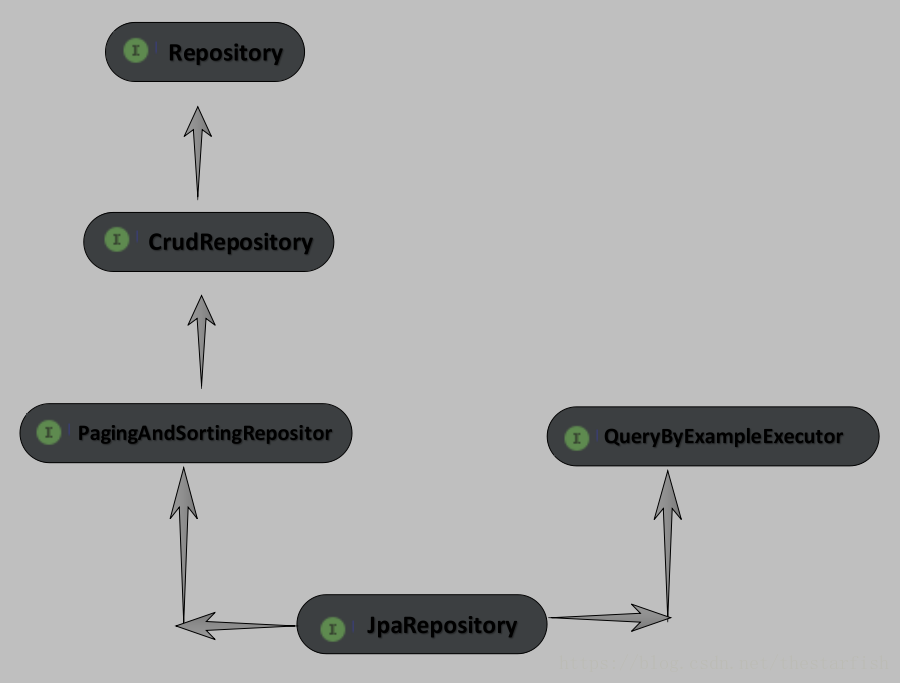
對於我這樣初次接觸的人來說,jpa就是一種連線資料的api,由於JpaRepository介面提供了很多強大的方法,能很方便的拼接,從而能讓我們對資料庫的操作較為方便的進行操作。
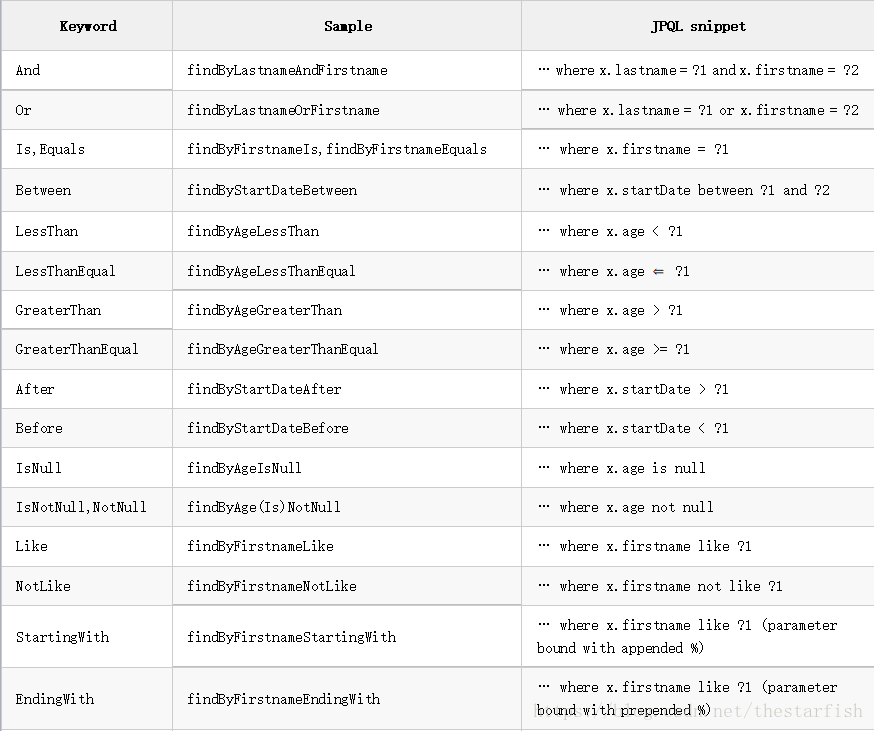
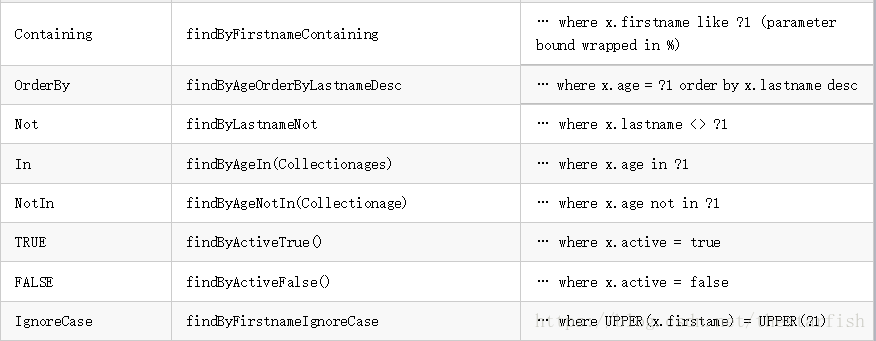
JPA關鍵字
下面是各種可以拼接組合的關鍵字
SpringBoot JPA程式碼例項
檔案目錄閱覽

具體實現
UserEntity.java
建立一個UserEntity.java,用來實現user表的實體 @Table最好表明一下是什麼表,name=“user” 其實還可以有schema="sqltest"表明資料庫,catalog也是可以存在,和schema的效果差不多,不過mysql不支援catalog jpa中,很多都是按照id來操作的,表中id的需求就是主鍵
@Entity
@Table(name = "user")
public class UserEntity {
private int id; UserRepository.java
這裡其實是用來實現一些需要關鍵字組裝的方法,或者是通過原始的sql語句來實現的對資料操作的方法。 這裡的方法其實只需要未存在的方法就好,不需要已經存在的,比如下面的findAll(),因為繼承的介面存在了,所以需要額外的@Override,而且也是不需要的。 1. 如果原生的sql語句在idea中會有背景顏色,可以使用alt+enter然後將語句檢查調整為mysql就可以了 2. 在進行update或者是delete時,需要加上@Modifying,同時也是需要加上@Transaction事物
public interface UserRepository extends JpaRepository<UserEntity, Integer> {

    /**
     * 通過id來查詢user表中的資料
     *
     * @param id 引數id
     * @return 返回通過id查詢出來的實體
     */
    UserEntity findAllById (int id);

    /**
     * 查詢所有的資料
     *
     * @return 返回表中所有的資料
     */
    @Override
    List<UserEntity> findAll();

    /**
     * 利用原始的sql語句進行對指定id資料的刪除
     *
     * @param id 引數id
     *
     * 這種方式是使用@Param方式,採用的是:id,然後和Param中的名字一致
     */
    @Query(value = "delete from user where user.id = :id ", nativeQuery = true)
    @Modifying
    @Transactional(rollbackOn = Exception.class)
    void deleteOrderById(@Param("id") int id);

    /**
     * 通過id來改變這條資料中的電話號碼
     *
     * @param telephone 需要改變的電話號碼
     * @param id 引數id
     *
     * 這裡的引數採用了?1,?2這樣的方式,直接對應第幾個引數
     */
    @Query(value = "update user set user.telephone = ?1 where user.id = ?2", nativeQuery = true)
    @Modifying
    @Transactional(rollbackOn = Exception.class)
    void updataTelephoneById(String telephone, int id);

}
UserService.java
這裡自己建立一個介面UserService,裡面編寫好自己需要的呼叫方法
public interface UserService {

    /**
     * 通過id來查詢資料
     * @param id 引數id
     * @return 返回通過id查詢出來的結果
     */
    UserEntity findAllById(int id);

    /**
     * 查詢表中所有資料
     *
     * @return 返回所有的資料
     */
    List<UserEntity> findAll();

    /**
     * 通過id刪除資料
     *
     * @param id 引數id
     */
    void deleteOrderById(int id);

    /**
     * 通過id確認資料,並修改其telephone的值
     *
     * @param telephone 修改後的telephone
     * @param id 引數id
     */
    void updateTelephoneById(String telephone, int id);
}
UserServiceImpl.java
建立一個UserService介面的實現類,通過@Resource或者是@Autowired來自動注入UserRepository介面,然後通過userRepository來重寫UserService這些方法,來具體實現這些方法。 不要忘記@Service,方便能自動裝配UserService介面,因為只有這個類來實現,所以不需要在裝配的時候來區分
@Service
public class UserServiceImpl implements UserService {

    @Resource
    private UserRepository userRepository;

    @Override
    public UserEntity findAllById(int id) {
        return userRepository.findAllById(id);
    }

    @Override
    public List<UserEntity> findAll() {
        return userRepository.findAll();
    }

    @Override
    public void deleteOrderById(int id) {
        userRepository.deleteOrderById(id);
    }

    @Override
    public void updateTelephoneById(String telephone, int id) {
        userRepository.updataTelephoneById(telephone, id);
    }
}
Main.java
接下來就是實現和呼叫一下資料庫操作的方法了 首先先自動裝配UserService介面,然後再呼叫接口裡面的方法
@RestController
public class Main {

    @Resource
    private UserService userService;

    /**
     * 這是最普通的url的方式
     * localhost:8080/printFindAll
     */
    @RequestMapping("/printFindAll")
    public List<UserEntity> printFindAll(){
        return userService.findAll();
    }

    /**
     * 這種方式是採用@RequestParam
     * localhost:8080/printFindAllById?id=2
     */
    @RequestMapping("/printFindAllById")
    public UserEntity printFindAllById(@RequestParam("id") int id){
        return userService.findAllById(id);
    }

    /**
     * 採用@PathVariable
     * localhost:8080/printDeleteById/2
     */
    @RequestMapping("/printDeleteById/{id}")
    public List<UserEntity> printDeleteById(@PathVariable("id") int id){
        userService.deleteOrderById(id);
        return userService.findAll();
    }

    /**
     * 混合@PathVariable和@RequestParam
     * localhost:8080/printUpdateTelephoneById/17825465874?id=2
     */
    @RequestMapping("/printUpdateTelephoneById/{telephone}")
    public UserEntity printUpdateTelephoneById(@PathVariable("telephone") String telephone, @RequestParam("id") int id){
        userService.updateTelephoneById(telephone, id);
        return userService.findAllById(id);
    }
}
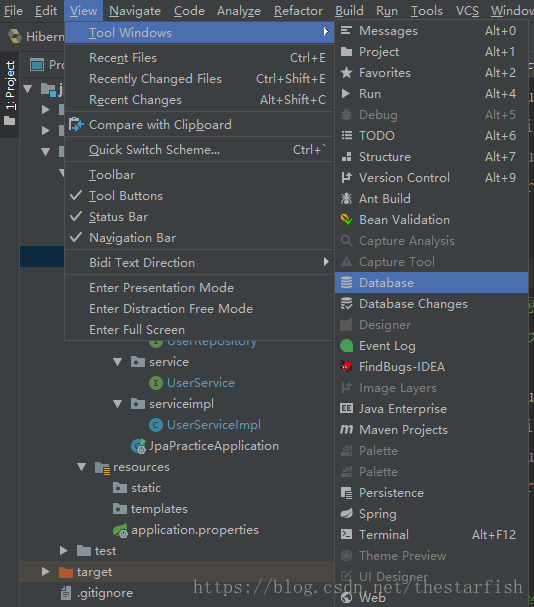
JPA中Entity的自動生成
首先連線database,將自己的資料庫連線進來
View->Tool Windows->Database
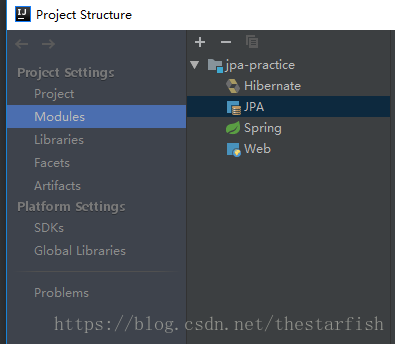
新增Hibernate持久層支援
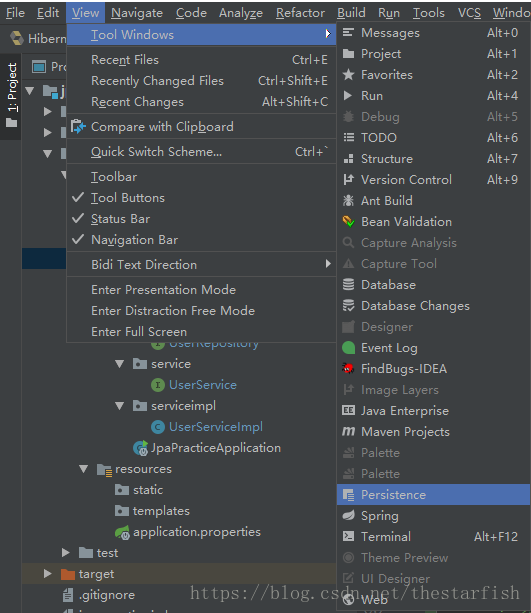
如果沒有Persistence,新增JPA即可

接下來開始生成實體Bean
右鍵->Cenerate Persistence Mapping->By Database Schema
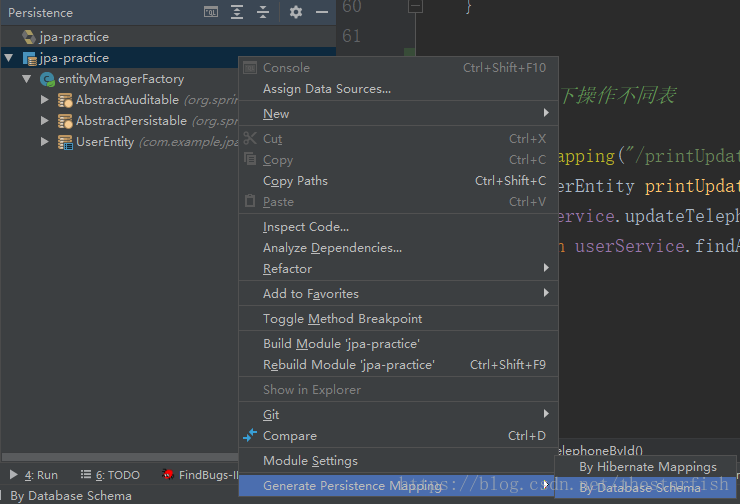
選擇自己生成的實體的路徑,在選擇資料庫中的表,直接預設生成即可

總結
這只是我第一次來學習jpa的使用,其實還是有很多不足的地方。如果有錯誤之處,望不吝賜教。 想多保留一下這樣的部落格,可以為自己的進步增加一點點的幫助。