
android EventBus原始碼解析
尊重原創,轉載請標明出處 http://blog.csdn.net/abcdef314159
eventBus3.1.1
eventBus主要用於資料之間的傳遞,使用也非常簡單,就幾個主要的方法,一個是register和unregister,這兩個要成對出現,一般在onCreate中註冊,在onDestroy中取消註冊。還有幾個方法post,postSticky,removeAllStickyEvents。其中post必須在register之後才有效,否則接收不到資訊,postSticky可以在register之前和之後都可以。先看一下register方法
    /**
     * Registers the given subscriber to receive events. Subscribers must call {@link #unregister(Object)} once they
     * are no longer interested in receiving events.
     * <p/>
     * Subscribers have event handling methods that must be annotated by {@link Subscribe}.
     * The {@link Subscribe} annotation also allows configuration like {@link
     * ThreadMode} and priority.
     */
    public void register(Object subscriber) {
        Class<?> subscriberClass = subscriber.getClass();
        List<SubscriberMethod> subscriberMethods = subscriberMethodFinder.findSubscriberMethods(subscriberClass);
        synchronized (this) {
            for (SubscriberMethod subscriberMethod : subscriberMethods) {
                subscribe(subscriber, subscriberMethod);
            }
        }
    }
這裡面主要看一下findSubscriberMethods方法,他是找到你所在註冊類的註解方法,因為一般情況下要想接收資料,必須要加註解的方法,比如@Subscribe(threadMode = ThreadMode.MAIN)或者@Subscribe(threadMode = ThreadMode.MAIN, sticky = true),當然你也可以修改threadMode指定在其他執行緒中操作。
POSTING :表示傳送事件和接收事件在相同的執行緒
MAIN :表示在主執行緒中處理資料
MAIN_ORDERED:和MAIN一樣是在主執行緒中操作,但需要排隊
BACKGROUND :在後臺執行緒中執行
ASYNC :在另起一個非同步執行緒中執行
    List<SubscriberMethod> findSubscriberMethods(Class<?> subscriberClass) {
        List<SubscriberMethod> subscriberMethods = METHOD_CACHE.get(subscriberClass);
        if (subscriberMethods != null) {
            return subscriberMethods;
        }

        if (ignoreGeneratedIndex) {
            subscriberMethods = findUsingReflection(subscriberClass);
        } else {
            subscriberMethods = findUsingInfo(subscriberClass);
        }
        if (subscriberMethods.isEmpty()) {
            throw new EventBusException("Subscriber " + subscriberClass
                    + " and its super classes have no public methods with the @Subscribe annotation");
        } else {
            METHOD_CACHE.put(subscriberClass, subscriberMethods);
            return subscriberMethods;
        }
    }
上面程式碼中ignoreGeneratedIndex預設情況下是false,其中findUsingReflection和findUsingInfo有可能最終呼叫的都是findUsingReflectionInSingleClass,為啥說是有可能,是因為findUsingInfo取值的時候會從先從subscriberInfoIndexes中取,如果有就返回,沒有就會呼叫findUsingReflectionInSingleClass方法,所以來看一下findUsingInfo方法
   private List<SubscriberMethod> findUsingInfo(Class<?> subscriberClass) {
        FindState findState = prepareFindState();
        findState.initForSubscriber(subscriberClass);
        while (findState.clazz != null) {
            findState.subscriberInfo = getSubscriberInfo(findState);
            if (findState.subscriberInfo != null) {
                SubscriberMethod[] array = findState.subscriberInfo.getSubscriberMethods();
                for (SubscriberMethod subscriberMethod : array) {
                    if (findState.checkAdd(subscriberMethod.method, subscriberMethod.eventType)) {
                        findState.subscriberMethods.add(subscriberMethod);
                    }
                }
            } else {
                findUsingReflectionInSingleClass(findState);
            }
            findState.moveToSuperclass();
        }
        return getMethodsAndRelease(findState);
} private FindState prepareFindState() {
synchronized (FIND_STATE_POOL) {
for (int i = 0; i < POOL_SIZE; i++) {
FindState state = FIND_STATE_POOL[i];
if (state != null) {
FIND_STATE_POOL[i] = null;
return state;
}
}
}
return new FindState();
} private SubscriberInfo getSubscriberInfo(FindState findState) {
if (findState.subscriberInfo != null && findState.subscriberInfo.getSuperSubscriberInfo() != null) {
SubscriberInfo superclassInfo = findState.subscriberInfo.getSuperSubscriberInfo();
if (findState.clazz == superclassInfo.getSubscriberClass()) {
return superclassInfo;
}
}
if (subscriberInfoIndexes != null) {
for (SubscriberInfoIndex index : subscriberInfoIndexes) {
SubscriberInfo info = index.getSubscriberInfo(findState.clazz);
if (info != null) {
return info;
}
}
}
return null;
} private List<SubscriberMethod> getMethodsAndRelease(FindState findState) {
List<SubscriberMethod> subscriberMethods = new ArrayList<>(findState.subscriberMethods);
findState.recycle();
synchronized (FIND_STATE_POOL) {
for (int i = 0; i < POOL_SIZE; i++) {
if (FIND_STATE_POOL[i] == null) {
FIND_STATE_POOL[i] = findState;
break;
}
}
}
return subscriberMethods;
} private void findUsingReflectionInSingleClass(FindState findState) {
Method[] methods;
try {
// This is faster than getMethods, especially when subscribers are fat classes like Activities
methods = findState.clazz.getDeclaredMethods();
} catch (Throwable th) {
// Workaround for java.lang.NoClassDefFoundError, see https://github.com/greenrobot/EventBus/issues/149
methods = findState.clazz.getMethods();
findState.skipSuperClasses = true;
}
for (Method method : methods) {
int modifiers = method.getModifiers();
if ((modifiers & Modifier.PUBLIC) != 0 && (modifiers & MODIFIERS_IGNORE) == 0) {
Class<?>[] parameterTypes = method.getParameterTypes();
if (parameterTypes.length == 1) {
Subscribe subscribeAnnotation = method.getAnnotation(Subscribe.class);
if (subscribeAnnotation != null) {
Class<?> eventType = parameterTypes[0];
if (findState.checkAdd(method, eventType)) {
ThreadMode threadMode = subscribeAnnotation.threadMode();
findState.subscriberMethods.add(new SubscriberMethod(method, eventType, threadMode,
subscribeAnnotation.priority(), subscribeAnnotation.sticky()));
}
}
} else if (strictMethodVerification && method.isAnnotationPresent(Subscribe.class)) {
String methodName = method.getDeclaringClass().getName() + "." + method.getName();
throw new EventBusException("@Subscribe method " + methodName +
"must have exactly 1 parameter but has " + parameterTypes.length);
}
} else if (strictMethodVerification && method.isAnnotationPresent(Subscribe.class)) {
String methodName = method.getDeclaringClass().getName() + "." + method.getName();
throw new EventBusException(methodName +
" is a illegal @Subscribe method: must be public, non-static, and non-abstract");
}
}
} // Must be called in synchronized block
private void subscribe(Object subscriber, SubscriberMethod subscriberMethod) {
Class<?> eventType = subscriberMethod.eventType;
Subscription newSubscription = new Subscription(subscriber, subscriberMethod);
CopyOnWriteArrayList<Subscription> subscriptions = subscriptionsByEventType.get(eventType);
if (subscriptions == null) {
subscriptions = new CopyOnWriteArrayList<>();
subscriptionsByEventType.put(eventType, subscriptions);
} else {
if (subscriptions.contains(newSubscription)) {
throw new EventBusException("Subscriber " + subscriber.getClass() + " already registered to event "
+ eventType);
}
}
int size = subscriptions.size();
for (int i = 0; i <= size; i++) {
if (i == size || subscriberMethod.priority > subscriptions.get(i).subscriberMethod.priority) {
subscriptions.add(i, newSubscription);
break;
}
}
List<Class<?>> subscribedEvents = typesBySubscriber.get(subscriber);
if (subscribedEvents == null) {
subscribedEvents = new ArrayList<>();
typesBySubscriber.put(subscriber, subscribedEvents);
}
subscribedEvents.add(eventType);
if (subscriberMethod.sticky) {
if (eventInheritance) {
// Existing sticky events of all subclasses of eventType have to be considered.
// Note: Iterating over all events may be inefficient with lots of sticky events,
// thus data structure should be changed to allow a more efficient lookup
// (e.g. an additional map storing sub classes of super classes: Class -> List<Class>).
Set<Map.Entry<Class<?>, Object>> entries = stickyEvents.entrySet();
for (Map.Entry<Class<?>, Object> entry : entries) {
Class<?> candidateEventType = entry.getKey();
if (eventType.isAssignableFrom(candidateEventType)) {
Object stickyEvent = entry.getValue();
checkPostStickyEventToSubscription(newSubscription, stickyEvent);
}
}
} else {
Object stickyEvent = stickyEvents.get(eventType);
checkPostStickyEventToSubscription(newSubscription, stickyEvent);
}
}
} private void postToSubscription(Subscription subscription, Object event, boolean isMainThread) {
switch (subscription.subscriberMethod.threadMode) {
case POSTING:
invokeSubscriber(subscription, event);
break;
case MAIN:
if (isMainThread) {
invokeSubscriber(subscription, event);
} else {
mainThreadPoster.enqueue(subscription, event);
}
break;
case MAIN_ORDERED:
if (mainThreadPoster != null) {
mainThreadPoster.enqueue(subscription, event);
} else {
// temporary: technically not correct as poster not decoupled from subscriber
invokeSubscriber(subscription, event);
}
break;
case BACKGROUND:
if (isMainThread) {
backgroundPoster.enqueue(subscription, event);
} else {
invokeSubscriber(subscription, event);
}
break;
case ASYNC:
asyncPoster.enqueue(subscription, event);
break;
default:
throw new IllegalStateException("Unknown thread mode: " + subscription.subscriberMethod.threadMode);
}
} void invokeSubscriber(Subscription subscription, Object event) {
try {
subscription.subscriberMethod.method.invoke(subscription.subscriber, event);
} catch (InvocationTargetException e) {
handleSubscriberException(subscription, event, e.getCause());
} catch (IllegalAccessException e) {
throw new IllegalStateException("Unexpected exception", e);
}
} /**
* Posts the given event to the event bus and holds on to the event (because it is sticky). The most recent sticky
* event of an event's type is kept in memory for future access by subscribers using {@link Subscribe#sticky()}.
*/
public void postSticky(Object event) {
synchronized (stickyEvents) {
stickyEvents.put(event.getClass(), event);
}
// Should be posted after it is putted, in case the subscriber wants to remove immediately
post(event);
} /** Posts the given event to the event bus. */
public void post(Object event) {
PostingThreadState postingState = currentPostingThreadState.get();
List<Object> eventQueue = postingState.eventQueue;
eventQueue.add(event);
if (!postingState.isPosting) {
postingState.isMainThread = isMainThread();
postingState.isPosting = true;
if (postingState.canceled) {
throw new EventBusException("Internal error. Abort state was not reset");
}
try {
while (!eventQueue.isEmpty()) {
postSingleEvent(eventQueue.remove(0), postingState);
}
} finally {
postingState.isPosting = false;
postingState.isMainThread = false;
}
}
} private void postSingleEvent(Object event, PostingThreadState postingState) throws Error {
Class<?> eventClass = event.getClass();
boolean subscriptionFound = false;
if (eventInheritance) {
List<Class<?>> eventTypes = lookupAllEventTypes(eventClass);
int countTypes = eventTypes.size();
for (int h = 0; h < countTypes; h++) {
Class<?> clazz = eventTypes.get(h);
subscriptionFound |= postSingleEventForEventType(event, postingState, clazz);
}
} else {
subscriptionFound = postSingleEventForEventType(event, postingState, eventClass);
}
if (!subscriptionFound) {
if (logNoSubscriberMessages) {
logger.log(Level.FINE, "No subscribers registered for event " + eventClass);
}
if (sendNoSubscriberEvent && eventClass != NoSubscriberEvent.class &&
eventClass != SubscriberExceptionEvent.class) {
post(new NoSubscriberEvent(this, event));
}
}
} private boolean postSingleEventForEventType(Object event, PostingThreadState postingState, Class<?> eventClass) {
CopyOnWriteArrayList<Subscription> subscriptions;
synchronized (this) {
subscriptions = subscriptionsByEventType.get(eventClass);
}
if (subscriptions != null && !subscriptions.isEmpty()) {
for (Subscription subscription : subscriptions) {
postingState.event = event;
postingState.subscription = subscription;
boolean aborted = false;
try {
postToSubscription(subscription, event, postingState.isMainThread);
aborted = postingState.canceled;
} finally {
postingState.event = null;
postingState.subscription = null;
postingState.canceled = false;
}
if (aborted) {
break;
}
}
return true;
}
return false;
} /** Adds an index generated by EventBus' annotation preprocessor. */
public EventBusBuilder addIndex(SubscriberInfoIndex index) {
if (subscriberInfoIndexes == null) {
subscriberInfoIndexes = new ArrayList<>();
}
subscriberInfoIndexes.add(index);
return this;
} javaCompileOptions {
annotationProcessorOptions {
arguments = [ eventBusIndex : 'com.example.myapp.MyEventBusIndex' ]
}
} implementation 'org.greenrobot:eventbus:3.1.1'
annotationProcessor 'org.greenrobot:eventbus-annotation-processor:3.1.1'就會自動為我們生成一個類,具體位置如下,
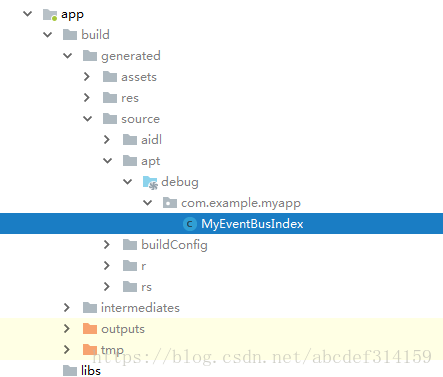
這裡我寫了兩個類,每個類都寫了兩個註解的方法
    @Subscribe(threadMode = ThreadMode.MAIN)
    public void onReceiveEvent(String event) {
        Log.d("wld_____", "FirstActivity:onReceiveEvent1:" + event);
    }

    @Subscribe(threadMode = ThreadMode.MAIN, sticky = true)
    public void onReceiveStickyEvent(String event) {
        Log.d("wld_____", "FirstActivity:onReceiveStickyEvent2:" + event);
} @Subscribe(threadMode = ThreadMode.MAIN)
public void onReceiveEvent(String event) {
Log.d("wld_____", "SecondActivity:onReceiveEvent:" + event);
}
@Subscribe(threadMode = ThreadMode.MAIN, sticky = true)
public void onReceiveStickyEvent(String event) {
Log.d("wld_____", "SecondActivity:onReceiveStickyEvent:" + event);
}package com.example.myapp;
import org.greenrobot.eventbus.meta.SimpleSubscriberInfo;
import org.greenrobot.eventbus.meta.SubscriberMethodInfo;
import org.greenrobot.eventbus.meta.SubscriberInfo;
import org.greenrobot.eventbus.meta.SubscriberInfoIndex;
import org.greenrobot.eventbus.ThreadMode;
import java.util.HashMap;
import java.util.Map;
/** This class is generated by EventBus, do not edit. */
public class MyEventBusIndex implements SubscriberInfoIndex {
private static final Map<Class<?>, SubscriberInfo> SUBSCRIBER_INDEX;
static {
SUBSCRIBER_INDEX = new HashMap<Class<?>, SubscriberInfo>();
putIndex(new SimpleSubscriberInfo(yiquan.xianquan.com.myapplication.SecondActivity.class, true,
new SubscriberMethodInfo[] {
new SubscriberMethodInfo("onReceiveEvent", String.class, ThreadMode.MAIN),
new SubscriberMethodInfo("onReceiveStickyEvent", String.class, ThreadMode.MAIN, 0, true),
}));
putIndex(new SimpleSubscriberInfo(yiquan.xianquan.com.myapplication.FirstActivity.class, true,
new SubscriberMethodInfo[] {
new SubscriberMethodInfo("onReceiveEvent", String.class, ThreadMode.MAIN),
new SubscriberMethodInfo("onReceiveStickyEvent", String.class, ThreadMode.MAIN, 0, true),
}));
}
private static void putIndex(SubscriberInfo info) {
SUBSCRIBER_INDEX.put(info.getSubscriberClass(), info);
}
@Override
public SubscriberInfo getSubscriberInfo(Class<?> subscriberClass) {
SubscriberInfo info = SUBSCRIBER_INDEX.get(subscriberClass);
if (info != null) {
return info;
} else {
return null;
}
}
} EventBus.builder().addIndex(new MyEventBusIndex()).installDefaultEventBus();
EventBus eventBus = EventBus.getDefault();這裡最好把EventBus.builder().addIndex(new MyEventBusIndex()).installDefaultEventBus();放到Application中,只初始化一次,如果多次初始化會直接拋異常,我們看一下原始碼
/**
* Installs the default EventBus returned by {@link EventBus#getDefault()} using this builders' values. Must be
* done only once before the first usage of the default EventBus.
*
* @throws EventBusException if there's already a default EventBus instance in place
*/
public EventBus installDefaultEventBus() {
synchronized (EventBus.class) {
if (EventBus.defaultInstance != null) {
throw new EventBusException("Default instance already exists." +
" It may be only set once before it's used the first time to ensure consistent behavior.");
}
EventBus.defaultInstance = build();
return EventBus.defaultInstance;
}
}所以他只能初始化一次。OK,EventBus的原理基本已經分析完畢,下面來看一下具體使用。下面有兩個類FirstActivity和SecondActivity,我們暫且標記為A和B
public class FirstActivity extends AppCompatActivity {
private Button button1;
@Override
protected void onCreate(Bundle savedInstanceState) {
super.onCreate(savedInstanceState);
setContentView(R.layout.activity_first);
EventBus.getDefault().register(this);
button1 = findViewById(R.id.button1);
button1.setOnClickListener(new View.OnClickListener() {
@Override
public void onClick(View view) {
EventBus.getDefault().postSticky("111111");
startActivity(new Intent(FirstActivity.this, SecondActivity.class));
}
});
}
@Subscribe(threadMode = ThreadMode.MAIN)
public void onReceiveEvent(String event) {
Log.d("wld_____", "FirstActivity:onReceiveEvent:" + event);
}
@Subscribe(threadMode = ThreadMode.MAIN, sticky = true)
public void onReceiveStickyEvent(String event) {
Log.d("wld_____", "FirstActivity:onReceiveStickyEvent:" + event);
}
@Override
protected void onDestroy() {
super.onDestroy();
EventBus.getDefault().unregister(this);
}
}public class SecondActivity extends AppCompatActivity {
private Button button2;
@Override
protected void onCreate(Bundle savedInstanceState) {
super.onCreate(savedInstanceState);
setContentView(R.layout.activity_second);
EventBus.getDefault().register(this);
button2 = findViewById(R.id.button2);
button2.setOnClickListener(new View.OnClickListener() {
@Override
public void onClick(View view) {
finish();
}
});
}
    @Subscribe(threadMode = ThreadMode.MAIN)
    public void onReceiveEvent(String event) {
        Log.d("wld_____", "SecondActivity:onReceiveEvent:" + event);
    }

    @Subscribe(threadMode = ThreadMode.MAIN, sticky = true)
    public void onReceiveStickyEvent(String event) {
        Log.d("wld_____", "SecondActivity:onReceiveStickyEvent:" + event);
    }
@Override
protected void onDestroy() {
super.onDestroy();
EventBus.getDefault().unregister(this);
}
}執行一下,看一下列印的log

結果顯然是正確的,因為在A和B中都是先註冊,所以會獲得他們註解的方法,當在A中傳送訊息的時候A的兩個方法都是可以接收到訊息的,但在B中由於B還沒有啟動,所以當B啟動的時候只能接收到sticky註冊的方法。改一下程式碼再看一下
                EventBus.getDefault().post("111111");
                startActivity(new Intent(FirstActivity.this, SecondActivity.class));
我們發現只有A的兩個方法執行了,B的方法一個也沒執行,這個也很好理解,因為B還沒有註冊就開始傳送訊息,所以收不到。再來改一下程式碼看看,調整一下順序
                startActivity(new Intent(FirstActivity.this, SecondActivity.class));
                EventBus.getDefault().post("111111");
一樣B不會列印,這是因為Activity的啟動是耗時的,而B還沒啟動就開始傳送訊息,自然是接收不到的,我們再改一下,延遲30毫秒在傳送,30毫秒的時間Activity應該完全啟動了吧,我們看一下
                startActivity(new Intent(FirstActivity.this, SecondActivity.class));
                new Handler().postDelayed(new Runnable() {
                    @Override
                    public void run() {
                        EventBus.getDefault().post("111111");
                    }
                }, 30);
            }
再來看一下列印log

看到沒,A和B的兩個註解的方法都執行了,這是因為延遲之後A和B都已經啟動了,但A的onDestroy還沒有執行,所以兩個類的註解方法都會執行的。OK,到這裡EventBus的原理就已經分析完了。