
在SpringBoot中對SpringSecurity的基本使用
阿新 • • 發佈:2018-12-13
參考文獻:
Spring Security是一個能夠為基於Spring的企業應用系統提供宣告式的安全訪問控制解決方案的安全框架。它提供了一組可以在Spring應用上下文中配置的Bean,為應用系統提供宣告式的安全訪問控制功能,減少了為企業系統安全控制編寫大量重複程式碼的工作。
基本使用:
新增依賴:
- <!-- 安全框架 Spring Security -->
- <dependency>
- <groupId>org.springframework.boot</groupId>
- <artifactId>spring-boot-starter-security</artifactId
- </dependency>
我的專案中的使用:
自定義的User物件:
- /**
- * 自定義的 User 物件
- * 此 User 類不是我們的資料庫裡的使用者類,是用來安全服務的
- */
- public class AnyUser extends User {
- //import org.springframework.security.core.userdetails.User;
- private Long id;
- private String nickname;
- AnyUser(
- String username,
- String password,
- Collection<? extends GrantedAuthority> authorities
- ) {
- super(username, password, authorities);
- }
- public Long getId() {
- return id;
- }
- public void setId(Long id) {
- this.id = id;
- }
- public String getNickname() {
- return nickname;
- }
- public
- this.nickname = nickname;
- }
- }
- /**
- * 自定義 UserDetailsService
- */
- @Service
- class AnyUserDetailsService implements UserDetailsService {
- private final UserService userService;
- public AnyUserDetailsService(UserService userService){
- this.userService = userService;
- }
- @Override
- public UserDetails loadUserByUsername(String s) throws UsernameNotFoundException {
- com.zhou.model.User user = userService.getByEmail(s);
- if (user == null){
- throw new UsernameNotFoundException("使用者不存在");
- }
- List<SimpleGrantedAuthority> authorities = new ArrayList<>();
- //對應的許可權新增
- authorities.add(new SimpleGrantedAuthority("ROLE_USER"));
- AnyUser anyUser = new AnyUser(s, user.getPassword(), authorities);
- anyUser.setId(user.getId());
- anyUser.setNickname(user.getNickname());
- return anyUser;
- }
- }
- /**
- * 安全控制中心
- */
- @EnableWebSecurity//@EnableWebMvcSecurity 註解開啟Spring Security的功能
- public class WebSecurityConfig extends WebSecurityConfigurerAdapter {
- private final UserDetailsService userDetailsService;
- public WebSecurityConfig(AnyUserDetailsService userDetailsService){
- this.userDetailsService = userDetailsService;
- }
- @Override
- protected void configure(AuthenticationManagerBuilder auth) throws Exception {
- auth.userDetailsService(this.userDetailsService);
- }
- /**
- * http.authorizeRequests()
- .anyRequest().authenticated()
- .and().formLogin().loginPage("/login")
- //設定預設登入成功跳轉頁面
- .defaultSuccessUrl("/index").failureUrl("/login?error").permitAll()
- .and()
- //開啟cookie儲存使用者資料
- .rememberMe()
- //設定cookie有效期
- .tokenValiditySeconds(60 * 60 * 24 * 7)
- //設定cookie的私鑰
- .key("")
- .and()
- .logout()
- //預設登出行為為logout,可以通過下面的方式來修改
- .logoutUrl("/custom-logout")
- //設定登出成功後跳轉頁面,預設是跳轉到登入頁面
- .logoutSuccessUrl("")
- .permitAll();
- * @param http
- * @throws Exception
- */
- @Override
- protected void configure(HttpSecurity http) throws Exception {
- http
- .authorizeRequests()//authorizeRequests() 定義哪些URL需要被保護、哪些不需要被保護
- .antMatchers("/user/**","/news/**").authenticated()
- .anyRequest().permitAll()
- .and()
- .formLogin()
- .loginPage("/login")
- .defaultSuccessUrl("/user", true)
- .permitAll()
- .and()
- .logout()
- .permitAll()
- .and().csrf().disable();
- }
- }
Spring Security提供了一個過濾器來攔截請求並驗證使用者身份。如果使用者身份認證失敗,頁面就重定向到/login?error,並且頁面中會展現相應的錯誤資訊。若使用者想要登出登入,可以通過訪問@{/logout}請求,在完成登出之後,頁面展現相應的成功訊息。
自定義登入成功處理邏輯:
使登陸成功後跳到登入前頁面:
- //處理登入成功的。
- @Component("myAuthenticationSuccessHandler")
- public class MyAuthenticationSuccessHandler extends SavedRequestAwareAuthenticationSuccessHandler {
- @Autowired
- private ObjectMapper objectMapper;
- @Override
- public void onAuthenticationSuccess(HttpServletRequest request, HttpServletResponse response, Authentication authentication)
- throws IOException, ServletException {
- //什麼都不做的話,那就直接呼叫父類的方法
- super.onAuthenticationSuccess(request, response, authentication);
- String url=request.getRequestURI();
- //如果是要跳轉到某個頁面的
- new DefaultRedirectStrategy().sendRedirect(request, response, url);
- }
- }
重新配置安全中心(程式碼完成之後,修改配置config類程式碼。新增2個註解,自動注入):
- @Autowired
- private AuthenticationSuccessHandler myAuthenticationSuccessHandler;
- @Override
- protected void configure(HttpSecurity http) throws Exception {
- http
- .authorizeRequests()//authorizeRequests() 定義哪些URL需要被保護、哪些不需要被保護
- .antMatchers("/user/**","/news/**","/blog/manage/**","/blog/create/**").authenticated()
- .anyRequest().permitAll()
- .and()
- .formLogin()
- .loginPage("/login")
- .successHandler(myAuthenticationSuccessHandler)//登陸成功處理
- .permitAll()
- .and()
- .logout()
- .permitAll()
- .and().csrf().disable();
- }
QQ登入實現:
準備工作:為了方便各位測試,這裡直接提供一個可以使用的: APP ID:101386962 APP Key:2a0f820407df400b84a854d054be8b6a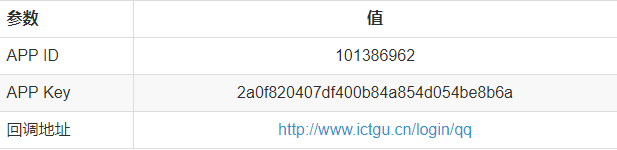 提醒:因為回撥地址不是 http://localhost ,所以在啟動我提供的demo時,需要在host檔案中新增一行:127.0.0.1 www.ictgu.cn
後端詳解:
1、自定義 QQAuthenticationFilter 繼承 AbstractAuthenticationProcessingFilter:- import com.alibaba.fastjson.JSON;
- import org.jsoup.Jsoup;
- import org.jsoup.nodes.Document;
- import org.springframework.security.authentication.UsernamePasswordAuthenticationToken;
- import org.springframework.security.core.Authentication;
- import org.springframework.security.core.AuthenticationException;
- import org.springframework.security.web.authentication.AbstractAuthenticationProcessingFilter;
- import org.springframework.security.web.util.matcher.AntPathRequestMatcher;
- import javax.servlet.ServletException;
- import javax.servlet.http.HttpServletRequest;
- import javax.servlet.http.HttpServletResponse;
- import java.io.IOException;
- import java.util.regex.Matcher;
- import java.util.regex.Pattern;
- public class QQAuthenticationFilter extends AbstractAuthenticationProcessingFilter {
- private final static String CODE = "code";
- /**
- * 獲取 Token 的 API
- */
- private final static String accessTokenUri = "https://graph.qq.com/oauth2.0/token";
- /**
- * grant_type 由騰訊提供
- */
- private final static String grantType = "authorization_code";
- /**
- * client_id 由騰訊提供
- */
- public static final String clientId = "101386962";
- /**
- * client_secret 由騰訊提供
- */
- private final static String clientSecret = "2a0f820407df400b84a854d054be8b6a";
- /**
- * redirect_uri 騰訊回撥地址
- */
- private final static String redirectUri = "http://www.ictgu.cn/login/qq";
- /**
- * 獲取 OpenID 的 API 地址
- */
- private final static String openIdUri = "https://graph.qq.com/oauth2.0/me?access_token=";
- /**
- * 獲取 token 的地址拼接
- */
- private final static String TOKEN_ACCESS_API = "%s?grant_type=%s&client_id=%s&client_secret=%s&code=%s&redirect_uri=%s";
- public QQAuthenticationFilter(String defaultFilterProcessesUrl) {
- super(new AntPathRequestMatcher(defaultFilterProcessesUrl, "GET"));
- }
- @Override
- public Authentication attemptAuthentication(HttpServletRequest request, HttpServletResponse response) throws AuthenticationException, IOException, ServletException {
- String code = request.getParameter(CODE);
- String tokenAccessApi = String.format(TOKEN_ACCESS_API, accessTokenUri, grantType, clientId, clientSecret, code, redirectUri);
- QQToken qqToken = this.getToken(tokenAccessApi);
- if (qqToken != null){
- String openId = getOpenId(qqToken.getAccessToken());
- if (openId != null){
- // 生成驗證 authenticationToken
- UsernamePasswordAuthenticationToken authRequest = new UsernamePasswordAuthenticationToken(qqToken.getAccessToken(), openId);
- // 返回驗證結果
- return this.getAuthenticationManager().authenticate(authRequest);
- }
- }
- return null;
- }
- private QQToken getToken(String tokenAccessApi) throws IOException{
- Document document = Jsoup.connect(tokenAccessApi).get();
- String tokenResult = document.text();
- String[] results = tokenResult.split("&");
- if (results.length == 3){
- QQToken qqToken = new QQToken();
- String accessToken = results[0].replace("access_token=", "");
- int expiresIn = Integer.valueOf(results[1].replace("expires_in=", ""));
- String refreshToken = results[2].replace("refresh_token=", "");
- qqToken.setAccessToken(accessToken);
- qqToken.setExpiresIn(expiresIn);
- qqToken.setRefresh_token(refreshToken);
- return qqToken;
- }
- return null;
- }
- private String getOpenId(String accessToken) throws IOException{
- String url = openIdUri + accessToken;
- Document document = Jsoup.connect(url).get();
- String resultText = document.text();
- Matcher matcher = Pattern.compile("\"openid\":\"(.*?)\"").matcher(resultText);
- if (matcher.find()){
- return matcher.group(1);
- }
- return null;
- }
- class QQToken {
- /**
- * token
- */
- private String accessToken;
- /**
- * 有效期
- */
- private int expiresIn;
- /**
- * 重新整理時用的 token
- */
- private String refresh_token;
- String getAccessToken() {
- return accessToken;
- }
- void setAccessToken(String accessToken) {
- this.accessToken = accessToken;
- }
- public int getExpiresIn() {
- return expiresIn;
- }
- void setExpiresIn(int expiresIn) {
- this.expiresIn = expiresIn;
- }
- public String getRefresh_token() {
- return refresh_token;
- }
- void setRefresh_token(String refresh_token) {
- this.refresh_token = refresh_token;
- }
- }
- }
- import com.alibaba.fastjson.JSON;
- import com.alibaba.fastjson.JSONObject;
- import com.zhou.model.User;
- import org.jsoup.Jsoup;
- import org.jsoup.nodes.Document;
- import org.springframework.security.authentication.AuthenticationManager;
- import org.springframework.security.authentication.BadCredentialsException;
- import org.springframework.security.authentication.UsernamePasswordAuthenticationToken;
- import org.springframework.security.core.Authentication;
- import org.springframework.security.core.AuthenticationException;
- import org.springframework.security.core.GrantedAuthority;
- import org.springframework.security.core.authority.SimpleGrantedAuthority;
- import java.io.IOException;
- import java.util.ArrayList;
- import java.util.List;
- import static com.zhou.config.qq.QQAuthenticationFilter.clientId;
- public class QQAuthenticationManager implements AuthenticationManager {
- private static final List<GrantedAuthority> AUTHORITIES = new ArrayList<>();
- /**
- * 獲取 QQ 登入資訊的 API 地址
- */
- private final static String userInfoUri = "https://graph.qq.com/user/get_user_info";
- /**
- * 獲取 QQ 使用者資訊的地址拼接
- */
- private final static String USER_INFO_API = "%s?access_token=%s&oauth_consumer_key=%s&openid=%s";
- static {
- AUTHORITIES.add(new SimpleGrantedAuthority("ROLE_USER"));
- }
- @Override
- public Authentication authenticate(Authentication auth) throws AuthenticationException {
- if (auth.getName() != null && auth.getCredentials() != null) {
- User user = null;
- try {
- user = getUserInfo(auth.getName(), (String) (auth.getCredentials()));
- } catch (Exception e) {
- e.printStackTrace();
- }
- return new UsernamePasswordAuthenticationToken(user,
- null, AUTHORITIES);
- }
- throw new BadCredentialsException("Bad Credentials");
- }
- private User getUserInfo(String accessToken, String openId) throws Exception {
- String url = String.format(USER_INFO_API, userInfoUri, accessToken, clientId, openId);
- Document document;
- try {
- document = Jsoup.connect(url).get();
- } catch (IOException e) {
- throw new BadCredentialsException("Bad Credentials!");
- }
- String resultText = document.text();
- JSONObject json = JSON.parseObject(resultText);
- User user = new User();
- user.setNickname(json.getString("nickname"));
- user.setEmail("暫無。。。。");
- //user.setGender(json.getString("gender"));
- //user.setProvince(json.getString("province"));
- //user.setYear(json.getString("year"));
- user.setAvatar(json.getString("figureurl_qq_2"));
- return user;
- }
- @Override
- protected void configure(HttpSecurity http) throws Exception {
- http
- .authorizeRequests()//authorizeRequests() 定義哪些URL需要被保護、哪些不需要被保護
- .antMatchers("/user/**","/news/**","/blog/manage/**").authenticated()
- .anyRequest().permitAll()
- .and()
- .formLogin()
- .loginPage("/login")
- .successHandler(myAuthenticationSuccessHandler)//登陸成功處理
- .permitAll()
- .and()
- .logout()
- .permitAll()
- .and().csrf().disable();
- // 在 UsernamePasswordAuthenticationFilter 前新增 QQAuthenticationFilter
- http.addFilterAt(qqAuthenticationFilter(), UsernamePasswordAuthenticationFilter.class);
- }
- /**
- * 自定義 QQ登入 過濾器
- */
- private QQAuthenticationFilter qqAuthenticationFilter(){
- QQAuthenticationFilter authenticationFilter = new QQAuthenticationFilter("/login/qq");
- //SimpleUrlAuthenticationSuccessHandler successHandler = new SimpleUrlAuthenticationSuccessHandler();
- //successHandler.setAlwaysUseDefaultTargetUrl(true);
- //successHandler.setDefaultTargetUrl("/user");
- MyAuthenticationSuccessHandler successHandler = new MyAuthenticationSuccessHandler();
- authenticationFilter.setAuthenticationManager(new QQAuthenticationManager());
- authenticationFilter.setAuthenticationSuccessHandler(successHandler);
- return authenticationFilter;
- }
前端說明:
前端很簡單,一個QQ登陸按鈕,程式碼如下:<a href="https://graph.qq.com/oauth2.0/authorize?response_type=code&client_id=101386962&redirect_uri=http://www.ictgu.cn/login/qq&state=test" class="btn btn-primary btn-block">QQ登入</a>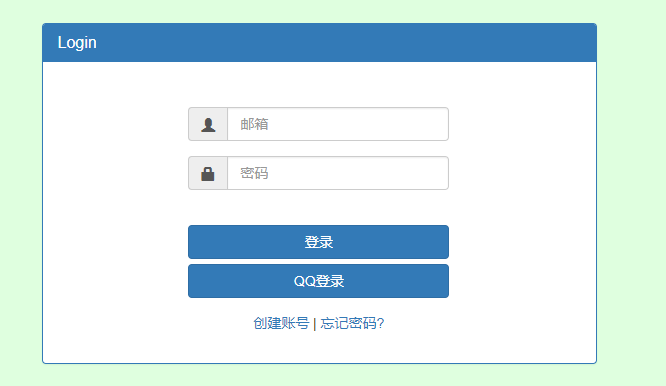 其他說明:
騰訊官網原話:openid是此網站上唯一對應使用者身份的標識,網站可將此ID進行儲存便於使用者下次登入時辨識其身份,或將其與使用者在網站上的原有賬號進行繫結。
通過QQ登入獲取的 openid 用於與自己網站的賬號一一對應。
其他說明:
騰訊官網原話:openid是此網站上唯一對應使用者身份的標識,網站可將此ID進行儲存便於使用者下次登入時辨識其身份,或將其與使用者在網站上的原有賬號進行繫結。
通過QQ登入獲取的 openid 用於與自己網站的賬號一一對應。