
Nginx從入門到實踐(三)
動靜分離
動靜分離是將網站靜態資源(JavaScript,CSS,img等檔案)與後臺應用分開部署,提高使用者訪問靜態程式碼的速度,降低對後臺應用訪問。
動靜分離的一種做法是將靜態資源部署在nginx上,後臺專案部署到應用伺服器上,根據一定規則靜態資源的請求全部請求nginx伺服器,達到動靜分離的目標。
rewrite規則
Rewrite 主要的功能就是實現URL的重寫,Nginx的rewrite功能是使用nginx提供的全域性變數或自己設定的變數,結合正則表示式和標誌位實現url重寫以及重定向。
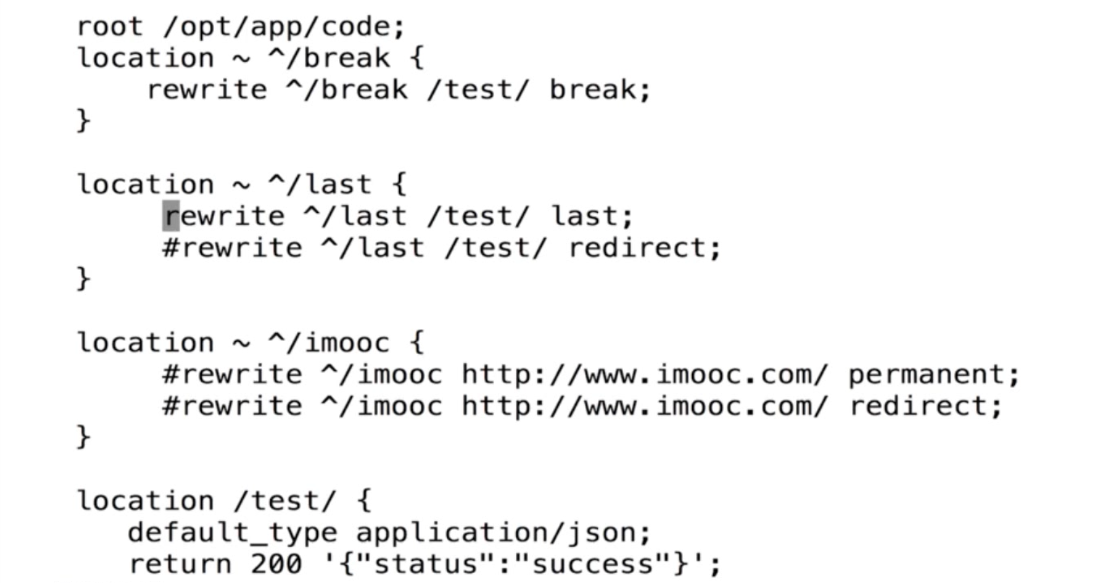
Syntax: rewrite regex replacement [flag];
Default: —
Context: server, location, if
flag:
- last:停止處理當前的 ngx_http_rewrite_module 指令集合,開始搜尋能夠匹配修改過的 URI 的新的 location
- break:跟 break 指令一樣,停止處理當前的 ngx_http_rewrite_module 指令集合
- redirect:返回使用 302 程式碼的臨時重定向,在替換字串不以“http//”,“https//”或“$scheme”開頭時使用
- permanent:返回使用 301 程式碼的永久重定向
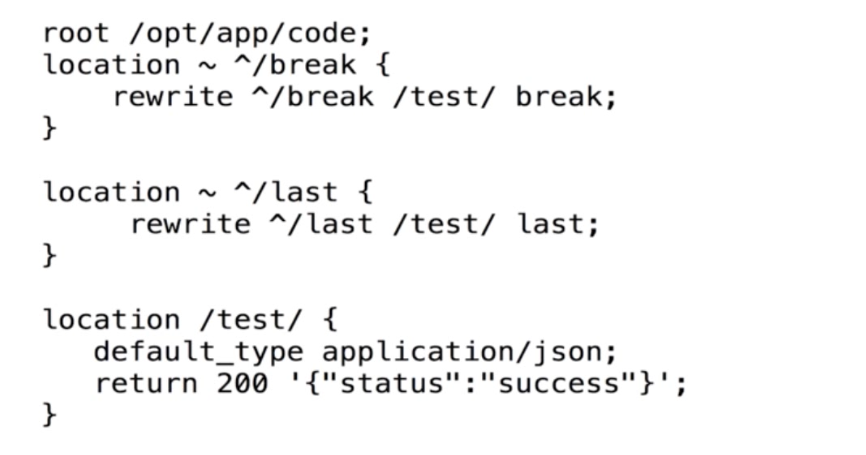
瀏覽器訪問/break返回的時404, 訪問/last和/test都是success
訪問/break時會從 root中查詢/test/
/last時會新建一個/test的請求
高階模組
secure_link模組
http://nginx.org/en/docs/http/ngx_http_secure_link_module.html
ngx_http_secure_link_module模組能夠檢查請求連結的許可權以及是否過期,多用於下載伺服器防盜鏈
原理
1)加密串與過期時間作為url中的引數
2)nginx伺服器接收到了過期時間,也使用過期時間、配置裡金鑰、檔案uri生成加密串
3)計算的加密串與url傳遞的加密串進行對比
通過將請求中傳遞的校驗和值與為請求計算的值進行比較來驗證所請求連結的真實性。如果連結的生命週期有限且時間已過,則該連結將被視為過時。這些檢查的狀態在$secure_link
location  / {
    secure_link $arg_md5,$arg_expires;  #設定兩個變數
    secure_link_md5 "xxxxxx$remote_addr$arg_expires";   #設定md5,當作口令

    if ($secure_link = "") {
        # 資源不存在或雜湊比對失敗
        return 403;
    }

    if ($secure_link = "0") {
        # 時間戳過期
        return 410;
    }
}


 $secret = 'xxxxxx'; # 金鑰
 $path = '/web/nginx-1.4.2.tar.gz'; # 下載檔案
 # 下載到期時間,time是當前時間,300表示300秒,也就是說從現在到300秒之內檔案不過期
 $expire = time()+300;
# 用檔案路徑、金鑰、過期時間生成加密串
 $md5 = base64_encode(md5($secret . $path . $expire, true));
 $md5 = strtr($md5, '+/', '-_');
 $md5 = str_replace('=', '', $md5);
# 加密後的下載地址
 echo '<a href=http://s1.down.ttlsa.com/web/nginx-1.4.2.tar.gz?md5='.$md5.'&expires='.$expire.'>nginx-1.4.2</a>';
 echo '<br>http://s1.down.ttlsa.com/web/nginx-1.4.2.tar.gz?md5='.$md5.'&expires='.$expire;
開啟下載地址,等到5分鐘後在下載一次,你會發現點選下載會跳轉到410頁面
Geoip讀取地域資訊
http://nginx.org/en/docs/http/ngx_http_geoip_module.html
安裝
yum install nginx-module-geoip安裝的檔案在/etc/nginx/modules資料夾下
[[email protected] modules]# pwd
/etc/nginx/modules
[[email protected] modules]# ls
ngx_http_geoip_module-debug.so         ngx_http_perl_module.so
ngx_http_geoip_module.so               ngx_http_xslt_filter_module-debug.so
ngx_http_image_filter_module-debug.so  ngx_http_xslt_filter_module.so
ngx_http_image_filter_module.so        ngx_stream_geoip_module-debug.so
ngx_http_js_module-debug.so            ngx_stream_geoip_module.so
ngx_http_js_module.so                  ngx_stream_js_module-debug.so
ngx_http_perl_module-debug.so ngx_stream_js_module.so建立目錄geoip
mkdir -p /etc/nginx/geoip/
cd /etc/nginx/geoip/

# 下載IP庫資訊檔案
wget http://geolite.maxmind.com/download/geoip/database/GeoLiteCountry/GeoIP.dat.gz
wget http://geolite.maxmind.com/download/geoip/database/GeoLiteCity.dat.gz

# 解壓
gunzip GeoIP.dat.gz
gunzip GeoLiteCity.dat.gz


[[email protected] geoip]# ls
GeoIP.dat  GeoLiteCity.dat
在nginx全域性配置中載入模組
[[email protected] nginx]# cat nginx.conf
# For more information on configuration, see:
#   * Official English Documentation: http://nginx.org/en/docs/
#   * Official Russian Documentation: http://nginx.org/ru/docs/

user nginx;
worker_processes auto;
error_log /var/log/nginx/error.log;
pid /run/nginx.pid;

# Load dynamic modules. See /usr/share/nginx/README.dynamic.
include /usr/share/nginx/modules/*.conf;
load_module "modules/ngx_http_geoip_module.so";
load_module "modules/ngx_stream_geoip_module.so";

events {
    worker_connections 1024;
}
配置訪問介面
[[email protected] conf.d]# cat HtmlTest.conf
geoip_country /etc/nginx/geoip/GeoIP.dat;
geoip_city /etc/nginx/geoip/GeoLiteCity.dat;

server {
    listen 80;
    server_name ip; # substitute your machine's IP address or FQDN

    sendfile on;

    location /ip {
            if ($geoip_country_code != CN) {
               return 403;
             }
        }

    location /myip {
            default_type text/plain;
            return 200 "$remote_addr $geoip_country_name $geoip_country_code $geoip_city";
     }

}關閉代理,訪問/myip即可看到自己的IP資訊;使用國外代理,訪問/ip會顯示403
HTTPS服務
超文字傳輸協議HTTP協議被用於在Web瀏覽器和網站伺服器之間傳遞資訊,HTTP協議以明文方式傳送內容,不提供任何方式的資料加密,如果攻擊者截取了Web瀏覽器和網站伺服器之間的傳輸報文,就可以直接讀懂其中的資訊,因此,HTTP協議不適合傳輸一些敏感資訊,比如:信用卡號、密碼等支付資訊。
為了解決HTTP協議的這一缺陷,需要使用另一種協議:安全套接字層超文字傳輸協議HTTPS,為了資料傳輸的安全,HTTPS在HTTP的基礎上加入了SSL協議,SSL依靠證書來驗證伺服器的身份,併為瀏覽器和伺服器之間的通訊加密。
HTTPS就是使用SSL/TLS協議進行加密傳輸,讓客戶端拿到伺服器的公鑰,然後客戶端隨機生成一個對稱加密的祕鑰,使用公鑰加密,傳輸給服務端,後續的所有資訊都通過該對稱祕鑰進行加密解密,完成整個HTTPS的流程。
證書籤名生成
http://nginx.org/en/docs/http/ngx_http_ssl_module.html
檢測是否安裝openssl
[[email protected] conf.d]# openssl version
OpenSSL 1.0.2k-fips 26 Jan 2017- 生成key金鑰
- 生成證書籤名請求檔案(csr檔案)
- 生成證書籤名檔案(CA檔案)
https://www.cnblogs.com/jingxiaoniu/p/6745254.html
cd /etc/nginx
mkdir ssl_key
cd ssl_key

# 建立伺服器證書金鑰檔案 server.key:
openssl genrsa -des3 -out server.key 1024
輸入密碼,確認密碼,自己隨便定義,但是要記住,後面會用到。

# 建立伺服器證書的申請檔案 server.csr
openssl req -new -key server.key -out server.csr

# 輸出內容為:
Enter pass phrase for root.key: ← 輸入前面建立的密碼
Country Name (2 letter code) [AU]:CN ← 國家代號,中國輸入CN
State or Province Name (full name) [Some-State]:BeiJing ← 省的全名,拼音
Locality Name (eg, city) []:BeiJing ← 市的全名,拼音
Organization Name (eg, company) [Internet Widgits Pty Ltd]:MyCompany Corp. ← 公司英文名
Organizational Unit Name (eg, section) []: ← 可以不輸入
Common Name (eg, YOUR name) []: ← 此時不輸入
Email Address []:[email protected] ← 電子郵箱,可隨意填
Please enter the following ‘extra’ attributes
to be sent with your certificate request
A challenge password []: ← 可以不輸入
An optional company name []: ← 可以不輸入

# 備份一份伺服器金鑰檔案
cp server.key server.key.org

# 生成證書檔案server.crt
openssl x509 -req -days 365 -in server.csr -signkey server.key -out server.crt
配置檔案
server
 {
   listen       443;
   server_name  ip;
   ssl on;
   ssl_certificate /etc/nginx/ssl_key/server.crt;
   ssl_certificate_key /etc/nginx/ssl_key/server.key;

   index index.html index.htm;
   location / {
       root  /opt/app/code;
   }
}
重啟nginx,瀏覽器訪問,如果返回的是503,檢視一下nginx的錯誤日誌
tail -f /var/log/nginx/error.log

2018/12/14 21:03:55 [emerg] 30086#30086: SSL_CTX_use_PrivateKey_file("/etc/nginx/ssl_key/server.key") failed (SSL: error:0906406D:PEM routines:PEM_def_callback:problems getting password error:0906A068:PEM routines:PEM_do_header:bad password read error:140B0009:SSL routines:SSL_CTX_use_PrivateKey_file:PEM lib)


cd /etc/nginx/ssl_key
# 去除檔案口令(重啟nginx無需輸入密碼)
openssl rsa -in server.key.org -out server.key
重新啟動即可,這個證書是自己頒發的,瀏覽器會提示不安全
蘋果要求的openssl後臺
先檢查一下openssl版本
[[email protected] ssl_key]# openssl version
OpenSSL 1.0.2k-fips  26 Jan 2017
如果版本不滿足,可以升級一下版本
#!/bin/sh
cd /opt/download
wget https://www.openssl.org/source/openssl-1.0.2k.tar.gz
tar -zxvf openssl-1.0.2k.tar.gz
cd openssl-1.0.2k
./config --prefix=/usr/local/openssl
make && make install
mv /usr/bin/openssl   /usr/bin/openssl.OFF
mv /usr/include/openssl   /usr/include/openssl.OFF
ln -s   /usr/local/openssl/bin/openssl   /usr/bin/openssl
ln -s   /usr/local/openssl/include/openssl   /usr/include/openssl
echo "/usr/local/openssl/lib"  >>/etc/ld.so.conf
ldconfig -v
openssl version -a
檢視簽名檔案
[[email protected] ssl_key]# openssl x509 -noout -text -in server.crt
Certificate:
    Data:
        Version: 1 (0x0)
        Serial Number:
            f2:da:9a:30:90:5f:4a:1b
    Signature Algorithm: sha256WithRSAEncryption
        Issuer: C=CN, ST=HeNan, L=NanYang, O=Ice Corp
        Validity
            Not Before: Dec 14 12:59:08 2018 GMT
            Not After : Dec 14 12:59:08 2019 GMT
        Subject: C=CN, ST=HeNan, L=NanYang, O=Ice Corp
        Subject Public Key Info:
            Public Key Algorithm: rsaEncryption
                Public-Key: (1024 bit)
                Modulus:
                    ...
                Exponent: 65537 (0x10001)
    Signature Algorithm: sha256WithRSAEncryption
...可以看到,演算法是sha256,公鑰是1024 bit
生成滿足蘋果要求的crt檔案
cd /etc/nginx/ssl_key

openssl req -x509 -days 365 -sha256 -nodes -newkey rsa:2048 -keyout server.key -out server_apple.crt
重新輸入一些公司資訊
修改一下配置檔案
server
 {
   listen       443;
   server_name  ip;
   ssl on;
   # ssl_certificate /etc/nginx/ssl_key/server.crt;
   ssl_certificate /etc/nginx/ssl_key/server_apple.crt;
   ssl_certificate_key /etc/nginx/ssl_key/server.key;

   index index.html index.htm;
   location / {
       root  /usr/share/nginx/html;
   }
}
重新啟動伺服器即可
HTTPS服務優化
- 啟用長連線
keepalive- 設定ssl session 快取
Nginx與Lua的開發
實現灰度釋出
LuaJIT
wget http://luajit.org/download/LuaJIT-2.0.2.tar.gz
tar -zxvf LuaJIT-2.0.2.tar.gz
cd LuaJIT-2.0.2
make install PREFIX=/usr/local/LuaJIT
/etc/profile 檔案中加入環境變數
注意路徑
export LUAJIT_LIB=/usr/local/LuaJIT/lib
export LUAJIT_INC=/usr/local/LuaJIT/include/luajit-2.0
ngx_devel_kit和lua-nginx-module
cd /root/download
wget https://github.com/simpl/ngx_devel_kit/archive/v0.3.0.tar.gz
wget https://github.com/openresty/lua-nginx-module/archive/v0.10.9rc7.tar.gz
分別解壓
重新編譯Nginx
cd /root/download
wget http://nginx.org/download/nginx-1.15.5.tar.gz
tar -zxvf nginx-1.15.5.tar.gz
cd nginx-1.15.5
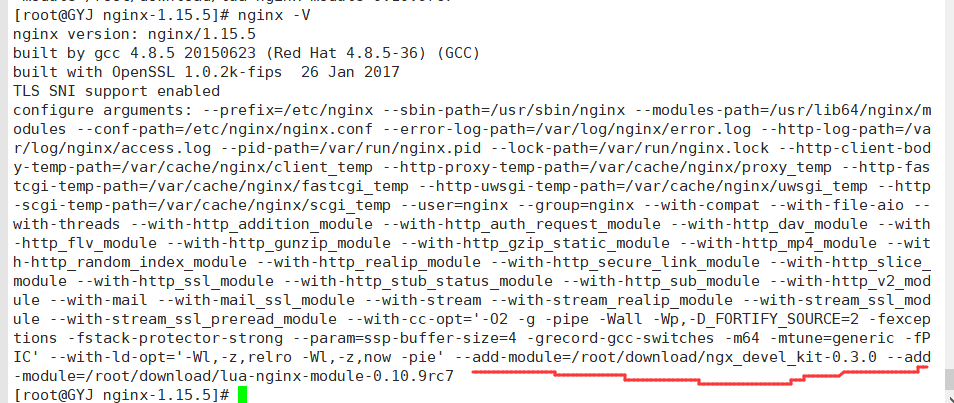
[[email protected] nginx-1.15.5]# ./configure --prefix=/etc/nginx  \
 --sbin-path=/usr/sbin/nginx \
 --modules-path=/usr/lib64/nginx/modules \
 --conf-path=/etc/nginx/nginx.conf \
 --error-log-path=/var/log/nginx/error.log \
 --http-log-path=/var/log/nginx/access.log \
 --pid-path=/var/run/nginx.pid \
 --lock-path=/var/run/nginx.lock \
 --http-client-body-temp-path=/var/cache/nginx/client_temp \
 --http-proxy-temp-path=/var/cache/nginx/proxy_temp \
 --http-fastcgi-temp-path=/var/cache/nginx/fastcgi_temp \
 --http-uwsgi-temp-path=/var/cache/nginx/uwsgi_temp \
 --http-scgi-temp-path=/var/cache/nginx/scgi_temp \
 --user=nginx \
 --group=nginx \
 --with-compat \
 --with-file-aio \
 --with-threads \
 --with-http_addition_module \
 --with-http_auth_request_module \
 --with-http_dav_module \
 --with-http_flv_module \
 --with-http_gunzip_module \
 --with-http_gzip_static_module \
 --with-http_mp4_module \
 --with-http_random_index_module \
 --with-http_realip_module \
 --with-http_secure_link_module \
 --with-http_slice_module \
 --with-http_ssl_module \
 --with-http_stub_status_module \
 --with-http_sub_module \
 --with-http_v2_module \
 --with-mail \
 --with-mail_ssl_module \
 --with-stream \
 --with-stream_realip_module \
 --with-stream_ssl_module \
 --with-stream_ssl_preread_module \
 --with-cc-opt='-O2 -g -pipe -Wall -Wp,-D_FORTIFY_SOURCE=2 -fexceptions -fstack-protector-strong \
 --param=ssp-buffer-size=4 -grecord-gcc-switches -m64 -mtune=generic -fPIC' \
 --with-ld-opt='-Wl,-z,relro -Wl,-z,now -pie' \
 --add-module=/root/download/ngx_devel_kit-0.3.0 \
 --add-module=/root/download/lua-nginx-module-0.10.9rc7
最後加入lua的模組,注意路徑別錯了
# 如若出現:
# error: the HTTP gzip module requires the zlib library.
# yum install zlib zlib-devel 一下即可
make -j 4 && make install
載入lua庫,加入到ld.so.conf檔案
echo "/usr/local/LuaJIT/lib" >> /etc/ld.so.conf

# 然後執行如下命令:
ldconfig
檢視一下是否安裝成功
簡單配置
wget https://github.com/agentzh/lua-resty-memcached/archive/v0.11.tar.gz
tar -zxvf v0.11.tar.gz
cp -r lua-resty-memcached-0.11/lib/resty /usr/local/share/lua/5.1/
server {
listen 80;
server_name localhost;
#charset koi8-r;
access_log /var/log/nginx/log/host.access.log main;
location /hello {
default_type 'text/plain';
content_by_lua 'ngx.say("hello, lua")';
}
location /myip {
default_type 'text/plain';
content_by_lua '
clientIP = ngx.req.get_headers()["x_forwarded_for"]
ngx.say("IP:",clientIP)
';
}
location / {
default_type "text/html";
content_by_lua_file /opt/app/lua/dep.lua;
#add_after_body "$http_x_forwarded_for";
}
location @server{
proxy_pass http://127.0.0.1:9090;
}
location @server_test{
proxy_pass http://127.0.0.1:8080;
}
error_page 500 502 503 504 404 /50x.html;
location = /50x.html {
root /usr/share/nginx/html;
}
}clientIP = ngx.req.get_headers()["X-Real-IP"]
if clientIP == nil then
clientIP = ngx.req.get_headers()["x_forwarded_for"]
end
if clientIP == nil then
clientIP = ngx.var.remote_addr
end
local memcached = require "resty.memcached"
local memc, err = memcached:new()
if not memc then
ngx.say("failed to instantiate memc: ", err)
return
end
local ok, err = memc:connect("127.0.0.1", 11211)
if not ok then
ngx.say("failed to connect: ", err)
return
end
local res, flags, err = memc:get(clientIP)
ngx.say("value key: ",res,clientIP)
if err then
ngx.say("failed to get clientIP ", err)
return
end
if res == "1" then
ngx.exec("@server_test")
return
end
ngx.exec("@server")