
Allocations分析記憶體分配
Allocations
Allocations用來分析靜態記憶體分配。
Demo App
Demo是一個簡單的圖片應用:首頁只有一個簡單的入口;次級頁面會讀取本地圖片,加濾鏡,然後按照瀑布流的方式顯示出來;第三個頁面提供大圖顯示;
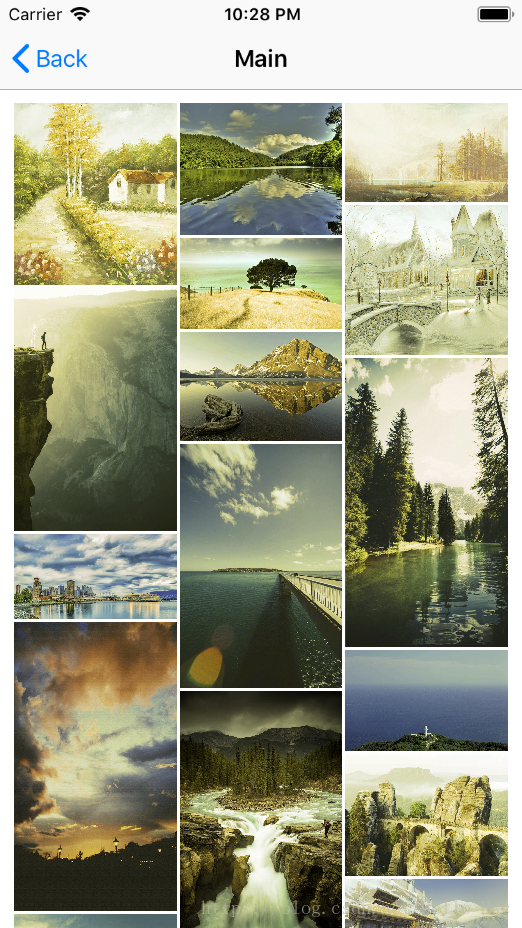

執行程式碼:點選Photos -> 進入main -> 點選一張圖,進入詳情頁 -> Pop直到回到第一個頁面,重複這段操作,從XCode的記憶體模組發現兩個問題。
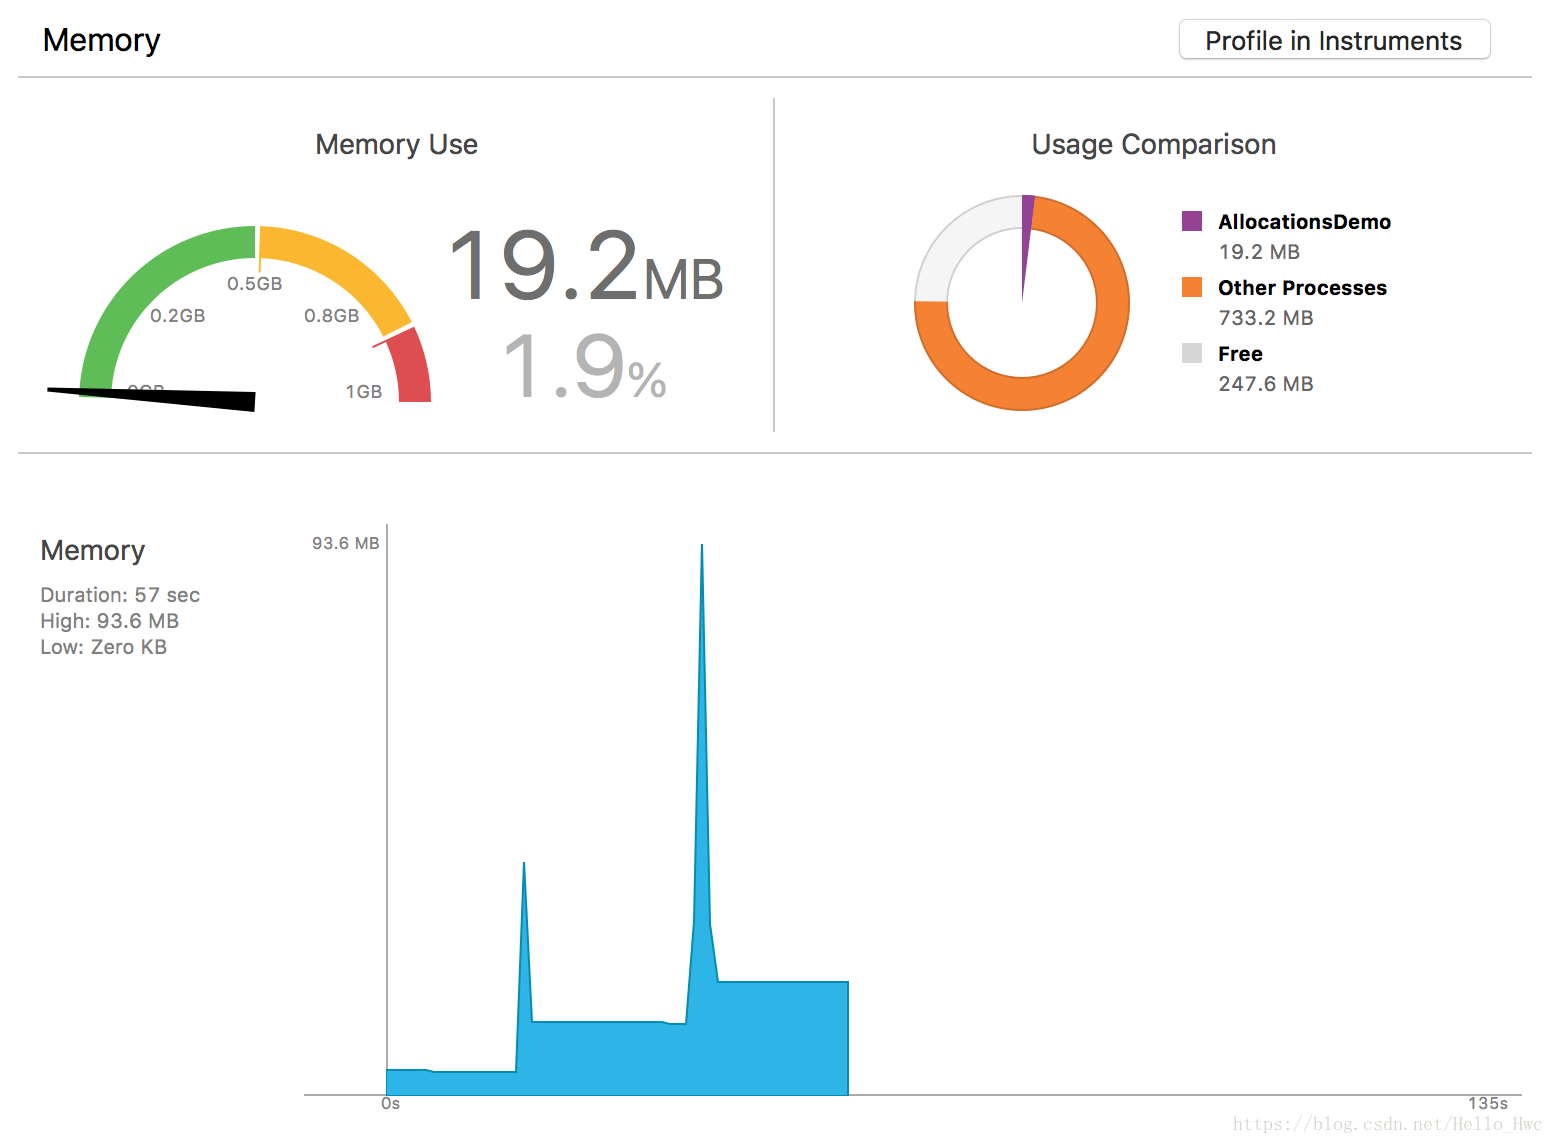
- 記憶體峰值過大
- 退出介面後,記憶體沒有降低。
Statistics
選單欄選擇Product -> Profile,然後選擇Allocations,執行專案,按照記憶體飆升的路徑重複操作,採集到記憶體資料後停止執行。
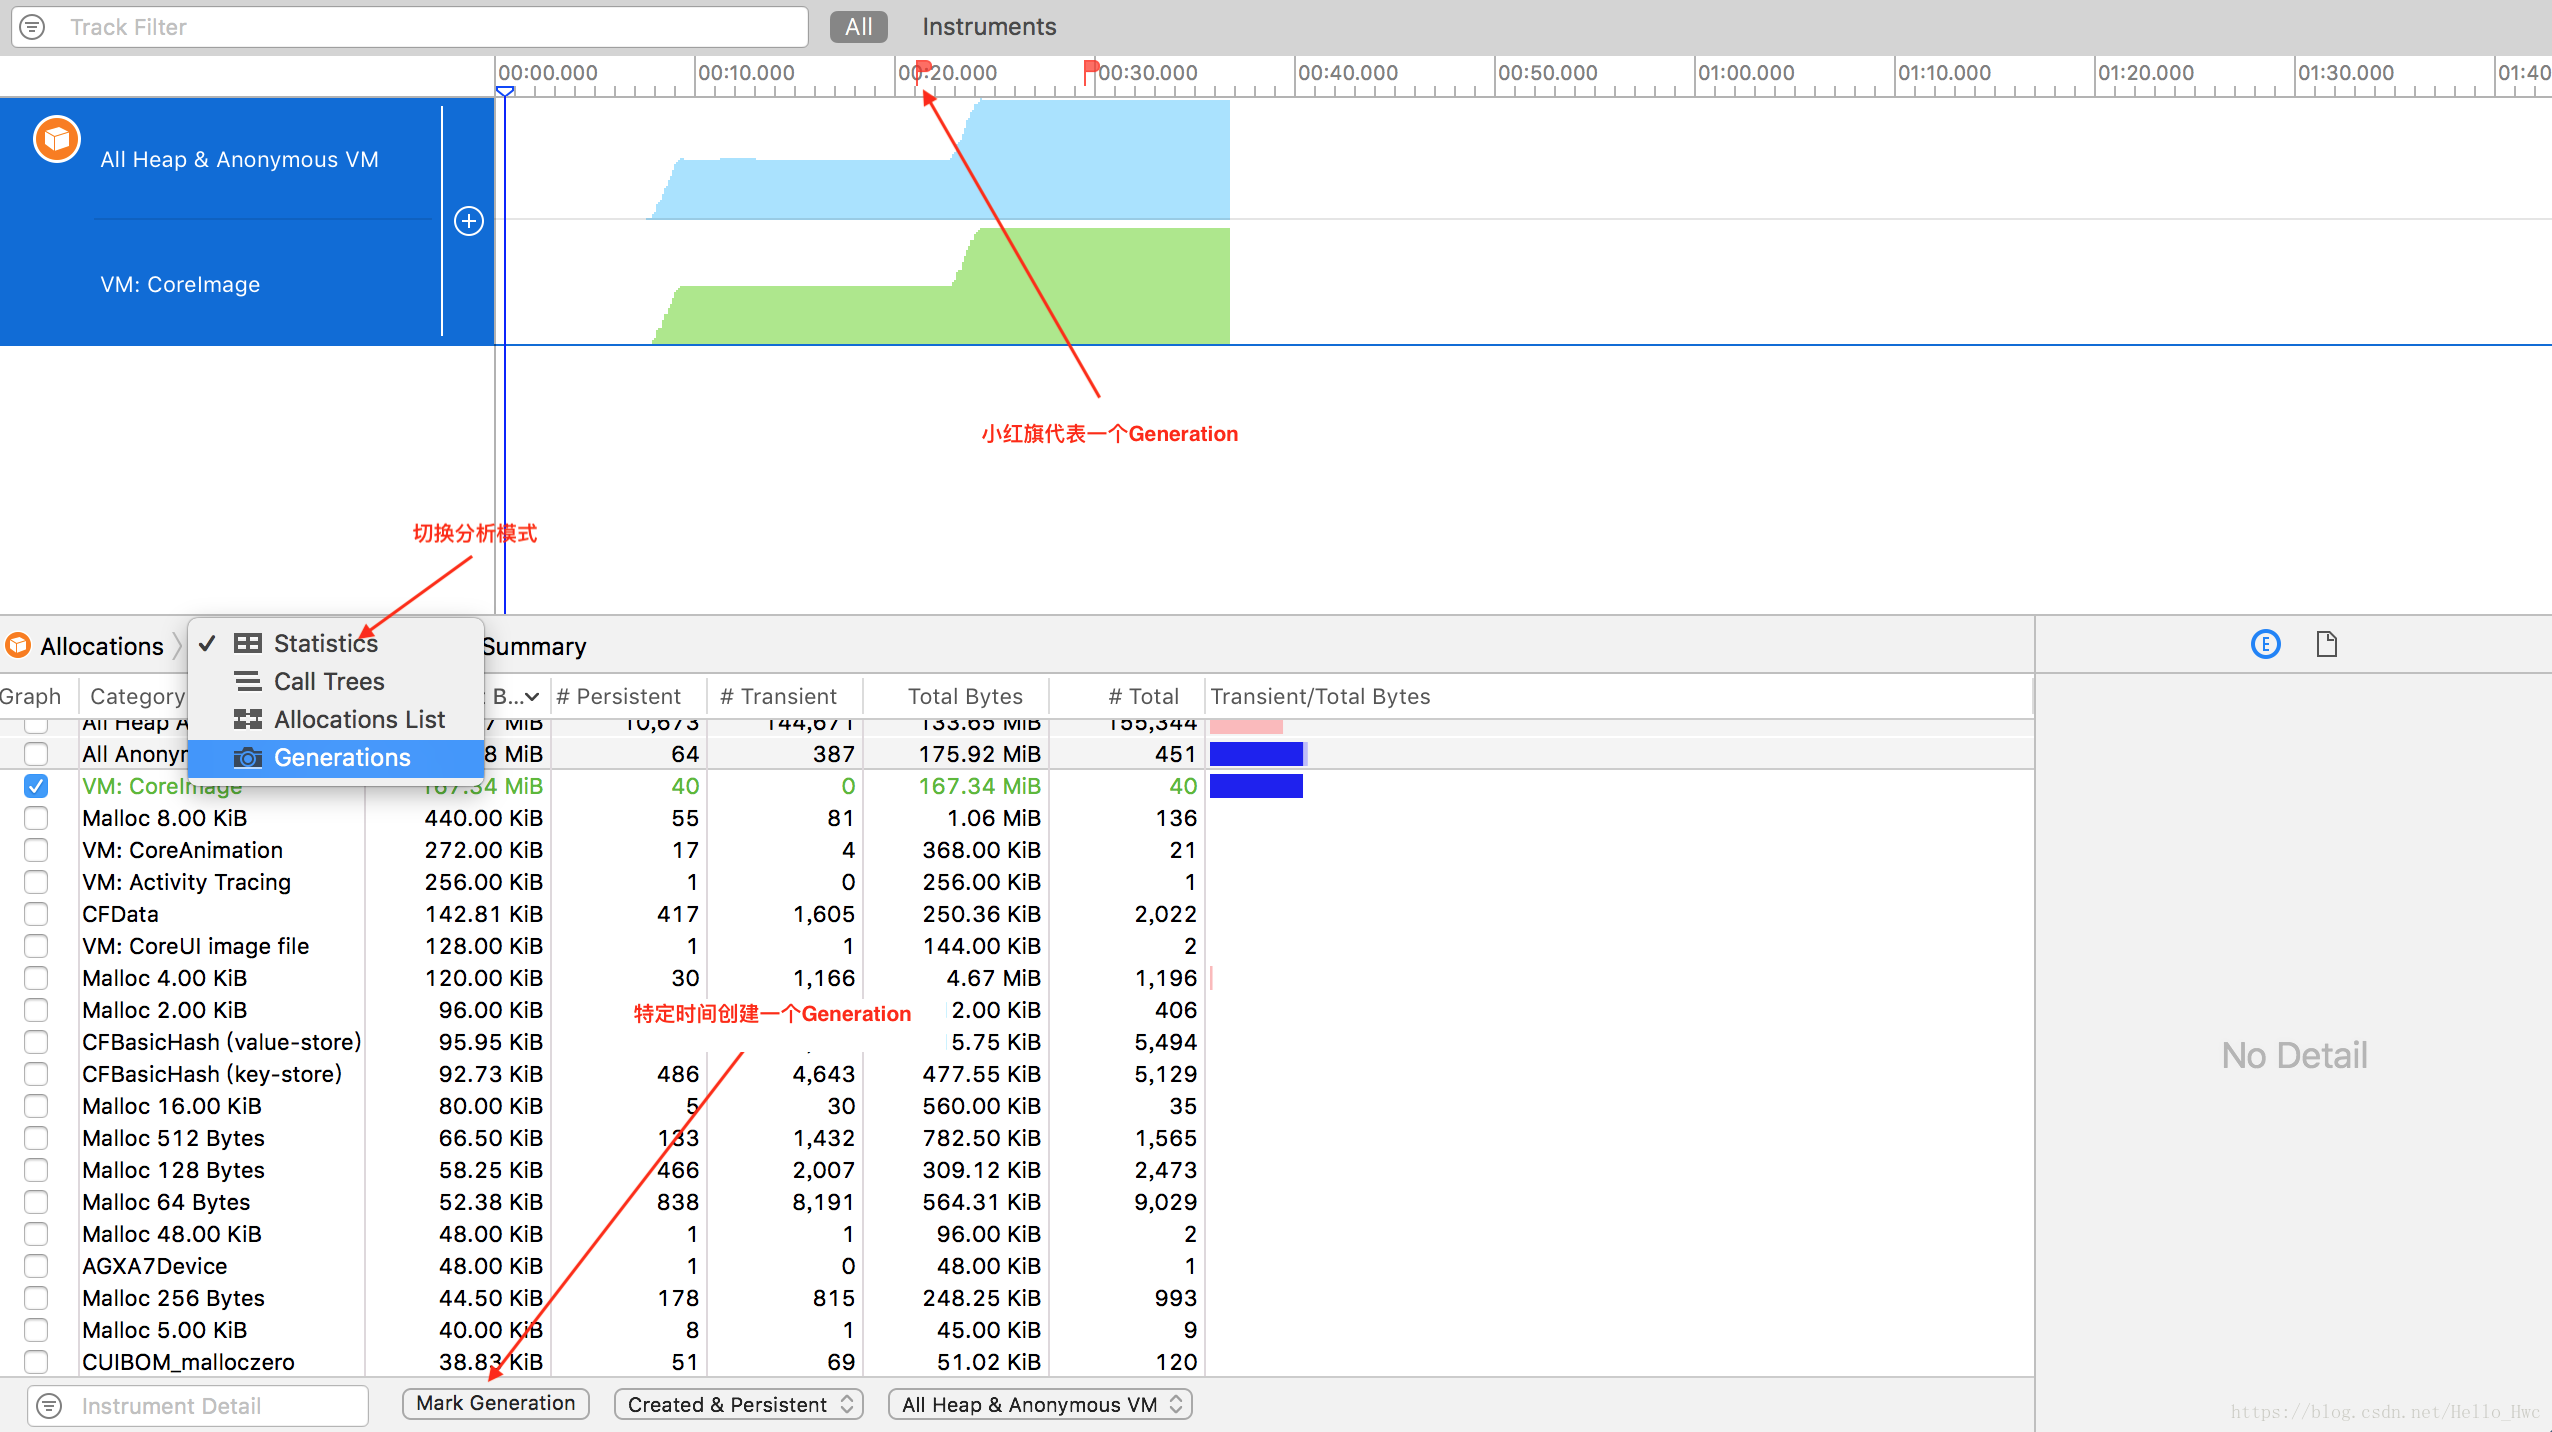
預設看到的資料是Statistics(靜態分析),點選mark 2可以更改資料分析模式。

為了更好的解決問題,有必要講解下這裡的記憶體相關概念:
- All Heap Allocation 堆上malloc分配的記憶體,不包過虛擬記憶體區域。
- All Anonymous VM 匿名的虛擬記憶體區域。何為匿名呢?就是Allocations不知道是你哪些程式碼建立的記憶體,也就是說這裡的記憶體你無法直接控制。像memory mapped file,CALayer back store等都會出現在這裡。這裡的記憶體有些是你需要優化的,有些不是。
表格的每一列的資料解釋:
| 列名 | 含義 |
|---|---|
| Graph | 是否需要繪製出來(在mark 1可以看到) |
| Category | 類別,比如CF物件,OC物件,或者就是一塊原始的記憶體。 |
| Bytes | 大小 |
| Count | 個數 |
| Persistent Bytes | 沒有釋放的大小 |
| # Persistent | 沒有釋放的個數 |
| Transient Bytes | 已經釋放的大小 |
| # Transient | 已經釋放的個數 |
| Total Bytes | Persistent Bytes + Transient Bytes |
| # Total | # Transient + # Persistent |
| Events | 所有型別的事件數量 |
| Transient/Total Bytes | 柱狀圖顯示百分比 |
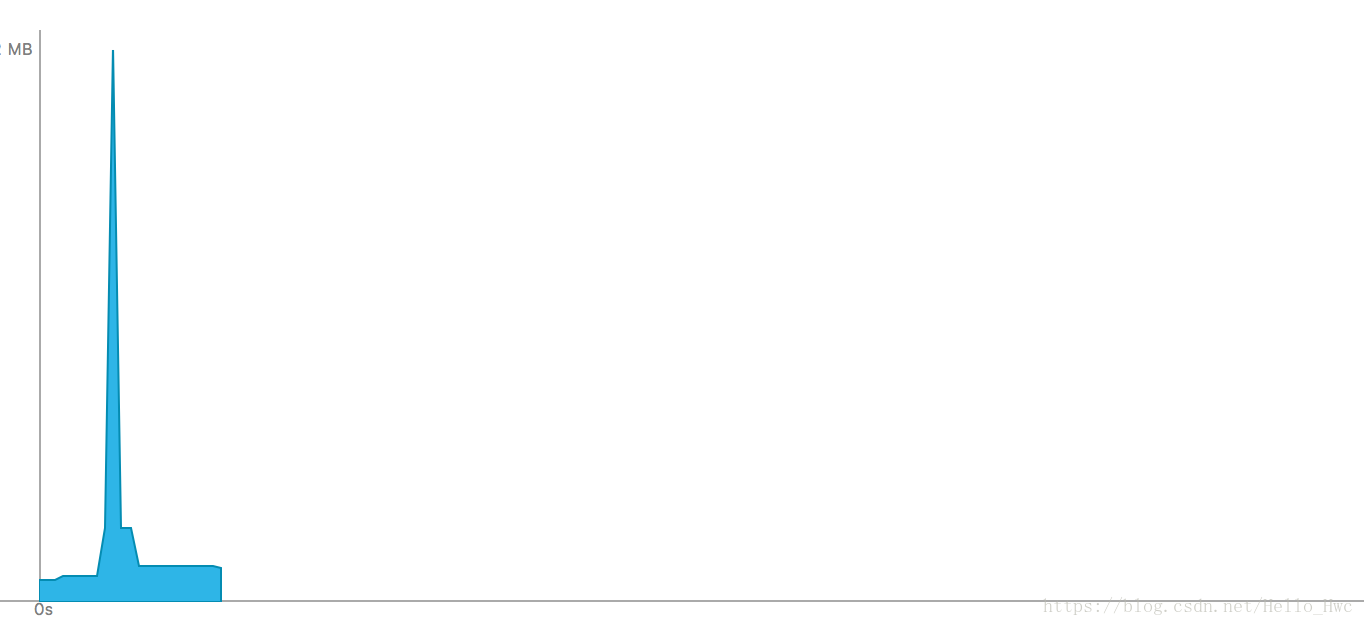
我們勾選前四個Graph,通過曲線的趨勢,不難看出問題就出在VM CoreImage上:
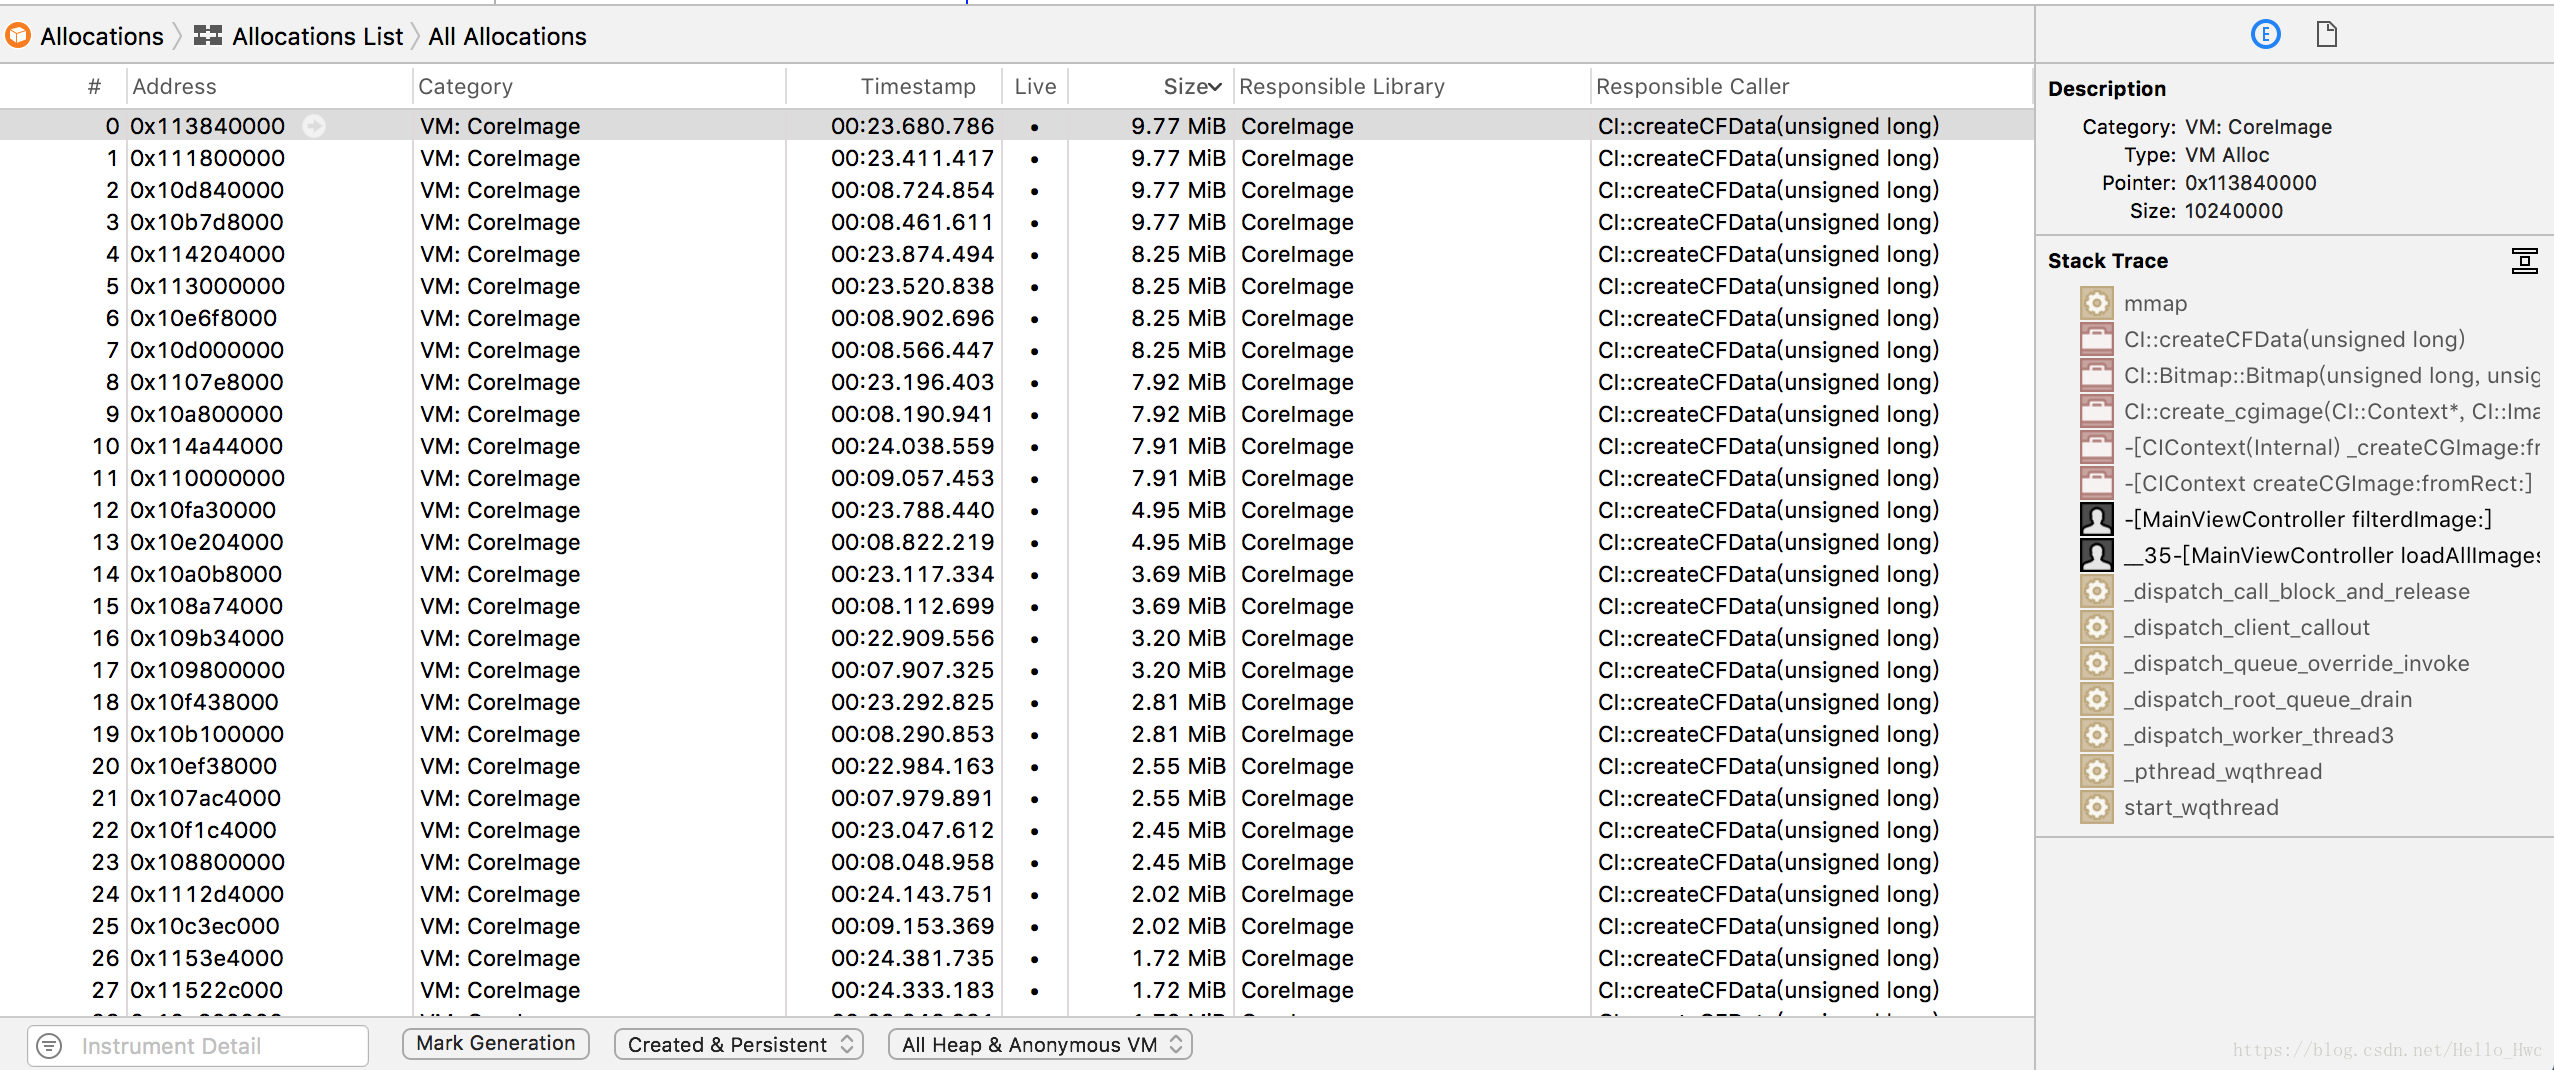
我們點一下mark 4,進入詳情頁,然後選擇一個記憶體物件地址,在右側我們可以看到這個物件是如何被建立的:
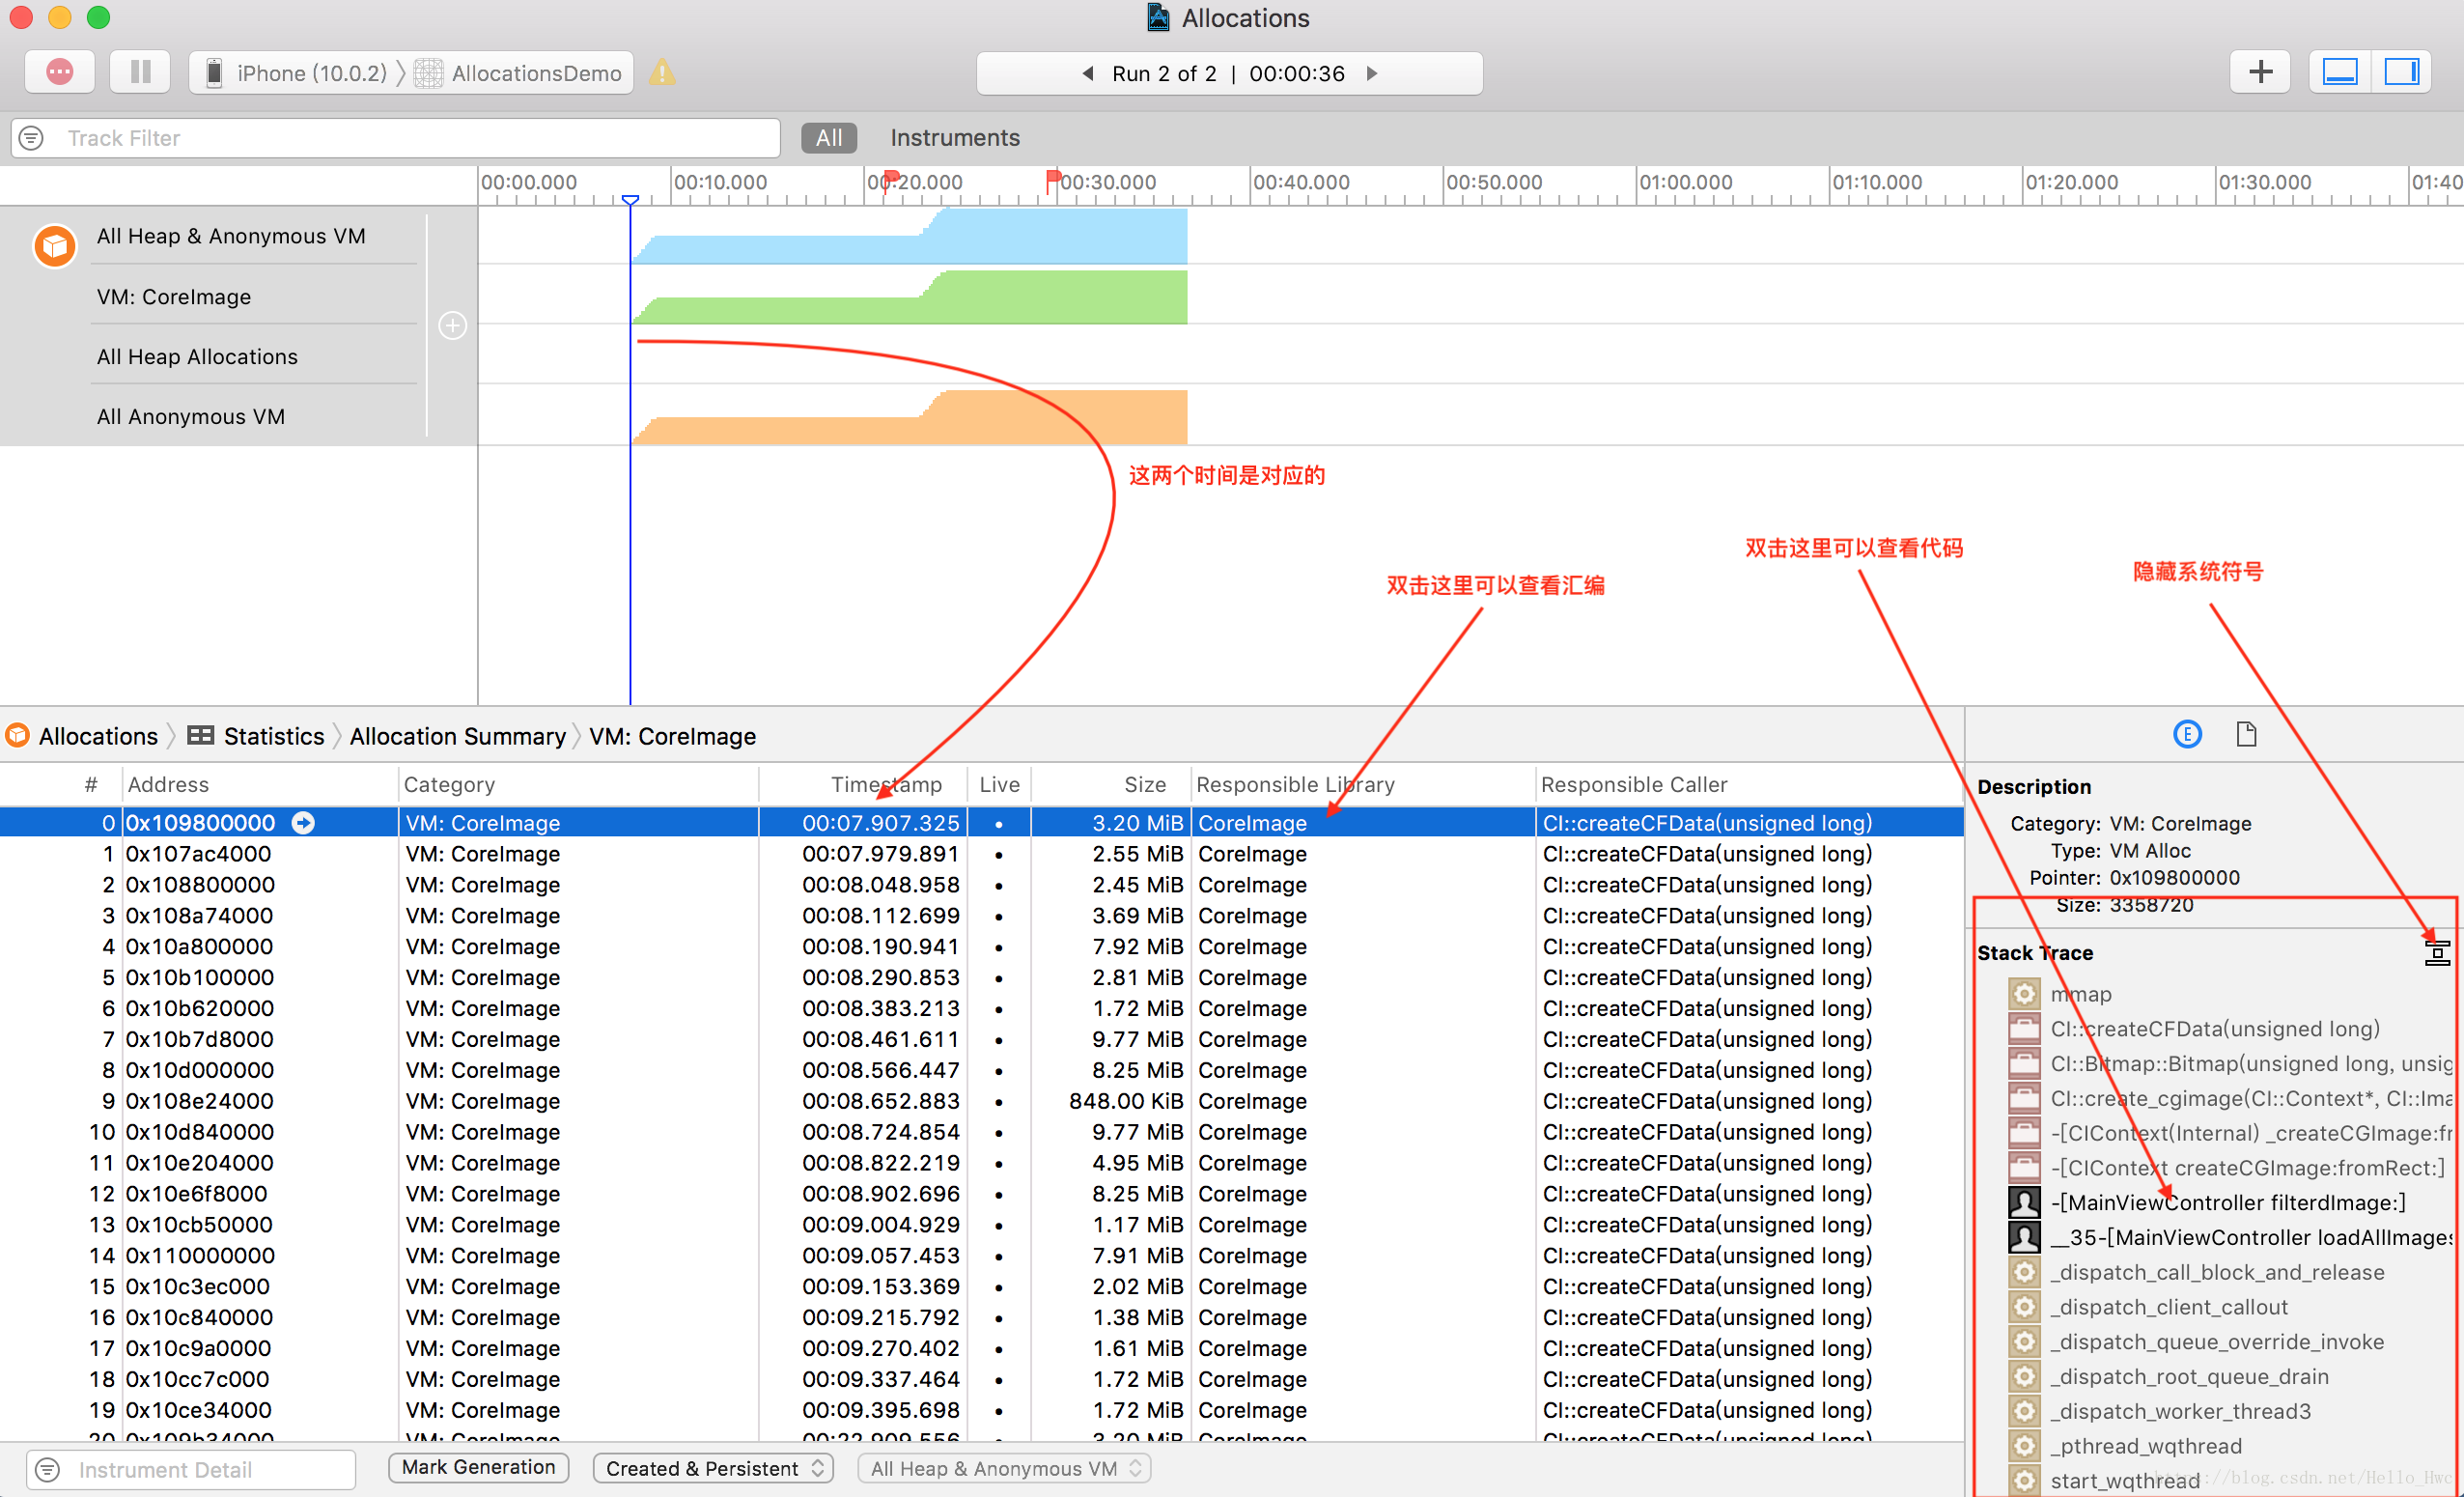
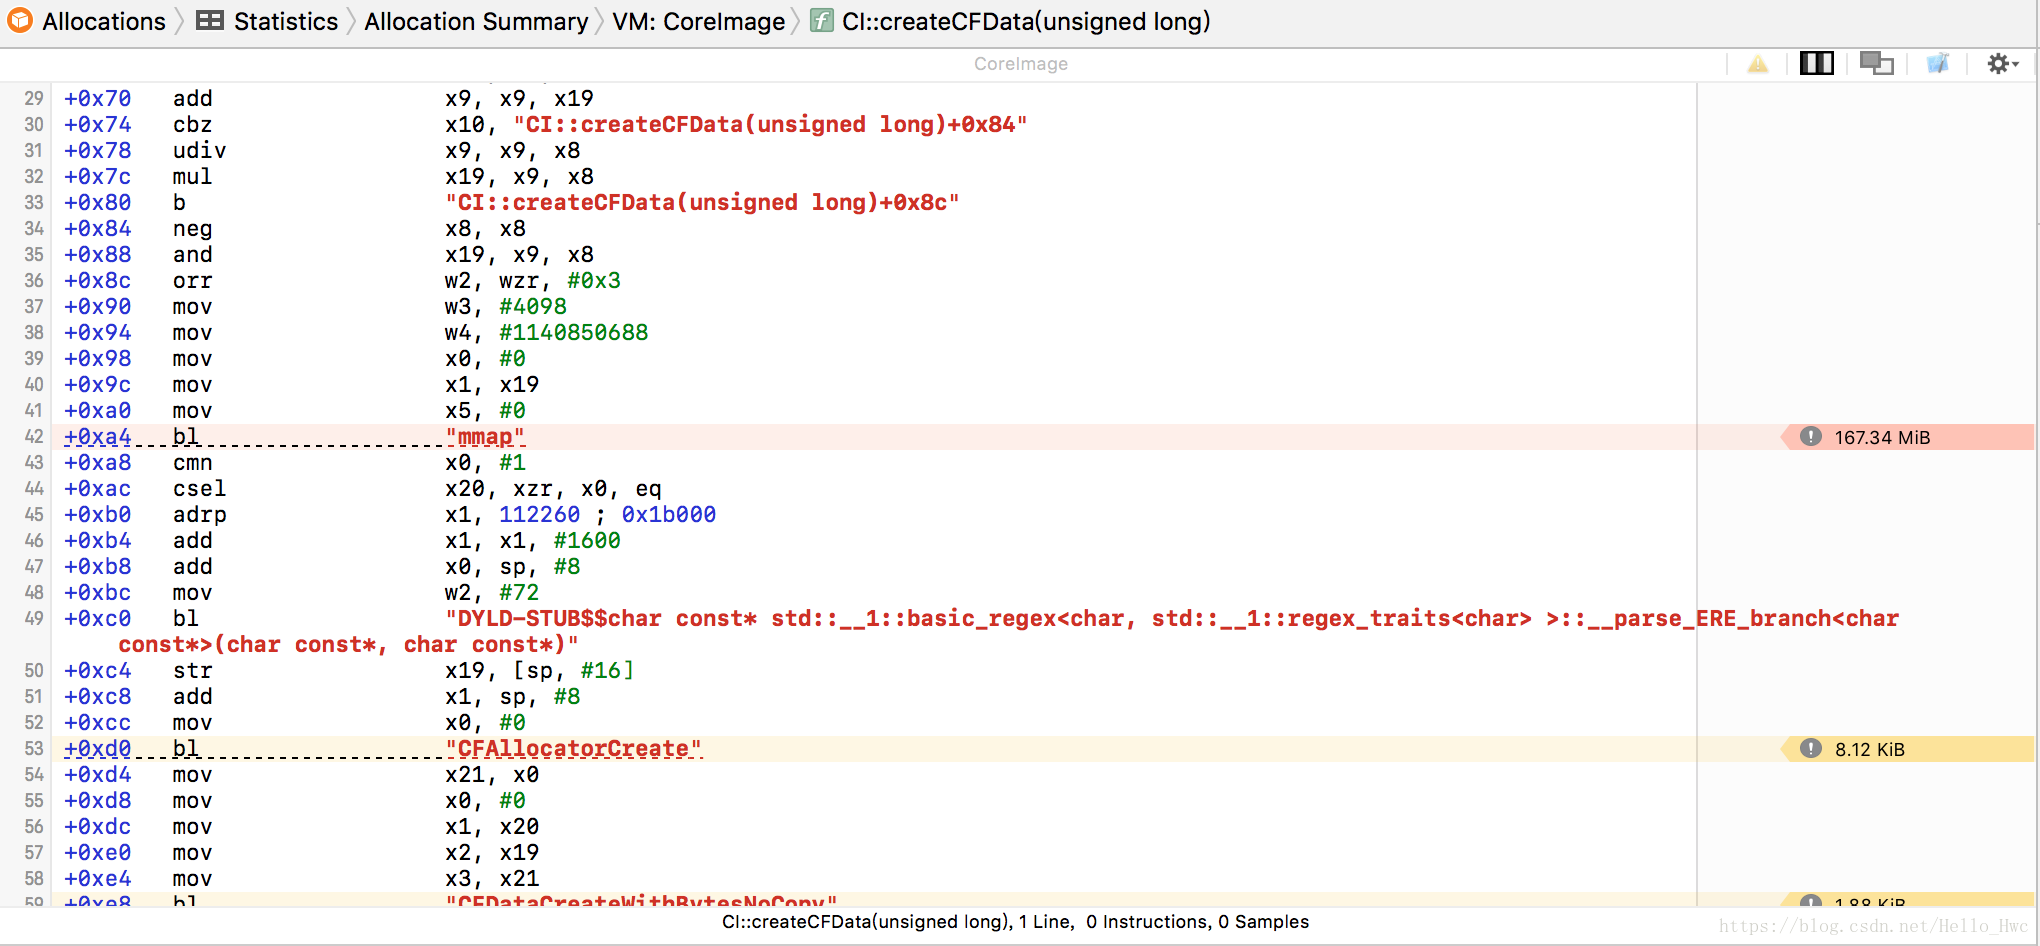
雙擊這一行,進入彙編介面,可以看出來,最後記憶體是由mmap分配的:
也可以雙擊右側Stack Trace,看看自己的程式碼:
Generation
利用Generation,我們可以對記憶體的增量進行分析:時間戳B相比時間戳A有那些記憶體增加了多少
點最下面的Mark Generation會建立一個Generation,並且在圖形區域增加一個小紅旗。
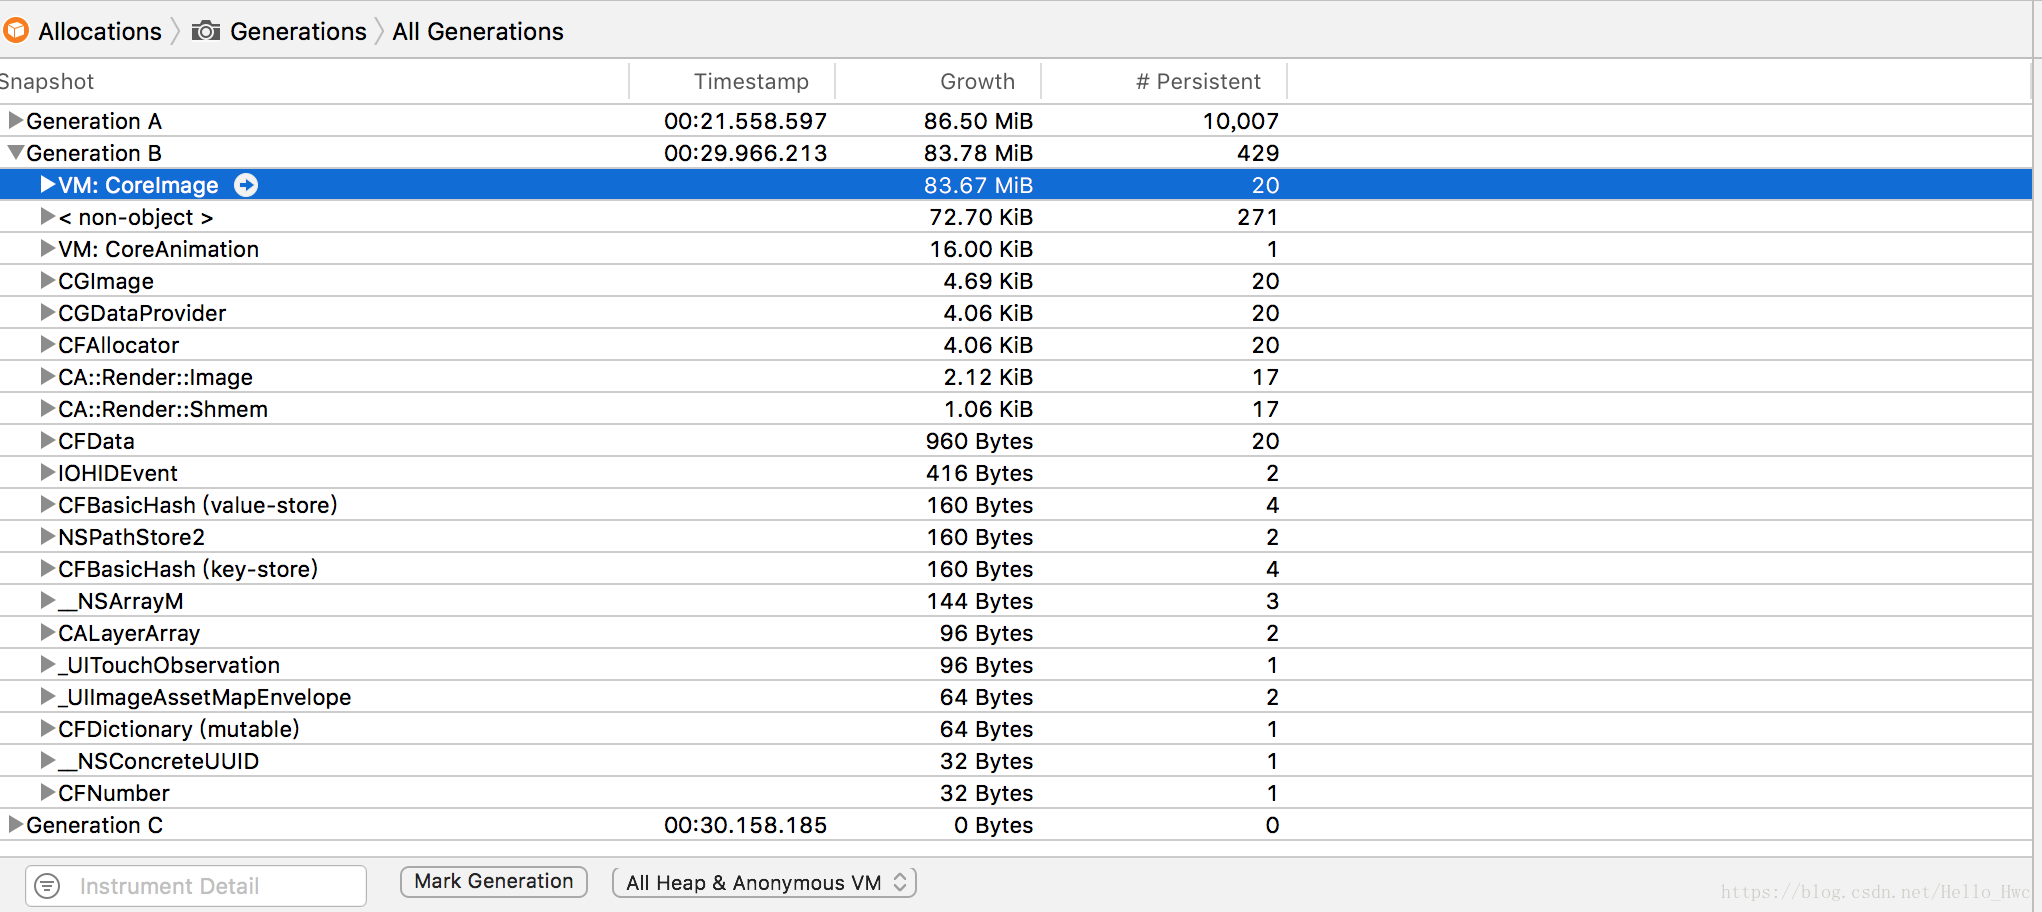
點Statictis,從下拉列表中,選擇Generations,我們就可以看到記憶體增量主要在VM: CoreImage中,這裡的每一行也可以點選檢視詳情,或者在右側檢視棧:
Call Tree
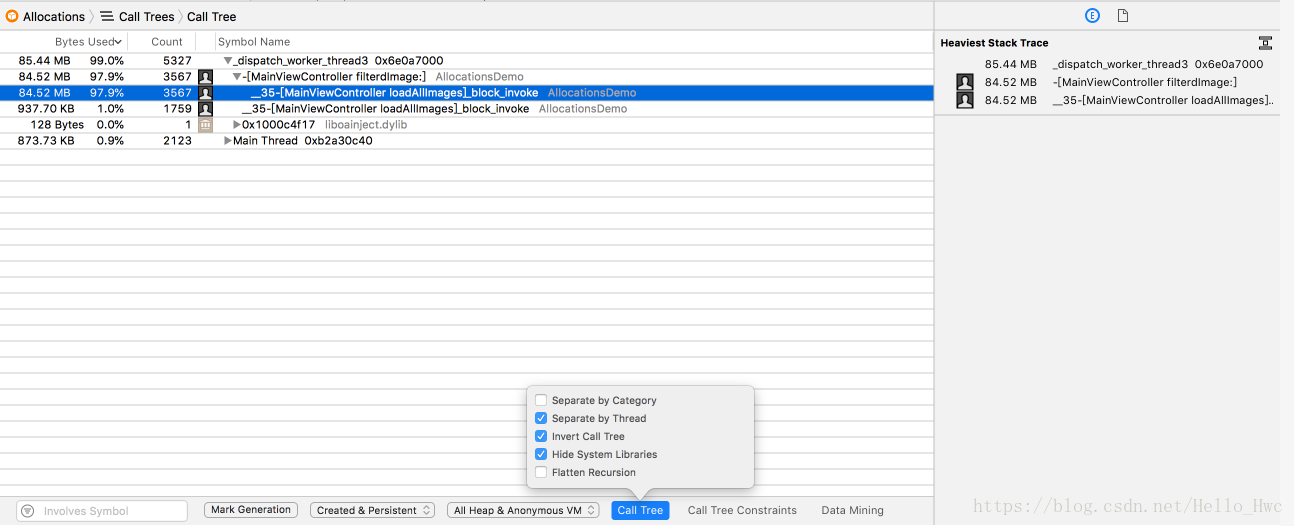
按照類似的方式,這次我們選擇Call Tree來直接分析程式碼是如何建立記憶體的,勾選Separator By Thread,按照執行緒來對記憶體進行分類:

Tips:按住Option,然後滑鼠左鍵點選圖中箭頭指向的三角箭頭,可以快捷展開呼叫棧。
也可以勾選:
- Invert Call Tree 倒置函式棧
- Hide System Libraries 隱藏系統庫
這樣,我們過濾掉了系統符號,同時也用更直觀的方式看到了呼叫棧:
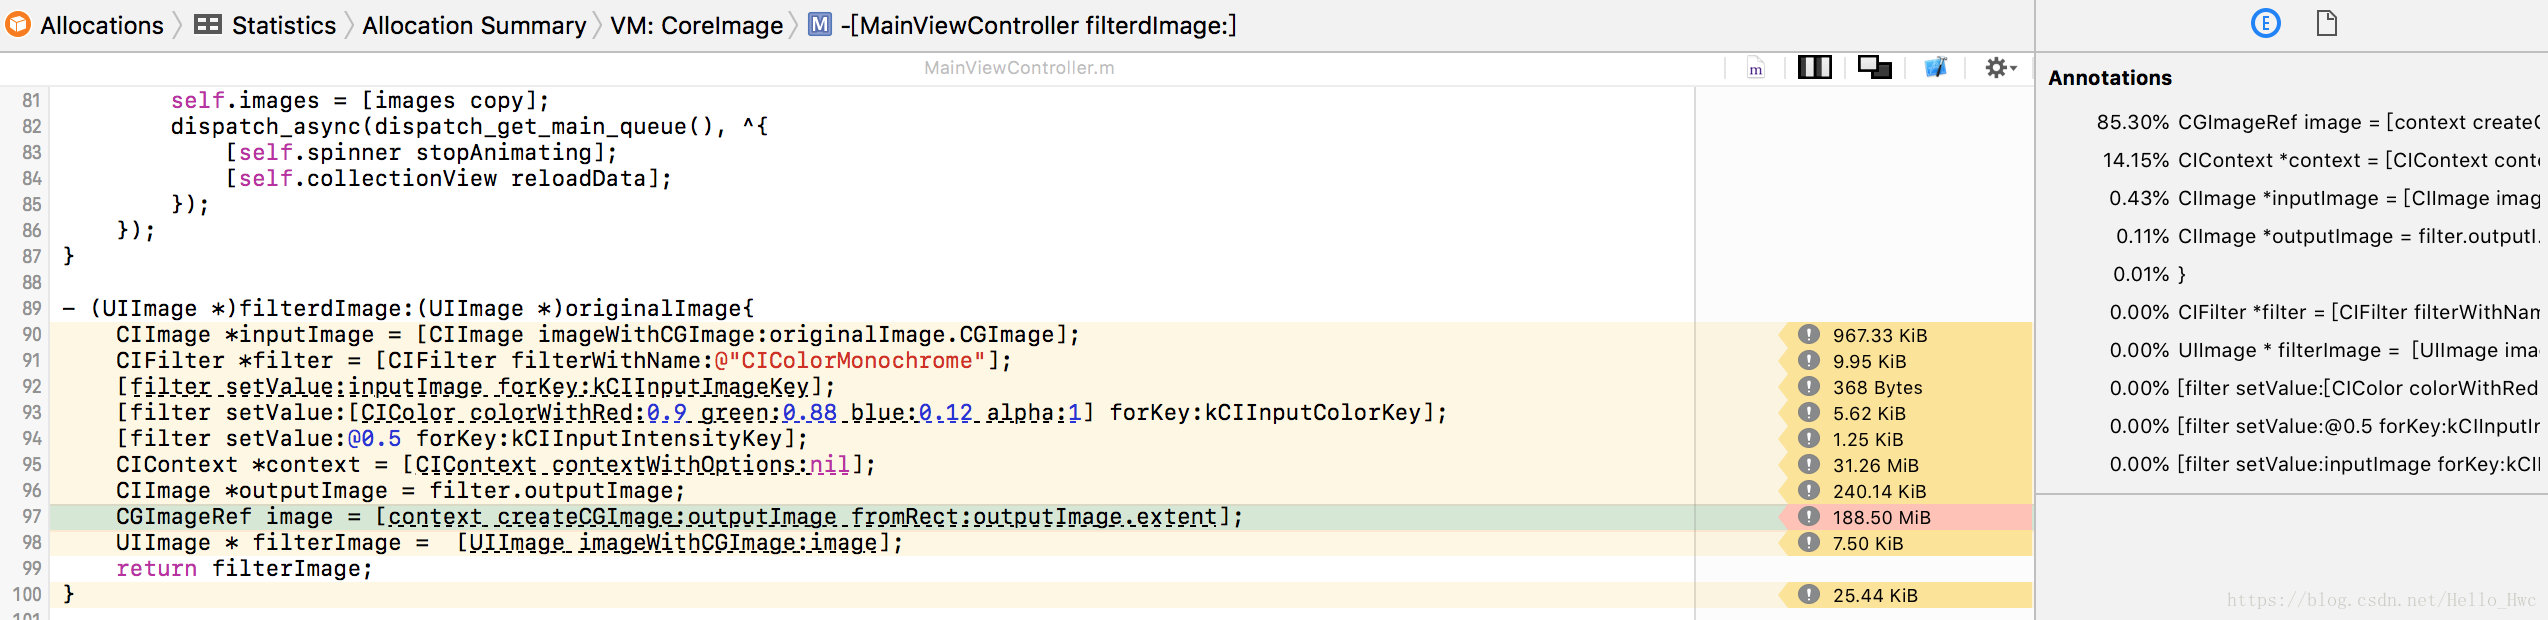
我們同樣可以選擇一行雙擊,然後可以進入XCode檢視原始碼或者彙編程式碼:
可以看到,引起記憶體爆增的就是這段程式碼
- (UIImage *)filterdImage:(UIImage *)originalImage{
    CIImage *inputImage = [CIImage imageWithCGImage:originalImage.CGImage];
    CIFilter *filter = [CIFilter filterWithName:@"CIColorMonochrome"];
    [filter setValue:inputImage forKey:kCIInputImageKey];
    [filter setValue:[CIColor colorWithRed:0.9 green:0.88 blue:0.12 alpha:1] forKey:kCIInputColorKey];
    [filter setValue:@0.5 forKey:kCIInputIntensityKey];
    CIContext *context = [CIContext contextWithOptions:nil];
    CIImage *outputImage = filter.outputImage;
    CGImageRef image = [context createCGImage:outputImage fromRect:outputImage.extent];
    UIImage * filterImage =  [UIImage imageWithCGImage:image];
    return filterImage;
}
Allocations list
Allocations List提供了一種更純粹的方式,讓你看到記憶體的分配的列表,我們一般會選擇記憶體從高到低,看看是不是有什麼意外分配的大記憶體塊:
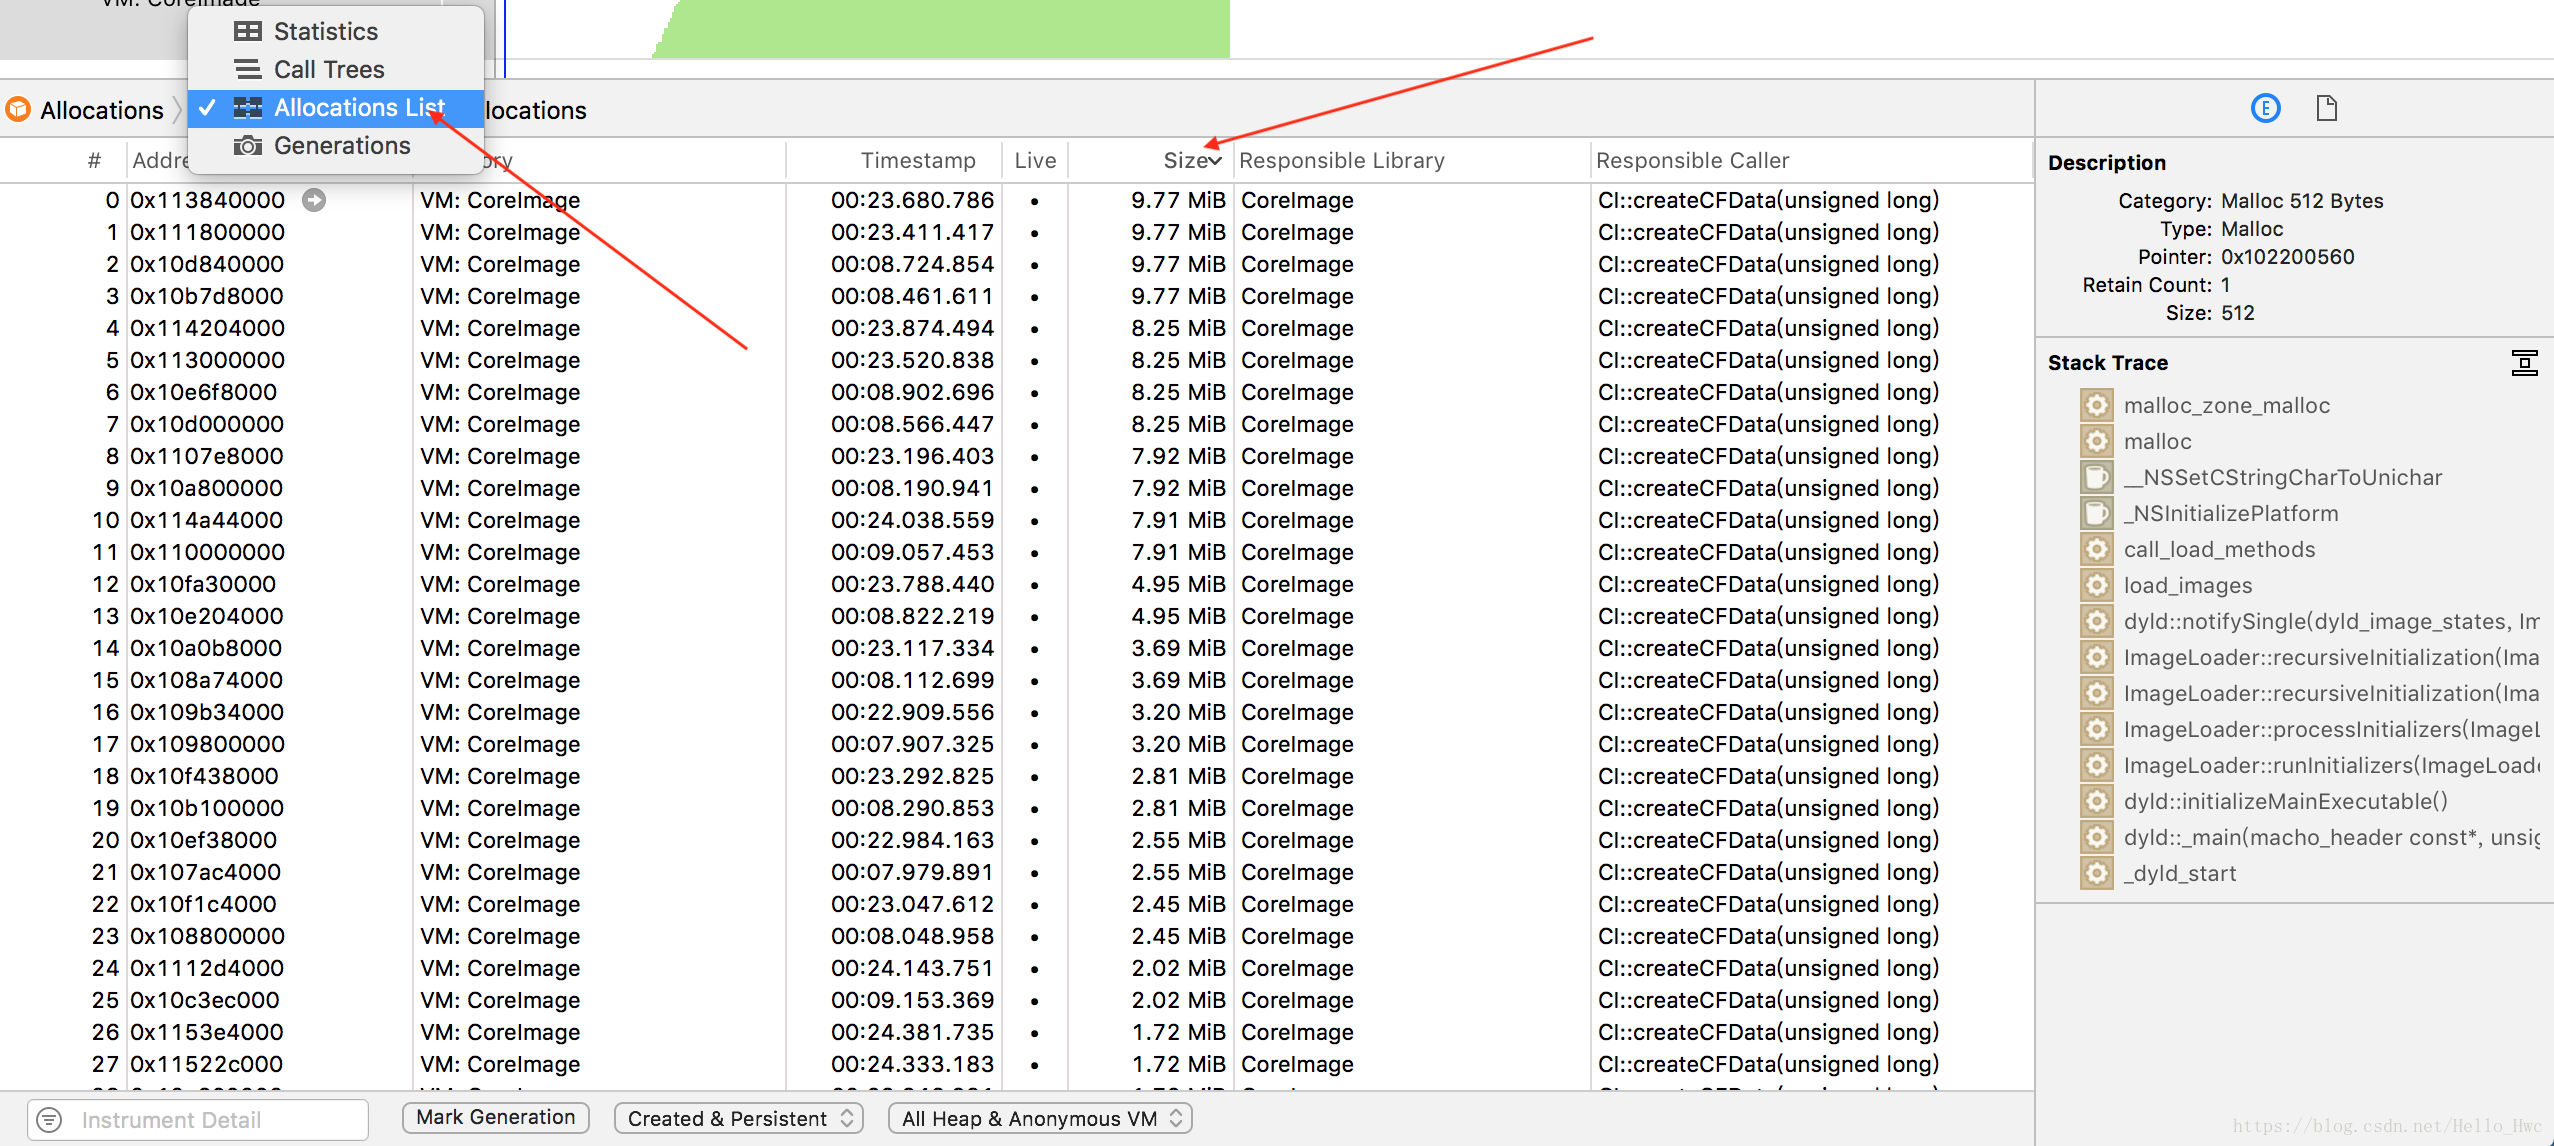
可以看到,排名前幾的記憶體塊都是VM:CoreImage,從名字也就不難看出來,這是圖片引起的記憶體。
我們選中某一行,在右側可以看到具體的呼叫棧:
解決記憶體問題
不管是上述那種分析方式,我們都很容易找到問題出現在這段程式碼裡:

那麼,為什麼這段程式碼分配記憶體後沒有釋放呢?如果有一些CoreFoundation或者CoreGraphics經驗,很容易就知道這裡應該手動釋放記憶體,這裡假設你不知道,那麼怎麼找到原因呢?
看看這個函式的文件文件就知道了:
- (nullable CGImageRef)createCGImage:(CIImage *)image
                            fromRect:(CGRect)fromRect
Creates a Quartz 2D image from a region of a Core Image image object.
Renders a region of an image into a temporary buffer using the context, then creates and returns a Quartz 2D image with the results.
You are responsible for releasing the returned image when you no longer need it.
所以,在建立函式後,我們進行release即可
CGImageRef image = [context createCGImage:outputImage fromRect:outputImage.extent];
UIImage * filterImage =  [UIImage imageWithCGImage:image];
CGImageRelease(image);
再觀察記憶體:
可以看到,仍然有個峰值,我們的瀑布流介面其實並不需要完整的大圖塞給ImageView,一個比較常見的優化方式是對圖片進行縮放,這裡有兩點要注意
- 大圖的縮放不要用
UIGraphicsBeginImageContextWithOptions或者CGBitmapContextCreate,因為當圖片很大的時候,這個函式很有可能建立幾百M甚至上G的記憶體,應該用更底層的ImageIO相關的API - 假如ImageView的尺寸是100*100,那麼為了不影響使用者體驗,你應該縮放到
100*UIScreem.main.scale
縮放舉例:
- (UIImage *)scaledImageFrom:(NSURL *)imageUrl width:(CGFloat)width{
    CGImageSourceRef source =  CGImageSourceCreateWithURL((__bridge CFURLRef)imageUrl, nil);
    CFDictionaryRef options = (__bridge CFDictionaryRef) @{
                                                           (id) kCGImageSourceCreateThumbnailWithTransform : @YES,
                                                           (id) kCGImageSourceCreateThumbnailFromImageAlways : @YES,
                                                           (id) kCGImageSourceThumbnailMaxPixelSize : @(width)
                                                           };

    CGImageRef scaledImageRef = CGImageSourceCreateThumbnailAtIndex(source, 0, options);
    UIImage *scaled = [UIImage imageWithCGImage:scaledImageRef];
    CGImageRelease(scaledImageRef);
    return scaled;
}