sonarQube,sonarScanner整合jenkins和gitlab實現提交程式碼後自動檢測程式碼
阿新 • • 發佈:2018-12-19
1.SonarQube安裝
1.1.需要已安裝mysql,sonarQube的伺服器啟動需要非root使用者,注意檔案許可權,指定系統環境為jdk1.8(不會百度)
(1)sonarQube 下載地址https://www.sonarqube.org/downloads/ 我下載的是sonarqube-6.7.6
(2)解壓檔案後到 bin目錄下 執行
./bin/linux-x86-64/sonar.sh start然後檢視日誌
tail -200f ./logs/sonar.log訪問http://你的IP:9000/sonar 看到歡迎介面即成功
1.2資料庫配置
sonarQube配置mysql,修改/conf/sonar.properties
sonar.jdbc.username=test
sonar.jdbc.password=1234
sonar.jdbc.url=jdbc:mysql://資料庫IP:3306/sonar?useUnicode=true&characterEncoding=utf8&rewriteBatchedStatements=true&useConfigs=maxPerformance
sonar.web.host=你的本地IP
sonar.web.context=/sonar
sonar.web.port=9000
重啟服務 觀察日誌
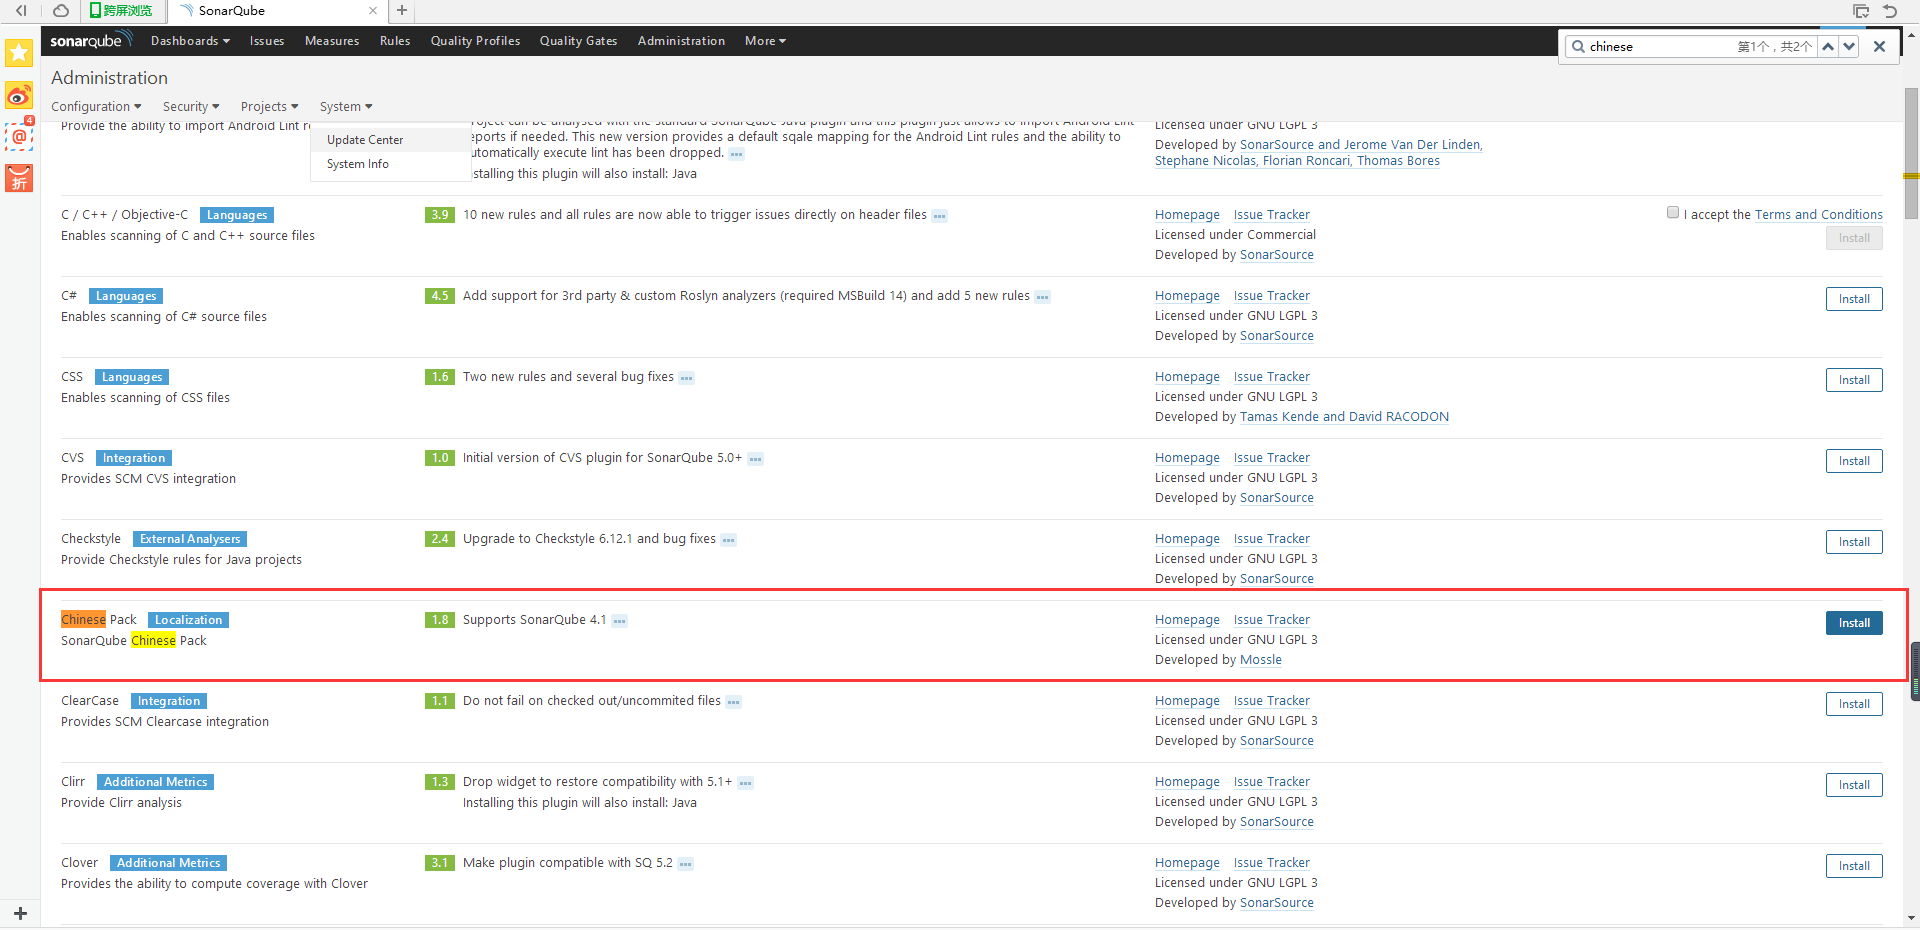
1.3sonarQube漢化
(1)按照如下步驟安裝中文外掛
(2)重啟,重新訪問即可發現漢化成功。
1.4簡單實用
預設使用者名稱是admin 密碼admin
2.Sonar-Scanner安裝
2.1解壓後配置conf目錄下的sonar-scanner.properties檔案
#----- Default SonarQube server
sonar.host.url=http://localhost:9000  #配置sonar服務地址

#----- Default source code encoding
sonar.sourceEncoding=UTF-8
配置環境變數
export SONARRUNNER_HOME=/data/software/sonar-scanner
export PATH=$SONARRUNNER_HOME/bin:$PATH
source /etc/profile 讓環境變數生效
3.jenkins配置整合sonar-scanner
jenkins:系統管理->系統設定 找到sonarQube services 配置如下

service authentication token 在sonarQube上獲取
配置->許可權->使用者->令牌 更新令牌

點選生成獲取令牌


