
Android學習筆記 四二 SQLite ListView ContextMenu
繼續上一個例子,結合ListView中對SQLite進行操作。
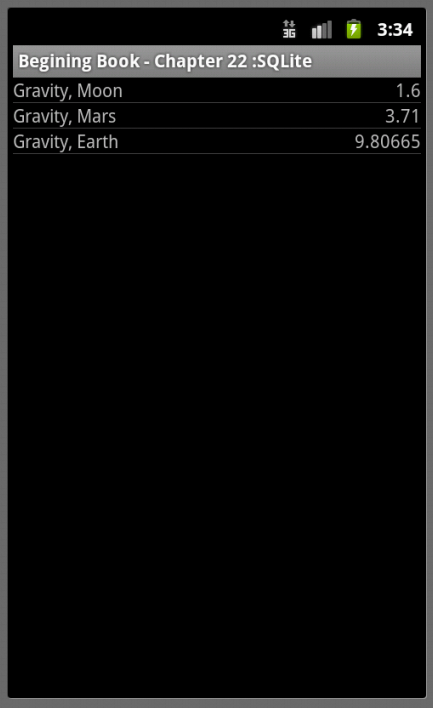
通過CursorAdapter在ListView中的資料呈現
在上一個例子中,我們可以對SQLite中的資料庫進行增刪改查,將資料讀到遊標Cursor中,然後一一讀出。在Android中可以通過CursorAdapter直接將資料對映到ListView中,如下處理:
 public class Chapter22Test1 extends ListActivity{ private SQLiteDatabase db = null; private Cursor cursor = null; private SimpleCursorAdapter
更新資料(以增加為例)
我們要實現:通過Menu彈出選單,有一個為增加,按之,彈出一個Dialog,可以在當中填入資料,按Dialog的確定按鍵,在SQLite資料庫的表格mytable中加入相關的資料,並且同步ListView的顯示。
第二步:在add()中,要完成彈出指定格式的Dialog,採用AlertDialog的方式,Dialog的格式在xml中給出。處理方式之前都學過,但是沒有合併使用的例子,包括Dialog的格式,同ListView中自定義元素的格式一樣,採用LayoutInflater。具體如下:
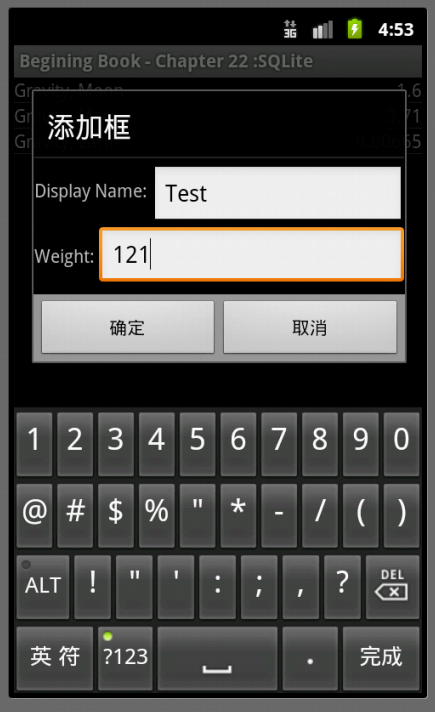 private void add(){ //步驟2.1:通過LayoutInflater從Android的XML檔案中生成View LayoutInflater inflater = LayoutInflater.from(this); final View addView = inflater.inflate(R.layout.add_dialgo,null); //步驟2.2:通過AlertDialog彈出對話方塊,並且在第一個button,即PositiveButton監聽事件,觸發操作 new AlertDialog.Builder(this) .setTitle("新增框") .setView(addView) .setPositiveButton("確定", new DialogInterface.OnClickListener() { //我們希望得到addView中的資料,但是這個inner class,只能獲取final的值,所以之前將addView設定為final,也就是所有addView的地址是固定的,而不是動態生成。 public void onClick(DialogInterface dialog, int which) { EditText nameView = (EditText)addView.findViewById(R.id.c22_name); EditText weigthView = (EditText)addView.findViewById(R.id.c22_weight); // addData是下面步驟三,實現SQLite的資料更新和ListView的顯示同步add(name,weight); addData(nameView.getText().toString(), new Float(weigthView.getText().toString()).floatValue()); } }) .setNegativeButton("取消",null) .show();}
第三步:更新資料庫和同步ListView,具體如下:
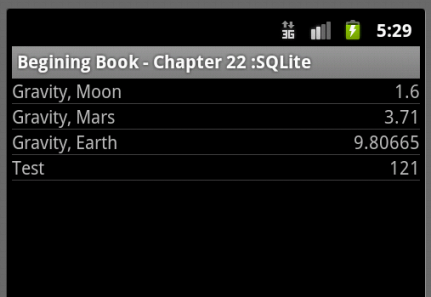 private void addData(String name ,float weight){ /* 略去資料的判斷,例如如果name一樣,採用update的方式等等*/ //步驟3.1 在資料庫表格中新增資料 ContentValues values = new ContentValues(2); values.put("Name",name); values.put("Weight",weight); db.insert("mytable","Name",values); //步驟3.2 同步ListView,更新遊標的資訊 cursor.requery(); }
非同步後臺同步資料
在上面的例子,貌似可以,而且的確是可以,但是在Android的API文件中,Cursor的方法requery()這樣寫道:This method is deprecated.Don't use this. Just request a new cursor, so you can do this asynchronously and update your list view once the new cursor comes back. 這提示我們風險的存在,如果資料量大,會導致重寫讀取的事件長(也就是requery()的執行時間)。雖然手機是人手操作,互動頻率較低,在資料庫資料少的時候,例如上面的例子,我們仍然可以安全地使用requery。但是對於具有大量資料時,我們就需要修改上面的程式。
修訂的方式步驟如下:1,通過後臺執行緒來讀取資料庫;2、通過更換cursor來更新ListView,具體如下:
//步驟1:通過後臺執行緒AsyncTask來讀取資料庫,放入更換Cursorprivate class RefreshList extends AsyncTask<Void, Void ,Cursor>{ //步驟1.1:在後臺執行緒中從資料庫讀取,返回新的遊標newCursor protected Cursor doInBackground(Void... params) { Cursor newCursor = db.rawQuery("SELECT _id,Name,Weight from mytable ORDER BY Weight", null); return newCursor; } //步驟1.2:執行緒最後執行步驟,更換adapter的遊標,並獎原遊標關閉,釋放資源 protected void onPostExecute(Cursor newCursor) { adapter.changeCursor(newCursor);//網上看到很多問如何更新ListView的資訊,採用CusorApater其實很簡單,換cursor就可以 cursor.close(); cursor = newCursor; } }//步驟2:取締requrey的方式,採用後臺執行緒更新形式private void addData(String name ,float weight){ ... ... //cursor.requery(); new RefreshList().execute();}
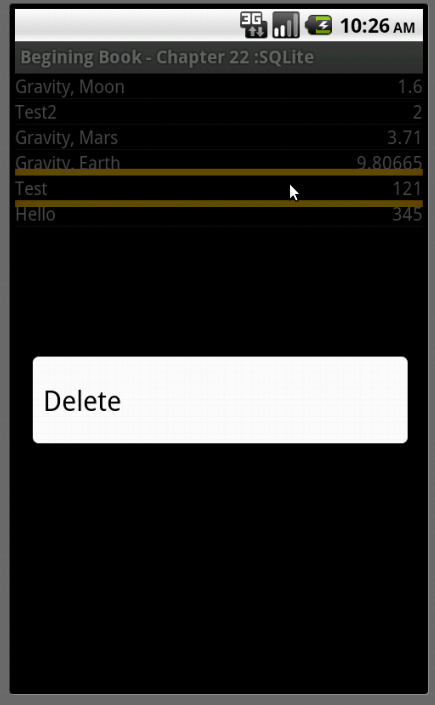
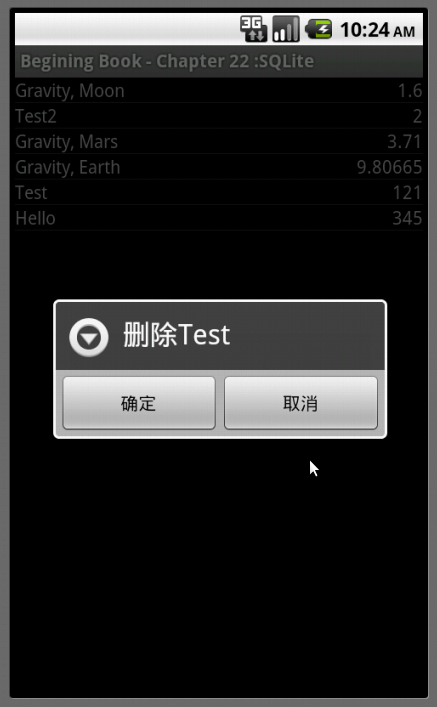
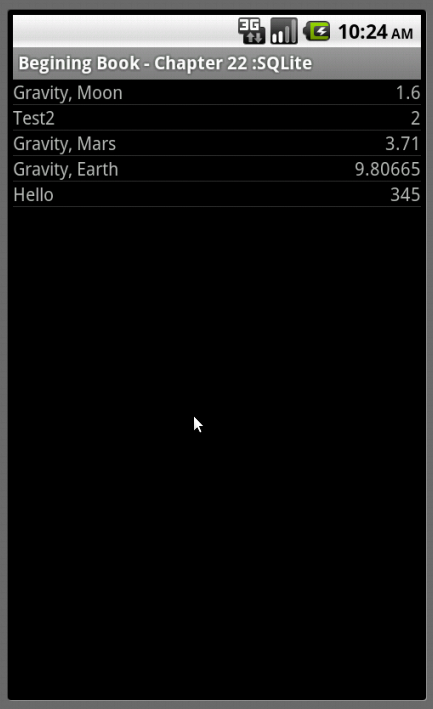
通過ContextMenu來刪除ListView的資料
ContextMenu使用者手指長按某個View觸發的選單,見Android 學習筆記(二七):Menu。這裡通過這個例子詳細展開。實現場景:使用者長按某個List元素,則彈出ContextMenu,選擇選單“Delete”,按下後,彈出AlertDialog,請使用者再去確定是否刪除,確定後將資料從SQLite中刪除,並更新ListView的顯示。具體如下:
   |
通過模擬器的Console進行資料庫操作
通過android-sdk-linux_x86/platform-tools目錄下面有adb命令,使用adb shell,可提供模擬器的console視窗。資料庫檔案存放的位置為/data/data/your.app.package/databases/your-db-name,進入相關的目錄,可以使用#sqlite3 your-db-name,進入相關的資料庫,可以在裡面執行SQL語句,例如在整個例子中,通過#.schema來查看錶格的格式,通過#select * from mytable;可以顯示資料庫的內容。