TensorFlow實踐(9)——普通BP神經網路
阿新 • • 發佈:2018-12-20
(一)前 言
BP(back propagation)神經網路是1986年由Rumelhart和McClelland為首的科學家提出的概念,是一種按照誤差逆向傳播演算法訓練的多層前饋神經網路,是目前應用最廣泛的神經網路。
20世紀80年代中期,David Runelhart。Geoffrey Hinton和Ronald W-llians、DavidParker等人分別獨立發現了誤差反向傳播演算法(Error Back Propagation Training),簡稱BP,系統解決了多層神經網路隱含層連線權學習問題,並在數學上給出了完整推導。人們把採用這種演算法進行誤差校正的多層前饋網路稱為BP網。
BP神經網路具有任意複雜的模式分類能力和優良的多維函式對映能力,解決了簡單感知器不能解決的異或(Exclusive、OR、XOR)和一些其他問題。從結構上講,BP網路具有輸入層、隱藏層和輸出層;從本質上講,BP演算法就是以網路誤差平方為目標函式、採用梯度下降法來計算目標函式的最小值。
——引用自百度百科
對於BP網路中的反向傳播演算法等數學基礎知識,我們在此不做詳細討論,讀者可以自行查閱相關資料
(二)問題描述
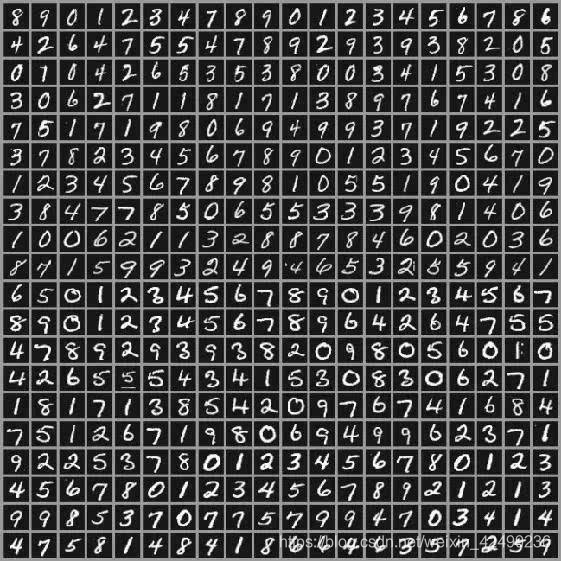
使用BP神經網路識別MNIST手寫體數字資料集:

(三)BP神經網路的TensorFlow實現
(1)模型引數設定
# 設定學習率
learning_rate = 0.01
# 設定訓練次數
train_steps = 1000
(2)輸入資料
import tensorflow.examples.tutorials.mnist.input_data as input_data
mnist = input_data.read_data_sets("", one_hot = True)
with (3)構建模型
我們構建一個5層的網路,其中每一層的
with tf.name_scope('Input'):
# Input layer with 256 nodes
input1 = tf.placeholder(tf.float32, [None, 784])
weight1 = tf.Variable(tf.ones([784, 256]))
bias1 = tf.Variable(tf. (4)定義損失函式
# 採用交叉熵作為損失函式
with tf.name_scope('Loss'):
loss = -tf.reduce_mean(Target * tf.log(output6))
(5)選擇優化器及定義訓練操作
with tf.name_scope('Train'):
train_op = tf.train.AdamOptimizer(learning_rate).minimize(loss)
(6)建立會話進行訓練
with tf.name_scope('Init'):
init = tf.global_variables_initializer()
with tf.Session() as sess:
sess.run(init)
l = []
start_time = time.time()
# cycle for 1000 times
for i in range(1000):
sess.run(train_op, feed_dict={input1: x_data, Target: y_data})
lo = sess.run(loss, feed_dict={input1: x_data, Target: y_data})
print(lo)
l.append(lo)
end_time = time.time()
print('time: ', (end_time - start_time))
start_time = end_time
print("Optimization Finished!")
plt.plot(l)
plt.xlabel('The sampling point')
plt.ylabel('loss')
plt.title("The variation of the loss")
plt.grid(True)
plt.show()
# 寫入日誌檔案,可自行指定路徑
writer = tf.summary.FileWriter("logs/", sess.graph)
(7)完整程式碼
# 設定學習率
learning_rate = 0.01
# 設定訓練次數
train_steps = 1000
impor tensorflow as tf
import tensorflow.examples.tutorials.mnist.input_data as input_data
mnist = input_data.read_data_sets("", one_hot = True)
with  tf.name_scope('data'):
    # 可修改批處理數
    x_data ,y_data = mnist.train.next_batch(50)
with tf.name_scope('Input'):
# 256個節點
input1 = tf.placeholder(tf.float32, [None, 784])
weight1 = tf.Variable(tf.ones([784, 256]))
bias1 = tf.Variable(tf.ones([256]))
output1 = tf.add(tf.matmul(input1, weight1), bias1)
with tf.name_scope('Layer1'):
# 10個節點
weight2 = tf.Variable(tf.ones([256, 10]))
bias2 = tf.Variable(tf.ones([10]))
output2 = tf.add(tf.matmul(output1, weight2), bias2)
with tf.name_scope('Layer2'):
# 10個節點
weight3 = tf.Variable(tf.ones([10, 10]))
bias3 = tf.Variable(tf.ones([10]))
output3 = tf.add(tf.matmul(output2, weight3), bias3)
with tf.name_scope('Layer3'):
# 10個節點
weight4 = tf.Variable(tf.ones([10, 10]))
bias4 = tf.Variable(tf.ones([10]))
output4 = tf.add(tf.matmul(output3, weight4), bias4)
with tf.name_scope('layer4'):
# 10個節點
weight5 = tf.Variable(tf.ones([10, 10]))
bias5 = tf.Variable(tf.ones([10]))
output5 = tf.add(tf.matmul(output4, weight5), bias5)
# 輸出
with tf.name_scope('Prediction'):
weight6 = tf.sigmoid(tf.Variable(tf.ones([10, 10])))
bias6 = tf.Variable(tf.ones([10]))
output6 = tf.add(tf.nn.softmax(tf.matmul(output5, weight6)), bias6)
Target = tf.placeholder(tf.float32, [None, 10])
# 採用交叉熵作為損失函式
with tf.name_scope('Loss'):
    loss = -tf.reduce_mean(Target * tf.log(output6))
# 定義訓練操作
with tf.name_scope('Train'):
    train_op = tf.train.AdamOptimizer(learning_rate).minimize(loss)
with tf.name_scope('Init'):
init = tf.global_variables_initializer()
with tf.Session() as sess:
sess.run(init)
l = []
start_time = time.time()
# 迴圈1000次
for i in range(1000):
sess.run(train_op, feed_dict={input1: x_data, Target: y_data})
lo = sess.run(loss, feed_dict={input1: x_data, Target: y_data})
print(lo)
l.append(lo)
end_time = time.time()
print('time: ', (end_time - start_time))
start_time = end_time
print("Optimization Finished!")
plt.plot(l)
plt.xlabel('The sampling point')
plt.ylabel('loss')
plt.title("The variation of the loss")
plt.grid(True)
plt.show()
# 寫入日誌檔案,可自行指定路徑
writer = tf.summary.FileWriter("logs/", sess.graph)
(四)tensorboard視覺化
使用tensorboard讀取訓練日誌,得到如下計算圖:

(五)總 結
本文介紹瞭如何使用TensorFlow建立普通的BP神經網路模型,讀者可通過修改模型內地隱藏層層數、隱藏層節點數、每一層的啟用函式、訓練迭代次數、學習率等因素調整模型,有任何的問題請在評論區留言,我會盡快回復,謝謝支援。下一節,我們開始介紹如何使用TensorFlow建立卷積神經網路模型以更好地處理和識別影象資料集。
