
SSM中使用Kindeditor外掛實現圖片的批量上傳與回顯
圖片上傳的方式:
1.上傳到資料庫中的Blob型別,從資料庫中取出來並顯示。詳細見下面連結
http://blog.sina.com.cn/s/blog_5b0745e80102we31.html
2.上傳到伺服器的固定目錄下,在資料庫中僅儲存圖片的地址。詳細見下文
效果展現:
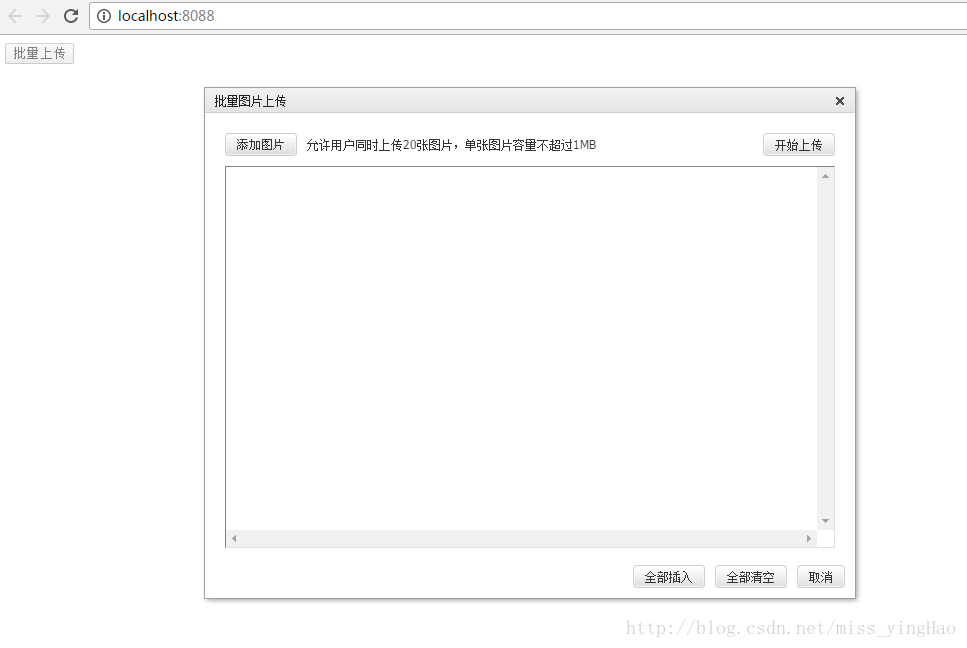
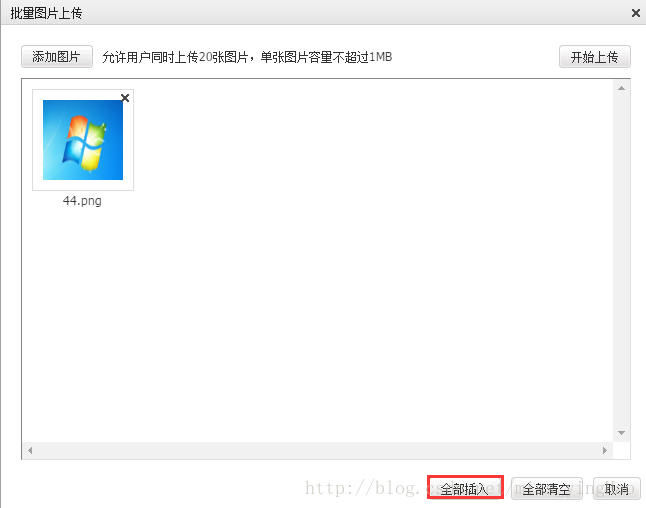
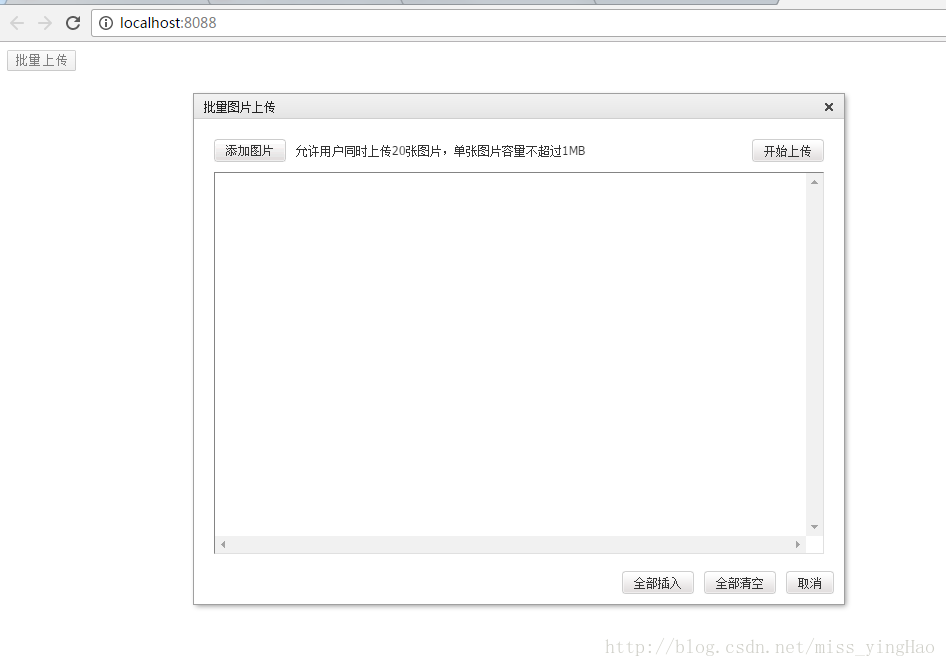
一.前端實現批量上傳彈出框
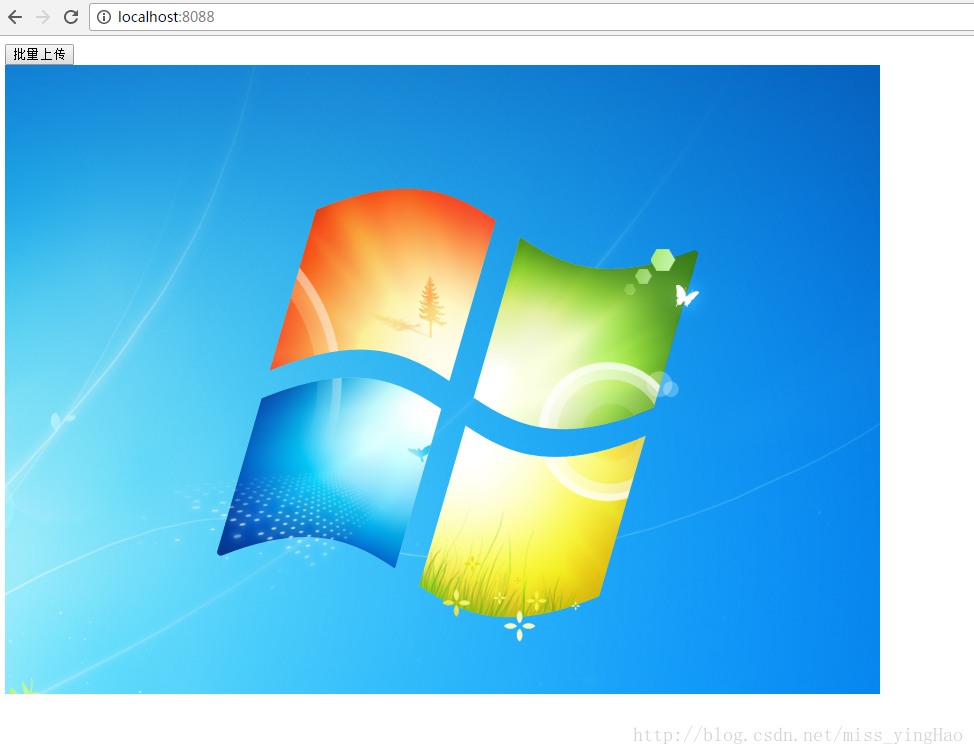
二.後端實現圖片的保存於回顯
具體實現步驟:
一.前端圖片上傳框的展現
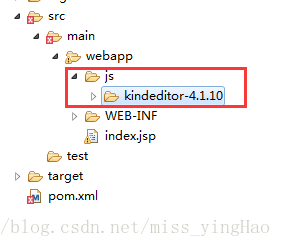
1.1下載外掛Kindeditor,並新增到專案目錄中
2.2編寫jsp檔案,該程式碼的編寫可以參考官方文件的原始碼
view-source:http://kindeditor.net/ke4/examples/multi-image-dialog.html
<%@ page language="java" pageEncoding="UTF-8"%>
<!DOCTYPE HTML>
<html>
<meta charset="utf-8" />
<title>批量上傳圖片</title>
<link href="js/kindeditor-4.1.10/themes/default/default.css" type="text/css" rel="stylesheet">
<script type="text/javascript" 注意:這裡涉及到靜態資源對映的問題。
具體的解決辦法可以參考該文件:http://blog.csdn.net/u012730299/article/details/51872704
我使用的是文件中介紹的第二種方法,在springmvc配置檔案中新增如下語句:
<!--對靜態資原始檔的訪問-->
    <mvc:resources mapping="/js/**" location="/js/" />
啟動專案訪問路徑正確的情況下就可以看到如下效果:
二.後端實現圖片的保存於回顯
2.1 在web專案的pom檔案中匯入依賴
<dependency>
                <groupId>org.apache.commons</groupId>
                <artifactId>commons-io</artifactId>
                <version>${commons-io.version}</version>
            </dependency>
            <dependency>
                <groupId>commons-fileupload</groupId>
                <artifactId>commons-fileupload</artifactId>
                <version>1.3.3</version>
            </dependency>
2.2 在springmvc配置檔案中新增檔案上傳解析器
<!-- 上傳檔案解析器 -->
    <bean id="multipartResolver" class="org.springframework.web.multipart.commons.CommonsMultipartResolver">
    <!-- 設定最大的檔案大小 5M*1024*1024-->
        <property name="maxUploadSize" value="5242880"/>
    </bean>
2.3 編寫上傳邏輯
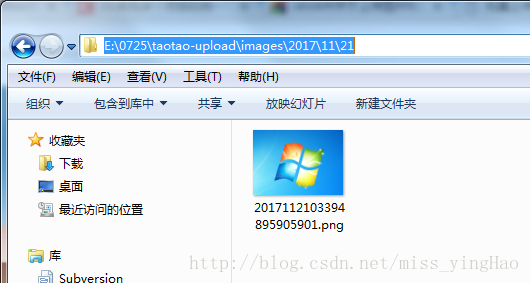
2.3.1確定圖片的儲存路徑
E:\0725\taotao-upload
2.3.2在nginx配置圖片的路徑
server {
        listen       80;
        server_name  image.taotao.com;

        #charset koi8-r;

        #access_log  logs/host.access.log  main;

    proxy_set_header X-Forwarded-Host $host;
        proxy_set_header X-Forwarded-Server $host;
        proxy_set_header X-Forwarded-For $proxy_add_x_forwarded_for;

        location / {
        root  E:\\0725\\taotao-upload;
        }

    }
2.3.3把圖片的請求域名配置到host中

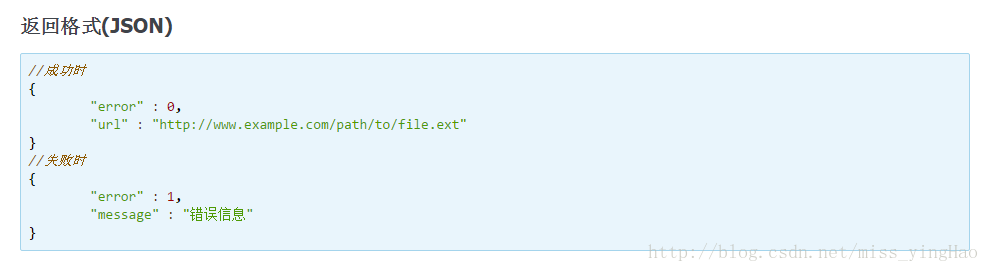
2.3.4確定該元件需要的返回型別,響應型別
檢視官方文件瞭解返回格式為json,響應型別為文字(text)
(1)可以建立一個物件包含返回的屬性,然後序列化為json(import com.fasterxml.jackson.databind.ObjectMapper;),ObjectMapper依賴於jackson,所以要在pom檔案中新增對應的依賴。如下:
<!-- JacksonJson處理工具包 -->
            <dependency>
                <groupId>com.fasterxml.jackson.core</groupId>
                <artifactId>jackson-databind</artifactId>
                <version>2.4.2</version>
            </dependency>
package com.bdit.common;
public class PicUploadResult {
private Integer error;
private String url;
private String width;
private String height;
public Integer getError() {
return error;
}
public void setError(Integer error) {
this.error = error;
}
public String getUrl() {
return url;
}
public void setUrl(String url) {
this.url = url;
}
public String getWidth() {
return width;
}
public void setWidth(String width) {
this.width = width;
}
public String getHeigth() {
return height;
}
public void setHeigth(String heigth) {
this.height = heigth;
}
}
(2)在controller中設定響應型別為文字
produces=MediaType.TEXT_PLAIN_VALUE2.3.5編寫controller檔案,直接貼原始碼
package com.bdit.controller;

import java.awt.image.BufferedImage;
import java.io.File;
import java.io.IOException;
import java.util.Date;

import javax.imageio.ImageIO;
import javax.servlet.http.HttpServletResponse;

import org.apache.commons.lang3.RandomUtils;
import org.apache.commons.lang3.StringUtils;
import org.joda.time.DateTime;
import org.slf4j.Logger;
import org.slf4j.LoggerFactory;
import org.springframework.beans.factory.annotation.Autowired;
import org.springframework.http.MediaType;
import org.springframework.stereotype.Controller;
import org.springframework.web.bind.annotation.RequestMapping;
import org.springframework.web.bind.annotation.RequestMethod;
import org.springframework.web.bind.annotation.RequestParam;
import org.springframework.web.bind.annotation.ResponseBody;
import org.springframework.web.multipart.MultipartFile;

import com.bdit.common.PicUploadResult;
import com.bdit.service.PropertyService;
import com.fasterxml.jackson.databind.ObjectMapper;

@RequestMapping("pic")
@Controller
public class PicUploadController {
    private static final Logger LOGGER=LoggerFactory.getLogger(PicUploadController.class);

    private static final ObjectMapper mapper = new ObjectMapper();

 // 允許上傳的格式
    private static final String[] IMAGE_TYPE=new String[]{".image",".png",".bmp",".jepg",".gif"};
 // 校驗圖片格式
    /**
     * produces:指定響應的型別
     * @param uploadFile接收檔案上傳的物件
     * @param response
     * @return
     * @throws Exception
     */
    @RequestMapping(value="upload",method=RequestMethod.POST,produces=MediaType.TEXT_PLAIN_VALUE)
    @ResponseBody
    public String upload(@RequestParam("uploadFile") MultipartFile uploadFile , HttpServletResponse response) throws Exception {
        // 校驗圖片格式
        boolean isLegal = false;
        /**
         * 用for迴圈判斷上傳的檔案,是不是以type作為結尾,並且忽略大小寫。type型別來自於IMAGE_TYPE
         * 然後做一個標記true表示合法
         */
        for (String type : IMAGE_TYPE) {
                if (StringUtils.endsWithIgnoreCase(uploadFile.getOriginalFilename(), type)) {
                        isLegal = true;
                        break;
                }
        }

        // 封裝Result物件
        PicUploadResult fileUploadResult = new PicUploadResult();

        // 狀態
        fileUploadResult.setError(isLegal ? 0 : 1);//如果為0表示上傳成功,如果為1表示失敗

        // 獲取檔案新路徑,也就是儲存的路徑
        String filePath = getFilePath(uploadFile.getOriginalFilename());
//       判斷是否啟用了debug,如果啟用就Pic file upload圖片檔案上傳哪裡到哪裡,就會在日誌中顯示清楚
        if (LOGGER.isDebugEnabled()) {
                LOGGER.debug("Pic file upload .[{}] to [{}] .", uploadFile.getOriginalFilename(), filePath);
        }

        // 生成圖片的絕對引用地
//        E:\0725\taotao-upload\images\2017\11\21\2017112102113742308216.png 這是伺服器上的地址,不可訪問
//        E:\\0725\\taotao-upload為圖片上傳的地址
//        http://imager.taotao.com為訪問圖片的地址
//        最終的請求地址:http://imager.taotao.com/images/2017/08/08/20170808162211.jpg
        String picUrl = StringUtils.replace(StringUtils.substringAfter(filePath, "E:\\0725\\taotao-upload"), "\\", "/");
        fileUploadResult.setUrl("http://image.taotao.com" + picUrl);
//      找打一個新生成的檔案,
        File newFile = new File(filePath);

        // 把上傳的檔案寫入到目標檔案中去;該語句執行完成後,就把上傳的檔案寫入到目標地址中了
        uploadFile.transferTo(newFile);


        // 校驗圖片是否合法
        isLegal = false;
        try {
//            通過BufferedImage讀取圖片,該內容資料Java介面程式設計
                BufferedImage image = ImageIO.read(newFile);
                if (image != null) {
//                    獲取圖片的寬和高
                        fileUploadResult.setWidth(image.getWidth() + "");
                        fileUploadResult.setHeigth(image.getHeight() + "");
//                        標記為true表示合法
                        isLegal = true;
                }
        } catch (IOException e) {
        }

        // 再次設定上傳的狀態
        fileUploadResult.setError(isLegal ? 0 : 1);

        if (!isLegal) {
                // 不合法,將磁碟上的檔案刪除
                newFile.delete();
        }

        response.setContentType(MediaType.TEXT_HTML_VALUE);
//        將Java物件序列化成json資料
        return mapper.writeValueAsString(fileUploadResult);
}

//    6.最終返回的路徑如:E:\\0725\\taotao-upload\\images\\2017(yyyy)\\08(MM)\\08(dd)\\20170808162211(yyyyMMddhhmmssSSSS).jpg(IMAGE_TYPE)
//    上面的地址就是圖片上傳到伺服器儲存的絕對路徑
    private String getFilePath(String sourceFileName) {
//        1.定義一個目錄,並在該目錄下建立一個imagers資料夾
        String baseFolder = "E:\\0725\\taotao-upload" + File.separator + "images";
//        2.建立時間物件
        Date nowDate = new Date();
        // yyyy/MM/dd
//        DateTime使用的是時間操作元件,功能很強大,就是用來操作時間的。比JDK提供的時間類要更好用
//       3. 獲取目錄
        String fileFolder = baseFolder + File.separator + new DateTime(nowDate).toString("yyyy") + File.separator + new DateTime(nowDate).toString("MM") + File.separator
                        + new DateTime(nowDate).toString("dd");
//      4.  判斷目錄是否存在
        File file = new File(fileFolder);
        if (!file.isDirectory()) {
                // 如果目錄不存在,則建立目錄
                file.mkdirs();
        }
        //5.最後 生成新的檔名
        String fileName = new DateTime(nowDate).toString("yyyyMMddhhmmssSSSS") + RandomUtils.nextInt(100, 9999) + "." + StringUtils.substringAfterLast(sourceFileName, ".");
        return fileFolder + File.separator + fileName;
}

}
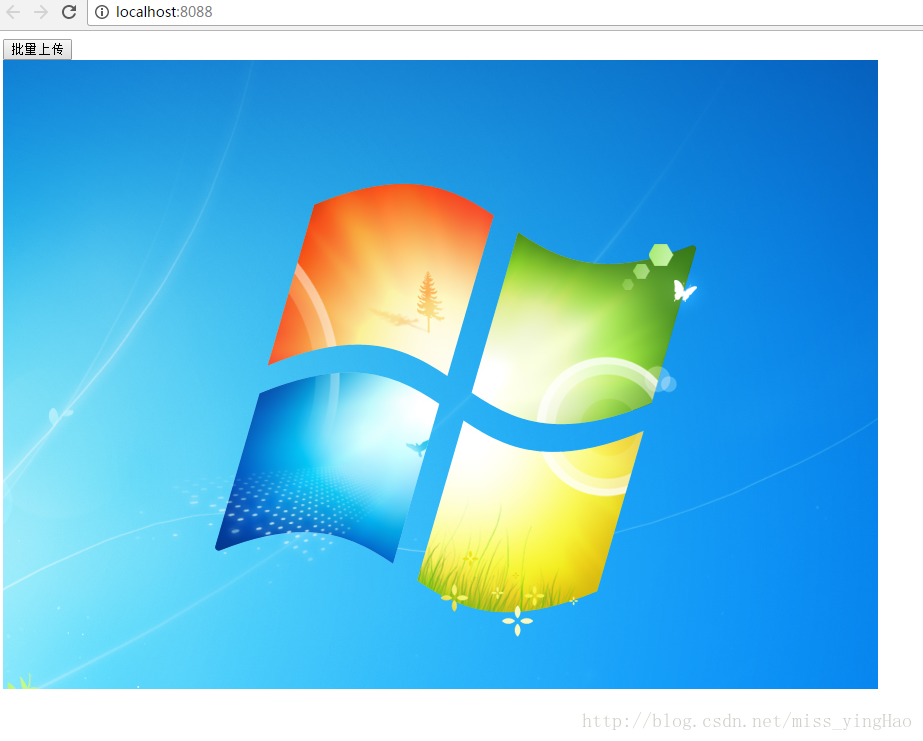
2.3.6 啟動nginx,啟動專案上傳圖片實現效果如下:
後續:上面的controller程式碼中關於圖片的路徑問題可以寫成配置檔案
1.建立一個外部配置檔案upload.properties
REPOSITORY_PATH=E:\\0725\\taotao-upload
IMAGE_BASE_URL=http://image.taotao.com
2.讓spring容器載入該配置檔案即在spring配置檔案中載入

3.編寫service檔案,獲取配置檔案內容
package com.bdit.service;

import org.springframework.beans.factory.annotation.Value;
import org.springframework.stereotype.Service;

@Service
public class PropertyService {
    @Value("${REPOSITORY_PATH}")
    public String REPOSITORY_PATH;

    @Value("${IMAGE_BASE_URL}")
    public String IMAGE_BASE_URL;
}
4.把service檔案注入到controller中,controller即可獲取內容並替換程式碼中的字串
package com.bdit.controller;

import java.awt.image.BufferedImage;
import java.io.File;
import java.io.IOException;
import java.util.Date;

import javax.imageio.ImageIO;
import javax.servlet.http.HttpServletResponse;

import org.apache.commons.lang3.RandomUtils;
import org.apache.commons.lang3.StringUtils;
import org.joda.time.DateTime;
import org.slf4j.Logger;
import org.slf4j.LoggerFactory;
import org.springframework.beans.factory.annotation.Autowired;
import org.springframework.http.MediaType;
import org.springframework.stereotype.Controller;
import org.springframework.web.bind.annotation.RequestMapping;
import org.springframework.web.bind.annotation.RequestMethod;
import org.springframework.web.bind.annotation.RequestParam;
import org.springframework.web.bind.annotation.ResponseBody;
import org.springframework.web.multipart.MultipartFile;

import com.bdit.common.PicUploadResult;
import com.bdit.service.PropertyService;
import com.fasterxml.jackson.databind.ObjectMapper;

@RequestMapping("pic")
@Controller
public class PicUploadController {
    private static final Logger LOGGER=LoggerFactory.getLogger(PicUploadController.class);

    private static final ObjectMapper mapper = new ObjectMapper();
    @Autowired
    private PropertyService propertyService;

 // 允許上傳的格式
    private static final String[] IMAGE_TYPE=new String[]{".image",".png",".bmp",".jepg",".gif"};
 // 校驗圖片格式
    /**
     * produces:指定響應的型別
     * @param uploadFile接收檔案上傳的物件
     * @param response
     * @return
     * @throws Exception
     */
    @RequestMapping(value="upload",method=RequestMethod.POST,produces=MediaType.TEXT_PLAIN_VALUE)
    @ResponseBody
    public String upload(@RequestParam("uploadFile") MultipartFile uploadFile , HttpServletResponse response) throws Exception {
        // 校驗圖片格式
        boolean isLegal = false;
        /**
         * 用for迴圈判斷上傳的檔案,是不是以type作為結尾,並且忽略大小寫。type型別來自於IMAGE_TYPE
         * 然後做一個標記true表示合法
         */
        for (String type : IMAGE_TYPE) {
                if (StringUtils.endsWithIgnoreCase(uploadFile.getOriginalFilename(), type)) {
                        isLegal = true;
                        break;
                }
        }

        // 封裝Result物件
        PicUploadResult fileUploadResult = new PicUploadResult();

        // 狀態
        fileUploadResult.setError(isLegal ? 0 : 1);//如果為0表示上傳成功,如果為1表示失敗

        // 獲取檔案新路徑,也就是儲存的路徑
        String filePath = getFilePath(uploadFile.getOriginalFilename());
//       判斷是否啟用了debug,如果啟用就Pic file upload圖片檔案上傳哪裡到哪裡,就會在日誌中顯示清楚
        if (LOGGER.isDebugEnabled()) {
                LOGGER.debug("Pic file upload .[{}] to [{}] .", uploadFile.getOriginalFilename(), filePath);
        }

        // 生成圖片的絕對引用地
//        E:\0725\taotao-upload\images\2017\11\21\2017112102113742308216.png 這是伺服器上的地址,不可訪問
//        E:\\0725\\taotao-upload為圖片上傳的地址
//        http://imager.taotao.com為訪問圖片的地址
//        最終的請求地址:http://imager.taotao.com/images/2017/08/08/20170808162211.jpg
        String picUrl = StringUtils.replace(StringUtils.substringAfter(filePath, propertyService.REPOSITORY_PATH), "\\", "/");
        fileUploadResult.setUrl(propertyService.IMAGE_BASE_URL + picUrl);
//      找打一個新生成的檔案,
        File newFile = new File(filePath);

        // 把上傳的檔案寫入到目標檔案中去;該語句執行完成後,就把上傳的檔案寫入到目標地址中了
        uploadFile.transferTo(newFile);


        // 校驗圖片是否合法
        isLegal = false;
        try {
//            通過BufferedImage讀取圖片,該內容資料Java介面程式設計
                BufferedImage image = ImageIO.read(newFile);
                if (image != null) {
//                    獲取圖片的寬和高
                        fileUploadResult.setWidth(image.getWidth() + "");
                        fileUploadResult.setHeigth(image.getHeight() + "");
//                        標記為true表示合法
                        isLegal = true;
                }
        } catch (IOException e) {
        }

        // 再次設定上傳的狀態
        fileUploadResult.setError(isLegal ? 0 : 1);

        if (!isLegal) {
                // 不合法,將磁碟上的檔案刪除
                newFile.delete();
        }

        response.setContentType(MediaType.TEXT_HTML_VALUE);
//        將Java物件序列化成json資料
        return mapper.writeValueAsString(fileUploadResult);
}

//    6.最終返回的路徑如:E:\\0725\\taotao-upload\\images\\2017(yyyy)\\08(MM)\\08(dd)\\20170808162211(yyyyMMddhhmmssSSSS).jpg(IMAGE_TYPE)
//    上面的地址就是圖片上傳到伺服器儲存的絕對路徑
    private String getFilePath(String sourceFileName) {
//        1.定義一個目錄,並在該目錄下建立一個imagers資料夾
        String baseFolder = propertyService.REPOSITORY_PATH + File.separator + "images";
//        2.建立時間物件
        Date nowDate = new Date();
        // yyyy/MM/dd
//        DateTime使用的是時間操作元件,功能很強大,就是用來操作時間的。比JDK提供的時間類要更好用
//       3. 獲取目錄
        String fileFolder = baseFolder + File.separator + new DateTime(nowDate).toString("yyyy") + File.separator + new DateTime(nowDate).toString("MM") + File.separator
                        + new DateTime(nowDate).toString("dd");
//      4.  判斷目錄是否存在
        File file = new File(fileFolder);
        if (!file.isDirectory()) {
                // 如果目錄不存在,則建立目錄
                file.mkdirs();
        }
        //5.最後 生成新的檔名
        String fileName = new DateTime(nowDate).toString("yyyyMMddhhmmssSSSS") + RandomUtils.nextInt(100, 9999) + "." + StringUtils.substringAfterLast(sourceFileName, ".");
        return fileFolder + File.separator + fileName;
}

}