如何製作一個類似Tiny Wings的遊戲 Cocos2d-x 2 1 4
| 123456789101112131415161718 | #pragma once#include "cocos2d.h"#define kMaxHillKeyPoints 1000class Terrain : public cocos2d::CCNode{public: Terrain(void); ~Terrain(void); CREATE_FUNC(Terrain); CC_SYNTHESIZE_RETAIN(cocos2d::CCSprite*, _stripes, Stripes);private |
這裡聲明瞭一個_hillKeyPoints陣列,用來儲存每個山丘頂峰的點,同時聲明瞭一個_offsetX代表當前地形滾動的偏移量。檔案Terrain.cpp程式碼如下:
| 123456789101112 | #include "Terrain.h"using namespace cocos2d;Terrain::Terrain(void){ _stripes = NULL; _offsetX = 0;}Terrain::~Terrain(void |
增加如下方法:
| 123456789101112 | void Terrain::generateHills(){ CCSize winSize = CCDirector::sharedDirector()->getWinSize(); float x = 0; float y = winSize.height / 2; for (int i = 0; i < kMaxHillKeyPoints; ++i) { _hillKeyPoints[i] = ccp(x, y); x += winSize.width / 2 |
這個方法用來生成隨機的山丘頂峰的點。第一個點在螢幕的左側中間,之後的每一個點,x軸方向移動半個螢幕寬度,y軸方向設定為0到螢幕高度之間的一個隨機值。新增以下方法:
| 1234567891011121314151617181920212223 | bool Terrain::init(){ bool bRet = false; do { CC_BREAK_IF(!CCNode::init()); this->generateHills(); bRet = true; } while (0); return bRet;}void Terrain::draw(){ CCNode::draw(); for (int i = 1; i < kMaxHillKeyPoints; ++i) { ccDrawLine(_hillKeyPoints[i - 1], _hillKeyPoints[i]); }} |
init方法呼叫generateHills方法建立山丘,draw方法簡單地繪製相鄰點之間的線段,方便視覺化除錯。新增以下方法:
| 12345 | void Terrain::setOffsetX(float newOffsetX){ _offsetX = newOffsetX; this->setPosition(ccp(-_offsetX * this->getScale(), 0));} |
英雄沿著地形的x軸方法前進,地形向左滑動。因此,偏移量需要乘以-1,還有縮放比例。開啟HelloWorldScene.h檔案,新增標頭檔案引用:
| 1 | #include "Terrain.h" |
新增如下變數:
| 1 | Terrain *_terrain; |
開啟HelloWorldScene.cpp檔案,在onEnter方法裡,呼叫genBackground方法之前,加入如下程式碼:
| 12 | _terrain = Terrain::create();this->addChild(_terrain, 1); |
在update方法裡,最後面新增如下程式碼:
| 1 | _terrain->setOffsetX(offset); |
修改genBackground方法為如下:
| 123456789101112131415161718192021222324 | void HelloWorld::genBackground(){ if (_background) { _background->removeFromParentAndCleanup(true); } ccColor4F bgColor = this->randomBrightColor(); _background = this->spriteWithColor(bgColor, 512, 512); CCSize winSize = CCDirector::sharedDirector()->getWinSize(); _background->setPosition(ccp(winSize.width / 2, winSize.height / 2)); ccTexParams tp = {GL_LINEAR, GL_LINEAR, GL_REPEAT, GL_REPEAT}; _background->getTexture()->setTexParameters(&tp); this->addChild(_background); ccColor4F color3 = this->randomBrightColor(); ccColor4F color4 = this->randomBrightColor(); CCSprite *stripes = this->spriteWithColor1(color3, color4, 512, 512, 4); ccTexParams tp2 = {GL_LINEAR, GL_LINEAR, GL_REPEAT, GL_CLAMP_TO_EDGE}; stripes->getTexture()->setTexParameters(&tp2); _terrain->setStripes(stripes);} |
注意,每次觸控式螢幕幕,地形上的條紋紋理都會隨機生成一個新的條紋紋理,這方便於測試。此外,在Update方法裡_background呼叫setTextureRect方法時,可以將offset乘以0.7,這樣背景就會比地形滾動地慢一些。編譯執行,可以看到一些線段,連線著山丘頂峰的點,如下圖所示: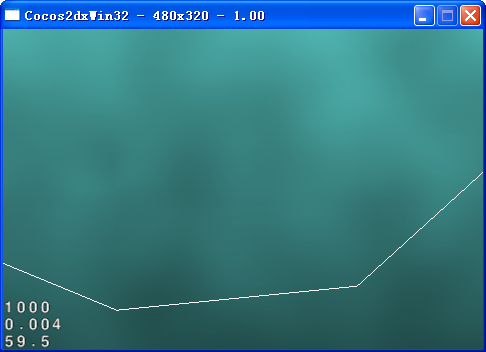
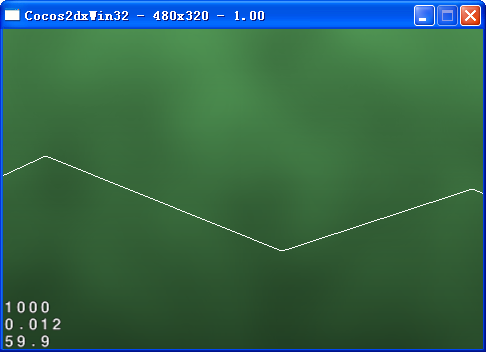
| 123456789101112131415161718192021222324252627282930313233343536373839404142 | void Terrain::generateHills(){ CCSize winSize = CCDirector::sharedDirector()->getWinSize(); float minDX = 160; float minDY = 60; int rangeDX = 80; int rangeDY = 40; float x = -minDX; float y = winSize.height / 2; float dy, ny; float sign = 1; // +1 - going up, -1 - going down float paddingTop = 20; float paddingBottom = 20; for (int i = 0; i < kMaxHillKeyPoints; ++i) { _hillKeyPoints[i] = ccp(x, y); if (i == 0) { x = 0; y = winSize.height / 2; } else { x += rand() % rangeDX + minDX; while (true) { dy = rand() % rangeDY + minDY; ny = y + dy * sign; if (ny < winSize.height - paddingTop && ny > paddingBottom) { break; } } y = ny; } sign *= -1; }} |
這個演算法執行的策略如下:
- 在範圍160加上0-80之間的隨機數進行遞增x軸。
- 在範圍60加上0-40之間的隨機數進行遞增y軸。
- 每次都反轉y軸偏移量。
- 不要讓y軸值過於接近頂部或底部(paddingTop, paddingBottom)。
- 開始於螢幕外的左側,硬編碼第二個點為(0, winSize.height/2),所以左側螢幕外有一個山丘。
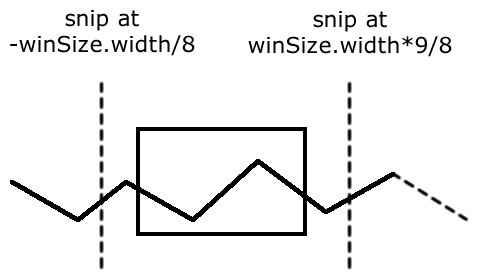
 4.一次只繪製部分。在更進一步之前,需要做出一項重大的效能優化。現在,繪製出了山丘的1000個頂峰點,即使每次都只有少數在螢幕上看得到。所以,可以根據螢幕區域來計算哪些頂峰點會被顯示出來,然後只顯示那些點,如下圖所示:
 開啟Terrain.h檔案,新增如下變數:
 | 12 | int _fromKeyPointI;int _toKeyPointI; |
開啟Terrain.cpp檔案,在建構函式裡面新增如下程式碼:
| 12 | _fromKeyPointI = 0;_toKeyPointI = 0; |
新增如下方法:
| 1234567891011121314151617 | void Terrain::resetHillVertices(){ CCSize winSize = CCDirector::sharedDirector()->getWinSize(); static int prevFromKeyPointI = -1; static int prevToKeyPointI = -1; // key points interval for drawing while (_hillKeyPoints[_fromKeyPointI + 1].x < _offsetX - winSize.width / 8 / this->getScale()) { _fromKeyPointI++; } while (_hillKeyPoints[_toKeyPointI].x < _offsetX + winSize.width * 9 / 8 / this->getScale()) { _toKeyPointI++; }} |
這裡,遍歷每一個頂峰點(從0開始),將它們的x軸值拿來做比較。無論當前對應到螢幕左邊緣的偏移量設定為多少,只要將它減去winSize.width/8。如果頂峰點的x軸值小於結果值,那麼就繼續遍歷,直到找到一個大於結果值的,這個頂峰點就是顯示的起始點。對於toKeypoint也採用同樣的過程。修改draw方法,程式碼如下:
| 123456789 | void Terrain::draw(){ CCNode::draw(); for (int i = MAX(_fromKeyPointI, 1); i <= _toKeyPointI; ++i) { ccDrawColor4F(1.0, 0, 0, 1.0); ccDrawLine(_hillKeyPoints[i - 1], _hillKeyPoints[i]); }} |
現在,不是繪製所有點,而是隻繪製當前可見的點,這些點是前面計算得到的。另外,也把線的顏色改成紅色,這樣更易於分辨。接著,在init方法裡面,最後面新增如下程式碼:
| 1 | this->resetHillVertices(); |
在setOffsetX方法裡面,最後面新增如下程式碼:
| 1 | this->resetHillVertices(); |
為了更容易看到,開啟HelloWorldScene.cpp檔案,在onEnter方法,最後面新增如下程式碼:
| 1 | this->setScale(0.25); |
編譯執行,可以看到線段出現時才進行繪製,如下圖所示: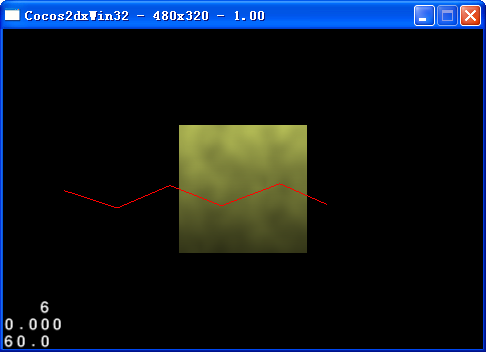
| 1 | #define kHillSegmentWidth 10 |
然後,開啟Terrain.cpp檔案,在draw方法裡面,ccDrawLine之後,新增如下程式碼:
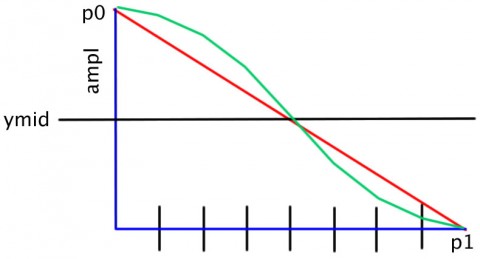
| 1234567891011121314151617181920 | ccDrawColor4F(1.0, 1.0, 1.0, 1.0);CCPoint p0 = _hillKeyPoints[i - 1];CCPoint p1 = _hillKeyPoints[i];int hSegments = floorf((p1.x - p0.x) / kHillSegmentWidth);float dx = (p1.x - p0.x) / hSegments;float da = M_PI / hSegments;float ymid = (p0.y + p1.y) / 2;float ampl = (p0.y - p1.y) / 2;CCPoint pt0, pt1;pt0 = p0;for (int j = 0; j < hSegments + 1; ++j){ pt1.x = p0.x + j * dx; pt1.y = ymid + ampl * cosf(da * j); ccDrawLine(pt0, pt1); pt0 = pt1;} |
開啟HelloWorldScene.cpp檔案,在onEnter方法,設定scale為1.0,如下程式碼:
| 1 | this->setScale(1.0); |
編譯執行,現在可以看到一條曲線連線著山丘,如下圖所示: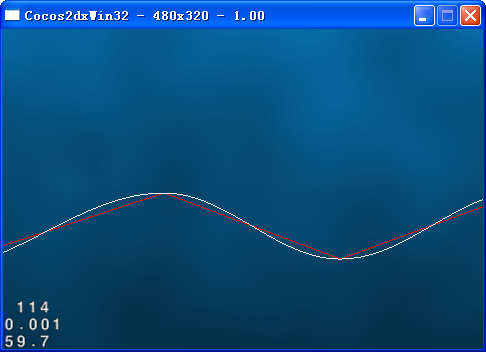
| 12 | #define kMaxHillVertices 4000#define kMaxBorderVertices 800 |
新增類變數,程式碼如下:
| 12345 | int _nHillVertices;cocos2d::CCPoint _hillVertices[kMaxHillVertices];cocos2d::CCPoint _hillTexCoords[kMaxHillVertices];int _nBorderVertices;cocos2d::CCPoint _borderVertices[kMaxBorderVertices]; |
開啟Terrain.cpp檔案,在resetHillVertices方法裡面,最後面新增如下程式碼:
| 1234567891011121314151617181920212223242526272829303132333435363738394041424344 | if (prevFromKeyPointI != _fromKeyPointI || prevToKeyPointI != _toKeyPointI){ // vertices for visible area _nHillVertices = 0; _nBorderVertices = 0; CCPoint p0, p1, pt0, pt1; p0 = _hillKeyPoints[_fromKeyPointI]; for (int i = _fromKeyPointI + 1; i < _toKeyPointI + 1; ++i) { p1 = _hillKeyPoints[i]; // triangle strip between p0 and p1 int hSegments = floorf((p1.x - p0.x) / kHillSegmentWidth); float dx = (p1.x - p0.x) / hSegments; float da = M_PI / hSegments; float ymid = (p0.y + p1.y) / 2; float ampl = (p0.y - p1.y) / 2; pt0 = p0; _borderVertices[_nBorderVertices++] = pt0; for (int j = 1; j < hSegments + 1; ++j) { pt1.x = p0.x + j * dx; pt1.y = ymid + ampl * cosf(da * j); _borderVertices[_nBorderVertices++] = pt1; _hillVertices[_nHillVertices] = ccp(pt0.x, 0); _hillTexCoords[_nHillVertices++] = ccp(pt0.x / 512, 1.0f); _hillVertices[_nHillVertices] = ccp(pt1.x, 0); _hillTexCoords[_nHillVertices++] = ccp(pt1.x / 512, 1.0f); _hillVertices[_nHillVertices] = ccp(pt0.x, pt0.y); _hillTexCoords[_nHillVertices++] = ccp(pt0.x / 512, 0); _hillVertices[_nHillVertices] = ccp(pt1.x, pt1.y); _hillTexCoords[_nHillVertices++] = ccp(pt1.x / 512, 0); pt0 = pt1; } p0 = p1; } prevFromKeyPointI = _fromKeyPointI; prevToKeyPointI = _toKeyPointI;} |
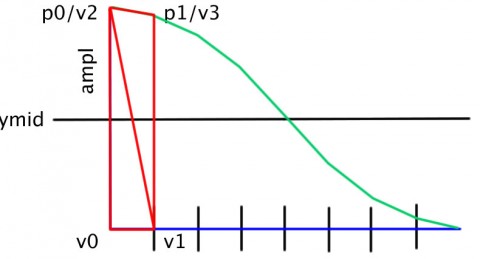
這裡的大部分程式碼,跟上面的使用餘弦繪製山丘曲線一樣。新的部分,是將山丘每個區段的頂點用來填充陣列,每個條紋需要4個頂點和4個紋理座標。在draw方法裡面,最上面新增如下程式碼:
| 12345678910 | CC_NODE_DRAW_SETUP();ccGLBindTexture2D(_stripes->getTexture()->getName());ccGLEnableVertexAttribs(kCCVertexAttribFlag_Position | kCCVertexAttribFlag_TexCoords);ccDrawColor4F(1.0f, 1.0f, 1.0f, 1.0f);glVertexAttribPointer(kCCVertexAttrib_Position, 2, GL_FLOAT, GL_FALSE, 0, _hillVertices);glVertexAttribPointer(kCCVertexAttrib_TexCoords, 2, GL_FLOAT, GL_FALSE, 0, _hillTexCoords);glDrawArrays(GL_TRIANGLE_STRIP, 0, (GLsizei)_nHillVertices); |
這裡繫結條紋紋理作為渲染紋理來使用,傳入之前計算好的頂點陣列和紋理座標陣列,然後以GL_TRIANGLE_STRIP來繪製這些陣列。此外,註釋掉繪製山丘直線和曲線的程式碼。在init方法裡面,呼叫generateHills方法之前,新增如下程式碼:
| 1 | this->setShaderProgram(CCShaderCache::sharedShaderCache()->programForKey(kCCShader_PositionTexture)); |
開啟HelloWorldScene.cpp檔案,在spriteWithColor1方法裡面,註釋// Layer 4: Noise裡,更改混合方式,程式碼如下:
| 1 | ccBlendFunc blendFunc = {GL_DST_COLOR, CC_BLEND_DST}; |
編譯執行,可以看到不錯的山丘了,如下圖所示: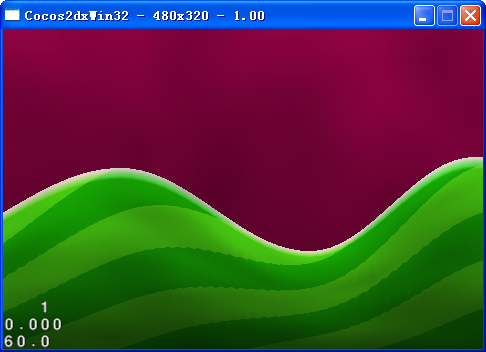
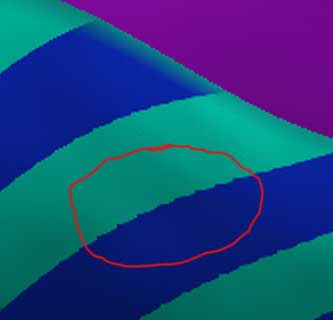
| 1 | #define kHillSegmentWidth 5 |
