
如何使用CCRenderTexture創建動態紋理 Cocos2d-x 2 1 4
本文實踐自 Ray Wenderlich、Ali Hafizji 的文章《How To Create Dynamic Textures with CCRenderTexture in Cocos2D 2.X》,文中使用Cocos2D,我在這裏使用Cocos2D-x 2.1.4進行學習和移植。在這篇文章,將會學習到如何創建實時紋理、如何用Gimp創建無縫拼接紋理、如何混合陰影和光照到紋理上以顯現逼真效果、如何創建條紋紋理、如何設置紋理重復等等。
步驟如下:
1.新建Cocos2d-win32工程,工程名為"TinySeal",勾選"Box2D"選項(後續文章會使用到),勾選"Simple Audio Engine in Cocos Denshion
2.打開HelloWorldScene.cpp文件,在添加如下方法:
|
1 2 3 4 5 6 7 8 9 10 11 12 13 14 15 16 17 |
CCSprite *HelloWorld::spriteWithColor(ccColor4F bgColor, float textureWidth, float textureHeight) { // 1: Create new CCRenderTexture CCRenderTexture *rt = CCRenderTexture::create(textureWidth, textureHeight); // 2: Call CCRenderTexture:begin rt->beginWithClear(bgColor.r, bgColor.g, bgColor.b, bgColor.a); // 3: Draw into the texture // You‘ll add this later // 4: Call CCRenderTexture:end rt->end(); // 5: Create a new Sprite from the texture return CCSprite::createWithTexture(rt->getSprite()->getTexture()); |
正如你所見,這5個步驟是用來創建動態紋理的,具體描述如下:
①.創建一個新的CCRenderTexture:指定所要創建紋理的寬度和高度。
②.調用CCRenderTexture的begin方法:設置OpenGL以便之後的任何圖形繪制都在CCRenderTexture上,而不是屏幕上。
③.繪制紋理:使用原始的OpenGL命令來繪制,或通過調用現有的Cocos2D對象的visit方法。
④.調用CCRenderTexture的end方法:渲染紋理,關閉繪制到紋理上。
⑤.以紋理創建一個新的精靈:以CCRenderTexture的getSprite()->getTexture()來創建一個新的精靈。
註意這裏不是調用CCRenderTexture:begin方法,而是調用一個更方便的方法beginWithClear,可以在繪制之前,用特定的顏色來清除紋理。
3.接著打開HelloWorldScene.h文件,添加如下代碼:
|
1 2 |
private: cocos2d::CCSprite *_background; |
打開HelloWorldScene.cpp文件,在構造函數裏添加如下代碼:
| 1 | _background = NULL; |
修改init函數為如下:
|
1 2 3 4 5 6 7 8 9 10 11 12 |
bool HelloWorld::init() { bool bRet = false; do { CC_BREAK_IF(! CCLayer::init()); bRet = true; } while (0); return bRet; } |
添加以下方法:
|
1 2 3 4 5 6 7 8 9 10 11 12 13 14 15 16 17 18 19 20 21 22 23 24 25 26 27 28 29 30 31 32 33 34 35 36 37 38 39 40 41 42 43 44 |
ccColor4F HelloWorld::randomBrightColor() { while (true) { float requiredBrightness = 192; ccColor4B randomColor = ccc4(rand() % 255, rand() % 255, rand() % 255, 255); if (randomColor.r > requiredBrightness || randomColor.g > requiredBrightness || randomColor.b > requiredBrightness) { return ccc4FFromccc4B(randomColor); } } } void HelloWorld::genBackground() { if (_background) { _background->removeFromParentAndCleanup(true); } ccColor4F bgColor = this->randomBrightColor(); _background = this->spriteWithColor(bgColor, 512, 512); CCSize winSize = CCDirector::sharedDirector()->getWinSize(); _background->setPosition(ccp(winSize.width / 2, winSize.height / 2)); this->addChild(_background, -1); } void HelloWorld::onEnter() { CCLayer::onEnter(); this->genBackground(); this->setTouchEnabled(true); } void HelloWorld::ccTouchesBegan(CCSet *pTouches, CCEvent *pEvent) { this->genBackground(); } |
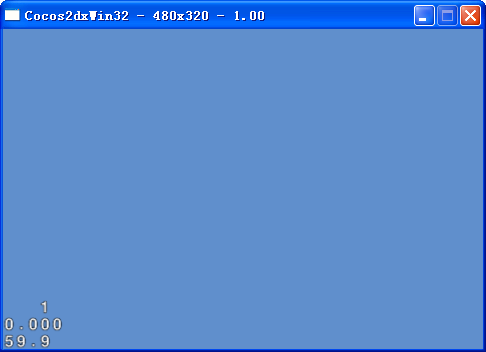
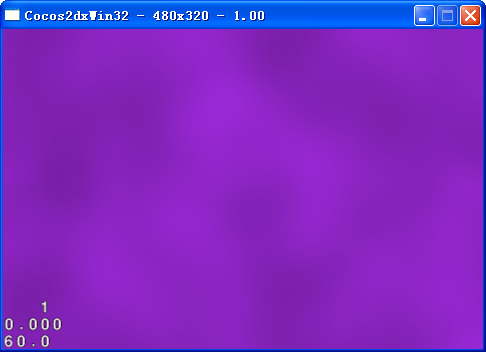
randomBrightColor是一個輔助方法,用來創建隨機顏色。註意到這裏是使用ccc4B,所以可以指定R/G/B/A值在0-255範圍內,並且確保至少其中之一大於192,這樣就不會得到較深的顏色。然後再將顏色轉換成ccc4F。genBackground方法調用spriteWithColor方法,然後把創建的精靈加到屏幕中央。onEnter方法調用genBackground,並且開啟觸摸,這樣觸摸屏幕就可以重新生成另一個隨機背景。編譯運行,每次運行程序或觸摸屏幕都會有不同顏色的背景,如下圖所示:
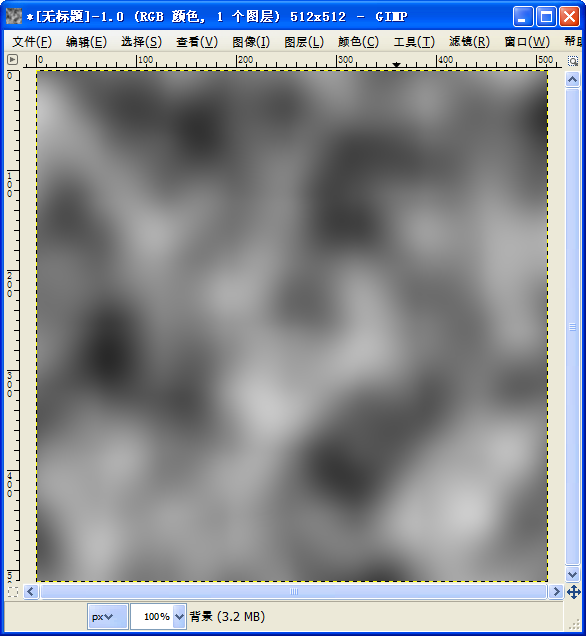
4.創建噪音紋理。用一些噪音來進行修飾,這樣會使得它們看起來像是有陰影和光照。可以編寫一些代碼生成動態噪音,但是使用一些預先做好的噪音,這將更容易,性能也更高,這也是這裏所將要介紹的。一種簡單的方法來創建隨機噪音,是通過一個免費的圖像編輯程序,名為Gimp。在這裏,可以下載已經制作好的圖片(下載),跳過這部分。也可以下載Gimp(下載,當前2.8.4版本),動手制作。啟動Gimp程序,菜單欄→“文件”→“新建”,創建一張512x512大小的圖像。菜單欄→“濾鏡”→“繪制”→“雲彩”→“純色噪音”,如果需要的話,可以在這裏調整參數,然後點擊“確定”。這樣就會得到看起來像下圖那樣的圖片:
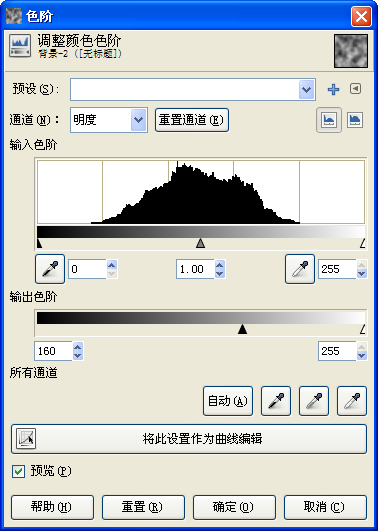
將會使用這張圖片乘以紋理的顏色。因此,圖片中的白色部分,將使原來的顏色顯現出來,而黑色的部分,將使原來的顏色變得更暗。目前,圖片中有太多的黑色部分,這會影響到我們所需要的效果。所以要減少黑色部分的數量,菜單欄→“顏色”→“色階”,拖動“輸出色階”最左邊的滑塊到右邊一些,這裏調整為160,如下圖所示:
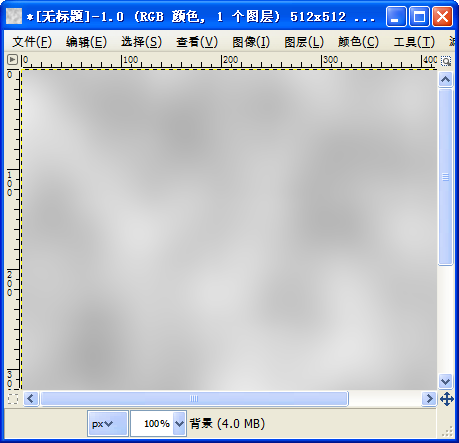
將會看到圖片變得明亮許多,如下圖所示:
噪音紋理需要制作成無縫拼接,這樣才能創建拼接完整的重復紋理。菜單欄→“濾鏡”→“映射”→“無縫處理”即可。最後保存文件,菜單欄→“文件”→“導出到”,名稱為Noise.png,保存到工程Resources文件夾下。
5.應用噪音紋理。把這張噪音圖片應用到用CCRenderTexture所創建的紋理上。在spriteWithColor函數裏面,第3步註釋後面添加如下代碼:
|
1 2 3 4 5 |
CCSprite *noise = CCSprite::create("Noise.png"); ccBlendFunc blendFunc = {GL_DST_COLOR, GL_ZERO}; noise->setBlendFunc(blendFunc); noise->setPosition(ccp(textureWidth / 2, textureHeight / 2)); noise->visit(); |
這裏用噪音紋理來創建精靈,將它放置在渲染紋理的中心,然後調用visit方法。這個visit方法就是一系列的OpenGL ES命令調用,來繪制紋理。ccBlendFunc的第一個常量(GL_DST_COLOR)指定如何乘以輸入/源(也就是噪音紋理)的顏色,第二個常量(GL_ZERO)指定如何乘以現有的/目標(也就是上面的純色紋理)的顏色。具體如下:
- 現有的顏色乘以GL_ZERO,意味著現有的顏色被清除掉。
- 噪音紋理的顏色乘以GL_DST_COLOR,而GL_DST_COLOR意味著現有的顏色,因此噪音紋理的顏色乘以現有的顏色。所以噪音中白色部分越多,那麽對應現有的顏色將會越明顯,而噪音中黑色部分越多,則對應現有的顏色越暗。
- 上述兩種顏色進行相加,由於第一種顏色為零,所以真正重要的是第二種顏色結果。
6.添加漸變到紋理上。為了使紋理看起來更好些,添加一個從上到下的漸變,紋理越往下越暗。雖然可以通過Gimp修改噪音文件達到效果,但也可以用代碼做到,這樣使得事情更加動態,而且容易修改。基本的想法是,在紋理之上繪制一個黑色矩形,它的頂部完全透明,而底部不透明,這將使得紋理頂部不變,而底部逐漸變暗下去。要做到這一點,需要用到一些OpenGL命令。在spriteWithColor函數裏面,創建噪音精靈之前,添加如下代碼:
|
1 2 3 4 5 6 7 8 9 10 11 12 13 14 15 16 17 18 19 20 21 22 23 24 25 |
this->setShaderProgram(CCShaderCache::sharedShaderCache()->programForKey(kCCShader_PositionColor)); CC_NODE_DRAW_SETUP(); // 3: Draw into the texture float gradientAlpha = 0.7f; CCPoint vertices[4]; ccColor4F colors[4]; int nVertices = 0; vertices[nVertices] = CCPointMake(0, 0); colors[nVertices++] = ccc4f(0, 0, 0, 0); vertices[nVertices] = CCPointMake(textureWidth, 0); colors[nVertices++] = ccc4f(0, 0, 0, 0); vertices[nVertices] = CCPointMake(0, textureHeight); colors[nVertices++] = ccc4f(0, 0, 0, gradientAlpha); vertices[nVertices] = CCPointMake(textureWidth, textureHeight); colors[nVertices++] = ccc4f(0, 0, 0, gradientAlpha); ccGLEnableVertexAttribs(kCCVertexAttribFlag_Position | kCCVertexAttribFlag_Color); glVertexAttribPointer(kCCVertexAttrib_Position, 2, GL_FLOAT, GL_FALSE, 0, vertices); glVertexAttribPointer(kCCVertexAttrib_Color, 4, GL_FLOAT, GL_FALSE, 0, colors); glBlendFunc(CC_BLEND_SRC, CC_BLEND_DST); glDrawArrays(GL_TRIANGLE_STRIP, 0, (GLsizei)nVertices); |
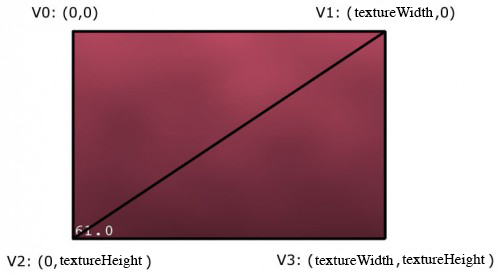
繪制紋理時,左上角是(0,0)點,而不是Cocos2D中的左下角。因此,以上代碼首先定義了紋理的四個頂點,順序為左上、右上、左下、右下,還定義了每個點的顏色。以這樣的順序來繪制頂點,是因為將繪制兩個三角形來形成一個矩形,如下圖所示:
使用GL_TRIANGLE_STRIP來繪制這些三角形,這意味著,第一個三角形由頂點數組中的前三個頂點組成,其余的三角形由前一個三角形的後兩個頂點和下一個頂點組成。因此,這裏第一個三角形由V0、V1、V2組成,第二個三角形由V1、V2、V3組成。定義完頂點數組和顏色數組之後,傳遞頂點數組和kCCVertexAttrib_Position常量給glVertexAttribPointer,同樣傳遞顏色數組和kCCVertexAttrib_Color常量給glVertexAttribPointer。編譯運行,可以看到一個整齊的漸變紋理,如下圖所示:
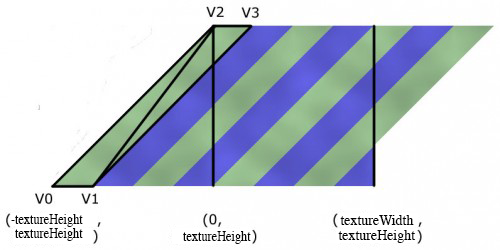
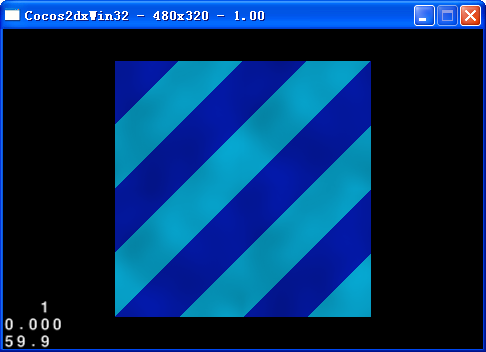
7.創建條紋紋理。將以一種顏色(如藍色)著色紋理開始,然後繪制一些條紋(如綠色)斜穿過它,如下圖所示:
註意,因為條紋是斜向的,實際上要在紋理的邊界之外就開始繪制,並且在紋理的邊界之外繼續繪制一些條紋。另外還要註意,為了得到一個不錯的45度角,把V0偏移紋理的高度,這樣兩邊都是紋理高度,因此,可以得到一個45度角。添加一個新的方法,代碼如下:
|
1 2 3 4 5 6 7 8 9 10 11 12 13 14 15 16 17 18 19 20 21 22 23 24 25 26 27 28 29 30 31 32 33 34 35 36 37 38 39 40 41 42 43 44 45 46 47 48 49 50 51 52 53 54 55 56 57 58 59 60 61 62 63 64 65 66 67 68 |
CCSprite * HelloWorld::spriteWithColor1(ccColor4F c1, ccColor4F c2, float textureWidth, float textureHeight, int nStripes) { // 1: Create new CCRenderTexture CCRenderTexture *rt = CCRenderTexture::create(textureWidth, textureHeight); // 2: Call CCRenderTexture:begin rt->beginWithClear(c1.r, c1.g, c1.b, c1.a); // 3: Draw into the texture this->setShaderProgram(CCShaderCache::sharedShaderCache()->programForKey(kCCShader_PositionColor)); CC_NODE_DRAW_SETUP(); // Layer 1: Stripes CCPoint *vertices = new CCPoint[nStripes * 6]; ccColor4F *colors = new ccColor4F[nStripes * 6]; int nVertices = 0; float x1 = -textureHeight; float x2; float y1 = textureHeight; float y2 = 0; float dx = textureWidth / nStripes * 2; float stripeWidth = dx / 2; for (int i = 0; i < nStripes; ++i) { x2 = x1 + textureHeight; vertices[nVertices] = ccp(x1, y1); colors[nVertices++] = ccc4f(c2.r, c2.g, c2.b, c2.a); vertices[nVertices] = ccp(x1 + stripeWidth, y1); colors[nVertices++] = ccc4f(c2.r, c2.g, c2.b, c2.a); vertices[nVertices] = ccp(x2, y2); colors[nVertices++] = ccc4f(c2.r, c2.g, c2.b, c2.a); vertices[nVertices] = vertices[nVertices - 2]; colors[nVertices++] = ccc4f(c2.r, c2.g, c2.b, c2.a); vertices[nVertices] = vertices[nVertices - 2]; colors[nVertices++] = ccc4f(c2.r, c2.g, c2.b, c2.a); vertices[nVertices] = ccp(x2 + stripeWidth, y2); colors[nVertices++] = ccc4f(c2.r, c2.g, c2.b, c2.a); x1 += dx; } ccGLEnableVertexAttribs(kCCVertexAttribFlag_Position | kCCVertexAttribFlag_Color); glVertexAttribPointer(kCCVertexAttrib_Position, 2, GL_FLOAT, GL_FALSE, 0, vertices); glVertexAttribPointer(kCCVertexAttrib_Color, 4, GL_FLOAT, GL_TRUE, 0, colors); glDrawArrays(GL_TRIANGLES, 0, (GLsizei)nVertices); CC_SAFE_DELETE_ARRAY(vertices); CC_SAFE_DELETE_ARRAY(colors); // Layer 4: Noise CCSprite *noise = CCSprite::create("Noise.png"); ccBlendFunc blendFunc = {GL_DST_COLOR, GL_ZERO}; noise->setBlendFunc(blendFunc); noise->setPosition(ccp(textureWidth / 2, textureHeight / 2)); noise->visit(); // 4: Call CCRenderTexture:end rt->end(); // 5: Create a new Sprite from the texture return CCSprite::createWithTexture(rt->getSprite()->getTexture()); } |
|
1 2 3 4 5 6 7 8 9 10 11 12 13 14 15 16 17 18 19 |
void HelloWorld::genBackground() { if (_background) { _background->removeFromParentAndCleanup(true); } ccColor4F bgColor = this->randomBrightColor(); ccColor4F color2 = this->randomBrightColor(); //_background = this->spriteWithColor(bgColor, 512, 512); int nStripes = ((rand() % 4) + 1) * 2; _background = this->spriteWithColor1(bgColor, color2, 512, 512, nStripes); this->setScale(0.5f); CCSize winSize = CCDirector::sharedDirector()->getWinSize(); _background->setPosition(ccp(winSize.width / 2, winSize.height / 2)); this->addChild(_background); } |
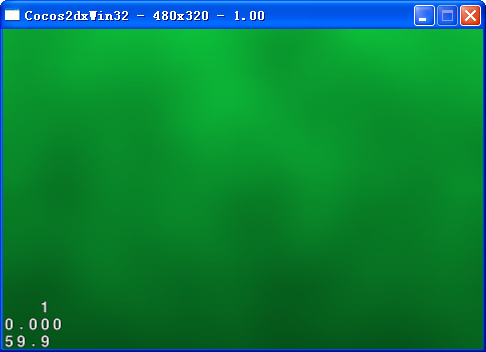
這裏調用新的方法,並且還設置了層的縮放為0.5,使其更容易地看到整個紋理。編譯運行,每當觸摸屏幕都可以看到隨機生成的條紋紋理,如下圖所示:
8.重復背景。對於條紋背景和漸變背景,都希望能夠平鋪整個區域空間,這可能比紋理更寬。一種簡單的方式是創建多個CCSprites,讓它們鏈接在一起。但那太瘋狂了,因為還有一種更簡單的方式,設置紋理重復。修改genBackground函數,在addChild之前添加如下代碼:
|
1 2 |
ccTexParams tp = {GL_LINEAR, GL_LINEAR, GL_REPEAT, GL_REPEAT}; _background->getTexture()->setTexParameters(&tp); |
在onEnter函數底端,添加如下代碼:
| 1 | this->scheduleUpdate(); |
添加如下方法:
|
1 2 3 4 5 6 7 8 9 |
void HelloWorld::update(float dt) { float PIXELS_PER_SECOND = 100; static float offset = 0; offset += PIXELS_PER_SECOND * dt; CCSize textureSize = _background->getTextureRect().size; _background->setTextureRect(CCRectMake(offset, 0, textureSize.width, textureSize.height)); } |
這裏最重要的部分就是紋理的參數:
- GL_LINEAR:當以比原始大小更小或者更大的尺寸,來顯示紋理時,采用鄰近像素的加權平均值。
- GL_REPEAT:當需要顯示紋理邊界之外時,顯示的是平鋪紋理。
也可以用漸變紋理來嘗試一下,也是如此。
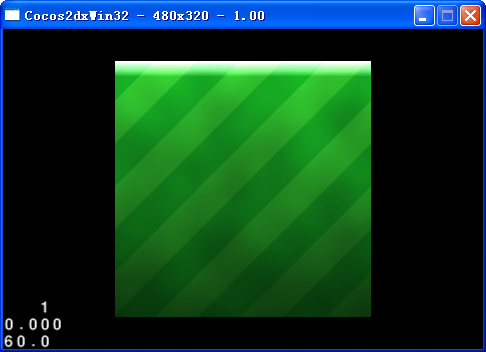
9.光照效果。為了使它看起來更佳,讓它在頂部有一些輕微的光照,並且還有從上到下的漸變。修改前面的條紋紋理,在spriteWithColor1函數裏面,glDrawArrays代碼之後,添加如下代碼:
|
1 2 3 4 5 6 7 8 9 10 11 12 13 14 15 16 17 18 19 20 21 22 23 24 25 26 27 28 29 30 31 32 33 34 35 36 37 38 39 40 41 42 |
// Layer 2: gradient float gradientAlpha = 0.7f; nVertices = 0; vertices[nVertices] = ccp(0, 0); colors[nVertices++] = ccc4f(0, 0, 0, 0); vertices[nVertices] = ccp(textureWidth, 0); colors[nVertices++] = ccc4f(0, 0, 0, 0); vertices[nVertices] = ccp(0, textureHeight); colors[nVertices++] = ccc4f(0, 0, 0, gradientAlpha); vertices[nVertices] = ccp(textureWidth, textureHeight); colors[nVertices++] = ccc4f(0, 0, 0, gradientAlpha); glVertexAttribPointer(kCCVertexAttrib_Position, 2, GL_FLOAT, GL_FALSE, 0, vertices); glVertexAttribPointer(kCCVertexAttrib_Color, 4, GL_FLOAT, GL_TRUE, 0, colors); glBlendFunc(CC_BLEND_SRC, CC_BLEND_DST); glDrawArrays(GL_TRIANGLE_STRIP, 0, (GLsizei)nVertices); // Layer 3: top highlight float borderHeight = textureHeight / 16; float borderAlpha = 0.3f; nVertices = 0; vertices[nVertices] = ccp(0, 0); colors[nVertices++] = ccc4f(1, 1, 1, borderAlpha); vertices[nVertices] = ccp(textureWidth, 0); colors[nVertices++] = ccc4f(1, 1, 1, borderAlpha); vertices[nVertices] = ccp(0, borderHeight); colors[nVertices++] = ccc4f(0, 0, 0, 0); vertices[nVertices] = ccp(textureWidth, borderHeight); colors[nVertices++] = ccc4f(0, 0, 0, 0); glVertexAttribPointer(kCCVertexAttrib_Position, 2, GL_FLOAT, GL_FALSE, 0, vertices); glVertexAttribPointer(kCCVertexAttrib_Color, 4, GL_FLOAT, GL_TRUE, 0, colors); glBlendFunc(CC_BLEND_SRC, CC_BLEND_DST); glDrawArrays(GL_TRIANGLE_STRIP, 0, (GLsizei)nVertices); |
參考資料:
1.How To Create Dynamic Textures with CCRenderTexture in Cocos2D 2.Xhttp://www.raywenderlich.com/33266/how-to-create-dynamic-textures-with-ccrendertexture-in-cocos2d-2-x
2.(譯)如何使用CCRenderTexture來創建動態紋理
http://www.cnblogs.com/zilongshanren/archive/2011/07/01/2095479.html
非常感謝以上資料,本例子源代碼附加資源下載地址:http://download.csdn.net/detail/akof1314/5664815
如文章存在錯誤之處,歡迎指出,以便改正。
再分享一下我老師大神的人工智能教程吧。零基礎!通俗易懂!風趣幽默!還帶黃段子!希望你也加入到我們人工智能的隊伍中來!http://www.captainbed.net
如何使用CCRenderTexture創建動態紋理 Cocos2d-x 2 1 4