自定義控制元件三部曲之動畫篇(十一)——layoutAnimation與gridLayoutAnimation
前言:人或許天生是懶惰的,明知道的不足,卻不努力彌補。
前幾篇給大家講述瞭如何針對某一個控制元件應用動畫,這篇將給大家講解如何給容器中的控制元件應用統一動畫。即在容器中控制元件出現時,不必為每個控制元件新增進入動畫,可以在容器中為其新增統一的進入和退出動畫。
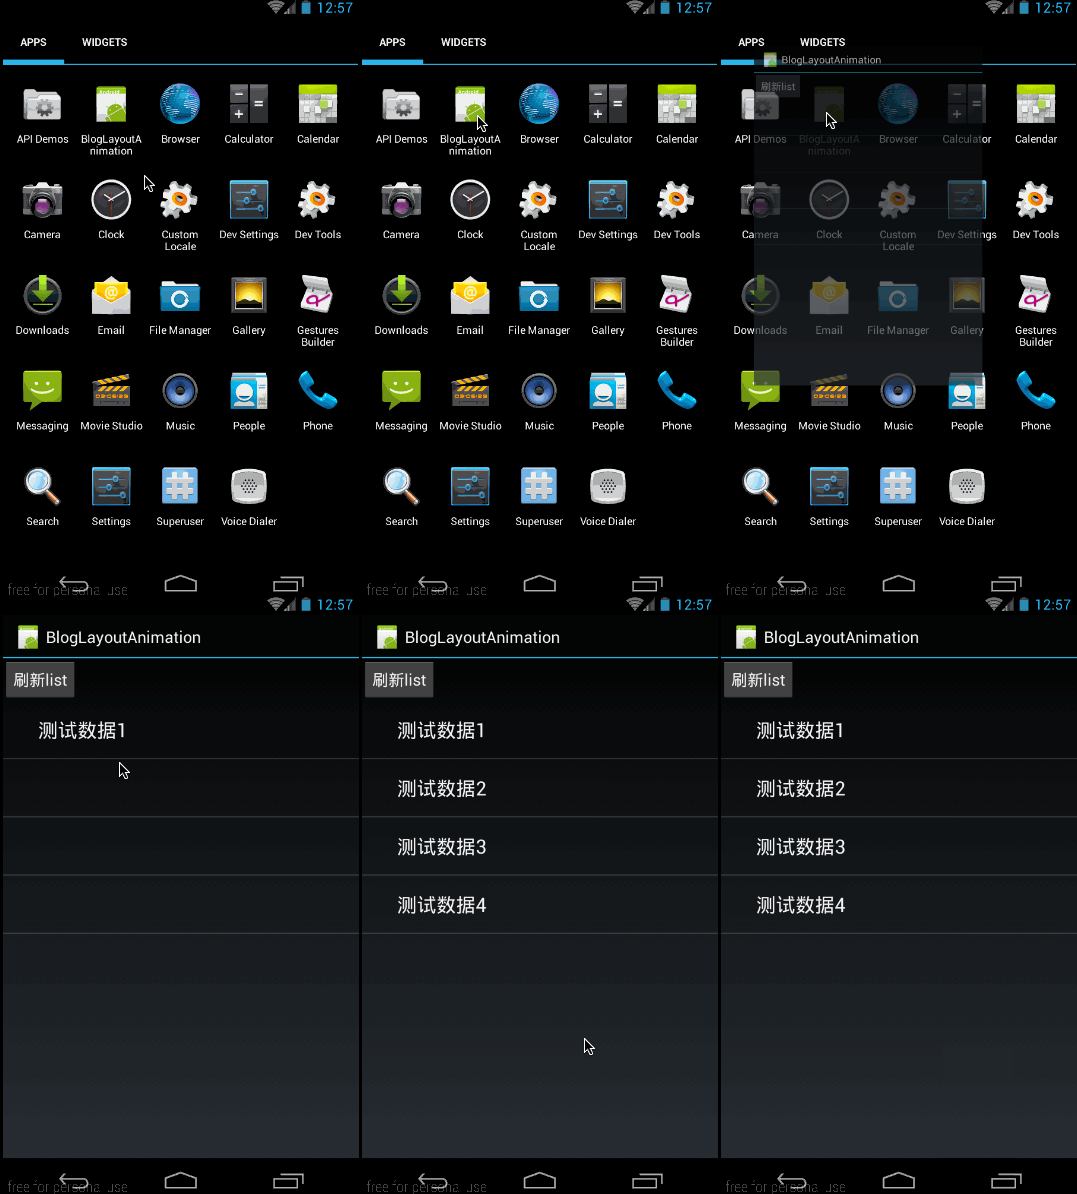
從上面的示例動畫也可以看出,listview中的資料在進入時就加入了統一動畫,下面我們就來看看這些是怎麼來實現的吧。
這篇我們將講述有關普通viewGroup新增進入統一動畫的LayoutAnimation和針對grideView新增進入動畫的gridLayoutAnimation;
LayoutAnimation和gridLayoutAnimation在API 1中就有的函式。所有大家不必擔心他們的所能使用的api等級;也正因為他們是在API 1中就引入了,所以他們也只能使用animtion來做動畫,而不能使用animator。
一、LayoutAnimation的xml實現——layoutAnimation標籤
1、概述
這部分,我們就來看看layoutAnimation標籤的用法,要使用layoutAnimation只需要兩步:
第一:定義一個layoutAnimation的animation檔案,如:(anim/layout_animation.xml)
<?xml version="1.0" encoding="utf-8"?>
<layoutAnimation xmlns:android="http://schemas.android.com/apk/res/android"
android:delay="1" 有關它的具體意義,我們後面會講。
第二步:在viewGroup型別的控制元件中,新增android:layoutAnimation=”@anim/layout_animation”,如:
<ListView
android:id="@+id/listview"
android:layout_width="match_parent"
android:layout_height="match_parent" 2、示例
這部分,我們將要實現的效果圖如下:
從效果圖中,可以看出兩點:
- listview中各個item從左至右滑入位置
- 動畫僅在第一次建立時有用,後期加入的資料,將不會再有動畫(這個問題最後再講)
這裡新增的layoutAnimation,與上面的layout_animation.xml檔案一樣:
<?xml version="1.0" encoding="utf-8"?>
<layoutAnimation xmlns:android="http://schemas.android.com/apk/res/android"
                 android:delay="1"
                 android:animationOrder="normal"
android:animation="@anim/slide_in_left"/>其中的@anim/slide_in_left對應程式碼為:
<?xml version="1.0" encoding="utf-8"?>
<set xmlns:android="http://schemas.android.com/apk/res/android" android:duration="1000">
<translate android:fromXDelta="-50%p" android:toXDelta="0"/>
<alpha android:fromAlpha="0.0" android:toAlpha="1.0"/>
</set>這部分實現的效果是,讓控制元件從左邊50%的位置進入螢幕,同時透明度從0變到1;動畫總時長為1000毫秒。
然後看main.xml的佈局程式碼,根據效果圖中也很容易看出佈局程式碼:
<?xml version="1.0" encoding="utf-8"?>
<LinearLayout xmlns:android="http://schemas.android.com/apk/res/android"
android:layout_width="match_parent"
android:layout_height="match_parent"
android:orientation="vertical">
<Button
android:layout_width="wrap_content"
android:layout_height="wrap_content"
android:text="重新整理list"/>
<ListView
android:id="@+id/listview"
android:layout_width="match_parent"
android:layout_height="match_parent"
android:layoutAnimation="@anim/layout_animation"/>
</LinearLayout>這裡最重要的是,在listView中新增上 android:layoutAnimation=”@anim/layout_animation”來指定建立佈局時,其中的子item所使用的動畫。
最後是MyActivity中填充listview的程式碼:
public class MyActivity extends Activity {
private ListView mListView;
private ArrayAdapter mAdapter;
private Button mAddListBtn;
@Override
public void onCreate(Bundle savedInstanceState) {
super.onCreate(savedInstanceState);
setContentView(R.layout.main);
mListView = (ListView) findViewById(R.id.listview);
mAdapter = new ArrayAdapter<String>(this, android.R.layout.simple_expandable_list_item_1, getData());
mListView.setAdapter(mAdapter);
mAddListBtn = (Button)findViewById(R.id.addlist);
mAddListBtn.setOnClickListener(new View.OnClickListener() {
@Override
public void onClick(View v) {
mAdapter.addAll(getData());
}
});
}
private List<String> getData() {
List<String> data = new ArrayList<String>();
data.add("測試資料1");
data.add("測試資料2");
data.add("測試資料3");
data.add("測試資料4");
return data;
}
}這段程式碼理解起來難度不大,主要就是兩個點,第一:填充listview,第二在點選新增list資料按鈕時,向Listview新增新的資料。
最終的效果圖在本部分開頭就已經給出。通過這個例子,我們可以知道最重要的一點:android:layoutAnimation只在viewGroup建立的時候,才會對其中的item新增動畫。在建立成功以後,再向其中新增item將不會再有動畫。
我們可以看出,只需要在viewGroup控制元件中新增android:layoutAnimation="@anim/layout_animation",就可以實現其容器內部控制元件建立時的動畫。
3、layoutAnimation各欄位意義
上面我們講了layoutAnimation的使用方法,下面我們就來看看layoutAnimation標籤中各個欄位的意義。
在layoutAnimation中,只有三個欄位是有效的,分別是:android:delay、android:animationOrder和android:animation;其它諸如android:duration、android:interpolator等針對animation的欄位都是無效的。下面我們結合上面的layoutAnimation程式碼,來看一下各個欄位的具體意義:
<?xml version="1.0" encoding="utf-8"?>
<layoutAnimation xmlns:android="http://schemas.android.com/apk/res/android"
                 android:delay="1"
                 android:animationOrder="normal"
android:animation="@anim/slide_in_left"/>- delay:指每個Item的動畫開始延時,取值是android:animation所指定動畫時長的倍數,取值型別可以是float型別,也可以是百分數,預設是0.5;比如我們這裡指定的動畫是@anim/slide_in_left,而在slide_in_left.xml中指定android:duration=”1000”,即單次動畫的時長是1000毫秒,而我們在這裡的指定android:delay=”1”,即一個Item的動畫會在上一個item動畫完成後延時單次動畫時長的一倍時間開始,即延時1000毫秒後開始。
- animationOrder:指viewGroup中的控制元件動畫開始順序,取值有normal(正序)、reverse(倒序)、random(隨機)
- animation:指定每個item入場所要應用的動畫。僅能指定res/aim資料夾下的animation定義的動畫,不可使用animator動畫。
這裡最難理解的引數應該是android:delay,它是指viewGroup中各個item開始動畫的時間延遲,取值是Item動畫時長的倍數。其中item動畫是通過android:animation指定的。
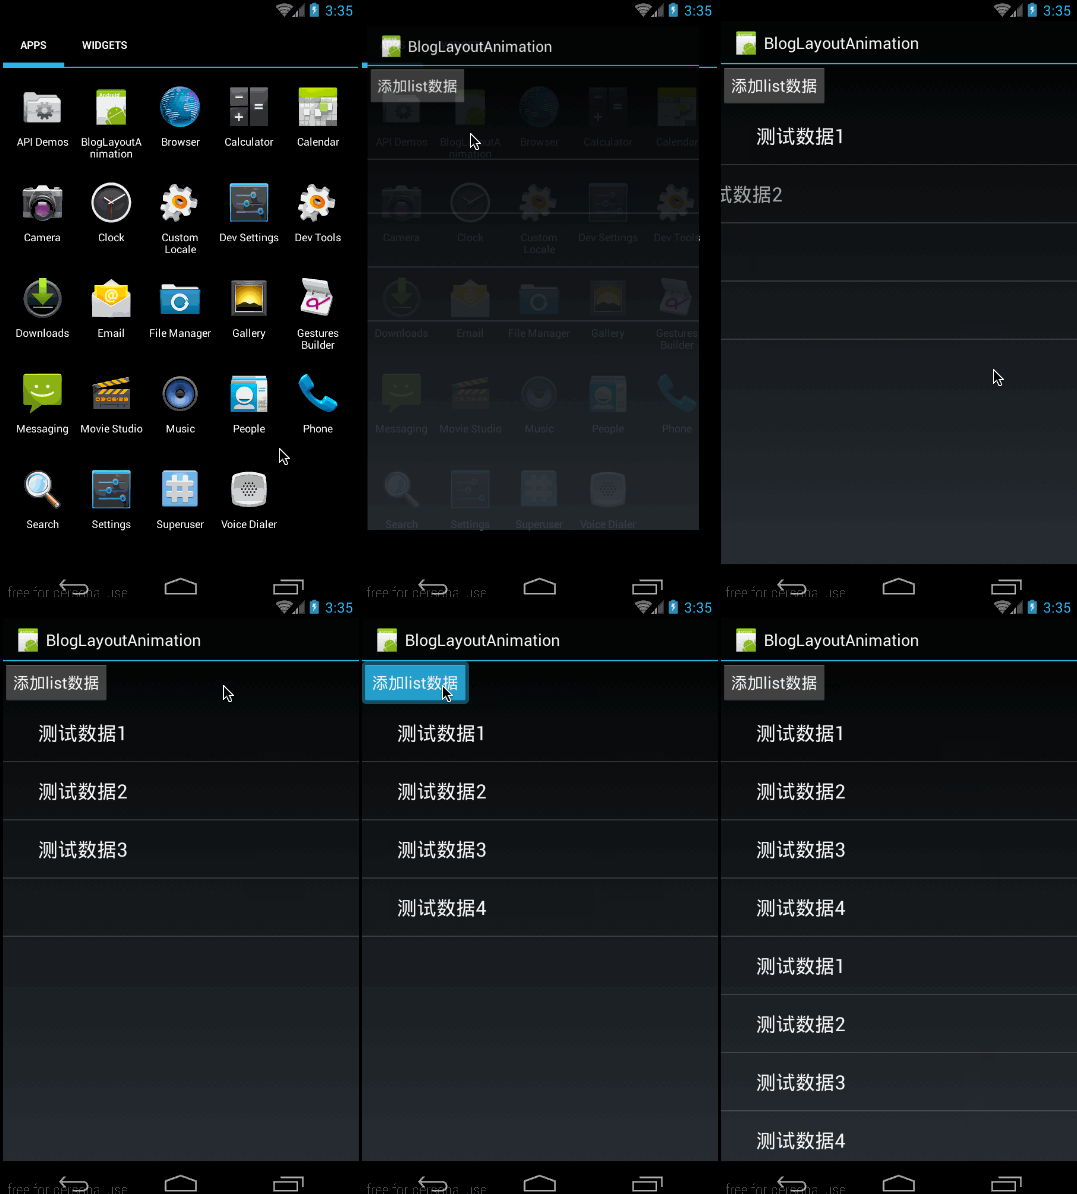
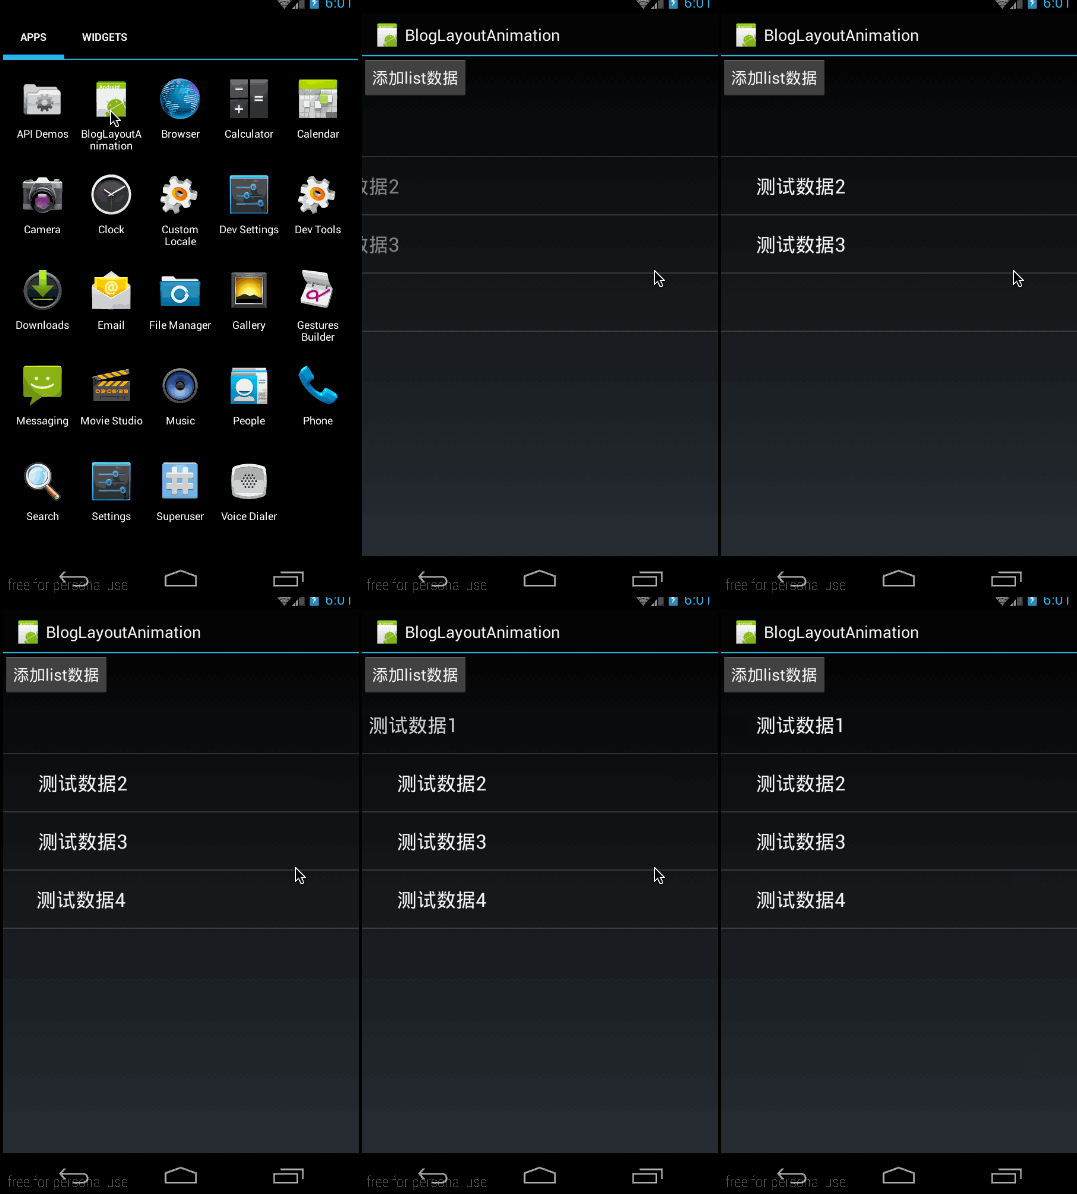
其次就是animationOrder的三種次序,其實也沒什麼難度,我們就直接通過動畫來看看它們的區別吧。上面的效果圖中,我們演示的normal(正序),下面我們再來看看reverse和random的效果圖:
android:animationOrder=”reverse”(倒序)
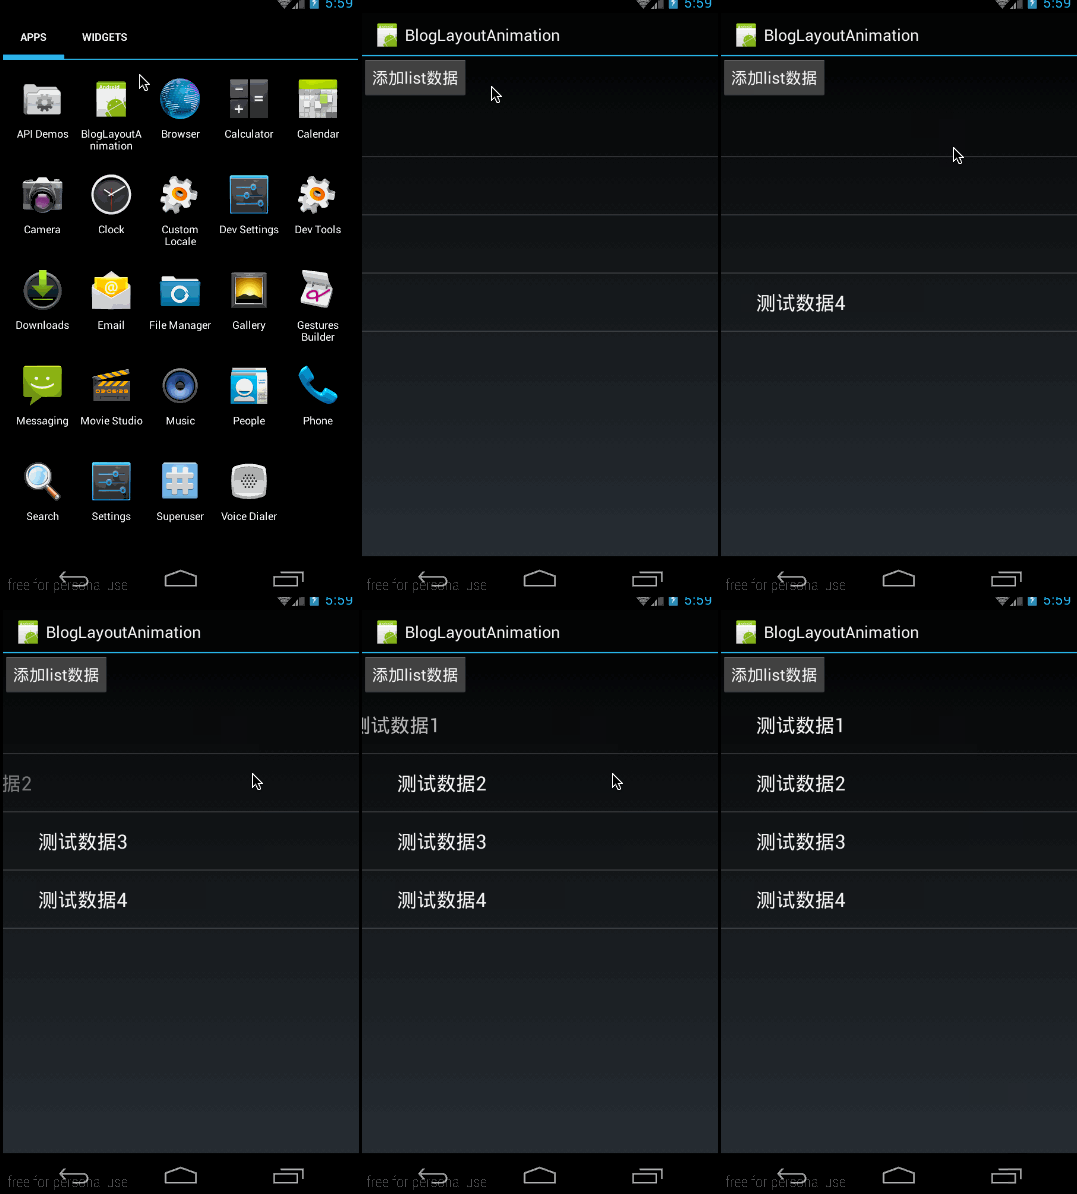
android:animationOrder=”random”(隨機)
原始碼在文章底部給出
二、LayoutAnimation的程式碼實現——LayoutAnimationController
1、概述
上面我們講過了LayoutAnimation的xml實現方式,下面來看看LayoutAnimation的程式碼實現方式。
首先,xml中layoutAnimation標籤所對應的類為LayoutAnimationController;它有兩個建構函式:
public LayoutAnimationController(Animation animation)
public LayoutAnimationController(Animation animation, float delay)很容易理解,animation對應標籤中的android:animation屬性,delay對應標籤中的android:delay屬性。
LayoutAnimationController的函式如下:
/**
* 設定animation動畫
*/
public void setAnimation(Animation animation)
/**
* 設定單個item開始動畫延時
*/
public void setDelay(float delay)
/**
* 設定viewGroup中控制元件開始動畫順序,取值為ORDER_NORMAL、ORDER_REVERSE、ORDER_RANDOM
*/
public void setOrder(int order)這些函式都很容易理解,與xml中標籤的意義完全相同。下面我們就來看看使用方法。
2、示例
同樣以上面的例子為例,把xml實現改成程式碼實現。由於我們要程式碼實現layoutAnimation,所以我們不再需要寫layoutAnimation的xml了,只需要一個動畫的animation:(slide_in_left.xml)
<?xml version="1.0" encoding="utf-8"?>
<set xmlns:android="http://schemas.android.com/apk/res/android" android:duration="1000">
    <translate android:fromXDelta="-50%p" android:toXDelta="0"/>
    <alpha android:fromAlpha="0.0" android:toAlpha="1.0"/>
</set>然後是主佈局(main.xml)
<?xml version="1.0" encoding="utf-8"?>
<LinearLayout xmlns:android="http://schemas.android.com/apk/res/android"
              android:layout_width="match_parent"
              android:layout_height="match_parent"
              android:orientation="vertical">


    <Button
            android:id="@+id/addlist"
            android:layout_width="wrap_content"
            android:layout_height="wrap_content"
            android:text="新增list資料"/>

    <ListView
            android:id="@+id/listview"
            android:layout_width="match_parent"
            android:layout_height="match_parent"/>
</LinearLayout>
佈局與xml的實現方式一樣,唯一不同的是Listview中沒有定義android:layoutAnimation=”@anim/layout_animation”屬性,因為所有有關LayoutAnimation的部分都是利用程式碼來實現的;
最後我們來看看程式碼(MyActivity.java)
public class MyActivity extends Activity {

    private ListView mListView;
    private ArrayAdapter mAdapter;

    private Button mAddListBtn;

    @Override
    public void onCreate(Bundle savedInstanceState) {
        super.onCreate(savedInstanceState);
        setContentView(R.layout.main);

        mListView = (ListView) findViewById(R.id.listview);
        mAdapter = new ArrayAdapter<String>(this, android.R.layout.simple_expandable_list_item_1, getData());
        mListView.setAdapter(mAdapter);

        mAddListBtn = (Button)findViewById(R.id.addlist);
        mAddListBtn.setOnClickListener(new View.OnClickListener() {
            @Override
            public void onClick(View v) {
                mAdapter.addAll(getData());
            }
        });


        //程式碼設定通過載入XML動畫設定檔案來建立一個Animation物件;
        Animation animation= AnimationUtils.loadAnimation(this,R.anim.slide_in_left);   //得到一個LayoutAnimationController物件;
        LayoutAnimationController controller = new LayoutAnimationController(animation);   //設定控制元件顯示的順序;
        controller.setOrder(LayoutAnimationController.ORDER_REVERSE);   //設定控制元件顯示間隔時間;
        controller.setDelay(0.3f);   //為ListView設定LayoutAnimationController屬性;
        mListView.setLayoutAnimation(controller);
        mListView.startLayoutAnimation();
    }

    private List<String> getData() {

        List<String> data = new ArrayList<String>();
        data.add("測試資料1");
        data.add("測試資料2");
        data.add("測試資料3");
        data.add("測試資料4");

        return data;
    }
}
這段程式碼中,在填充listview的程式碼都是與xml的實現方式相同的,關鍵是填充後,開始給listview設定LayoutAnimationController,程式碼如下:
Animation animation= AnimationUtils.loadAnimation(this,R.anim.slide_in_left);
//得到一個LayoutAnimationController物件;
LayoutAnimationController controller = new LayoutAnimationController(animation);   //設定控制元件顯示的順序;
controller.setOrder(LayoutAnimationController.ORDER_REVERSE);
//設定控制元件顯示間隔時間;
controller.setDelay(0.3f);
//為ListView設定LayoutAnimationController屬性;
mListView.setLayoutAnimation(controller);
mListView.startLayoutAnimation();
這段程式碼就是構造LayoutAnimationController變數,然後利用setLayoutAnimation將其設定為listview,最後利用mListView.startLayoutAnimation();開始動畫;難度不大,看一下就明白,沒必要細講了。
效果與上一部分xml實現一樣,就不再貼圖了
原始碼在文章底部給出
三、GridLayoutAnimation的XML實現——gridLayoutAnimation
1、概述
這部分將給大家講解有關gridview給內部子控制元件新增建立動畫的內容。本部分的效果圖如下:
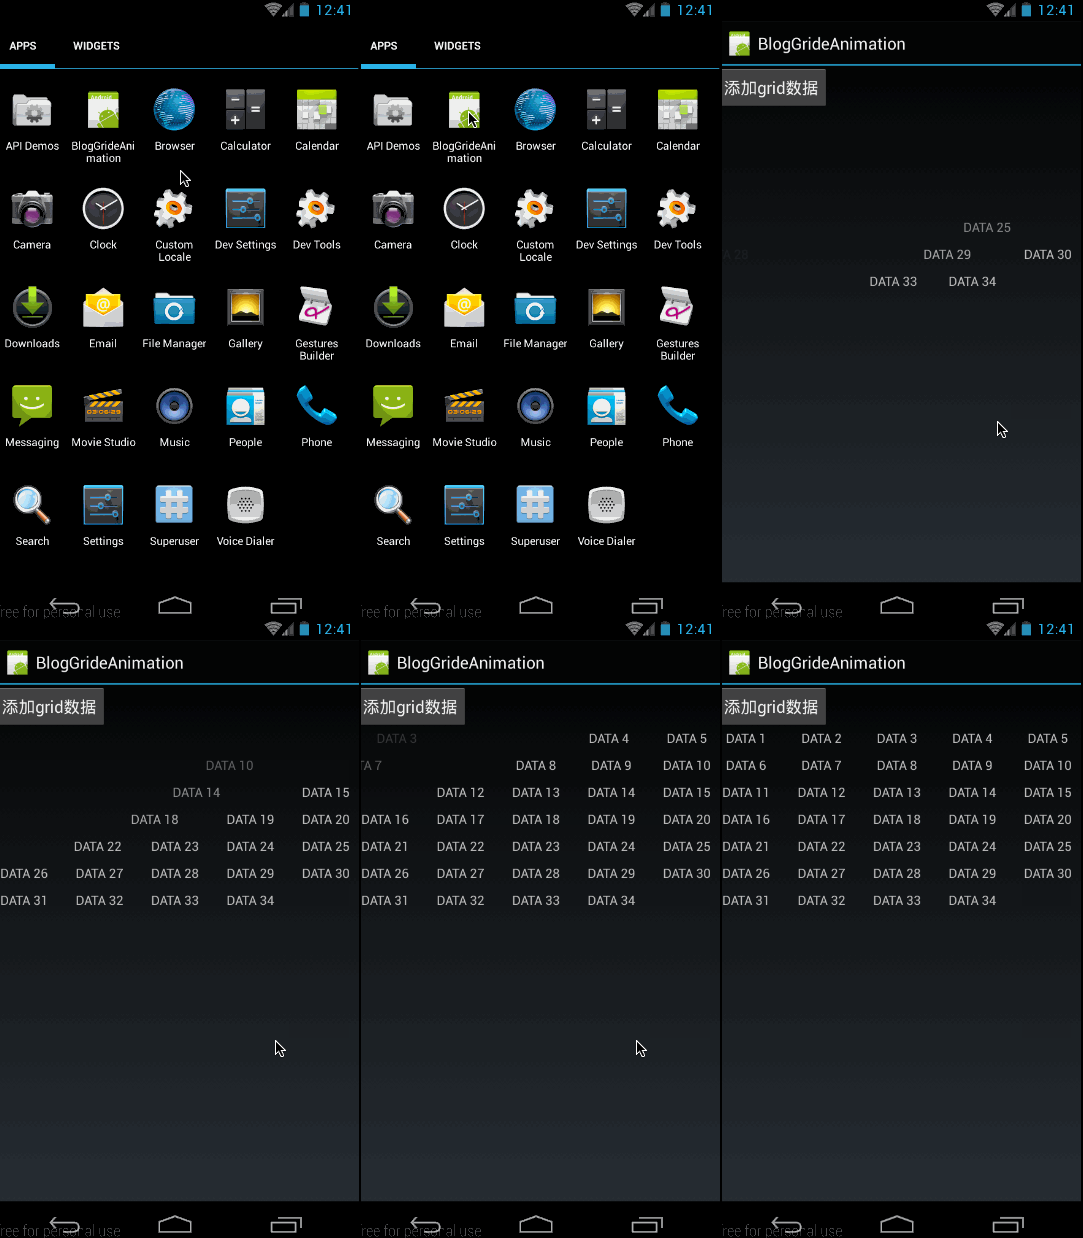
我們先來看一下gridLayoutAnimation標籤都有哪些屬性:
<?xml version="1.0" encoding="utf-8"?>
<gridLayoutAnimation xmlns:android="http://schemas.android.com/apk/res/android"
                     android:rowDelay="75%"
                     android:columnDelay="60%"
                     android:directionPriority="none"
                     android:direction="bottom_to_top|right_to_left"
                     android:animation="@android:anim/slide_in_left"/>
這是一個寫好了的gridLayoutAnimation的動畫檔案。其中各欄位的意義如下:
- rowDelay:每一行動畫開始的延遲。與LayoutAnimation一樣,可以取百分數,也可以取浮點數。取值意義為,當前android:animation所指動畫時長的倍數。
- columnDelay:每一列動畫開始的延遲。取值型別及意義與rowDelay相同。
- directionPriority:方向優先順序。取值為row,collumn,none,意義分別為:行優先,列優先,和無優先順序(同時進行);具體意義,後面會細講
- **direction:**gridview動畫方向。
取值有四個:left_to_right:列,從左向右開始動畫
right_to_left :列,從右向左開始動畫
top_to_bottom:行,從上向下開始動畫
bottom_to_top:行,從下向上開始動畫
這四個值之間可以通過“|”連線,從而可以取多個值。很顯然left_to_right和right_to_left是互斥的,top_to_bottom和bottom_to_top是互斥的。如果不指定 direction欄位,預設值為left_to_right | top_to_bottom;即從上往下,從左往右。
- animation: gridview內部元素所使用的動畫。
2、示例
上面,我們簡單講述了gridLayoutAnimation標籤各欄位的意義,下面我們就構建一個動畫,看看效果,這部分實現的效果如下:
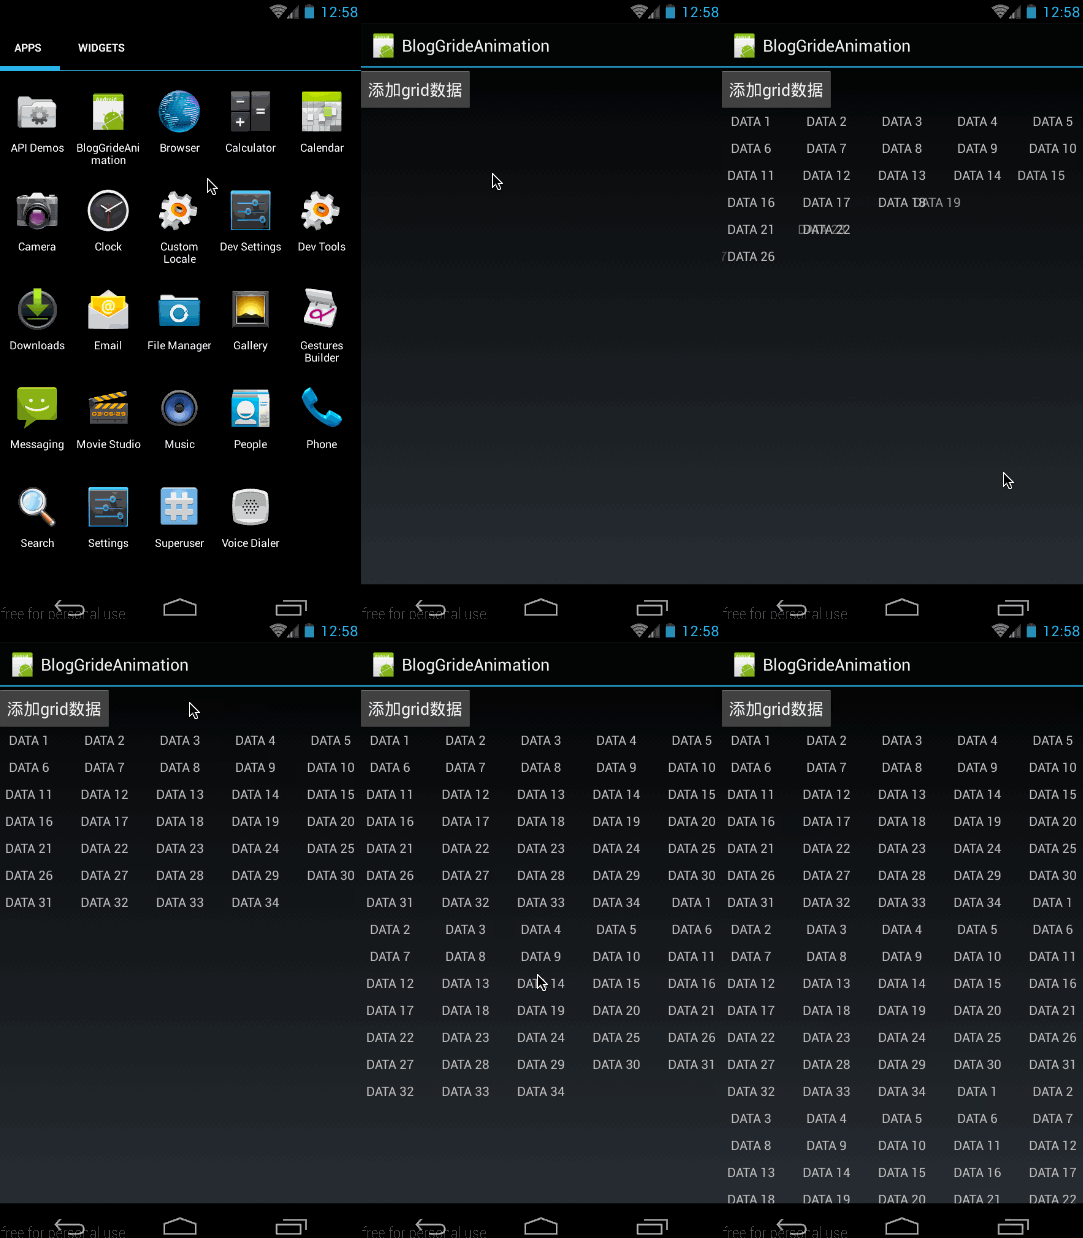
第一:gridview中各個元素的出場順序為從上往下,從左往右。
第二:gridLayoutAnimation僅在gridview第一次建立時各個元素才會有出場動畫,在建立成功以後,再向其中新增資料就不會再有動畫。這一點與layoutAnimation相同。
下面來看看這個例項的實現過程:
(1)、首先是gride_animation.xml
<?xml version="1.0" encoding="utf-8"?>
<gridLayoutAnimation xmlns:android="http://schemas.android.com/apk/res/android"
                     android:rowDelay="75%"
                     android:columnDelay="60%"
                     android:directionPriority="none"
                     android:animation="@anim/slide_in_left"/>
這裡沒有設定android:direction屬性,採用預設值:left_to_right|top_to_bottom;然後是對應的animation動畫slide_in_left.xml:
<?xml version="1.0" encoding="utf-8"?>
<set xmlns:android="http://schemas.android.com/apk/res/android" android:duration="1000">
    <translate android:fromXDelta="-50%p" android:toXDelta="0"/>
    <alpha android:fromAlpha="0.0" android:toAlpha="1.0" />
</set>
與LayoutAnimation所使用的動畫一樣,也是從左側50%的位置移動到初始位置,同時透明度從0變到1;
(2)、程式佈局main.xml
從效果圖中也可以很簡單的看出佈局,佈局很簡單,一個按鈕,一個gridview,程式碼如下:
<?xml version="1.0" encoding="utf-8"?>
<LinearLayout xmlns:android="http://schemas.android.com/apk/res/android"
              android:layout_width="match_parent"
              android:layout_height="match_parent"
              android:orientation="vertical">


    <Button
            android:id="@+id/add_data"
            android:layout_width="wrap_content"
            android:layout_height="wrap_content"
            android:text="新增grid資料"/>


    <GridView
            android:id="@+id/grid"
            android:layout_width="match_parent"
            android:layout_height="match_parent"
            android:columnWidth="60dp"
            android:gravity="center"
            android:horizontalSpacing="10dp"
            android:layoutAnimation="@anim/gride_animation"
            android:numColumns="auto_fit"
            android:stretchMode="columnWidth"
            android:verticalSpacing="10dp"/>

</LinearLayout>
佈局很簡單,就不再細講,這裡最重要的部分,就是給GridView新增android:layoutAnimation=”@anim/gride_animation”這句。以新增gridLayoutAnimation。
下面看程式碼處理部分
(3)、程式碼處理
先貼出完整程式碼,然後再細講:
public class MyActivity extends Activity {
    private GridAdapter mGrideAdapter;
    private List<String> mDatas = new ArrayList<>();

    @Override
    public void onCreate(Bundle savedInstanceState) {
        super.onCreate(savedInstanceState);
        setContentView(R.layout.main);

        /**
         * 填充gridview
         */
        GridView grid = (GridView) findViewById(R.id.grid);
        mDatas.addAll(getData());
        mGrideAdapter = new GridAdapter();
        grid.setAdapter(mGrideAdapter);

        /**
         * 按鈕點選響應
         */
        Button addData = (Button)findViewById(R.id.add_data);
        addData.setOnClickListener(new View.OnClickListener() {
            @Override
            public void onClick(View v) {
                addData();
            }
        });
    }


    private List<String> getData() {

        List<String> data = new ArrayList<String>();
        for (int i = 1;i<35;i++){
            data.add("DATA "+i);
        }
        return data;
    }


    public void addData(){
        mDatas.addAll(mDatas);
        mGrideAdapter.notifyDataSetChanged();
    }


    public class GridAdapter extends BaseAdapter {
        public View getView(int position, View convertView, ViewGroup parent) {
            TextView i = new TextView(MyActivity.this);
            i.setText(mDatas.get(position));
            i.setLayoutParams(new GridView.LayoutParams(GridView.LayoutParams.WRAP_CONTENT, GridView.LayoutParams.WRAP_CONTENT));
            return i;
        }

        public final int getCount() {
            return mDatas.size();
        }

        public final Object getItem(int position) {
            return null;
        }

        public final long getItemId(int position) {
            return position;
        }
    }
}
這裡主要是完成兩個功能,第一:填充gridview 第二:在點選按鈕的時候向gridview中新加資料,看它是不是會有進入動畫。
先看第一部分:在OnCreate中
GridView grid = (GridView) findViewById(R.id.grid);
mDatas.addAll(getData());
mGrideAdapter = new GridAdapter();
grid.setAdapter(mGrideAdapter);
首先是構造資料的函式getData():程式碼如下,構造出35個數據
private List<String> getData() {

    List<String> data = new ArrayList<String>();
    for (int i = 1;i<35;i++){
        data.add("DATA "+i);
    }
    return data;
}
然後是構造gridview的adapter的構造:
public class GridAdapter extends BaseAdapter {
    public View getView(int position, View convertView, ViewGroup parent) {
        TextView i = new TextView(MyActivity.this);
        i.setText(mDatas.get(position));
        i.setLayoutParams(new GridView.LayoutParams(GridView.LayoutParams.WRAP_CONTENT, GridView.LayoutParams.WRAP_CONTENT));
        return i;
    }

    public final int getCount() {
        return mDatas.size();
    }

    public final Object getItem(int position) {
        return null;
    }

    public final long getItemId(int position) {
        return position;
    }
}
在getView中,向每一個item填充一個textview,將構造的資料mDatas所對應的String做為textview的內容;
最後將Adapter設定給gridview就可以了:
grid.setAdapter(mGrideAdapter);然後是第二部分,當點選按鈕的時候,呼叫addData()向其中新增資料
Button addData = (Button)findViewById(R.id.add_data);
addData.setOnClickListener(new View.OnClickListener() {
    @Override
    public void onClick(View v) {
        addData();
    }
});
其中addData()的實現為:
public void addData(){
    mDatas.addAll(mDatas);
    mGrideAdapter.notifyDataSetChanged();
}
到這裡,我這個例子就講完了,通過這個例子大家除了讓大家知道gridLayoutAnimation的使用方法以外,更要大家知道:gridLayoutAnimation與layoutAnimation一樣,都只是在viewGroup建立的時候,會對其中的item新增進入動畫,在建立完成後,再新增資料將不會再有動畫!
通過上面的示例也可以看到,通過xml方式實現gradview中item建立動畫是非常容易的,只需要在gridview的xml中新增android:layoutAnimation="@anim/gride_animation"即可。不需要在程式碼中做任何操作。
原始碼在文章底部給出
3、gridLayoutAnimation標籤各屬性詳解
在簡單看了上面的使用例子以後,我們就詳細來看看gridLayoutAnimation標籤各個屬性的意義吧。
有關rowDelay、columnDelay和animation欄位,想必大家也都已經熟悉了,就不再講了,這裡著重講一下directionPriority和direction
(1)、directionPriority
directionPriority指gridview動畫優先順序,取值有row,column,none.意義分別為行優先,列優先,和無優先順序(同時進行)。
還以上面的例子為例,我們使用direction的預設值即left_to_right|top_to_bottom,將android:directionPriority分別改變為row,column,none,看它的效果如何。
android:directionPriority=”row”
對應的gride_animation.xml內容為:
<gridLayoutAnimation xmlns:android="http://schemas.android.com/apk/res/android"
                     android:rowDelay="75%"
                     android:columnDelay="60%"
                     android:directionPriority="row"
                     android:animation="@anim/slide_in_left"/>
效果圖為:
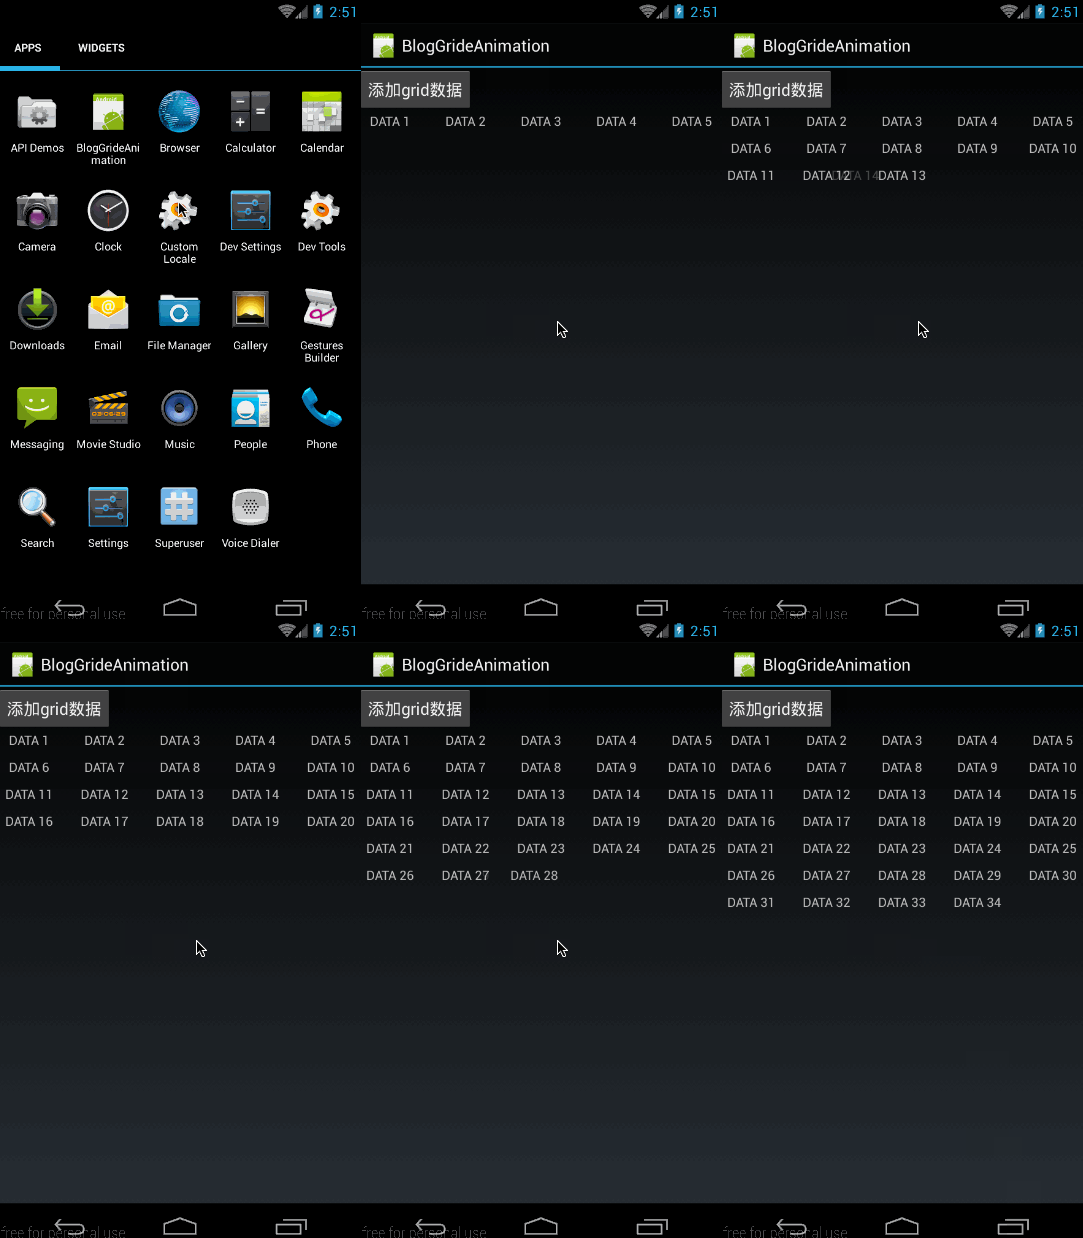
從效果圖中可以看出,在優先順序改為行以後,gridview中各個item的出場順序就變為一行一行的出現了。
android:directionPriority=”column”
對應的gride_animation.xml內容為:
<gridLayoutAnimation xmlns:android="http://schemas.android.com/apk/res/android"
                     android:rowDelay="75%"
                     android:columnDelay="60%"
                     android:directionPriority="column"
                     android:animation="@anim/slide_in_left"/>
對應效果圖為:
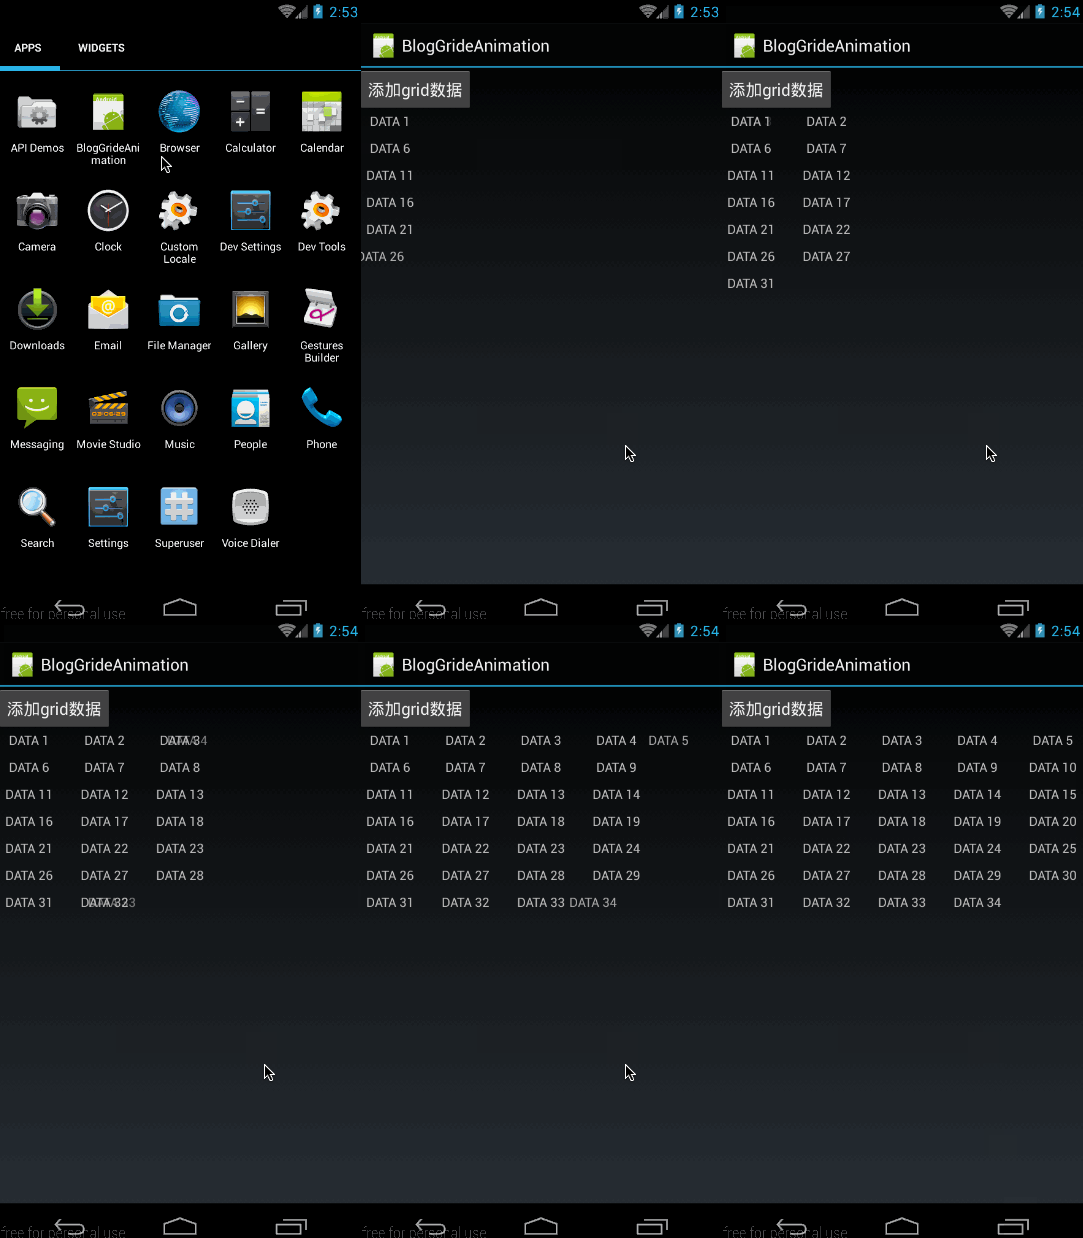
從效果圖中可以看出,在優先順序改為列以後,gridview中各個item的出場順序就改為一列一列的出現了。
android:directionPriority=”none”
對應的gride_animation.xml內容為:
<gridLayoutAnimation xmlns:android="http://schemas.android.com/apk/res/android"
                     android:rowDelay="75%"
                     android:columnDelay="60%"
                     android:directionPriority="none"
                     android:animation="@anim/slide_in_left"/>
效果圖為:
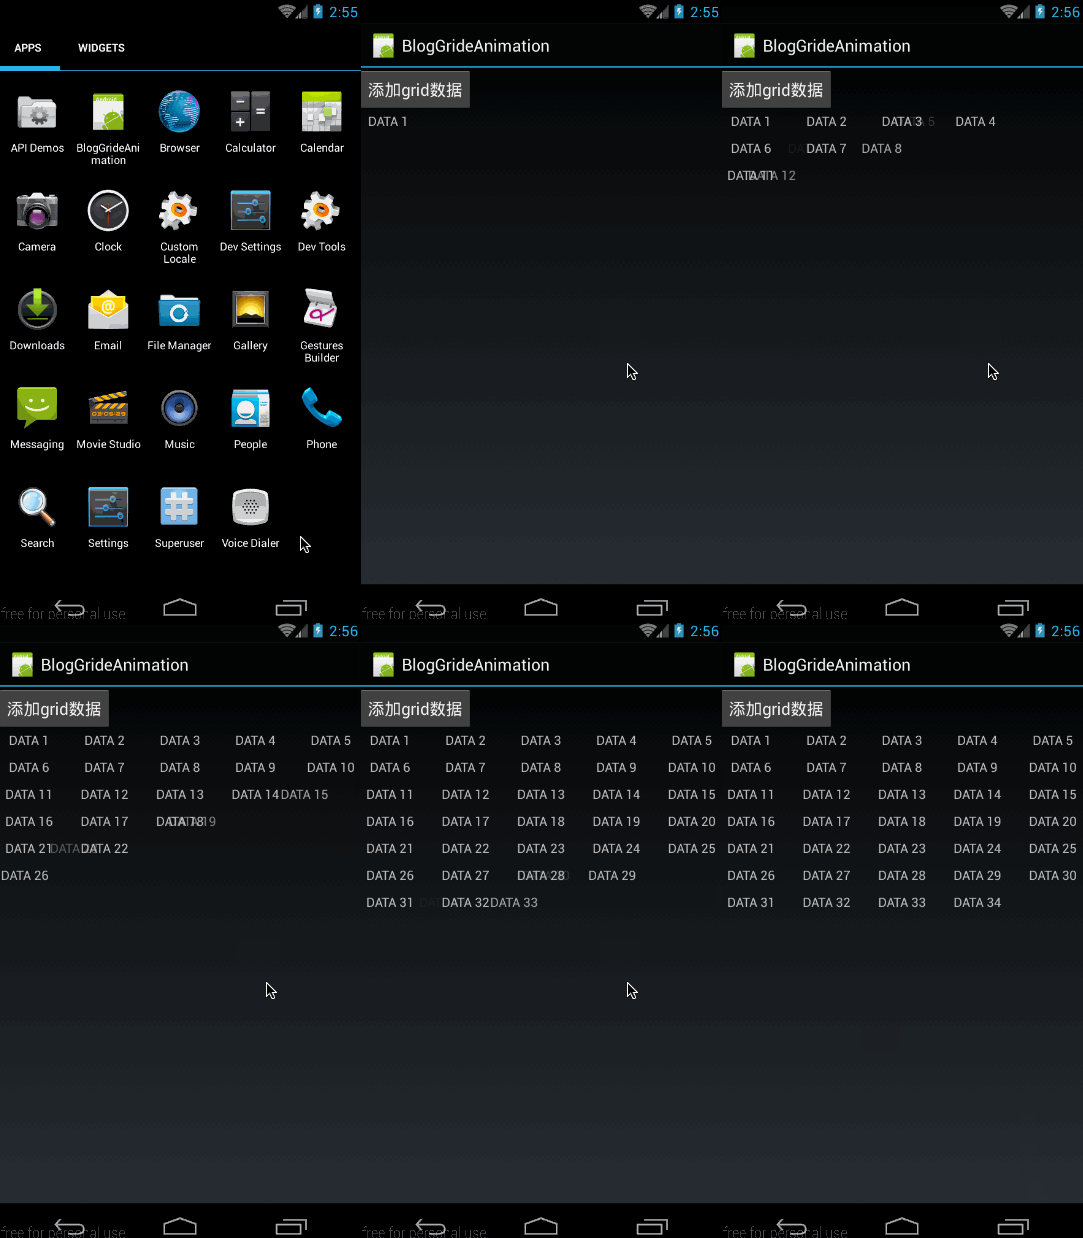
從效果圖中可以看出,在優先給改為None以後,gridview中各個item的出場順序就是行,列一起進行了。
在知道優先順序欄位的作用以後,我們來看看android:direction欄位的意義
(2)、direction
direction表示gridview的各個item的動畫方向,取值如下,可以通過“|”連線多個屬性值。
取值有四個:
- left_to_right:列,從左向右開始動畫
- right_to_left :列,從右向左開始動畫
- top_to_bottom:行,從上向下開始動畫
- bottom_to_top:行,從下向上開始動畫
為了更好的突顯效果,我們將android:directionPriority設定為none即行列一起進行動畫。
android:direction=”left_to_right”從左向右開始動畫
對應的gride_animation.xml內容為:
<gridLayoutAnimation xmlns:android="http://schemas.android.com/apk/res/android"
                     android:rowDelay="75%"
                     android:columnDelay="60%"
                     android:directionPriority="none"
                     android:direction="left_to_right"
                     android:animation="@anim/slide_in_left"/>
效果圖為:
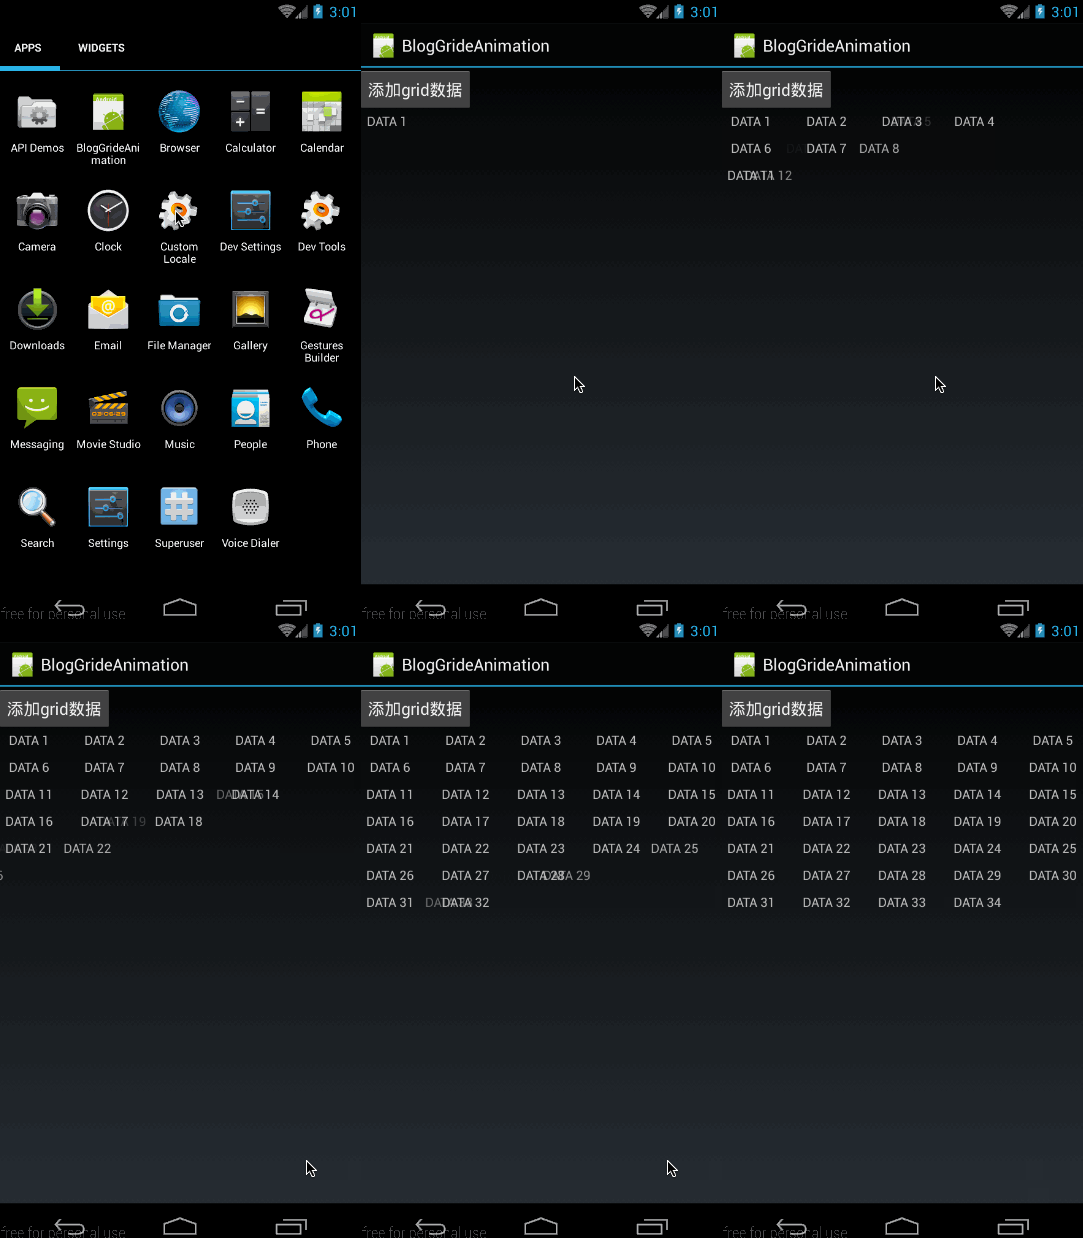
從效果圖中,很明顯可以看出,入場順序是從左向右的,由於上下的入場順序沒有指定,預設是從上向下入場
android:direction=”right_to_left”從右向左開始動畫
對應的gride_animation.xml內容為:
<gridLayoutAnimation xmlns:android="http://schemas.android.com/apk/res/android"
                     android:rowDelay="75%"
                     android:columnDelay="60%"
                     android:directionPriority="none"
                     android:direction="right_to_left"
                     android:animation="@anim/slide_in_left"/>
效果圖為:
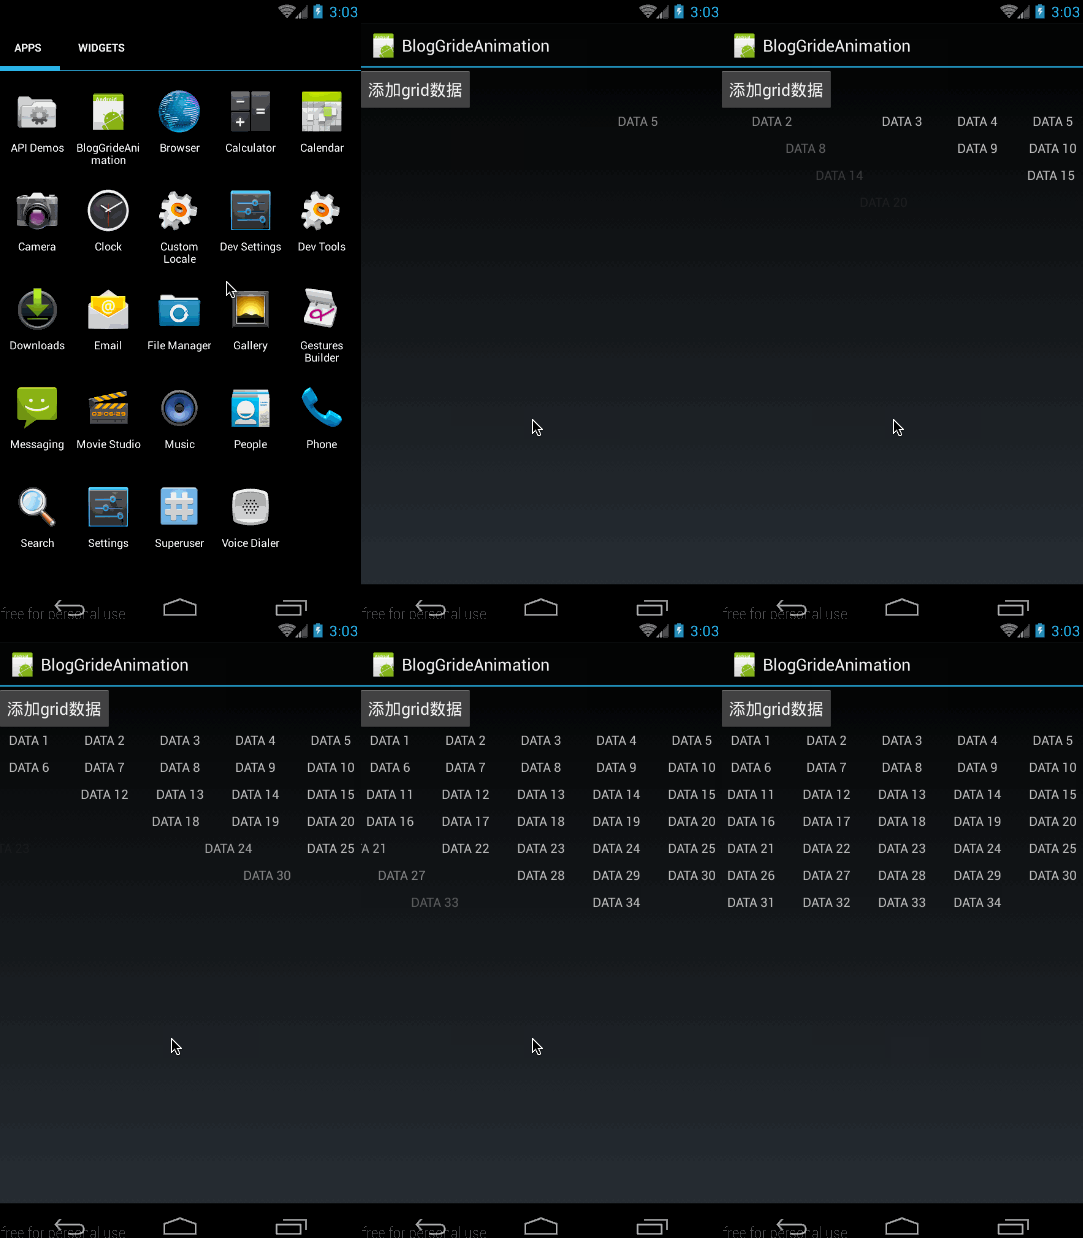
很明顯可以看出,各個item是從右向左入場的,同樣由於上下的入場順序沒有指定,預設是從上向下入場
android:direction=”top_to_bottom”從上向下開始動畫
對應的gride_animation.xml內容為:
<gridLayoutAnimation xmlns:android="http://schemas.android.com/apk/res/android"
                     android:rowDelay="75%"
                     android:columnDelay="60%"
                     android:directionPriority="none"
                     android:direction="top_to_bottom"
                     android:animation="@anim/slide_in_left"/>
效果圖為:
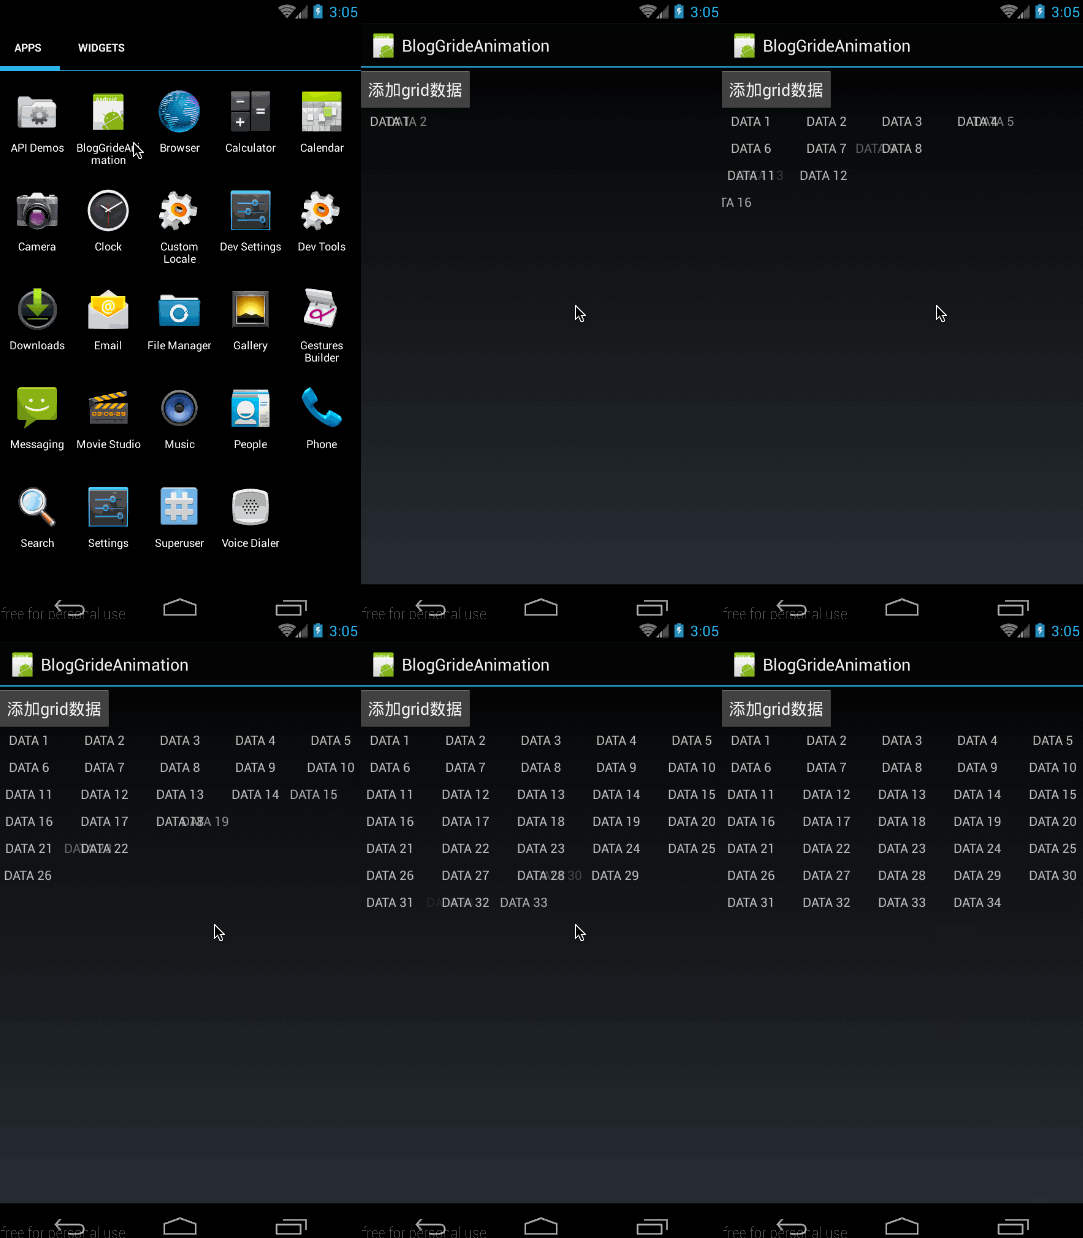
從效果圖中可以看出,各個item是從上向下入場的。由於左右入場順序沒有指定,所以預設是從左向右入場。
android:direction=”bottom_to_top”從下向上開始動畫
對應的gride_animation.xml內容為:
<gridLayoutAnimation xmlns:android="http://schemas.android.com/apk/res/android"
                     android:rowDelay="75%"
                     android:columnDelay="60%"
                     android:directionPriority="none"
                     android:direction="bottom_to_top"
                     android:animation="@anim/slide_in_left"/>
效果圖為:
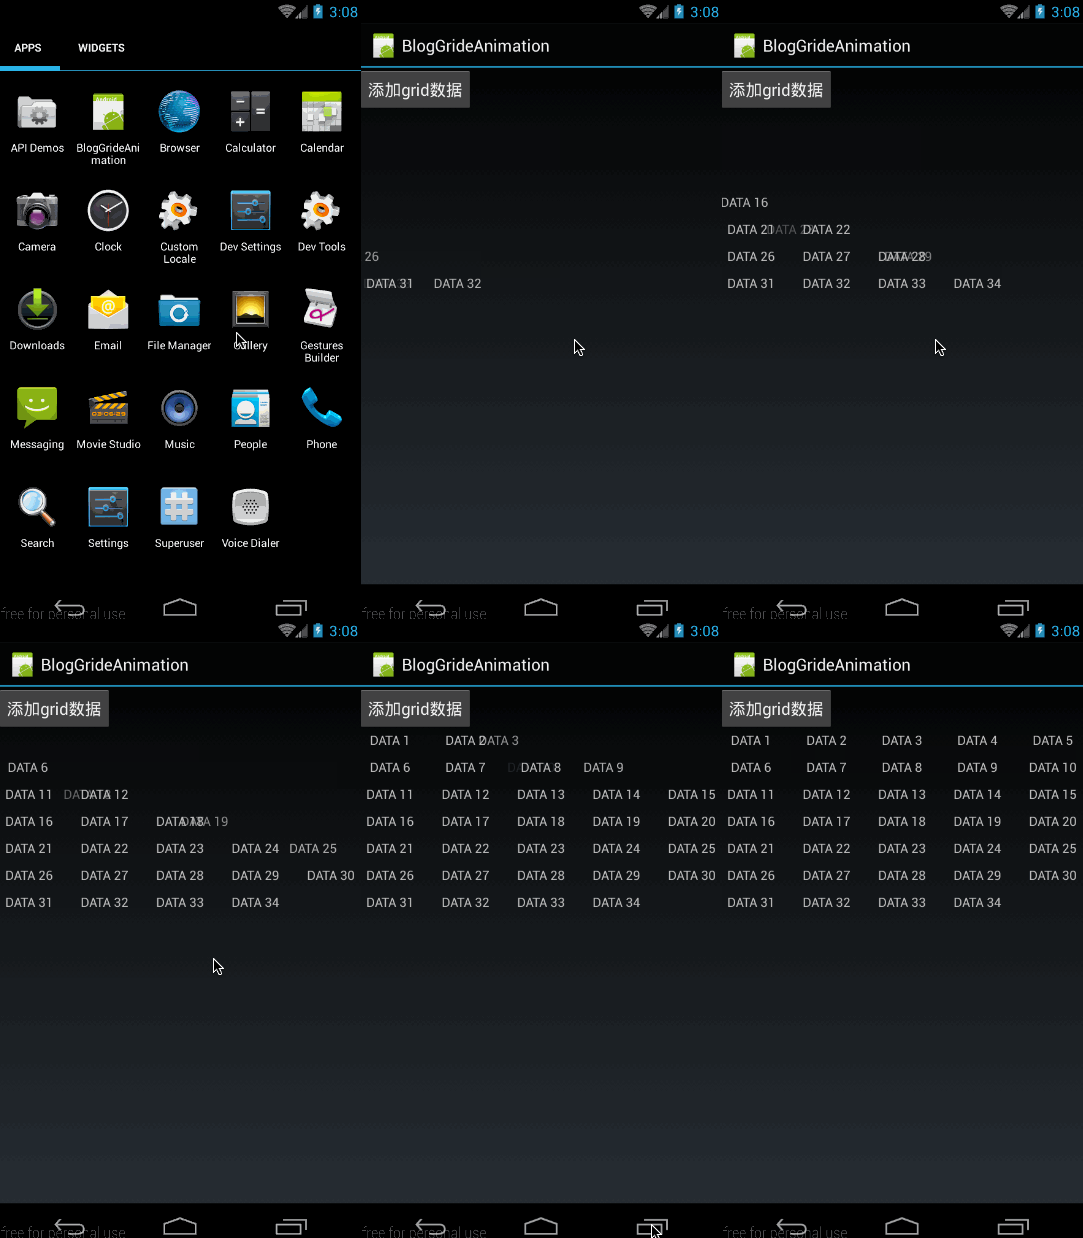
從效果圖中可以看出,各個item是從下向上入場的。同樣由於左右入場順序沒有指定,所以預設是從左向右入場。
組合:android:direction=”bottom_to_top|right_to_left”
前面我們說過,可以通過”|”將多個屬性值連線起來,我們這裡嘗試一下縱向從底向上入場,橫向從右向左入場。
對應的gride_animation.xml內容為:
<gridLayoutAnimation xmlns:android="http://schemas.android.com/apk/res/android"
                     android:rowDelay="75%"
                     android:columnDelay="60%"
                     android:directionPriority="none"
                     android:direction="bottom_to_top|right_to_left"
                     android:animation="@anim/slide_in_left"/>
對應效果圖為:
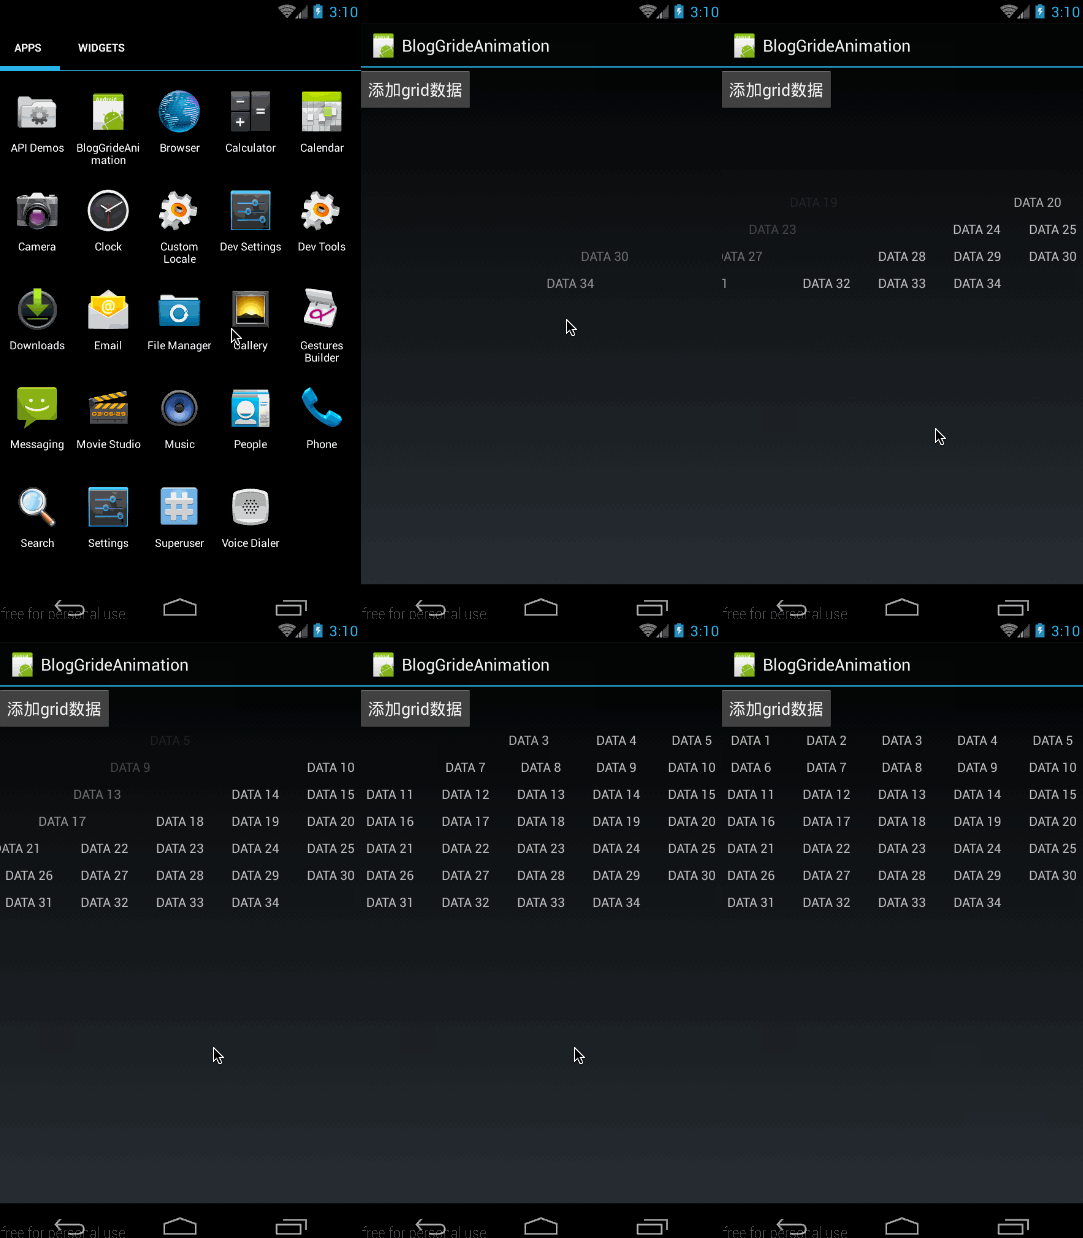
從效果圖中明顯可以看出,我們實現了縱向從底向上入場,橫向從右向左入場的效果。
到這裡,有關directionPriority和direction各個取值的意義已經講解完了,下面我們就來看看如何通過程式碼來實現GridLayoutAnimation。
四、GridLayoutAnimation的程式碼實現——GridLayoutAnimationController
1、概述
我們知道gridLayoutAnimation標籤在程式碼中對應GridLayoutAnimationController類,它的構造方法如下:
public GridLayoutAnimationController(Animation animation)
public GridLayoutAnimationController(Animation animation, float columnDelay, float rowDelay)
其中animation對應標籤屬性中的android:animation
columnDelay對應標籤屬性中的android:columnDelay,取值為float型別
rowDelay對應標籤屬性中的android:rowDelay,取值為float型別
然後是GridLayoutAnimationController的幾個函式:
/**
 * 設定列動畫開始延遲
 */
public void setColumnDelay(float columnDelay)
/**
 * 設定行動畫開始延遲
 */
 public void setRowDelay(float rowDelay)
 /**
 * 設定gridview動畫的入場方向。取值有:DIRECTION_BOTTOM_TO_TOP、DIRECTION_TOP_TO_BOTTOM、DIRECTION_LEFT_TO_RIGHT、DIRECTION_RIGHT_TO_LEFT
 */
 public void setDirection(int direction)
 /**
 * 動畫開始優先順序,取值有PRIORITY_COLUMN、PRIORITY_NONE、PRIORITY_ROW
 */
 public void setDirectionPriority(int directionPriority)
這些函式和意義都與xml中的屬性相對應,這裡就不再多講了,下面我們就來看看例項中的應用吧
2、示例
本部分將實現的效果圖如下:
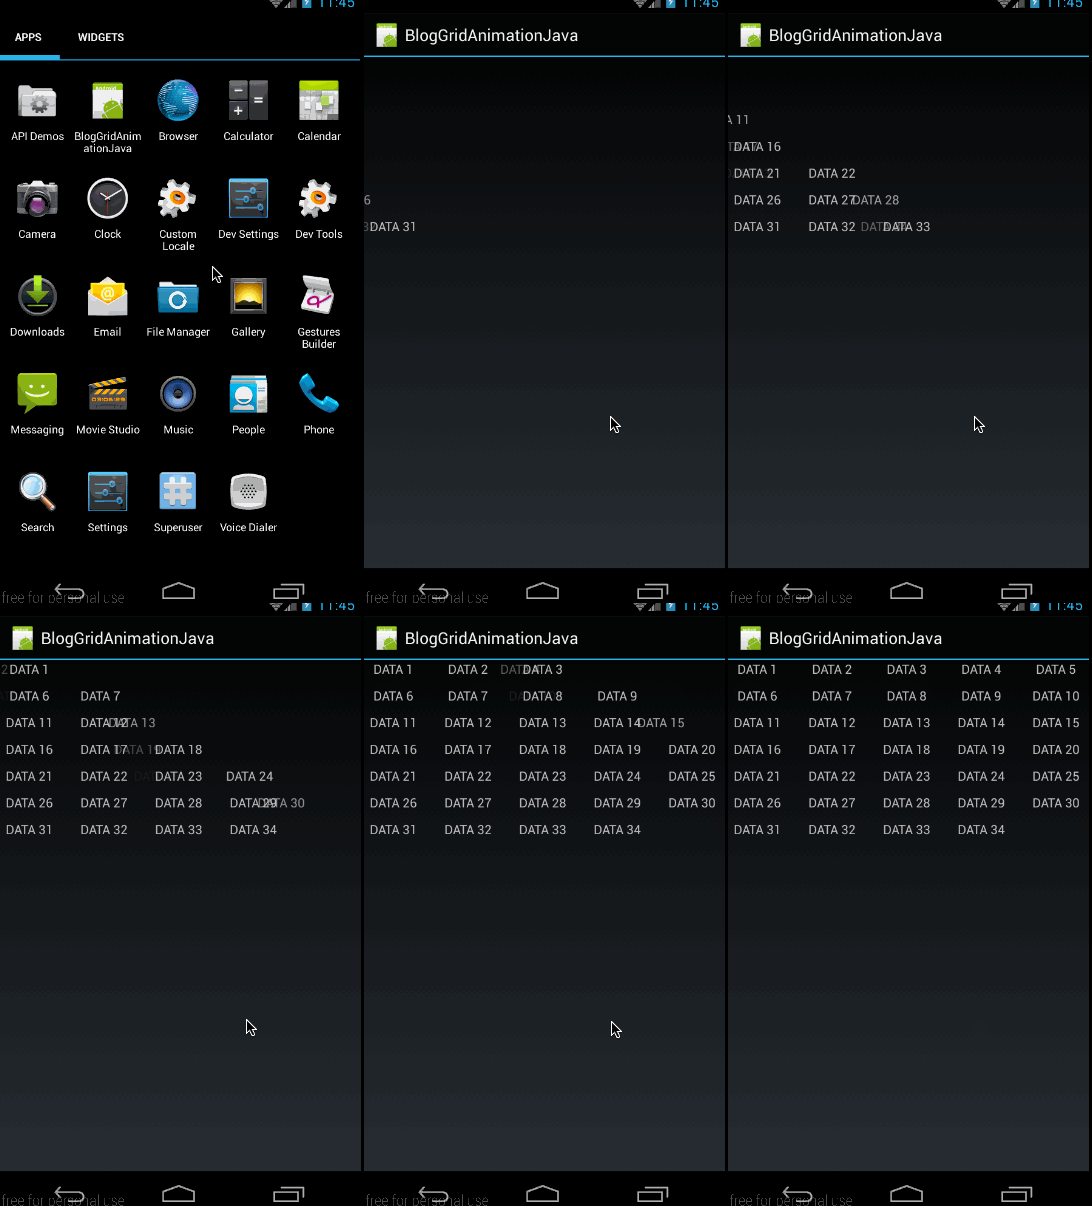
與xml實現的效果類似,只是這裡我們將不再寫grideAnimation的xml檔案,而是完全通過程式碼來構造grideAnimation。
無論怎樣,入場動畫還是需要的,所以我們同樣要建立一個slide_in_left.xml檔案:
<?xml version="1.0" encoding="utf-8"?>
<set xmlns:android="http://schemas.android.com/apk/res/android" android:duration="1000">
    <translate android:fromXDelta="-50%p" android:toXDelta="0"/>
    <alpha android:fromAlpha="0.0" android:toAlpha="1.0" />
</set>
然後是佈局檔案main.xml:
<?xml version="1.0" encoding="utf-8"?>
<LinearLayout xmlns:android="http://schemas.android.com/apk/res/android"
              android:layout_width="match_parent"
              android:layout_height="match_parent"
              android:orientation="vertical">


    <GridView
            android:id="@+id/grid"
            android:layout_width="match_parent"
            android:layout_height="match_parent"
            android:columnWidth="60dp"
            android:gravity="center"
            android:horizontalSpacing="10dp"
            android:numColumns="auto_fit"
            android:stretchMode="columnWidth"
            android:verticalSpacing="10dp"/>

</LinearLayout>
最後是MyActivity中的填充部分:
public class MyActivity extends Activity {
    private GridAdapter mGrideAdapter;
    private List<String> mDatas = new ArrayList<>();
    @Override
    public void onCreate(Bundle savedInstanceState) {
        super.onCreate(savedInstanceState);
        setContentView(R.layout.main);

        /**
         * 填充gridview
         */
        GridView grid = (GridView) findViewById(R.id.grid);
        mDatas.addAll(getData());
        mGrideAdapter = new GridAdapter();
        grid.setAdapter(mGrideAdapter);

        Animation animation = AnimationUtils.loadAnimation(MyActivity.this,R.anim.slide_in_left);
        GridLayoutAnimationController controller = new GridLayoutAnimationController(animation);
        controller.setColumnDelay(0.75f);
        controller.setRowDelay(0.5f);
        controller.setDirection(GridLayoutAnimationController.DIRECTION_BOTTOM_TO_TOP|GridLayoutAnimationController.DIRECTION_LEFT_TO_RIGHT);
        controller.setDirectionPriority(GridLayoutAnimationController.PRIORITY_NONE);
        grid.setLayoutAnimation(controller);
        grid.startLayoutAnimation();
    }

    private List<String> getData() {

        List<String> data = new ArrayList<String>();
        for (int i = 1;i<35;i++){
            data.add("DATA "+i);
        }
        return data;
    }


    public void addData(){
        mDatas.addAll(mDatas);
        mGrideAdapter.notifyDataSetChanged();
    }


    public class GridAdapter extends BaseAdapter {
        public View getView(int position, View convertView, ViewGroup parent) {
            TextView i = new TextView(MyActivity.this);
            i.setText(mDatas.get(position));
            i.setLayoutParams(new GridView.LayoutParams(GridView.LayoutParams.WRAP_CONTENT, GridView.LayoutParams.WRAP_CONTENT));
            return i;
        }

        public final int getCount() {
            return mDatas.size();
        }

        public final Object getItem(int position) {
            return null;
        }

        public final long getItemId(int position) {
            return position;
        }
    }
}
這部分程式碼雖然比較長,但填充grideView部分與上段實現是一致的。唯一不同的就是設定GridLayoutAnimationController的部分:
Animation animation = AnimationUtils.loadAnimation(MyActivity.this,R.anim.slide_in_left);
GridLayoutAnimationController controller = new GridLayoutAnimationController(animation);
controller.setColumnDelay(0.75f);
controller.setRowDelay(0.5f);
controller.setDirection(GridLayoutAnimationController.DIRECTION_BOTTOM_TO_TOP|GridLayoutAnimationController.DIRECTION_LEFT_TO_RIGHT);
controller.setDirectionPriority(GridLayoutAnimationController.PRIORITY_NONE);
grid.setLayoutAnimation(controller);
grid.startLayoutAnimation();
這部分理解起來難度也不大,無外乎就是構造一個GridLayoutAnimationController,然後通過它的各個set函式把各個屬性值設定進去。
原始碼在文章底部給出
到這裡有關LayoutAnimationt和GridLayoutAnimation的部分就講完了,下面對他們的特性做一個總結。
總結:
1、LayoutAnimationt和GridLayoutAnimation是在api1時就已經引入進來了,所以不用擔心API不支援的問題
2、gridLayoutAnimation與layoutAnimation一樣,都只是在viewGroup建立的時候,會對其中的item新增進入動畫,在建立完成後,再新增資料將不會再有動畫!
3、LayoutAnimationt和GridLayoutAnimation僅支援Animation動畫,不支援Animator動畫;正是因為它們在api 1就引入進來了,而Animator是在API 11才引入的,所以它們是不可能支援Animator動畫的。
這篇文章到這裡就結束了,這篇文章實現的效果只有在初次建立時才會有動畫,下篇將給大家講解如何在執行中給viewGroup中的item使用進入退出動畫。
原始碼內容:
1、《BlogLayoutAnimation》:第一部分,LayoutAnimation xml實現與程式碼實現所對應的程式碼
2、《BlogGrideAnimation》:第二部分的第一段,GrideAnimation的xml實現所對應的程式碼
3、《BlogGridAnimationJava》:第二部分的第二段,GrideAnimation的JAVA實現所對應的程式碼。
