
head first python選讀(5)
阿新 • • 發佈:2018-12-23
python web 開發
犯了低階錯誤,這本書看了一半了才知道書名應為《head first python》,不是hand first..
現在開始一個web應用。
總算是熟悉的內容了。但專案的總體的配置還是有些麻煩的。
考慮到Kelly教練的不斷變更的需求,現在需要開發一個網站。包括:
- 歡迎頁面
- 選擇選手
- 顯示時間
MVC模式和架構
- M 模型:資料儲存。你需要一個model模組,用一個函式比如set把txt檔案讀出來,變成一個pickle,所有資料放到一個字典裡
- V 檢視:前端介面
- C 控制:業務程式碼。用一個get方法把資料取出來!返回一個數據字典。
現在來思考架構吧:

在根目錄下以下程式碼可在本地執行一個基於python的簡單的http伺服器
# app.py
from http.server import HTTPServer, CGIHTTPRequestHandler

port = 8080

httpd = HTTPServer(('', port), CGIHTTPRequestHandler)
print("Starting simple_httpd on port: " + str(httpd.server_port))
httpd.serve_forever()
這個app.py是所有檔案的入口。因此所有的檔案都依靠這個檔案進行互動。路徑以根目錄為主。
看到這個就顯示成功了
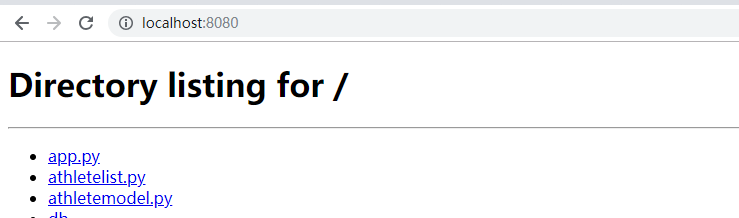
新增index.html可完成歡迎頁的開發.
模型
模型有兩個檔案
# athletelist.py
def sanitize(score):
    splitter = '.'
    if '-' in score:
        splitter = '-'
    if ':' in score:
        splitter = ':'
    elif '.' in splitter:
        return score
    (mins , sec) = score.split(splitter)
    return mins+'.'+sec

class AthleteList(list):
    def __init__(self, a_name, a_birth=None, a_scores=[]):
        list.__init__(list([]))
        self.name = a_name
        self.birth = a_birth
        self.extend(a_scores)
    def top3(self):
        return sorted(set([sanitize(score) for score in self]))[0:3]
然後把邏輯寫好
# athleteModal.py
import pickle
from athletelist import AthleteList

def get(filename):
    try:
        with open(filename) as data:
            line = data.readline()
            scores = line.split(',')
            return AthleteList(scores.pop(0), scores.pop(0), scores)
    except IOError as err:
        print('file error.'+str(err))


# 把讀取的資料轉化為二進位制檔案,提供一個檔名列表作為引數
def set_data(file_list):
    all_athletes={}
    for item in file_list:
        with open(item) as data:
            ath=get(item)
            all_athletes[ath.name]=ath
    try:
        pickle.dump(all_athletes,open('db','wb'))
    except IOError as ioerr:
        print('file err:'+str(ioerr))
    print('set_data finished.')
    return all_athletes

# 從二進位制檔案中讀取資料,
def get_from_store():
    all_athletes={}
    data=pickle.load(open('db','rb'))
    all_athletes=data
    print(all_athletes)
    return all_athletes

set_data(['james.txt','julie.txt','sarah.txt','mickey.txt'])
看到了熟悉的JSON!
模板引擎
模板引擎會用到一些新的方法,在此需要讀懂。
from string import Template
# 從內建的string庫匯入Template類,可支援字串替換模板
def start_response(resp="text/html"):
return('Content-type: ' + resp + '\n\n')
# 建立一個content-type:預設為text-html
def include_header(the_title):
with open('templates/header.html') as headf:
head_text = headf.read()
header = Template(head_text)
return(header.substitute(title=the_title))
# 開啟header.html,設定網站標題
def include_footer(the_links):
with open('templates/footer.html') as footf:
foot_text = footf.read()
link_string = ''
for key in the_links:
link_string += '<a href="' + the_links[key] + '">' + key + '</a> '
footer = Template(foot_text)
return(footer.substitute(links=link_string))
# 開啟 footer檔案,渲染腳部連結
def start_form(the_url, form_type="POST"):
return('<form action="' + the_url + '" method="' + form_type + '">')
# 生成一個post表單,表單跳轉action
def end_form(submit_msg="Submit"):
return('<p></p><input type=submit value="' + submit_msg + '"></form>')
# 提交按鈕
def radio_button(rb_name, rb_value):
return('<input type="radio" name="' + rb_name +'" value="' + rb_value + '"> ' + rb_value + '<br />')
# 渲染單選框
def u_list(items):
u_string = '<ul>'
for item in items:
u_string += '<li>' + item + '</li>'
u_string += '</ul>'
return(u_string)
# 渲染無序列表
def header(header_text, header_level=2):
return('<h' + str(header_level) + '>' + header_text +
'</h' + str(header_level) + '>')
# 渲染標題
def para(para_text):
return('<p>' + para_text + '</p>')
#渲染內容前端模板怎麼響應這個cgi呢?簡單寫一下吧。用$表示變數。
header:
<html>
<head>
<title>$title</title>
<link type="text/css" rel="stylesheet" href="/coach.css" />
</head>
<body>
<h1>$title</h1>
footer:
<p>
$links
</p>
</body>
</html>
建立列表邏輯
現在建立一個gen_liust.py,要求執行選手時,生成一個選擇選手的頁面。你所要做的就是閱讀模板引擎文件。
# gen_list.py
# 建立選手列表
import athletemodel
import fe
import glob
# glob可向作業系統查詢一個檔名列表
# 查詢,返回列表
data_files=glob.glob('data/*.txt')
#讀取資料
athletemodel.set_data(data_files)
athletes=athletemodel.get_from_store()
print(fe.start_response())
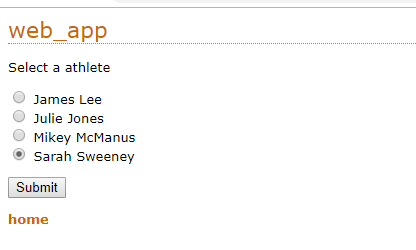
print(fe.include_header('web_app'))
print(fe.start_form('http://www.baidu.com'))
print(fe.para('Select a athlete'))
for athlete in athletes:
print(fe.radio_button('select_athlete',athletes[athlete].name))
print(fe.end_form())
print(fe.include_footer({'home':'/index.html'}))在首頁檔案中,a標籤為<a href="cgi-bin/gen_list.py">
即可跳轉相應的頁面。
建立資料介面
顯示某人的計時資料和快捷連結。
獲取post上傳資料L
import cgi
form_data=cgi
剩下的很好做了:
import cgi
import fe
import athletemodel

athletes=athletemodel.get_from_store()

#獲取表單資料並放到一個字典中
form_data=cgi.FieldStorage()
athlete_name=form_data['name'].value


# 渲染頁面
print(fe.start_response())
print(fe.include_header(athlete_name))
print(fe.u_list(athletes[athlete_name].top3()))

print(fe.include_footer({'home':'/index.html','back':'gen_list.py'}))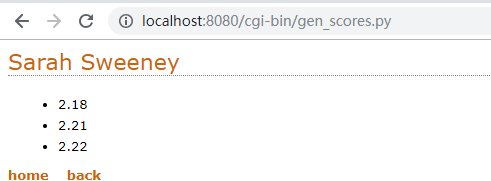
表單校驗,錯誤記錄
如果我在表單啥子也不填就提交。就很難跟蹤錯誤所在.
實際開發過程中,調bug會花費很多時間。應該想辦法在web伺服器上友好地顯示錯誤資訊。
import cgitb
cgitb.enable()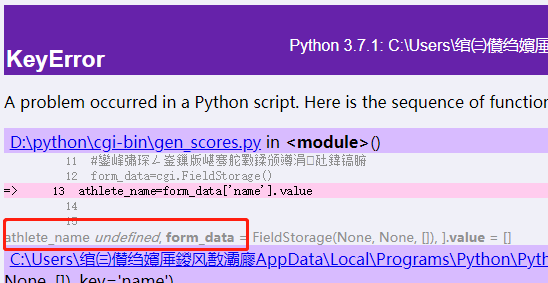
顯然就可以找到原因所在了。