
使用innobackupex、xtrabackup恢復Mysql資料庫
安裝xtrabackup的資料庫
# yum install https://www.percona.com/redir/downloads/percona-release/redhat/latest/percona-release-0.1-3.noarch.rpm開始安裝xtrabackup
安裝依賴包
# yum -y install perl perl-devel libaio libaio-devel perl-Time-HiRes perl-DBD-MySQL然後
找到xtrabackup相關的包# yum list | grep xtrabackup據,
yum安裝
yum -y install percona-xtrabackup.x86_64
恢復mysql需先停止mysqld服務
# systemctl stop mysqld將備份的資料庫備份filename拷貝到本機的/home/mysql/目錄
# cd /home/mysql/# tar vizxf filename.tar.gz安裝相關依賴,否則會報錯
# yum -y install perl-Digest-MD5

# yum -y install rsync
執行:
# innobackupex --defaults-file=./backup-my. 系統顯示 innobackupex: completed OK!,則資料恢復成功。
執行 ls

檢視需要恢復的資料庫有b2b、cgwy、cgwy_22 ,然後把這些需要恢復的資料庫目錄複製到/var/lib/mysql目錄
# rsync -avz b2b cgwy cgwy_22 ib* /var/lib/mysql/然後再修改b2b cgwy cgwy_22的使用者與組為mysql
# chown -R mysql:mysql b2b
# chown -R mysql:mysql cgwy
# chown -R mysql:mysql cgwy_22
啟動mysql,並檢視資料庫的表裡內容
# systemctl start mysqld# mysql -uroot -p輸入密碼
# mysql> show databases;系統顯示入選
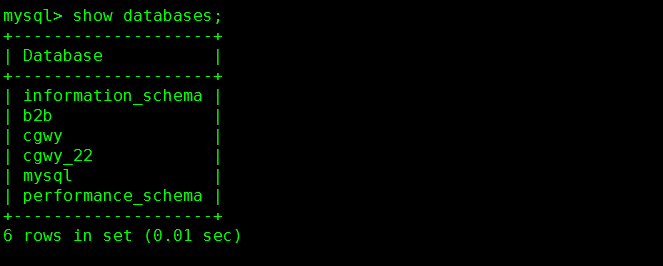
選定資料庫
# mysql> use b2b;檢視所有表
# mysql> show tables;查看錶中內容
# mysql> select * from table_name;若無誤,至此,大功告成!
方法二
安裝xtrabackup及拷貝mysql備份到home/mysql目錄,解壓mysql備份,然後刪除備份壓縮檔案
# cd /home/mysql/
# tar zxvf hins1300235_data_20161103031518.tar.gz
# rm -rf hins1300235_data_20161103031518.tar.gz
切換本機mysql安裝目錄 /var/lib/mysql
# cd /var/lib/備份mysql及刪除
# cp -a mysql/ mysql.bak# cd mysql
# rm -rf * 恢復檔案分兩步
第1步是apply-log,為了加快速度,一般建議設定–use-memory,這個步驟完成之後,目錄/mysql下的備份檔案已經準備就緒。因為我們的檔案比較少,因此我們不需要設定–user-memory產數檔案 ;第2步是copy-back,即把備份檔案拷貝至原資料目錄下:
# cd mysql
# innobackupex --defaults-file=/etc/my.cnf --user=root  --apply-log /home/mysql --ibbackup xtrabackup_56
# innobackupex --defaults-file=/etc/my.cnf --user=root --copy-back /home/mysql --ibbackup xtrabackup_56
修改許可權 啟動服務
# cd ..
# chown mysql:mysql /var/lib/mysql/ -R
# systemctl start mysqld
登陸檢視,同方法一
如果登陸,輸入密碼 提示:
ERROR 1045 (28000): Access denied for user 'root'@'localhost' (using password: YES)則需要重置user密碼:
停止服務:
# systemctl stop mysqld
# mysqld_safe --user=mysql --skip-grant-tables --skip-networking &
此時會莫名其妙的停頓在下面介面
[[email protected] ~]# 161106 07:03:25 mysqld_safe Logging to '/var/log/mysqld.log'.
161106 07:03:25 mysqld_safe Starting mysqld daemon with databases from /var/lib/mysql
按ctrl+z中斷即可
在輸入mysql,回車 登陸
[[email protected] ~]# mysql
Welcome to the MySQL monitor.  Commands end with ; or \g.
Your MySQL connection id is 1
Server version: 5.6.34 MySQL Community Server (GPL)

Copyright (c) 2000, 2016, Oracle and/or its affiliates. All rights reserved.

Oracle is a registered trademark of Oracle Corporation and/or its
affiliates. Other names may be trademarks of their respective
owners.

Type 'help;' or '\h' for help. Type '\c' to clear the current input statement.

mysql>
mysql>use mysql;
Reading table information for completion of table and column names
You can turn off this feature to get a quicker startup with -A

Database changed
mysql> select host,user from user;
+----------------+------------+
| host           | user       |
+----------------+------------+
| %              | aurora     |
| %              | b2b        |
| 127.0.0.1      | root       |
+----------------+------------+
3 rows in set (0.01 sec)
mysql>UPDATE user SET Password = password ( '123456' ) WHERE User = 'b2b' ;
mysql> flush privileges ;
Query OK, 0 rows affected (0.01 sec)
mysql> quit
可見user有b2b 和 root ,其中b2b可以在任何主機訪問,root只限本地登陸,
所以,上面我重置了b2b密碼為:123456
重新登陸:
# mysql -ub2b -p
Enter password:
Welcome to the MySQL monitor.  Commands end with ; or \g.
Your MySQL connection id is 16
Server version: 5.6.34 MySQL Community Server (GPL)

Copyright (c) 2000, 2016, Oracle and/or its affiliates. All rights reserved.

Oracle is a registered trademark of Oracle Corporation and/or its
affiliates. Other names may be trademarks of their respective
owners.

Type 'help;' or '\h' for help. Type '\c' to clear the current input statement.

mysql>
mysql>
mysql> show databases;
+--------------------+
| Database           |
+--------------------+
| information_schema |
| b2b                |
| cgwy               |
| cgwy_22            |
| mysql              |
| performance_schema |
| report             |
+--------------------+
7 rows in set (0.01 sec)
一切搞定!