Google / Facebook / Twitter 快速登入
本來想去賺點錢,但又不想花錢加入外包網站的VIP,所以我每天都上外包網站看看有沒有「非VIP可以免費提案」 的案件可做的,但是免費的案件都太難,或完全沒聽過的技術 @[email protected];。
預設外包網站會寄業主新建立的外包案來,看到有一個案子滿有趣的:
| 案件預算 | 1萬~5萬 |
| 案件內容 | 一、案件說明:ECShop 二次開發新功能 1.Google 快速登入 2.金額千位分隔符 3.PAYPAL 模組修改,收到錢後臺會顯示已付款 4.繳費程式碼回傳到 ECShop 訂單 5.後臺的虛擬卡列表需要輸入密碼才能開啟 6.使用者密碼登入錯誤 X 次暫時鎖定 O 分鐘不能登入並…. |
這個外掛在 wordpress 裡的「外掛」裡輸入關鍵字進去安裝就可以了,會比較簡單。
外掛安裝好後,作者附的 Facebook login 說明:
Application id and secret (also sometimes referred as Consumer key and secret or Client id and secret) are what we call an application credentials. This application will link your website moca-shop.com to Facebook API
These credentials may also differ in format, name and content depending on the social network.
To enable authentication with this provider and to register a new Facebook API Application, follow the steps :
2. Select Add a New App
3. Fill out Display Name, Namespace, choose a category and click Create App.
4. Go to Settings page and click on Add Platform. Choose website and enter in the new screen your website url in App Domains and Site URL fields. They should match with the current hostname moca-shop.com.
5. Go to the Status & Review page and choose yes where it says Do you want to make this app and all its live features available to the general public?.
6. Facebook normally shouldn’t require an Authorized redirect URI, however if it did, use both of those urls on Facebook Login > Settings > Valid OAuth redirect URIs:.
- http://moca-shop.com/wp-content/plugins/wordpress-social-login/hybridauth/?hauth.done=Facebook
- http://moca-shop.com/wp-content/plugins/wordpress-social-login/hybridauth/?hauth_done=Facebook
7. Go back to the Dashboard page and past the created application credentials (APP ID and Secret) into the boxes above.
 |
 |
 |
And that’s it!
If for some reason you still can’t manage to create an application for Facebook, first try to Google it, then check it on Youtube, and if nothing works ask for support.
心得:Facebook login 一下子就可以設定好。比設定 Google 簡單一點。只是這個外掛在Facebook login 時「多」跟 user 要了朋友清單(Friends List)的許可權,這一點很奇怪,只有要Login 拿別人好友名單做什麼?花了5分鐘找不到怎麼關掉這一個許可權,先跳過…。
作者附的 Google Login 說明:
Application id and secret (also sometimes referred as Consumer key and secret or Client id and secret) are what we call an application credentials. This application will link your website moca-shop.com to Google API and these credentials are needed in order for Google users to access your website.
These credentials may also differ in format, name and content depending on the social network.
To enable authentication with this provider and to register a new Google API Application, follow the steps :
2. On the Dashboard sidebar click on Project then click “Create Project”.
3. Once the project is created. Select that project, then APIs & auth > Consent screen and fill the required information.
4. Then APIs & auth > APIs and enable “Google+ API”. If you want to import the user contatcs enable “Contacts API” as well.
5. After that you will need to create an new application: APIs & auth > Credentials and then click “Create new Client ID”.
6. On the “Create Client ID” popup :
- Select “Web application” as your application type.
- Put your website domain in the Authorized JavaScript origins field. This should match with the current hostname moca-shop.com.
- Provide this URL as the Authorized redirect URI for your application:
http://moca-shop.com/wp-content/plugins/wordpress-social-login/hybridauth/?hauth.done=Google
7. Once you have registered past the created application credentials (Client ID and Secret) into the boxes above.
 |
 |
 |
And that’s it!
If for some reason you still can’t manage to create an application for Google, first try to Google it, then check it on Youtube, and if nothing works ask for support.
作者附的操作說明,和目前Google 小小改版之後有一點點不太一樣,不過介面差不多,一下小就都能設好。這個外掛需要 2 個值,Application ID/Application Secret,我以為 Application ID 是 project ID, 後來google show 的錯誤訊息才知道 Application ID=使用者端ID, 使用者端密碼,這2個值可以在建立好憑證時下載(client_id.json),也可以在建立好憑證時,點這個憑證後面的「小鉛筆」點示,點了之外的畫面如下:
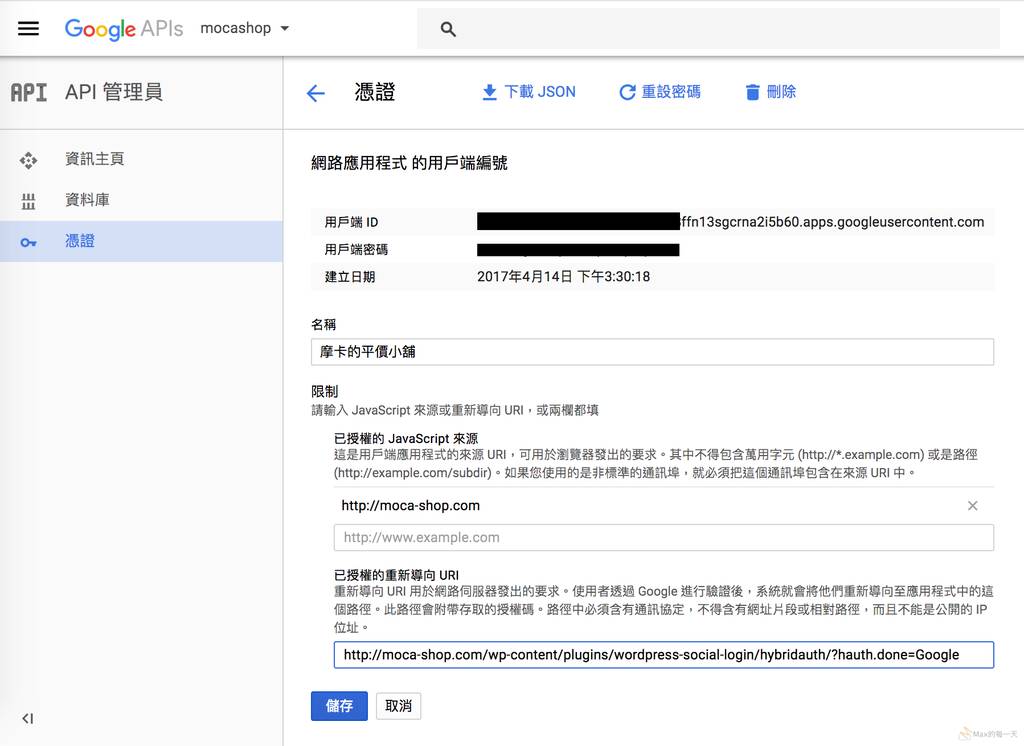
這個設計很怪,沒什麼會想到要去點一下那個小鉛筆的小圖。
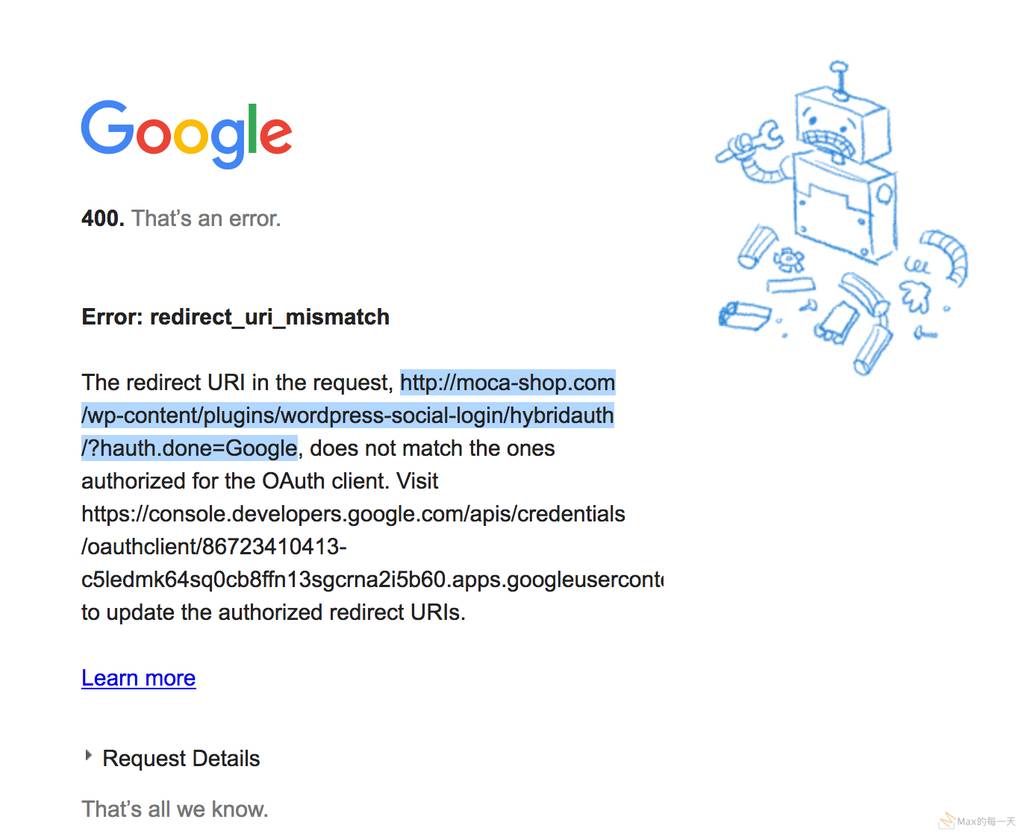
其實,亂設都沒關係,那裡設錯Google 都會跟我們講,下面的這個錯誤是因為上面沒有設定「已授權的重新導向 URI」,這一點看的出來google 比較重視安全性,這一個專案在設定facebook 時沒有,我覺得是多餘的,沒設google 要什麼我們就設給他。
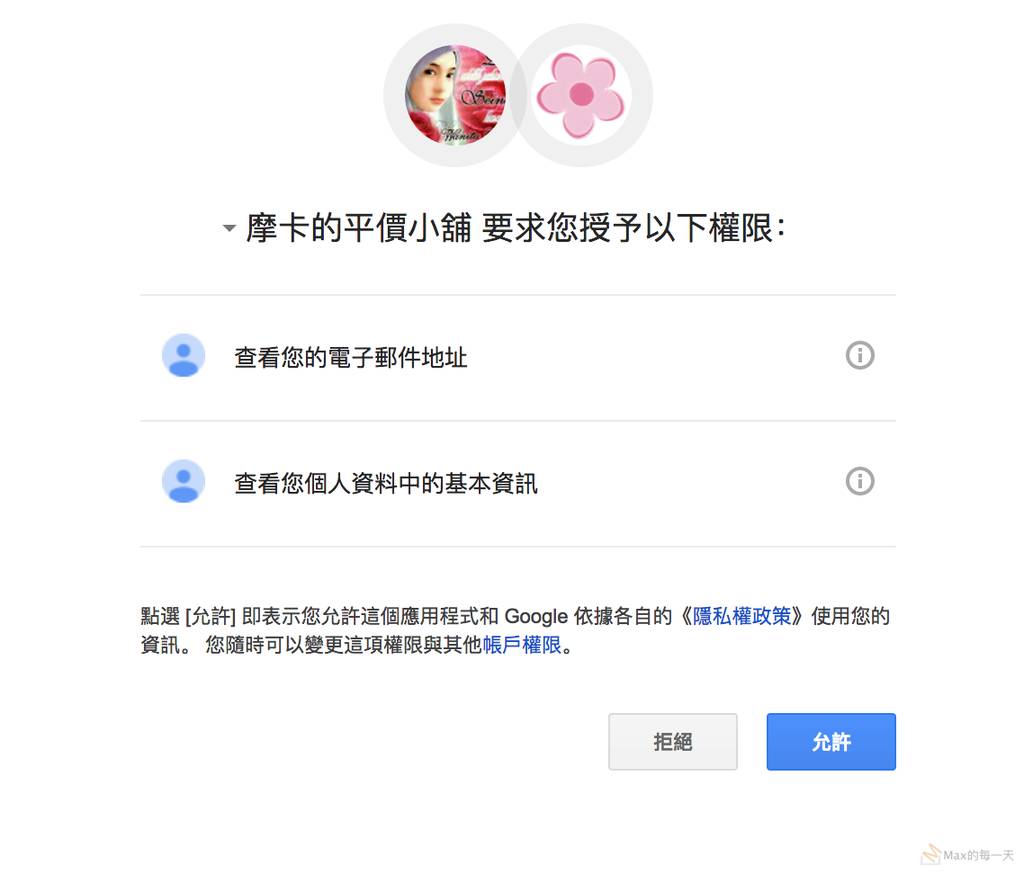
設好之後,到前臺點一下 google 登入就會出現下圖:
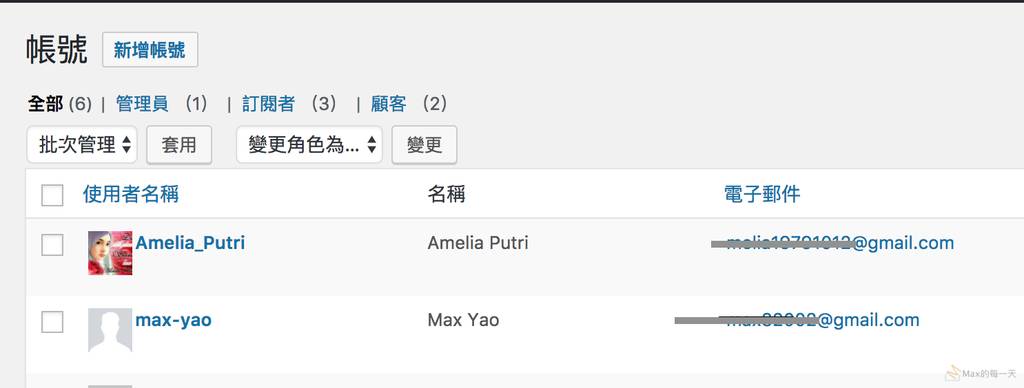
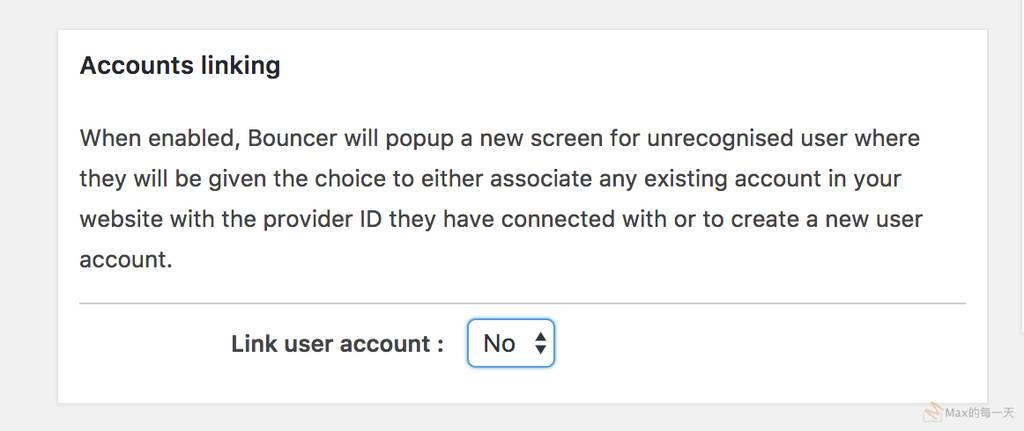
預設WordPress Social Login值是去問 客人要link 即有帳號,還是建個新的,這似乎太麻煩,所以關掉下面的設定值(Accounts linking:NO):
設好後,第一筆是 Google 登入,OK,也拿到大頭照,第2筆是Facebook登入OK, 也拿到FB大頭照。