Setup Unit Testing with TFS 2015
Setup Unit Testing with TFS 2015
Create unit test project in solution
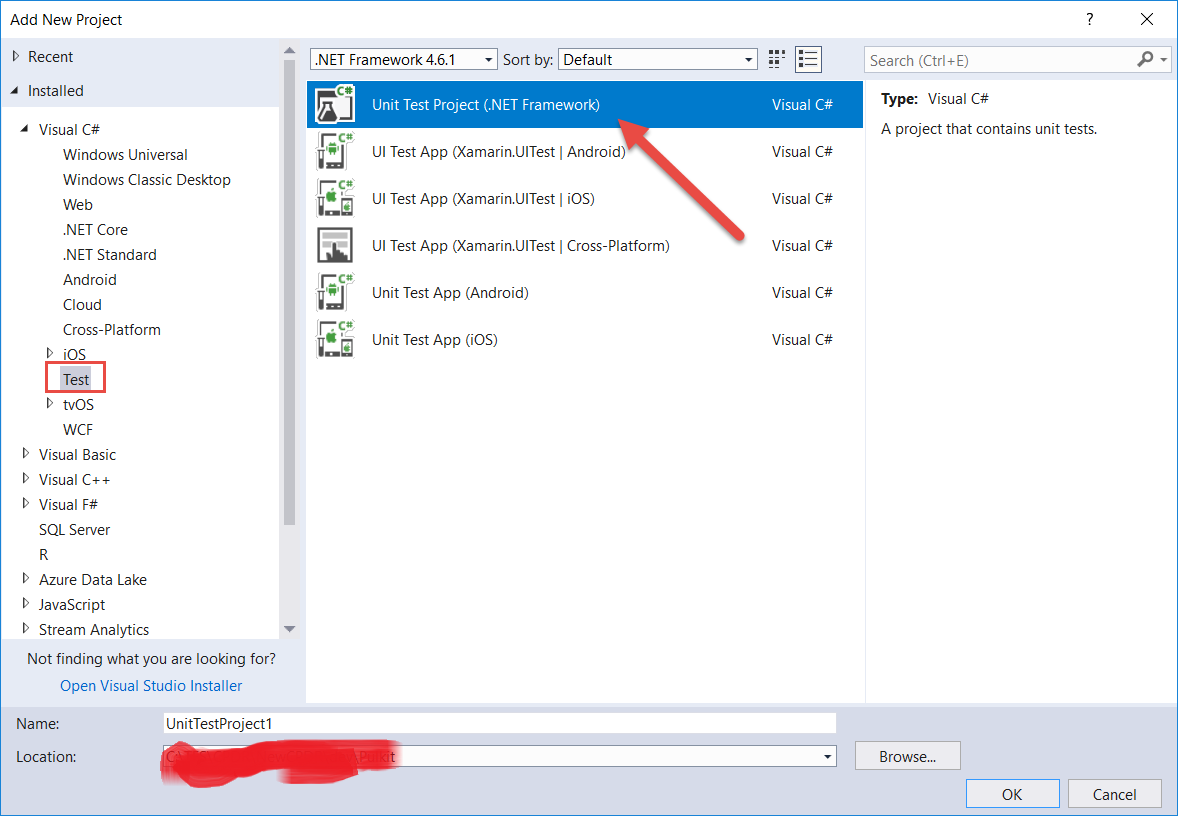
To get started with Unit Testing your Project along with the DevOps Process, we need to add Unit Test Project in your solution. E.g. if we have a web application, add the Unit Test Project the following way:
- Right-click solution
- Add New Project
- Select Unit Test Project as shown below
Any Unit Testing framework like MSTest or NUnit can be used to create unit test cases.

Add Unit Test Cases
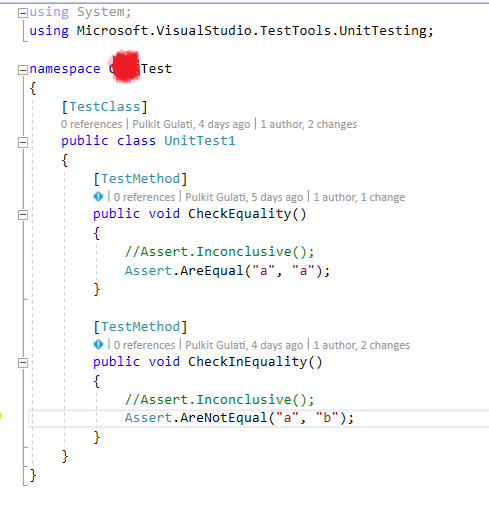
Following the convention of adding Unit test cases, add a class with same name of the class whose functionality requires to be unit tested with “Test” as suffix in the name.
Below is an example of dummy test-cases. The class name can be changed accordingly.
E.g. for a class named “Upload.cs”, add a unit test class named “UploadTest.cs”.

The test cases can be tested by:
- Right-click inside a method to run that single test case.
- Right-click inside the class outside all methods to run all test cases.
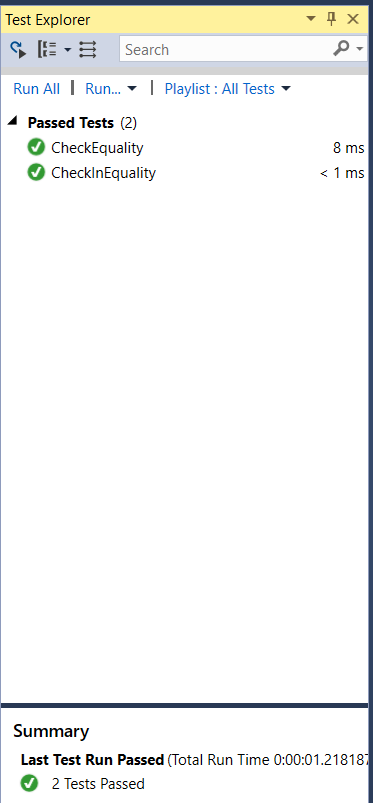
- View the results in the test explorer.

We have AAA pattern to write Unit Test cases:
- Arrange all the necessary preconditions and inputs.
- Act on the object or method under test.
- Assert that the expected results have occurred.
Build definition with test step
Create a build definition with the following tasks for your environment.
e.g. To test your Dev environment build add the following build tasks. Please note the configuration may change as per requirements:
- Visual Studio Build to build the solution

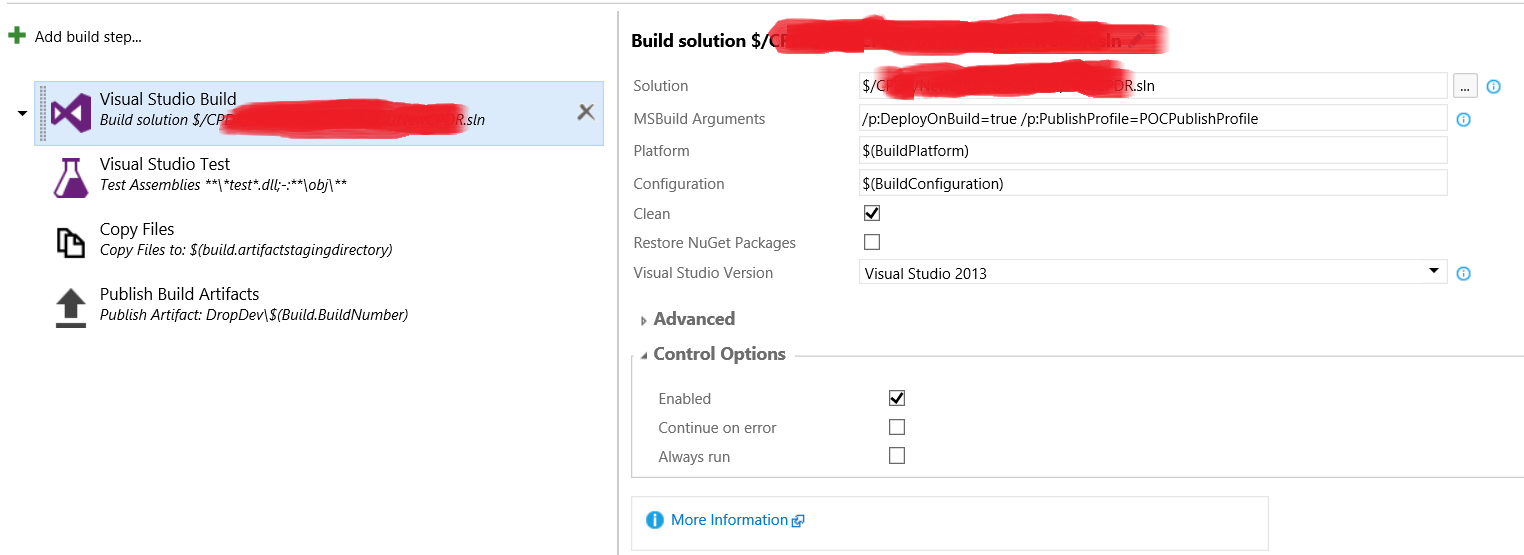
2. Visual Studio Test to run the test cases


3. Copy Files from Source directory to artifacts staging directory

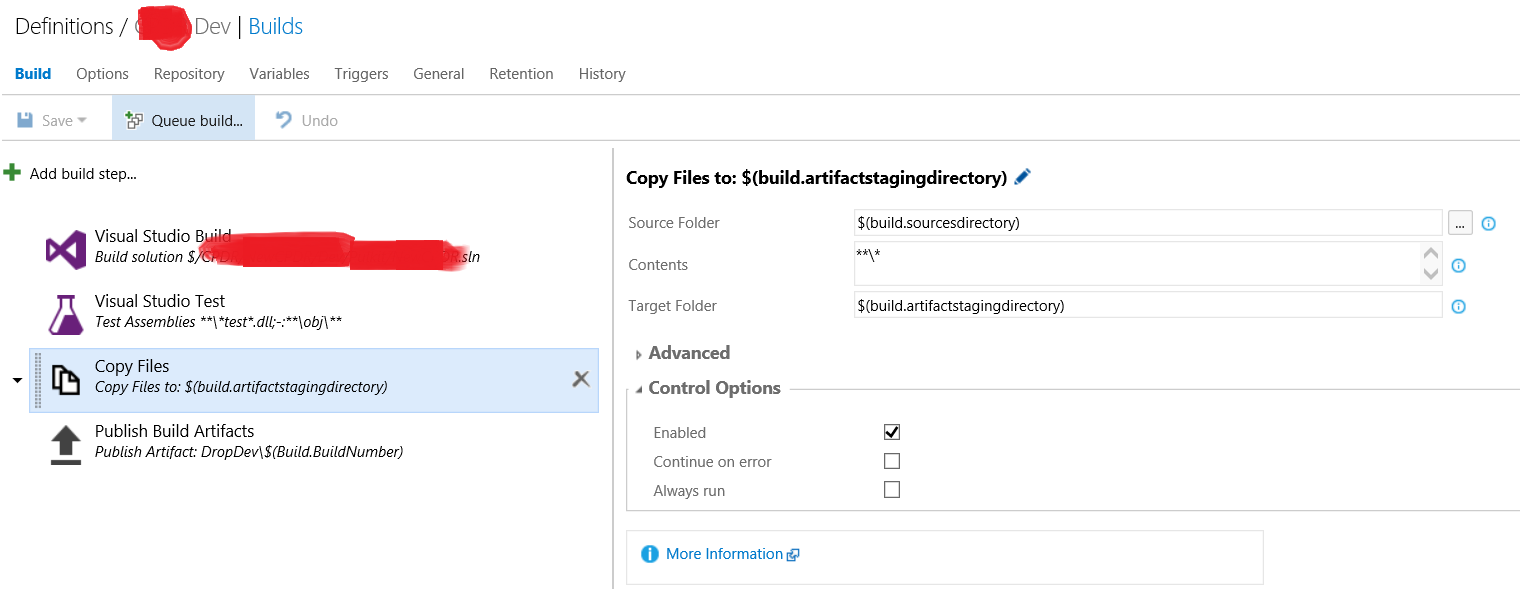
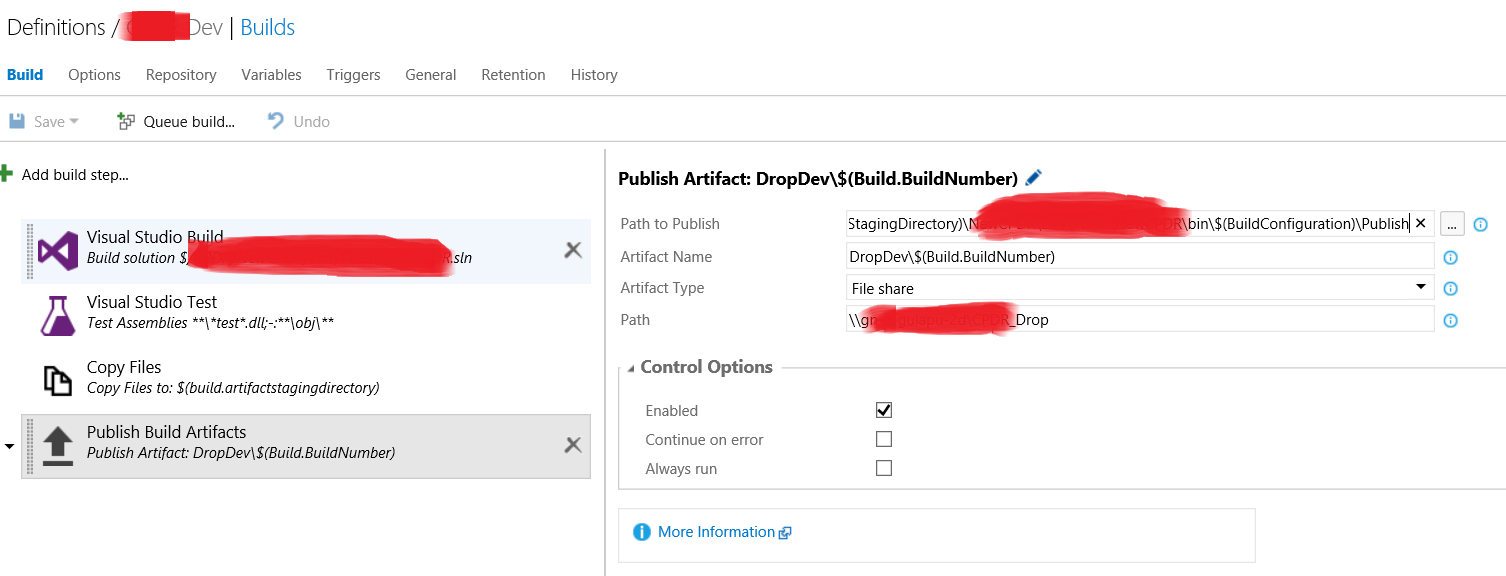
4. Publish Build artifacts from artifacts staging directory to deployment folder / shared location. Only the selected files from the Publish folder are copied to the shared path in this case.

Agent capabilities for unit testing
The General tab in the build definition shows the Demands for the build steps that we’ve added. The same capabilities should exist on the agent that’ll be used to build and run the test steps.
e.g.
- Msbuild is used to build the project.
- Visualstudio is for other tools that might be required during the build.
- vstest is used to run test cases.
Agent.Name is a manually added demand that searches for the Agent by name.

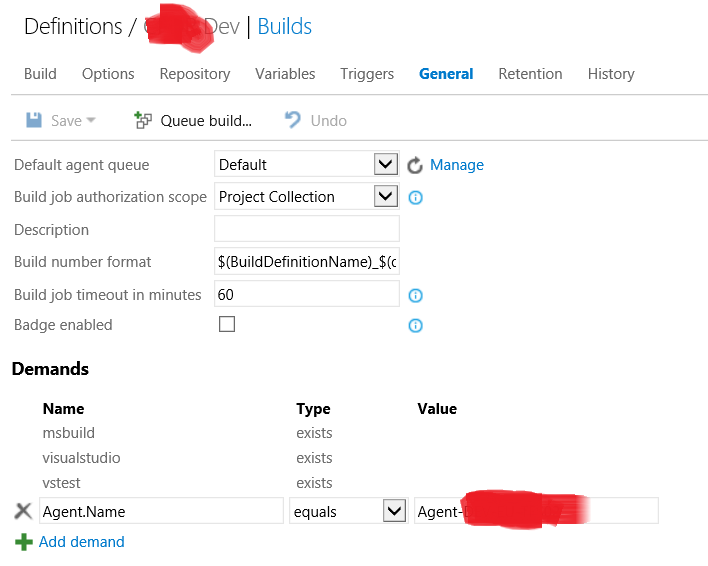
As per the above screen-shot, the build definition is looking for agent by name “Agent-xxxxx”. This Agent has Visual Studio 2013 installed and some of the capabilities which are automatically discovered.
If any of the Unit Test cases fail during the Build, the build will fail and the remaining steps will not be executed.
Issues faced
Visual Studio 2017 is not supported with TFS 2015 Update 4:
The format of Visual Studio folders under Program Files (x86) and registry settings have changed from Visual Studio 2017 onwards and are automatically discovered as capabilities on the Agent by TFS 2015. Even manually adding such capabilities is not recognized by the TFS Server Build.
Hence, selecting Latest Visual Studio in the drop-down for the Build tasks Visual Studio Build and Visual Studio Test does not work and gives the following errors:
- Visual Studio Build:
Visual studio version… not found.
2. Visual Studio Test:
Unable to determine the location of vstest.console.exe
To solve these issues:
- Use the supported Visual Studio versions 2013 or 2015 on the Build Agents for which the capabilities are automatically discovered while configuring the Agent.
- TFS may need to be upgraded to 2017 version.
Note: Using a custom build task vstestv2might work in this scenario using npm install, if the agent version can be upgraded. Current Agent version shipped with the on premise TFS 2015 does not support uploading the custom build task to support the latest test framework. On premise Agent version cannot be upgraded unless TFS is upgraded.
Comments are welcome for improvement!
