
Reactjs Unit Testing with Storybook + Jest
Reactjs Unit Testing with Storybook + Jest


In this post, you will learn how to use Storybookjs and Jest with your react project. Reactjs is a UI library by facebook while Storybookjs is a testing tool for components by representing different states of the component and Jest is another cool unit testing tool by the creators of reactjs for javascript including reactjs. The code used in this setup is available
Why Storybookjs?
Well, there are a number of cool things I think are notable about storybookjs, just to mention a few.
- Lets you describe your react components behavior and states.
- You can build stories and save component states for CI testing.
- Storybookjs has a supportive and enthusiastic community.
- It has a very detailed and simple documentation that makes debugging and usage very easy for starters.
Where does jest come in when we have Storybookjs?
Jest is a test runner for javascript including reactjs is in this scope because after writing storybook stories, the different states are generated to snapshots that are used by Jest to test changes of the component. So we will use Jest for automated testing.
Enough of the stories lets now get down to the actual stuff. Before we test, we need an app to test.
Creating the react application.
I used create-react-app which is a boilerplate for bootstrapping a react application.
Follow the getting started here to create a creat-react-app application. In the end, you should have a running react application.
Just in case, here is what you need to create the react app.
npx create-react-app storybook-jest-reactcd storybook-jest-reactnpm start
Adding Storybookjs.
We will use the start guide here. Here is what we need to do to add storybookjs to our react application. While inside our project root.
npm i -g @storybook/cli getstorybook
This will configure your app for Storybook adding packages and storybook scripts in your package.json. After that, you can run your Storybook with:
npm run storybook
Go to http://localhost:9009. You should have something like this.

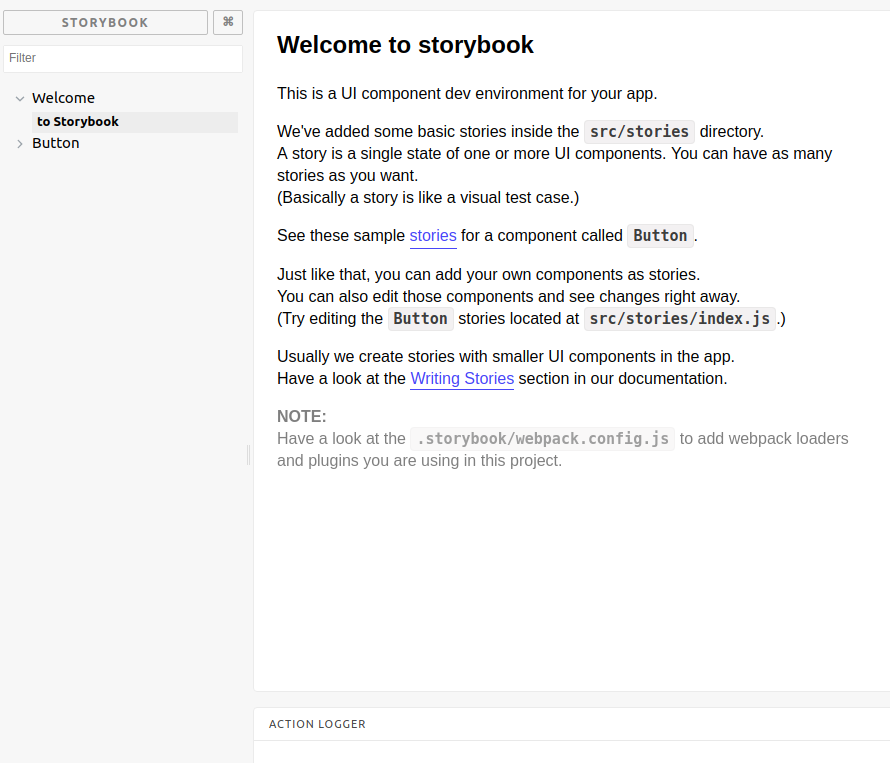
Let me explain: Looking at the Stories of Button, we have with text and with emojis. This just means that the button can have different states, that is a state with text rendering and another with emoji rendering.
Now, How is this used for testing?
Think about it. We have a component that displays the sum of two numbers if the sum is less than 100 and displays ‘sum is greater than 100’ if the sum is actually greater than 100. To test this component we would need to render with our numbers as 50 +40 in one case and 60 + 50 in the other case. These will form our stories of that component like we have two stories for the button. We can then save these states and always make sure that the component shows the right message when given any numbers. Sounds like fun right? Let's see it in action.
Look at .storybook/config.js and change to below. This will tell storybook to match stories with .stories.js file name pattern and enables us to write stories anywhere.
import React from 'react';
import { configure } from '@storybook/react';configure(
() => {const req = require.context('../src', true, /.stories.js$/);req.keys().forEach((filename) => req(filename));
},
module
);
Then rename your ./src/stories/index.js to ./src/stories/index.stories.js for storybook to find it.
Testing snapshots with Jest.
To run the stories with jest, we need to add a test file with instructions to build snapshots of stories. Rename create ./src/test and move ./stories to the test dir, then create ./src/test/storyshots.test.js
import initStoryshots from '@storybook/addon-storyshots';
initStoryshots({ /* configuration options */ });Now we can run npm test and see how jest will load our stories and build snapshots.


Now that we have jest running and building snapshots of our stories, let's see some things that are good to know about storybookjs.
Adding static files to your stories.
When your app has static files like images, js, css in the public directory or whichever place you store them, we can add them to storybook stories by creating a file named preview-head.html inside .storybook directory and placing the header portion of our HTML in there.
<link rel="stylesheet" href="/somecss.css" >
<title>Test Storybook Jest Snapshots</title>
Adding decorators to your stories.
Let's say we have a decorator like redux provider or react router or an error boundary that our components have to be wrapped around, we don't have to make this in every story. We can create a HOC that storybook decorates all stories with. For this let's use an error boundary.
Edit App.js to have some prop passed down to it.
import React, { Component } from 'react';import logo from './logo.svg';
import './App.css';
class App extends Component {render() {return (
<div className="App">
<header className="App-header">
<img src={logo} className="App-logo" alt="logo" /><h1 className="App-title">Welcome to React, this is {this.props.someProp.description}</h1></header>
<p className="App-intro">
To get started, edit <code>src/App.js</code> and save to reload.
</p>
</div>
);
}
}
export default App;
Edit index.js to have some ErrorBoundary wrapper and someProp passed to App.js
import React from 'react';
import ReactDOM from 'react-dom';
import './index.css';
import App from './App';
import registerServiceWorker from './registerServiceWorker';
import ErrorBoundary from './ErrorBoundary'
ReactDOM.render(
<ErrorBoundary>
<App someProp = {{ description: 'This is app.js component'}} /></ErrorBoundary>
, document.getElementById('root'));registerServiceWorker();
Create ErrorBoundary component ./src/ErrorBoundary.js
import React, { Component} from 'react';class ErrorBoundary extends Component{constructor(props) {super(props);
this.state = { hasError: false };}
componentDidCatch(error, info) { this.setState({hasError: true})}render() {if(this.state.hasError) {return(
<div>Error Message</div>)}return this.props.children; }}export default ErrorBoundary;
Create a story for ./src/App.js
import React from 'react';
import { storiesOf } from '@storybook/react';import { action } from '@storybook/addon-actions';import { linkTo } from '@storybook/addon-links';import App from '../../App'
storiesOf('App', module).add('No error', () => <App someProp = {{ description: 'This is app.js component'}}/>).add('With Error', () => (<App someProp = {null}/>));
Now with this setup, storybook with throw the error caused in storie With Error becausethe error boundary is not wrapped around App.js in the story.
To solve this we add the ErrorBoundary as a decorator inside .storybook
We create ./.storybook/Container.js
import React from 'react';
import ErrorBoundary from '../src/ErrorBoundary';
export default class Container extends React.Component {render() {const { story } = this.props;return (
<ErrorBoundary>
{story()}</ErrorBoundary>
);
}
}
Then we edit storybook config to add the container as a decorator.
./.stotybook/config.js
import React from 'react';
import { configure, addDecorator } from '@storybook/react';import Container from './Container';
addDecorator(story => <Container story={story} />);configure(
() => {const req = require.context('../src', true, /.stories.js$/);req.keys().forEach((filename) => req(filename));
},
module
);
This will wrap all stories around the error boundary.
Conclusion.
You have now setup storybook with Jest snapshots for this react project. In CI you can test changes to components against the saved snapshots. Storybookjs supports easy setup for even Vuejs and Angular.