
Authentication For Your React and Express Application w/ JSON Web Tokens
Backend
User Model
To get started we need to create a MongoDB/Mongoose model for a User object. Here is an example of one that I created:
// User.jsconst mongoose = require('mongoose');const UserSchema = new mongoose.Schema({ email: { type: String, required: true, unique: true }, password: { type: String, required: true }});module.exports = mongoose.model('User', UserSchema);Pretty simple, this allows us to create User objects which have their own unique email and password fields which can then be saved and retrieved from MongoDB to authenticate users.
Secure Passwords
Obviously we can’t just store passwords in plain text, that’s
To secure our passwords we will use a nice little library called bcrypt. This will allow us to hash our passwords (if you don’t know what that means read this).
npm install --save bcrypt
Once bcrypt is installed, we can add a hook to our User schema to hash passwords before we save them to our database:
// User.jsconst mongoose = require('mongoose');const bcrypt = require('bcrypt');const saltRounds = 10;
const UserSchema = new mongoose.Schema({ email: { type: String, required: true, unique: true }, password: { type: String, required: true }});UserSchema.pre('save', function(next) { // Check if document is new or a new password has been set if (this.isNew || this.isModified('password')) { // Saving reference to this because of changing scopes const document = this; bcrypt.hash(document.password, saltRounds, function(err, hashedPassword) { if (err) { next(err); } else { document.password = hashedPassword; next(); } }); } else { next(); }});module.exports = mongoose.model('User', UserSchema);If you’re curious about what saltRounds is used for, read here.
Now that we have our User object setup we can test it out and create some users. To do so, I’ll create another express route like so:
// Import our User schemaconst User = require('./models/User.js');...
// POST route to register a userapp.post('/api/register', function(req, res) { const { email, password } = req.body; const user = new User({ email, password }); user.save(function(err) { if (err) { res.status(500) .send("Error registering new user please try again."); } else { res.status(200).send("Welcome to the club!"); } });});And then we can test it using Postman or in this case I’ll just do a simple cURL on the command line:
curl -X POST \ http://localhost:3000/api/register \ -H 'Content-Type: application/json' \ -d '{ "email": "[email protected]", "password": "mypassword"}'
With which we should get back a nice message saying Welcome to the club! and if we check our MongoDB records, we should see something like this:
{ "_id" : ObjectId("5b89a402ec9ad51db3d37c44"), "email" : "[email protected]", "password" : "$2b$10$j/e4G.D1HzW1HjlkC9NclOQDDiIsLCm09Euj9QGvTzJNTOLmI9Tpm", "__v" : 0}Note: Don’t actually share production data hashed or not
Authentication
Now that we have some users saved to the database, we need a way to authenticate them against our database.
To do this we will add a method to our User schema that will take in a password and use bcrypt tell us if it's the correct password for that User
UserSchema.methods.isCorrectPassword = function(password, callback){ bcrypt.compare(password, this.password, function(err, same) { if (err) { callback(err); } else { callback(err, same); } });}Issuing Tokens
Now that we have all the tools in place, we can start issuing tokens to clients.
First step is we need a secret string to use when signing the tokens. For the sake of this example I will simply define it at the top of my server file
const secret = 'mysecretsshhh';
Next we need to install the jsonwebtoken library which will allow us to issue and verify JSON web tokens:
npm install --save jsonwebtoken
Finally we can create a new express route which, given an email and password, will find a User with the given email and verify that the given password is correct. If the password is correct, we will issue a signed token to the requester:
const jwt = require('jsonwebtoken');app.post('/api/authenticate', function(req, res) { const { email, password } = req.body; User.findOne({ email }, function(err, user) { if (err) { console.error(err); res.status(500) .json({ error: 'Internal error please try again' }); } else if (!user) { res.status(401) .json({ error: 'Incorrect email or password' }); } else { user.isCorrectPassword(password, function(err, same) { if (err) { res.status(500) .json({ error: 'Internal error please try again' }); } else if (!same) { res.status(401) .json({ error: 'Incorrect email or password' }); } else { // Issue token const payload = { email }; const token = jwt.sign(payload, secret, { expiresIn: '2 days' }); res.json({ token }); } }); } });});This looks like a lot going but basically we are checking if we have a user registered with the given email and if we do, then we check if the given password is correct and issue a token to the client if it is.
Once again we can test this is working with a simple cURL command:
curl -X POST \ http://localhost:3000/api/authenticate \ -H 'Content-Type: application/json' \ -d '{ "email": "[email protected]", "password": "mypassword"}'
And you should get back a nice looking signed token like so:
{ "token":"eyJhbGciOiJIUzI1NiIsInR5cCI6IkpXVCJ9.eyJlbWFpbCI6Im1lQGV4YW1wbGUuY29tIiwiaWF0IjoxNTM1ODU5ODE3LCJleHAiOjE1MzYwMzI2MTd9.vcJWB44k97qj8liLoKK7NXqFeuNQYYiRyucw-dZQ7UU"}Protecting Routes (express)
Now that we have established a way to issue signed token to authorized users, we need to define what routes in our application are off limits to non-authenticated users. In this case, we want our '/secret' route to only be accessible if the requesting client has a valid token.
First, let’s make sure that we have cookie-parser installed so that can express can parse cookies passed by our browser:
npm install --save cookie-parser
and let’s add the middleware to our express setup:
// server.jsconst cookieParser = require('cookie-parser');...
app.use(cookieParser());
Next, we will create our own custom express middleware which will sit in between a request and a protected route and verify if the request is authorized.
This middleware function will look for the token in the request body, query string, headers, or cookies in that order and then validate it.
Note: I’ve hardcoded our secret here again which is bad practice and I’m only doing so to keep the example simple// middleware.js
const jwt = require('jsonwebtoken');const secret = 'mysecretsshhh';const withAuth = function(req, res, next) { const token = req.body.token || req.query.token || req.headers['x-access-token'] || req.cookies.token; if (!token) { res.status(401).send('Unauthorized: No token provided'); } else { jwt.verify(token, secret, function(err, decoded) { if (err) { res.status(401).send('Unauthorized: Invalid token'); } else { res.email = decoded.email; next(); } }); }}module.exports = withAuth;
Finally we can use this middleware whenever we want to have a protected route by simply editing its route configuration:
// server.jsconst withAuth = require('./middleware');...
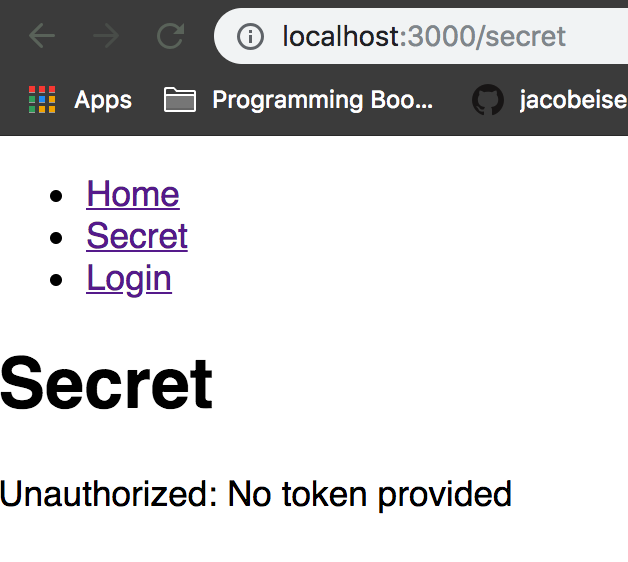
app.get('/api/secret', withAuth, function(req, res) { res.send('The password is potato');});We can test this change with some more cURL commands or we can just take a look at our React application which should now look like this:

As you can see, our secret is now actually a secret that will require a valid signed JSON web token to view.
Frontend
Now that we’ve got a backend that can register and authenticate users, we can work on securing our React web application.
Note: To keep things simple, we won’t create a registration page and instead use our previous cURL command if we want to create new users
Login Page
To get this started we are going to create a simple React component with a form that will be used to authenticate the user:
// Login.jsximport React, { Component } from 'react';export default class Login extends Component { constructor(props) { super(props) this.state = { email : '', password: '' }; } handleInputChange = (event) => { const { value, name } = event.target; this.setState({ [name]: value }); } onSubmit = (event) => { event.preventDefault(); alert('Authentication coming soon!'); } render() { return ( <form onSubmit={this.onSubmit}> <h1>Login Below!</h1> <input type="email" name="email" placeholder="Enter email" value={this.state.email} onChange={this.handleInputChange} required /> <input type="password" name="password" placeholder="Enter password" value={this.state.password} onChange={this.handleInputChange} required /> <input type="submit" value="Submit"/> </form> ); }}This is just a simple form, similar to the example on the react website.
Saving Token
As you probably noticed, the onSubmit method of the Login component is incomplete. We want this method to make a request to authenticate with our backend and save the resulting token to a browser cookie.
To get that rolling, first we are going to install another package called js-cookie.
Note: Browsers have a native cookies library but I find using js-cookie makes things much simpler for myself
npm install --save js-cookie
Now we are going to update the onSubmit method of our Login component to look like this:
import Cookie from 'js-cookie';
...
onSubmit = (event) => { event.preventDefault(); fetch('/api/authenticate', { method: 'POST', body: JSON.stringify(this.state), headers: { 'Content-Type': 'application/json' } }) .then(res => { if (res.status >= 200 && res.status < 300) { return res.json(); } else { const error = new Error(res.error); throw error; } }) .then(res => { const { token } = res; Cookie.set('token', token, { expires: 2 }); this.props.history.push('/'); }) .catch(err => { console.error(err); alert('Error logging in please try again'); });}All we’ve done here is use fetch to authenticate against our backend and then saved our JSON web token to a browser cookie.
Now we can simply add our Login component to our route configuration:
import Login from './Login';
...
<Route path="/login" component={Login} />And now we’ve got ourselves a functioning login screen:


Now if you login successfully, the secret should no longer be a secret!

Protecting Routes (react-router)
So we have a working login process that will fetch us a signed token from our backend, save it to our cookies, and subsequently use that token to access protected routes on the server:

To add the final touches, we need a way to specify routes to protect on our front end so that a user doesn’t have to see this screen when they aren’t logged in.
Instead we need to redirect them to the login page like a good web application should.
To accomplish this, we are going to be using a concept called higher-order components to wrap react-router routes which we want protected.
A higher-order component is nothing more than a function which takes in a component and returns a new component. So we want to create a higher-order component, withAuth, that will take in a component we want to protect, like <Secret /> , and slightly modify it so that users can’t access it unless they are logged in:
// withAuth.jsx
import React, { Component } from 'react';import Cookie from 'js-cookie';import { Redirect } from 'react-router-dom';export default function withAuth(ComponentToProtect) { return class extends Component { render() { let ComponentToReturn; if (Cookie.get('token')) { ComponentToReturn = <ComponentToProtect {...this.props} /> } else { ComponentToReturn = <Redirect to="/login" /> }return ComponentToReturn } }}
And then we can incorporate this back into our route configuration like so:
import withAuth from './withAuth';
...
<Route path="/secret" component={withAuth(Secret)} />And now we should have a protected route!

And that’s it!
We know have a working implementation of a React web app with authentication using JSON web tokens!
There’s definitely much more we can do to polish this up before making it production ready (password validation, cookie expiration checks and refreshes, more user-friendly authentication flow) but my hope is that serves as a good starting point towards a nice and secure application.
You can find a fully functioning example of the above at this Github repository.
Thanks!