
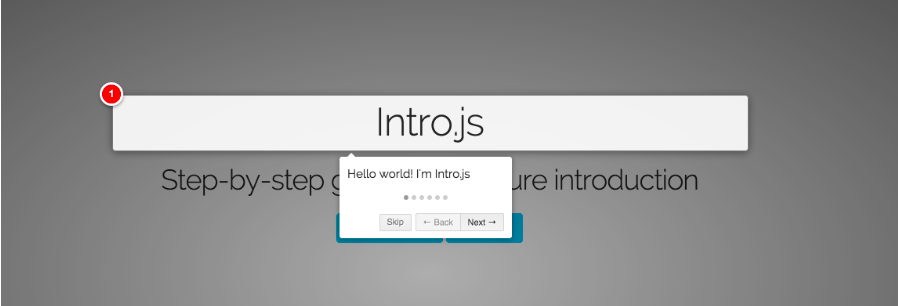
網站功能操作分佈引導外掛:Intro.js介紹;React裡如何使用Intro.js以及如何進行分頁導航
外掛作用:使用嚮導,引導新使用者正確使用Web網站。我的環境是React+Mobx。
基本使用介紹,參加程式碼地址裡的README.md:https://github.com/usablica/intro.js
安裝:npm install intro.js --save
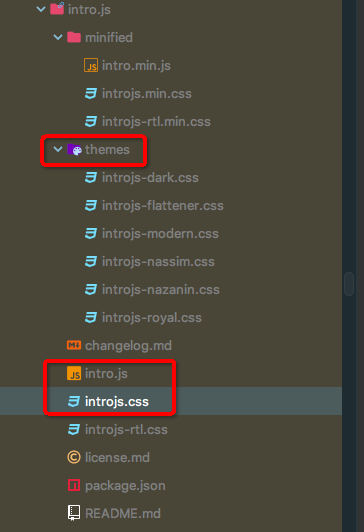
在專案裡的app.js裡引入css檔案,全域性引入一次即可:
import 'intro.js/introjs.css';
import 'intro.js/themes/introjs-modern.css';  // 使用模板,模板效果線上展示:https://introjs.com/docs/themes/list
在使用的的頁面引入js檔案,如果需要中文化,修改intro.js
import introJs from 'intro.js';
核心程式碼:intro.js/introjs.css/各種主題css(用於定製導覽顯示效果)
使用方法:把核心程式碼加入到作用範圍內,把下列元素加到你需要導覽的html元素上:
data-intro:使用導航時顯示給使用者的內容;data-step:表示導航的哪一步;data-position:表示導航元素顯示在被導航內容的位置,更改屬性定義參考官方文件。
introJs().goToStep(2).start();可以直接從某一個步驟開始。
introJs(".class").goToStep(2).start();introJs("#id").goToStep(2).start();可以直接使用id和class的方式引用元素
多頁實現參考官方示例:https://introjs.com/example/multi-page/index.html
在React+Mobx裡使用history.push("/api/v1/edit")進行後臺頁面切換(程式控制,而非使用者點選方式切換頁面),效果類似於window.location.href=url
使用mobx的history.push是遇到的問題(使用history的前提必須有path):
TypeError: Cannot read property 'history' of undefined
github地址:https://github.com/usablica/intro.js
文件地址:https://introjs.com/docs/
api地址:https://introjs.com/docs/intro/api/
官網地址:https://introjs.com/,裡面有大量的示例,還有原始碼:
點選Demo線上看效果,點選Source檢視github上的程式碼,其實通過除錯工具也可以看


React+Mobx的分頁導航示例:
import React from 'react';
import { inject, observer } from 'utils/mobx-react';
import { message, Button, Col } from 'td-ui';
import introJs from 'intro.js';

/**
 * 1、通過dataSource設定表格資料
 * 2、通過columns設定表格格式
 * 3、通過rowKey設定表格每一行的唯一key
 * 4、如果不需要翻頁,設定pagination=false
 */
@inject('manualStore', 'globalStore') // 將store注入到props中
// @inject()
@observer
export default class Manual extends React.Component {

    // constructor(props) {
    //     super(props);
    // }

    handleClick() {
        const {history} = this.props;  // 在這裡引入history
        const {globalStore} = this.props;
        // history.push("/pluginSec/Search");
        // introJs().setOption('showProgress', true);
        // introJs().start();
     // 注意下面的設定屬性的方法,當有多個屬性時,就連著寫,字典方式傳入無效;而且start函式、oncomplete函式要繼續寫在後面。分開寫的話,不生效。

        introJs().setOption('showProgress', true).setOption('doneLabel', '下一頁').start().oncomplete(function() {
            // const {history} = this.props;  // 這裡引入history是無效的
            // message.info('ss');
            history.push('/pluginSec/WhiteList');  // 分頁的時候跳轉
            // history.push('/pluginSec/RuleAdd/add?multi=true'); // 加引數的方式,其實引數並不能傳入進去
            globalStore.setMulti(true);   // 設定一個全域性引數,用於跳轉後的頁面判斷是否是引導進入到頁面?如果是引入進入的頁面,則繼續引導
            // window.location.href = '/manual/Manual'; // 不生效
        });
        // message.info("ss");
        // message.error("error");
        // console.log('sss');
    }
    render() {
        return (
            <div className='main_area' data-step="1" data-intro='請根據步驟完成設定,請點選下一步'>
                我是使用手冊
                <Col span={8} style={{textAlign:'right', paddingRight:20}}>
                    <Button type="primary" onClick={()=>this.handleClick()}>嚮導</Button>
                </Col>
            </div>
        );
    }
}
import React from 'react';
import { inject, observer } from 'utils/mobx-react';
import {Button, Table, message, Col} from 'td-ui';
import introJs from 'intro.js';

/**
 * 1、通過dataSource設定表格資料
 * 2、通過columns設定表格格式
 * 3、通過rowKey設定表格每一行的唯一key
 * 4、如果不需要翻頁,設定pagination=false
 * 5、通過設定expandedRowRender函式來渲染展開資訊(可以用過expandedRowKeys和onExpandedRowsChange來控制和獲取展開行id,具體可參考文件)
 */
@inject('securityWhiteListStore') // 將store注入到props中
@inject('globalStore') // 將store注入到props中
@observer
export default class WhiteList extends React.Component {

  constructor(props) {
    super(props);
  }

  componentWillMount() {
    const {securityWhiteListStore} = this.props;
    securityWhiteListStore.getWhiteList();

  }

  componentDidMount() {   // 一定在元件裝載之後來做導航這個事情,不然導航無法顯示
    const {match,globalStore} = this.props;
    // introJs().start();
  // 這是官方給的示例,通過傳入引數來判斷是否繼續導航
    // if (RegExp('multipage', 'gi').test(match.params)) {
    //   introJs().start();
    // }
    if(globalStore.multi) {    // 判斷全域性引數是否設定,來決定是否進行繼續導航
      introJs().start();   // 只能啟用當前頁面的導航點,其他頁面不可以,所以才介紹如何做分頁導航
      globalStore.setMulti(false);   // 恢復全域性引數,下次導航時重新設定
    }

  }

  handleClick(id) {
    message.info(id);
    const {securityWhiteListStore} = this.props;
    securityWhiteListStore.deleteWhite(id);
  }

  modifyWhiteList(id) {
      const {history} = this.props;
      history.push('/pluginSec/WhiteListEdit/' + id);
  }

  render() {
    const { whiteList } = this.props.securityWhiteListStore; // 從this.props.expandTableStore中取出dataList
    const columns = [{
      title: 'id',
      dataIndex: 'id',
      key: 'id',
      render: id => <a href="#">{id}</a>,
    }, {
      title: '規則內容',
      dataIndex: 'ruleContent',
      key: 'ruleContent',
      render: seqId => <a href="#">{seqId}</a>,
    }, {
      title: '專案名字',
      dataIndex: 'projectName',
      key: 'projectName',
    }, {
      title: '建立者',
      dataIndex: 'ruleCreater',
      key: 'ruleCreater',
    }, {
      title: '建立時間',
      dataIndex: 'modifyTime',
      key: 'modifyTime',
    }, {
      title: '操作',
      dataIndex: 'opt',
      key: 'opt',
      render: (text, record) => (
          <span>
            <Button type="default" style={{marginRight:10}} onClick={() => this.modifyWhiteList(record.id)}>修改</Button>
            <Button type="danger" onClick={() => this.handleClick(record.id)}>刪除</Button>
          </span>
      ),
    }];

    return (
        <div className="main_area">
          <Col style={{"marginBottom": 20, "textAlign": "right"}}>
            <Button type="primary" onClick={()=>this.modifyWhiteList('add')} data-step="2" data-intro='Hello step one!'>新建</Button>
          </Col>
          <Table
            dataSource={whiteList.toJS()}
            columns={columns}
            rowKey='key'
            pagination={false}
            expandedRowRender={record => <p>{record.ruleDescription}</p>}
          />
        </div>
    );
  }
}
最後再介紹一個封裝了intro.js的外掛:https://www.npmjs.com/package/intro.js-react#usage
參考:
https://devework.com/intro-js.html