
Android APK 更新之路
一、前言
提到 APK 更新,大家可能會想到友盟(umeng)更新,市場上已有數萬款應用在使用友盟自動更新的服務。但友盟於 2016 年 10 月 15 日起停止了更新服務。那麼我們需要自己處理 APK 更新的業務。
本篇主要講解以下知識點:
使用 DownloadManager 更新
基於 RxJava 和 retrofit 擴充套件的 Android 執行緒安全 http 請求庫下載 APK 更新
熱更新(AndFix)
我們來啾啾第一個知識點。
DownloadManager 更新
Android 2.3(API level 9)開始 Android 用系統服務(Service)的方式提供了DownloadManager 來優化處理長時間的下載操作。DownloadManager 對後臺下載,下載狀態回撥,斷點續傳,下載環境設定,下載檔案的操作等都有很好的支援。
本篇基於 Android 4.0 ~7.0 (SDK 14~24) 開發,眾所周知 Android 6.0 的 Runtime Permissions (執行時許可權)。
下面具體來看看 DownloadManager 更新的具體流程。
AndroidManifest 清單檔案配置許可權
下載檔案需要使用到網路許可權,檔案讀寫許可權:
<uses-permission android:name="android.permission.INTERNET"/>
<uses-permission android:name="android.permission.WRITE_EXTERNAL_STORAGE" 獲取當前的版本號
getPackageManager().getPackageInfo(getPackageName(), 0).versionName;後臺需要提供查詢最新版本號的介面,獲取介面資料與當前版本號對比,判定是否需要更新。
獲取 DownloadManager 例項
DownloadManager manager = (DownloadManager)
appContext.getSystemService 下面來看看 DownloadManager 提供哪些介面:
public long enqueue(Request request) 執行下載,返回 downloadId,downloadId 可用於後面查詢下載資訊。若網路不滿足條件、Sdcard 掛載中、超過最大併發數等異常則會等待下載,正常則直接下載。
int remove(long… ids) 刪除下載,若下載中取消下載。會同時刪除下載檔案和記錄。引數 ids 為 enqueue 返回的 downloadId 集合。
Cursor query(Query query) 查詢下載資訊。
getMaxBytesOverMobile(Context context) 返回行動網路下載的最大值
rename(Context context, long id, String displayName) 重新命名已下載項的名字
getRecommendedMaxBytesOverMobile(Context context) 獲取建議的行動網路下載的大小
其它:通過檢視程式碼我們可以發現還有個 CursorTranslator 私有靜態內部類。這個類主要對 Query 做了一層代理。將 DownloadProvider 和 DownloadManager之間做了個對映。
接著來看看 DownloadManager.Request 的請求引數。
組裝 DownloadManager.Request 請求引數
//獲取Request的例項物件
    DownloadManager.Request request = new DownloadManager.Request(Uri.parse(appUrl));
顯示資訊:
//設定一些基本顯示資訊
    request.setTitle(name); //通知欄標題
    request.setDescription(description);//通知欄內容
    request.setMimeType("application/vnd.android.package-archive");//檔案的型別
網路型別:
//NETWORK_MOBILE行動網路
//NETWORK_WIFI  wifi網路
//NETWORK_BLUETOOTH 藍芽
req.setAllowedNetworkTypes(DownloadManager.Request.NETWORK_WIFI);
通知欄顯示型別:
    request.setNotificationVisibility(DownloadManager.Request
.VISIBILITY_VISIBLE_NOTIFY_COMPLETED);- VISIBILITY_HIDDEN 下載UI不會顯示,也不會顯示在通知中,如果設定該值,
需要宣告android.permission.DOWNLOAD_WITHOUT_NOTIFICATION - VISIBILITY_VISIBLE 當處於下載中狀態時,可以在通知欄中顯示;當下載完成後,通知欄中不顯示
- VISIBILITY_VISIBLE_NOTIFY_COMPLETED 當處於下載中狀態和下載完成時狀態,均在通知欄中顯示
- VISIBILITY_VISIBLE_NOTIFY_ONLY_COMPLETION 只在下載完成時顯示在通知欄中。
檔案的儲存位置:
- 儲存到外部環境的私有目錄:file:///storage/emulated/0/Android/data/your-package/files/Download/app.apk
request.setDestinationInExternalFilesDir(context, Environment.DIRECTORY_DOWNLOADS, "app.apk");- 儲存到外部環境的共有目錄: file:///storage/emulated/0/Download/app.apk
request.setDestinationInExternalPublicDir(Environment.DIRECTORY_DOWNLOADS, "app.apk");- 自定義檔案路徑
setDestinationUri(Uri uri)新增請求下載的網路連結的http頭,比如User-Agent,gzip壓縮等:
request.addRequestHeader(String header, String value)漫遊:
//true  允許
//false  不允許
request.setAllowedOverRoaming(false);
其他:
setAllowedOverMetered(boolean allow) //是否允許計量
setRequiresCharging(boolean requiresCharging)//是否在充電環境下
setVisibleInDownloadsUi(boolean isVisible)//是否顯示下載介面
...
下面是本文建立Request的示例程式碼:
    request.setTitle(name);
    request.setDescription(description);
    //在通知欄顯示下載進度
    if (Build.VERSION.SDK_INT >= Build.VERSION_CODES.HONEYCOMB) {
        request.allowScanningByMediaScanner();
        request.setNotificationVisibility(DownloadManager.Request
                .VISIBILITY_VISIBLE_NOTIFY_COMPLETED);
    }

    request.setAllowedNetworkTypes(DownloadManager.Request.NETWORK_WIFI);
    request.setDestinationInExternalPublicDir(SAVE_APP_LOCATION, SAVE_APP_NAME);
加入下載佇列
DownloadManager manager = (DownloadManager)                appContext.getSystemService(Context.DOWNLOAD_SERVICE);

manager.enqueue(request);
下載資訊查詢
DownloadManager 下載工具並沒有提供相應的回撥介面用於返回實時的下載進度狀態。可以通過 DownloadManager.query 方法進行查詢,該方法返回一個 Cursor 物件,具體看以下程式碼:
private void queryDownloadManager(long id) {
DownloadManager mDownloadManager = (DownloadManager)
this.getSystemService(Context.DOWNLOAD_SERVICE);
DownloadManager.Query query = new DownloadManager.Query().setFilterById(id);
//可以對query設定一些過濾條件
//setFilterById(long… ids)根據下載id進行過濾
//setFilterByStatus(int flags)根據下載狀態進行過濾
Cursor cursor = mDownloadManager.query(query);
if (cursor != null) {
while (cursor.moveToNext()) {
String bytesDownload = cursor.getString(cursor.getColumnIndex(DownloadManager
.COLUMN_BYTES_DOWNLOADED_SO_FAR));
String description = cursor.getString(cursor.getColumnIndex(DownloadManager
.COLUMN_DESCRIPTION));
String cid = cursor.getString(cursor.getColumnIndex(DownloadManager.COLUMN_ID));
String localUri = cursor.getString(cursor.getColumnIndex(DownloadManager
.COLUMN_LOCAL_URI));
String mimeType = cursor.getString(cursor.getColumnIndex(DownloadManager
.COLUMN_MEDIA_TYPE));
String title = cursor.getString(cursor.getColumnIndex(DownloadManager
.COLUMN_TITLE));
String status = cursor.getString(cursor.getColumnIndex(DownloadManager
.COLUMN_STATUS));
String totalSize = cursor.getString(cursor.getColumnIndex(DownloadManager
.COLUMN_TOTAL_SIZE_BYTES));
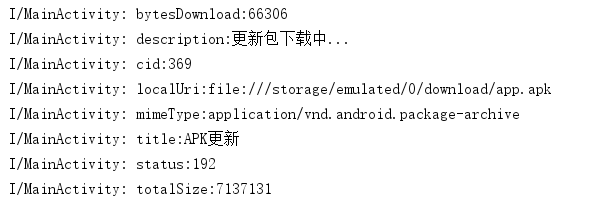
Log.i("MainActivity", "bytesDownload:" + bytesDownload);
Log.i("MainActivity", "description:" + description);
Log.i("MainActivity", "cid:" + cid);
Log.i("MainActivity", "localUri:" + localUri);
Log.i("MainActivity", "mimeType:" + mimeType);
Log.i("MainActivity", "title:" + title);
Log.i("MainActivity", "status:" + status);
Log.i("MainActivity", "totalSize:" + totalSize);
}
}
}
本篇示例的列印結果如下:
註冊廣播監聽通知欄點選事件和下載完成事件
當用戶點選通知欄中的下載列表時,系統會發出 ACTION_NOTIFICATION_CLICKED 事件廣播;下載完成時會發出 ACTION_DOWNLOAD_COMPLETE 事件廣播,那麼我們就可以實現一個廣播接收器處理點選和完成時的狀態。請看下面程式碼:
    public void onReceive(Context context, Intent intent) {
        if (intent.getAction().equals(DownloadManager.ACTION_DOWNLOAD_COMPLETE)) {

            installApk(context);

        } else if (intent.getAction().equals(DownloadManager.ACTION_NOTIFICATION_CLICKED)) {
            //Toast.makeText(context, "Clicked", Toast.LENGTH_SHORT).show();

        }
    }
如文字下載 apk 檔案,下載完成時就自動安裝,使用意圖進行 apk 安裝:
    // 安裝Apk
    private void installApk(Context context) {
        try {
            Intent i = new Intent(Intent.ACTION_VIEW);
            String filePath = DownloadManagerUtils.APP_FILE_NAME;
            i.setDataAndType(Uri.parse("file://" + filePath), "application/vnd.android" +
                    ".package-archive");
            i.addFlags(Intent.FLAG_ACTIVITY_NEW_TASK);
            context.startActivity(i);
        } catch (Exception e) {
            Log.e(TAG, "安裝失敗");
            e.printStackTrace();
        }
    }
DownloadManager 更新就講到這裡了,原始碼在文章的後面會附上。
基於 RxJava 和 retrofit 擴充套件的 Android 執行緒安全 http 請求庫下載 APK 更新
針對 DownloadManager 更新,我們還可以通過 http 請求庫下載 apk 檔案進行更新。
提到 http 請求庫,就不得不提到 Novate 庫,功能非常強大,使用便利,看看它有哪些功能:
- 加入基礎API,減少Api冗餘
- 支援離線快取
- 支援多種方式訪問網路(get,put,post ,delete)
- 支援Json字串,表單提交
- 支援檔案下載和上傳
- 支援請求頭統一加入
- 支援對返回結果的統一處理
- 支援自定義的擴充套件API
- 支援統一請求訪問網路的流程控制
我下載了原始碼,並修改了進度條的介面。下載檔案相信大家都比較熟悉了,我這裡就不再細講了。如果有什麼疑問請連結上面地址檢視。
新建通知
以下給出本篇用到的訊息程式碼:
    private NotificationCompat.Builder buildNotification() {
        final Resources res = mContext.getResources();

        // This image is used as the notification's large icon (thumbnail).
        // TODO: Remove this if your notification has no relevant thumbnail.
        final Bitmap picture = BitmapFactory.decodeResource(res, R.mipmap.ic_launcher);

        return new NotificationCompat.Builder(mContext).
                setContentTitle("更新包下載中...")
                .setTicker("準備下載...")
                .setProgress(100, 0, false)
                .setContentText(String.format(mContext.getResources()
                        .getString(R.string.apk_progress), 0) + "%")
                .setLargeIcon(picture)
                .setPriority(NotificationCompat.PRIORITY_DEFAULT)
                .setWhen(System.currentTimeMillis())
                .setSmallIcon(R.mipmap.ic_launcher)
                .setAutoCancel(false);
    }

    //更新訊息進度
    public void showProgressNotification(int progress) {
        if (mBuilder == null) {
            mBuilder = buildNotification();
        }
        Notification notification = mBuilder.setProgress(100, progress, false)
                .setContentText(String.format(mContext.getResources().getString(R.string
                        .apk_progress), progress) + "%")
                .build();
        notify(mContext, notification);
    }
apk下載
    private void downloadApk() {

        RetrofitClient.getInstance(this).createBaseApi()
                .download(DOWN_URL, new CallBack() {
                    @Override
                    public void onError(Throwable e) {
                        Log.e("HttpActivity", "onError--------2222" + e.getMessage());
                        mHttpNotification.removeProgressNotification();
                    }

                    @Override
                    public void onStart() {
                        super.onStart();
                        mHttpNotification.showProgressNotification(0);
                    }

                    @Override
                    public void onSucess(String path, String name, long fileSize) {
                        mHttpNotification.removeProgressNotification();
                        installApk(HttpActivity.this);
                    }

                    @Override
                    public void onProgress(int progress) {
                        super.onProgress(progress);
                        mCircleProgressView.setProgress(progress);
                        mHttpNotification.showProgressNotification(progress);
                    }
                });

    }
如果你還有疑問,在文章結尾處下載原始碼進行檢視。
更新全過程效果圖:
熱更新(AndFix)
熱更新技術近段時間非常火爆,各個大公司都相繼開發自己的熱更新框架。由於公司主要專案基於電商商城,所以我選擇了阿里巴巴的 AndFix 熱更新的實現,使用起來也比較簡單。至少在我的測試下修改一些小的 BUG 是沒有問題的。
我的開發工具是 Android Studio ,第一步導包:
app 的 dependencies 的節點下:
compile 'com.alipay.euler:andfix:0.3.1@aar'第二步配置 MyApplication 類:
    @TargetApi(Build.VERSION_CODES.KITKAT)
    @Override
    public void onCreate() {
        super.onCreate();

        String version = "";
        try {
            version = getPackageManager().getPackageInfo(getPackageName(), 0).versionName;
        } catch (PackageManager.NameNotFoundException e) {
            e.printStackTrace();
        }

        mPatchManager = new PatchManager(getApplicationContext());
        mPatchManager.init(version);
        mPatchManager.loadPatch();
        try {
            String patchFileString = "/sdcard" + APATCH_PATH;
            mPatchManager.addPatch(patchFileString);
        } catch (IOException e) {
            e.printStackTrace();
        }
    }
首先獲取到版本號,系統會判斷版本號,只有相同的版本號的時候會執行熱更新。其中 String patchFileString = "/sdcard" + APATCH_PATH; 是我測試的補丁存放路徑。你需要替換成你自己的存放路徑。
注意:檔案的許可權。
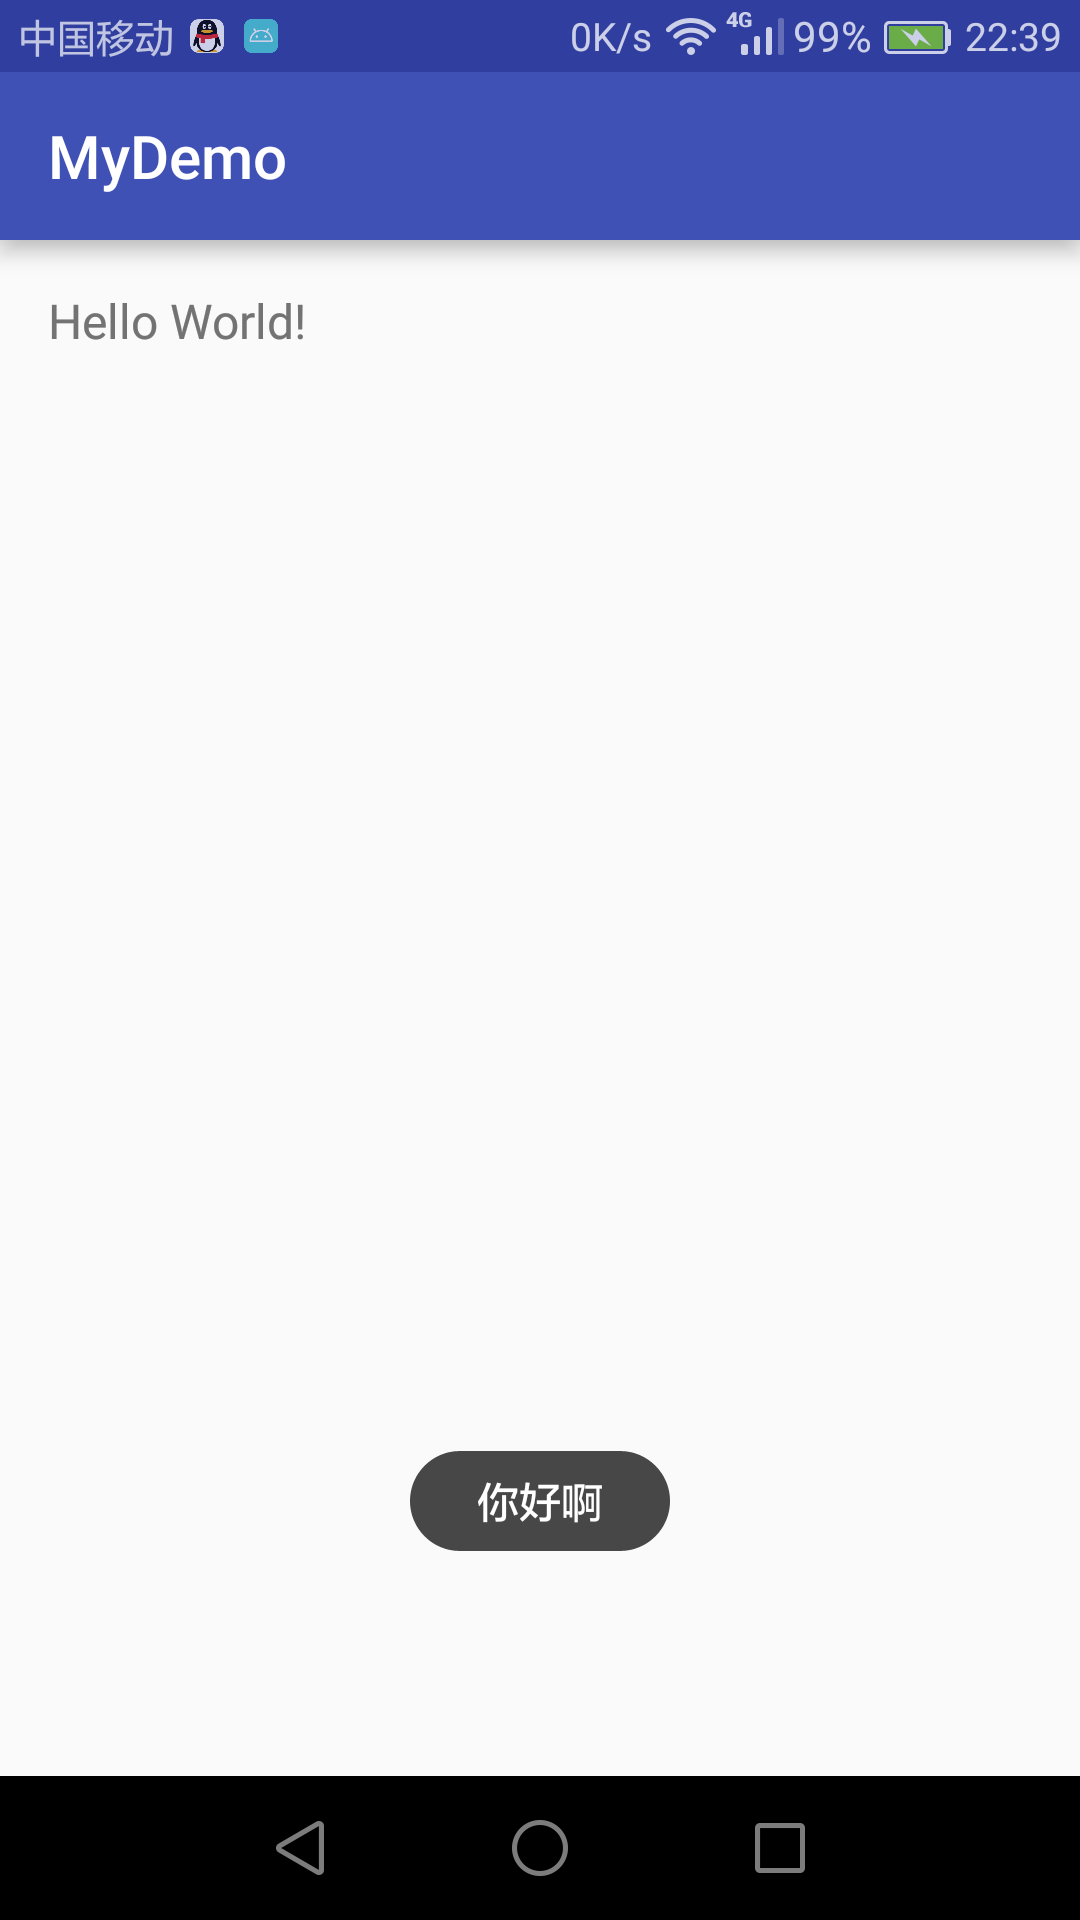
然後在 MainActivity 中寫一個列印吐司的方法:
    private void showToast() {
        Toast.makeText(this, "你好啊", Toast.LENGTH_LONG).show();
    }
然後打包,重新命名為 old.apk
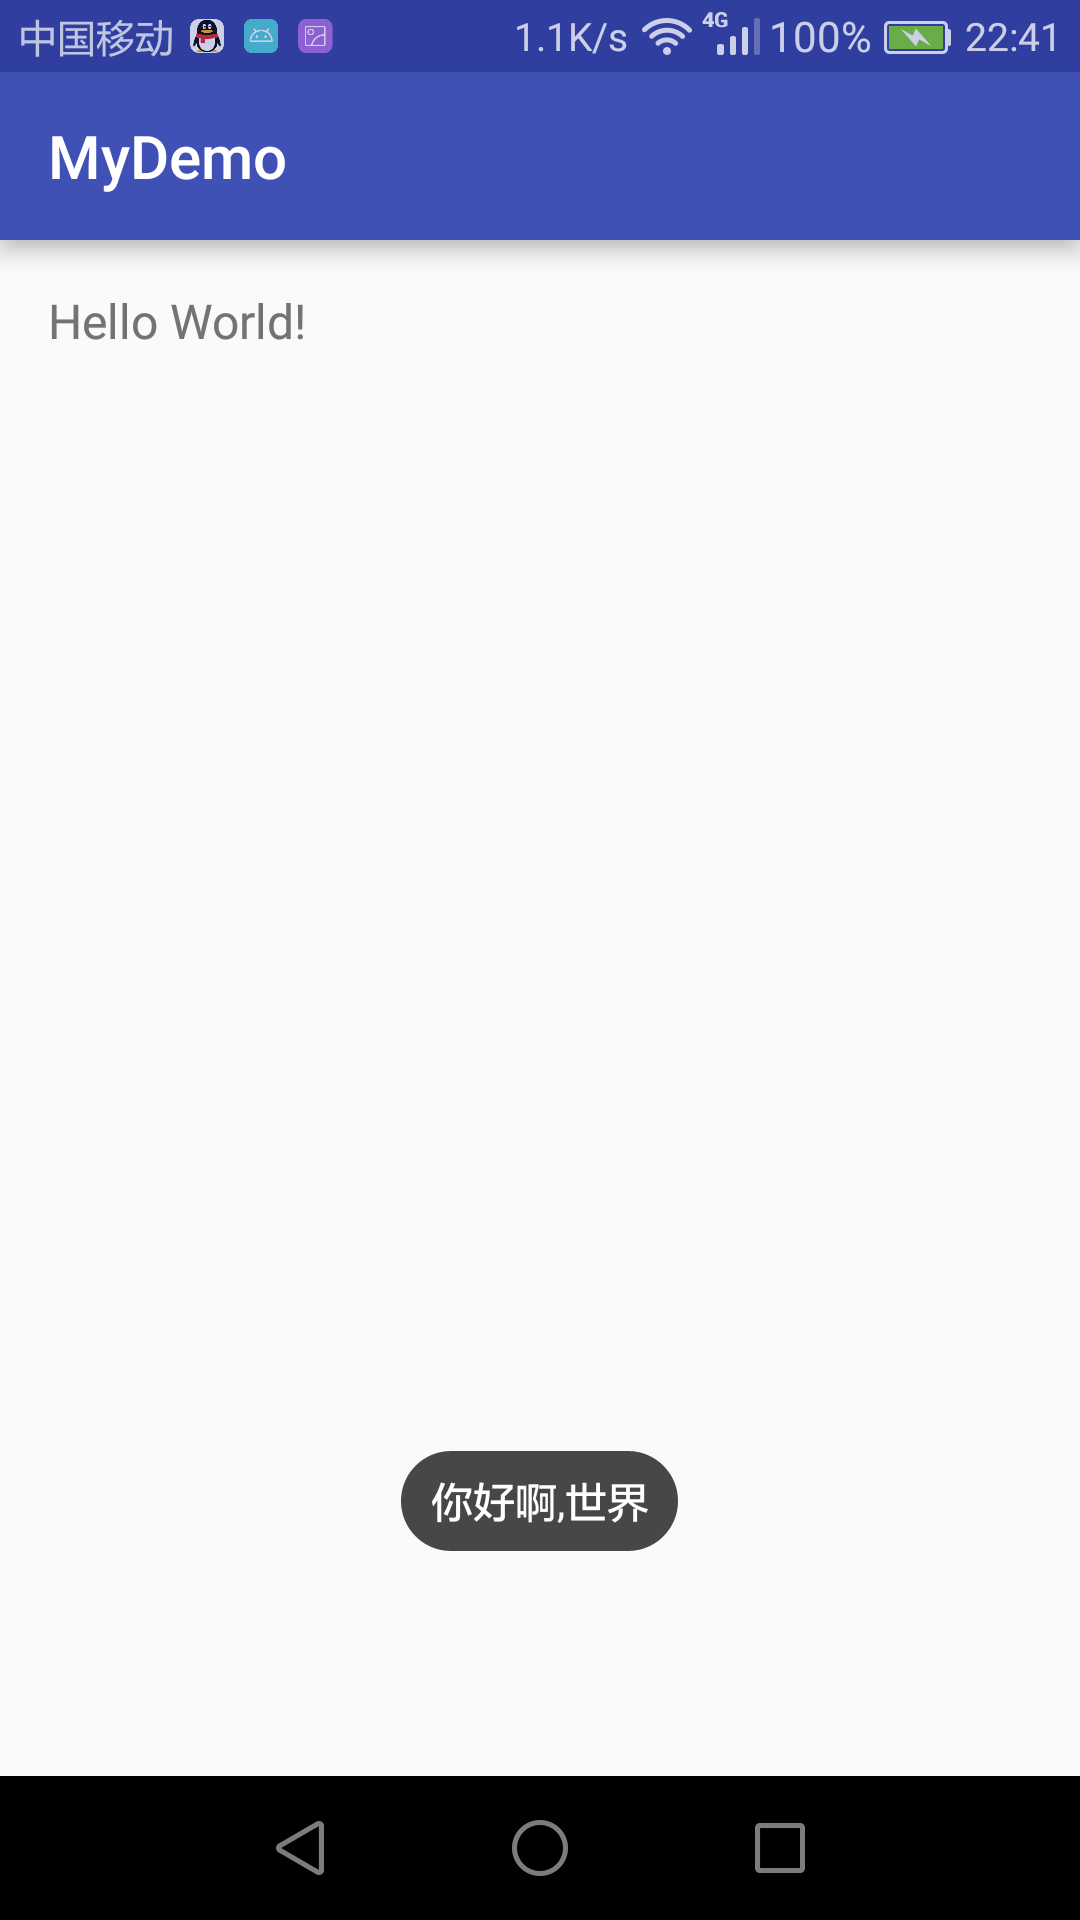
接著修改吐司的內容:
    private void showToast() {
        Toast.makeText(this, "你好啊,世界", Toast.LENGTH_LONG).show();
    }
重新打包,命名為 new.apk
下載apkpatch工具
下面是我的目錄結構:
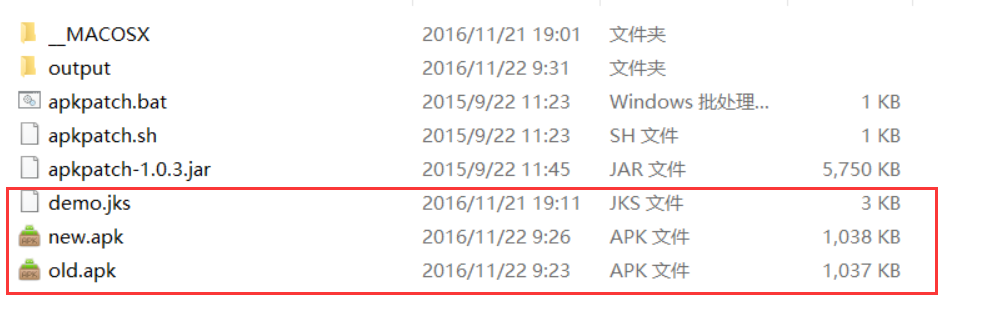
用紅線框框住的是簽名檔案,補丁包,舊包。
開啟 cmd ->cd 到 apkpatch 的目錄,如我 F:\AndroidTools\apkpatch 目錄下,下圖我已用紅框圈住:

然後輸入:
apkpatch.bat -f new.apk -t old.apk -o output -k demo.jks -p 123456 -a boby -e 123456 其中:
-f 是新apk的名字
-t 是舊apk的名字
-o 是輸出補丁的資料夾位置
-k 是 keystore(jks)檔案的名稱
-p 是keystore檔案的密碼
-a 是專案的別名
-e 別名的密碼
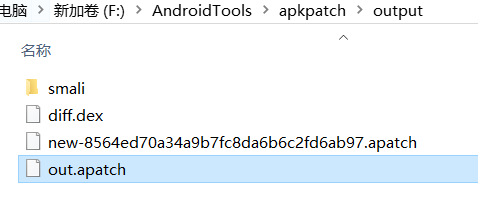
回車,不出現錯誤,補丁打包成功。
開啟 output 目錄,則可以看到 out.apatch 檔案。
補丁檔案上傳到後臺,然後通過介面下載到 /sdcard/out.apatch 目錄下。
注意 /sdcard/out.apatch 路徑,跟 MyApplication 中的一致。
看看效果:
安裝 old.apk 包:
安裝補丁,接著執行:
若你有什麼疑問請留言,如果對你有所幫助,請關注一下。