ASP.NET Core依賴注入&AutoFac
1. 前言
關於IOC模式和DI技術,網上已經有很多相關的探討,再次就不過多贅述了,只是簡單介紹一下它們的概念
- 控制反轉(IoC/Inverse Of Control): 呼叫者將建立例項的控制權交給IOC容器,由容器建立,所以稱為控制反轉。
- 依賴注入(DI/Dependence injection) : 容器建立好例項後再注入給呼叫者的過程稱為依賴注入。依賴注入技術讓我們的應用程式實現了鬆散耦合
.NetFramewok和.Net Core的區別之一就是.net core所有的例項都是通過依賴注入來建立的。下面介紹一下ASP.NET CORE中如何使用依賴注入
2.ASP.NET Core 中自帶的DI方式
ASP.NET Core本身已經集成了一個輕量級的IOC容器,開發者只需要定義好介面後,在Startup.cs的ConfigureServices方法裡使用對應生命週期的繫結方法即可
例:
//註冊資料庫基礎操作 services.AddScoped(typeof(IBLLConstruct<>), typeof(BLLConstruct<>)); //註冊快取操作 services.AddTransient(typeof(ICacheContext), typeof(CacheContext)); services.AddScoped(typeof(IAuth), typeof(LocalAuth)); services.AddSingleton(typeof(IHttpContextAccessor), typeof(HttpContextAccessor));
AddTransient:服務在每次請求時被建立
AddScoped:服務在每次請求時被建立,生命週期橫貫整次請求
AddSingleton:顧名思義Singleton(單例),服務在第一次請求時被建立(或者當我們在ConfigureServices中指定建立某一例項並執行方法),其後的每次請求將沿用已建立服務
在這之後,我們便可以將服務通過建構函式注入或者是屬性注入的方式注入到Controller,View(通過使用@inject),甚至是Filter中(以前的專案是使用Unity將依賴注入到Filter,個人感覺不如.net core中注入的簡潔)。
3.建構函式獲取例項
        //資料訪問
        protected IBLLConstruct<UserInforMations> _repository { get; set; }
        //快取
        protected ICacheContext _cache { get; set; }

        protected IAuth _auth { get; set; }

        public LoginService(IBLLConstruct<UserInforMations> repository, ICacheContext cache, IAuth auth)
        {
            this._cache = cache;
            this._repository = repository;
            this._auth = auth;
        }
流程大概就是這樣,我們啟動專案來看一下它的執行順序
(1)容器建立例項
(2)建構函式獲取例項

4.使用AutoFac實現擴充套件
除了ASP.NETCore自帶的IOC容器外,我們還可以使用其他成熟的DI框架,如Autofac,StructureMap等(本人只用過Unity,Autofac)。
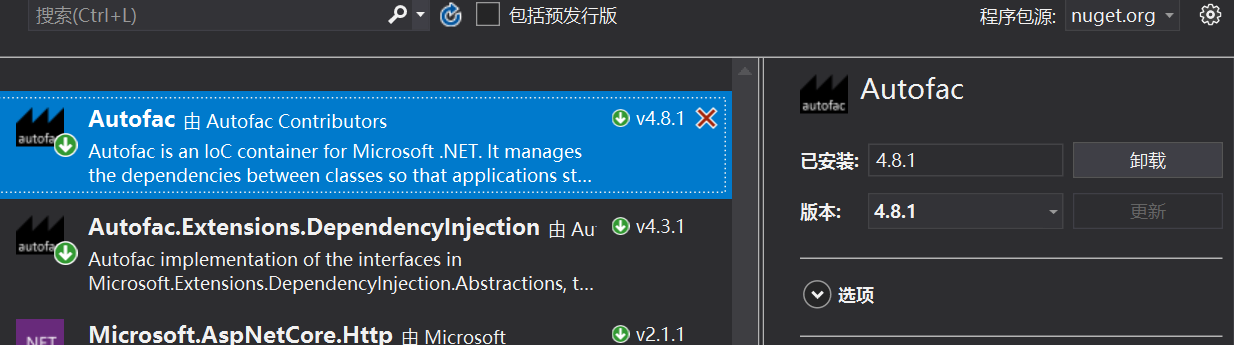
(1)安裝autofac
(2)建立容器並註冊依賴
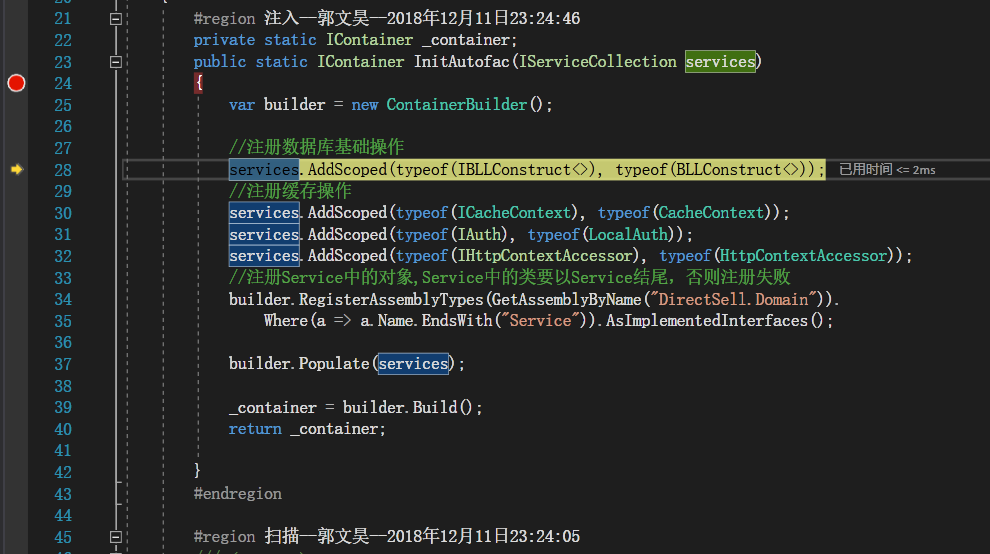
修改Startup.cs中ConfigureServices方法 不要忘了將ConfigureServices的返回值修改為IServiceProvider
public IServiceProvider ConfigureServices(IServiceCollection services)
        {
            services.Configure<CookiePolicyOptions>(options =>
            {
                // This lambda determines whether user consent for non-essential cookies is needed for a given request.
                options.CheckConsentNeeded = context => true;
                options.MinimumSameSitePolicy = SameSiteMode.None;
            });


            services.AddMvc().SetCompatibilityVersion(CompatibilityVersion.Version_2_1);

            services.AddDbContext<DirectSellContext>(options =>
            options.UseSqlServer(Configuration.GetConnectionString("DBContext"), b => b.UseRowNumberForPaging()));

            //使用AutoFac進行注入
            return new AutofacServiceProvider(AutofacExt.InitAutofac(services));

        }
(3)在AutofacExt類中建立容器並註冊依賴
        private static IContainer _container;
        public static IContainer InitAutofac(IServiceCollection services)
        {
            var builder = new ContainerBuilder();

            builder.RegisterType<GuidTransientAppService>().As<IGuidTransientAppService>();
            builder.RegisterType<GuidScopedAppService>().As<IGuidScopedAppService>().InstancePerLifetimeScope();
            builder.RegisterType<GuidSingletonAppService>().As<IGuidSingletonAppService>().SingleInstance();

            builder.Populate(services);

            _container = builder.Build();
            return _container;

        }
InstancePerLifetimeScope:同一個Lifetime生成的物件是同一個例項
SingleInstance:單例模式,每次呼叫,都會使用同一個例項化的物件;每次都用同一個物件;
InstancePerDependency:預設模式,每次呼叫,都會重新例項化物件;每次請求都建立一個新的物件;
(4)AutoFac批量註冊服務
通過以上方式可以實現注入,但是我們每定義一個介面,都要在AutoFac中註冊一次,可以使用RegisterAssemblyTypes來避免這種重複勞動
反射獲取程式集
        /// <summary>
        /// 根據程式集名稱獲取程式集
        /// </summary>
        /// <param name="AssemblyName">程式集名稱</param>
        /// <returns></returns>
        public static Assembly GetAssemblyByName(String AssemblyName)
        {
            return Assembly.Load(AssemblyName);
        }
批量註冊
            //註冊Service中的物件,Service中的類要以Service結尾,否則註冊失敗
            builder.RegisterAssemblyTypes(GetAssemblyByName("MyProject.Domain")).
                Where(a => a.Name.EndsWith("Service")).AsImplementedInterfaces();
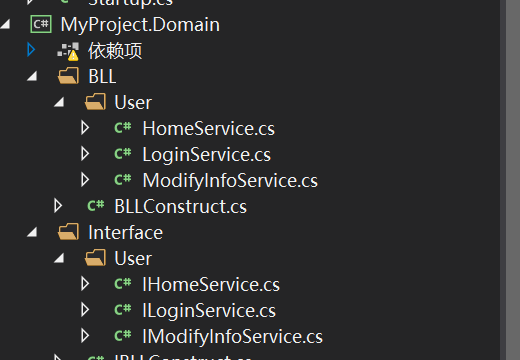
這樣就實現了Domain層中以Service結尾的介面批量註冊 命名格式如下: