Mycat快速入門(一): Mycat簡介
阿新 • • 發佈:2018-12-31
一:Mycat簡介
Mycat是資料庫分庫分表的中介軟體,Mycat使用最多的兩個功能是:讀寫分離和分庫分表功能,支援全域性表和E-R關係(這兩個比較實用)。
Mycat官網: http://www.mycat.io/
Mycat權威指南:http://www.mycat.io/document/mycat-definitive-guide.pdf
Mycat實體書籍:《分散式資料庫架構及企業實踐——基於Mycat中介軟體》 ISBN:978-7-121-30287-9
二:Mycat安裝
官網有Mycat的下載地址,下載最新的release版本即可,目前最新的是1.6-RELEASE,根據自己的作業系統下載安裝檔案,下載解壓就算安裝完成了,不需要別的操作。

- bin : 二進位制檔案,用於管理mycat,如啟動start、重啟restart、停止stop、檢視狀態status等
- conf : 配置檔案
- server.xml 用於配置Mycat的使用者名稱、密碼、邏輯資料庫名、服務埠、讀寫許可權等
- schema.xml 最常用的配置檔案,用於配置物理資料庫資訊(ip、port、username、password、database)、表的配置(表所在的資料節點、表的分片規則、主鍵是否自增等)、讀寫分離配置等
- rule.xml 分片規則配置,mycat提供了十多種分片規則,也可以自定義分片規則
- log4j2.xml 配置mycat的日誌資訊,開發的時候建議設定成debug級別
- lib : Mycat是Java語言開發的,這是引用的jar包
- logs: Mycat列印的日誌檔案
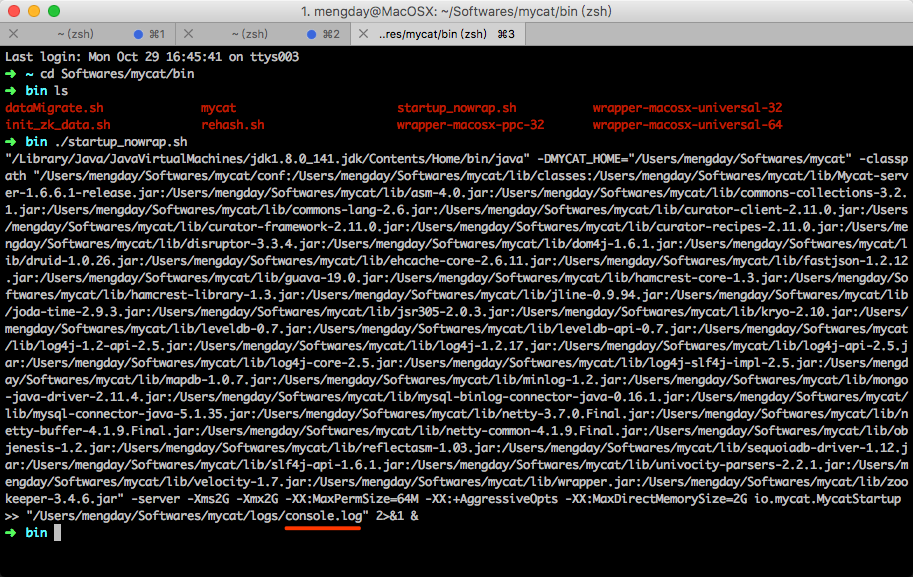
- console.log mycat啟動時的日誌,啟動成功一般會有有日誌記錄,如果沒有日誌記錄可以通過mycat status命令來檢視是否啟動成功,如果啟動失敗可以去mycat.log中檢視錯誤日誌
- mycat.log mycat執行sql對應的日誌,可以通過該日誌知道mycat是怎麼樣執行sql的,一些錯誤日誌會輸出到該檔案中,是一個很重要的日誌檔案
- wrapper.log 錯誤日誌也可能在這個日誌檔案中
- switch.log
三:mycat命令
# 前端啟動 列印一些資訊 通過ctrl+c來停止
~ bin/mycat console
# 後臺啟動 幾乎不列印日誌
~ bin/mycat start
# 列印的資訊比較多
~ ./bin/startup_nowrap.sh
# 重新啟動
~ bin/mycat restart

# 檢視mycat是否正在執行
~ bin/mycat status
# 停止mycat
~ bin/mycat stop

# 有時候啟動失敗是端口占用了,找到它,殺死它,重啟啟動
~ lsof -i:8066
~ kill -9 PID
~ bin/mycat start


四:Mycat的配置檔案
① server.xml
<?xml version="1.0" encoding="UTF-8"?>
<!DOCTYPE mycat:server SYSTEM "server.dtd">
<mycat:server xmlns:mycat="http://io.mycat/">
        <system>
                <property name="defaultSqlParser">druidparser</property>
                <property name="mutiNodeLimitType">1</property>
                <!-- mycat服務的埠號  -->
                <property name="serverPort">8066</property>
                <!-- mycat管理的埠號  -->
                <property name="managerPort">9066</property>
        </system>

        <!-- 配置連線Mycat的使用者名稱, 密碼, 邏輯資料庫名稱  -->
        <user name="root">
                <property name="password">root123</property>
                <property name="schemas">testdb</property>
        </user>

		<!-- readOnly=true 只讀使用者  -->
        <user name="guest">
                <property name="password">guest123</property>
                <property name="schemas">testdb</property>
                <property name="readOnly">true</property>
        </user>
</mycat:server>
server.xml用於配置mycat的服務引數,如mycat的服務埠號8066,mycat的管理埠號9066,連線mycat的使用者名稱user.name、密碼user.pasword、要連線的資料庫user.schemas(多個數據庫用逗號分隔,如db1,db2), user節點可以配置多個
② schema.xml
<?xml version="1.0"?>
<!DOCTYPE mycat:schema SYSTEM "schema.dtd">
<mycat:schema xmlns:mycat="http://io.mycat/">
	<schema name="TESTDB" checkSQLschema="false" sqlMaxLimit="100">
		<table name="hotnews" primaryKey="ID" autoIncrement="true" dataNode="dn1,dn2,dn3" rule="mod-long" />
		<table name="company" primaryKey="ID" type="global" dataNode="dn1,dn2,dn3" />

		<table name="customer" primaryKey="ID" dataNode="dn1,dn2" rule="sharding-by-intfile">
			<childTable name="orders" primaryKey="ID" joinKey="customer_id" parentKey="id">
				<childTable name="order_items" joinKey="order_id" parentKey="id" />
			</childTable>
			<childTable name="customer_addr" primaryKey="ID" joinKey="customer_id" parentKey="id" />
		</table>
	</schema>

	<dataNode name="dn1" dataHost="localhost1" database="db1" />
	<dataNode name="dn2" dataHost="localhost1" database="db2" />
	<dataNode name="dn3" dataHost="localhost1" database="db3" />

	<dataHost name="localhost1" maxCon="1000" minCon="10" balance="0"
			  writeType="0" dbType="mysql" dbDriver="native" switchType="1"  slaveThreshold="100">
		<heartbeat>select user()</heartbeat>

		<!-- 可以有多個writeHost子節點 -->
		<writeHost host="hostM1" url="localhost:3306" user="root" password="123456">
			<!-- 可以有多個readHost子節點 -->
			<readHost host="hostS2" url="192.168.1.200:3306" user="root" password="xxx" />
		</writeHost>
		<writeHost host="hostS1" url="localhost:3316" user="root" password="123456" />
		<!-- <writeHost host="hostM2" url="localhost:3316" user="root" password="123456"/> -->
	</dataHost>

</mycat:schema>
1. schema
schema標籤用於定義MyCat例項中的邏輯庫,MyCat可以有多個邏輯庫(即可以配置多個schema標籤),每個邏輯庫都有自己的相關配置。可以使用schema標籤來劃分這些不同的邏輯庫
| 屬性名 | 值 |
|---|---|
| name | 邏輯資料庫名稱,和server.xml中的user節點下的schemas節點的值保持相同(當schemas只有一個數據庫時) |
| checkSQLschema | 是否要檢查sql語句中是否包含schema,次schema的值就是schema節點中的name屬性,如當執行select * from TESTDB.表名;是否要將邏輯資料庫“TESTDB.”去掉,一般情況下寫SQL也不帶“TESTDB.”,所以一般情況下也不需要檢查,所以一般情況下都會設定為false |
| sqlMaxLimit | 當sql語句中沒有使用limit子句mycat會自動加上,防止返回資料過多影響效能,如果顯式使用limit子句了mycat就不會再自動加了 |
2. table
| 屬性名 | 值 |
|---|---|
| name | 表名 |
| primaryKey | 主鍵欄位 |
| autoIncrement | 主鍵是否自增,預設是false,如果要使用這個功能最好配合使用資料庫模式的全域性序列 |
| dataNode | 資料節點,一個數據節點對應一個物理資料庫,值為dataNode節點中的name屬性值,可以配置多個值,多個值使用逗號分隔 |
| type | 一般值為global表示全域性表,全域性表的意思是每個物理資料庫都會存在這個表,而且每個物理資料庫上的這個物理表的資料都完全一致,這樣當關聯全域性表時就不需要跨庫關聯 |
| rule | 分片規則,如果需要分表就需要指定使用哪個分片規則,分片規則在rule.xml中配置 |
3. childTable
子表,具有E-R關係的表,即具有父子關係的表或者是一對多關係的表,例如訂單表tbl_order和訂單項表tbl_order_item, 子表中可以巢狀子表
| 屬性名 | 值 |
|---|---|
| joinKey | 外來鍵欄位,例如tbl_order_item表中的欄位order_id |
| parentKey | 外來鍵實際指向的表對應的欄位,例如tbl_order_item.order_id實際是指向的tbl_order.id |
4. dataNode
資料節點
| 屬性名 | 值 |
|---|---|
| name | 名稱,可以在table節點中dataNode屬性來引用,dataHost屬性為dataHost節點中的name值 |
| database | 真實的物理資料庫名稱 |
5. dataHost
| 屬性名 | 值 |
|---|---|
| name | 名稱,可以在dataNode節點中的dataHost中引用該名稱 |
| maxCon | 指定每個讀寫例項連線池的最大連線 |
| minCon | 指定每個讀寫例項連線池的最小連線,初始化連線池的大小 |
| balance | 負載均衡型別,很重要的一個屬性, 一般讀寫分離要設定成1。 0: 不開啟讀寫分離機制,所有讀操作都發送到當前可用的writeHost上 1: 全部的 readHost 與 stand by writeHost 參與 select 語句的負載均衡,簡單的說,當雙主雙從模式(M1->S1,M2->S2,並且 M1 與 M2 互為主備),正常情況下,M2,S1,S2 都參與 select 語句的負載 均衡。 2: 所有讀操作都隨機的在 writeHost、readhost 上分發 3: 所有讀請求隨機的分發到 wiriterHost 對應的 readhost 執行,writerHost 不負擔讀壓力 |
| writeType | 寫操作的負載均衡,一般設定為0,表示所有寫操作傳送到配置的第一個writeHost,第一個掛了切到還生存的第二個writeHost,重新啟動後已切換後的為準,切換記錄在配置檔案中:dnindex.properties |
| switchType | 主從切換型別 1:預設值,表示自動切換 2: 基於MySQL主從同步的狀態決定是否切換(心跳語句為 show slave status) ,一般用於讀寫分離 3:基於 MySQL galary cluster 的切換機制(適合叢集) 心跳語句為 show status like ‘wsrep%’ |
| dbType | 資料庫的型別,有mysql、oracle、mongodb、spark等 |
| dbDriver | 一般設定為native |
6. heartbeat
心跳語句
- select user()
- show slave status
- show status like ‘wsrep%’
7. writeHost和readHost
writeHost:寫節點
readHost:讀節點,讀寫分離時一般寫走writeHost讀走readHost
| 屬性名 | 值 |
|---|---|
| host | 主機名,主一般使用Master中的M字尾來結尾,M後面使用1、2、3等序號標識 |
| url | 配置實際物理資料庫的ip和埠,例如url="127.0.0.1:3306" |
| user | 物理資料庫的使用者名稱 |
| password | 物理資料庫的密碼 |
③ rule.xml
<?xml version="1.0" encoding="UTF-8"?>
<!DOCTYPE mycat:rule SYSTEM "rule.dtd">
<mycat:rule xmlns:mycat="http://io.mycat/">
	<tableRule name="rule1">
		<rule>
			<columns>id</columns>
			<algorithm>func1</algorithm>
		</rule>
	</tableRule>

	<tableRule name="rule2">
		<rule>
			<columns>user_id</columns>
			<algorithm>func1</algorithm>
		</rule>
	</tableRule>

	<tableRule name="sharding-by-intfile">
		<rule>
			<columns>sharding_id</columns>
			<algorithm>hash-int</algorithm>
		</rule>
	</tableRule>
	<tableRule name="auto-sharding-long">
		<rule>
			<columns>id</columns>
			<algorithm>rang-long</algorithm>
		</rule>
	</tableRule>
	<tableRule name="mod-long">
		<rule>
			<columns>id</columns>
			<algorithm>mod-long</algorithm>
		</rule>
	</tableRule>
	<tableRule name="sharding-by-murmur">
		<rule>
			<columns>id</columns>
			<algorithm>murmur</algorithm>
		</rule>
	</tableRule>
	<tableRule name="crc32slot">
		<rule>
			<columns>id</columns>
			<algorithm>crc32slot</algorithm>
		</rule>
	</tableRule>
	<tableRule name="sharding-by-month">
		<rule>
			<columns>create_time</columns>
			<algorithm>partbymonth</algorithm>
		</rule>
	</tableRule>
	<tableRule name="latest-month-calldate">
		<rule>
			<columns>calldate</columns>
			<algorithm>latestMonth</algorithm>
		</rule>
	</tableRule>

	<tableRule name="auto-sharding-rang-mod">
		<rule>
			<columns>id</columns>
			<algorithm>rang-mod</algorithm>
		</rule>
	</tableRule>

	<tableRule name="jch">
		<rule>
			<columns>id</columns>
			<algorithm>jump-consistent-hash</algorithm>
		</rule>
	</tableRule>

	<function name="murmur" class="io.mycat.route.function.PartitionByMurmurHash">
		<property name="seed">0</property><!-- 預設是0 -->
		<property name="count">2</property><!-- 要分片的資料庫節點數量,必須指定,否則沒法分片 -->
		<property name="virtualBucketTimes">160</property><!-- 一個實際的資料庫節點被對映為這麼多虛擬節點,預設是160倍,也就是虛擬節點數是物理節點數的160倍 -->
		<!-- <property name="weightMapFile">weightMapFile</property> 節點的權重,沒有指定權重的節點預設是1。以properties檔案的格式填寫,以從0開始到count-1的整數值也就是節點索引為key,以節點權重值為值。所有權重值必須是正整數,否則以1代替 -->
		<!-- <property name="bucketMapPath">/etc/mycat/bucketMapPath</property>
			用於測試時觀察各物理節點與虛擬節點的分佈情況,如果指定了這個屬性,會把虛擬節點的murmur hash值與物理節點的對映按行輸出到這個檔案,沒有預設值,如果不指定,就不會輸出任何東西 -->
	</function>

	<function name="crc32slot" class="io.mycat.route.function.PartitionByCRC32PreSlot">
	</function>
	<function name="hash-int" class="io.mycat.route.function.PartitionByFileMap">
		<property name="mapFile">partition-hash-int.txt</property>
	</function>
	<function name="rang-long" class="io.mycat.route.function.AutoPartitionByLong">
		<property name="mapFile">autopartition-long.txt</property>
	</function>
	<function name="mod-long" class="io.mycat.route.function.PartitionByMod">
		<!-- dataNode 數量 -->
		<property name="count">3</property>
	</function>

	<function name="func1" class="io.mycat.route.function.PartitionByLong">
		<property name="partitionCount">8</property>
		<property name="partitionLength">128</property>
	</function>
	<function name="latestMonth" class="io.mycat.route.function.LatestMonthPartion">
		<property name="splitOneDay">24</property>
	</function>
	<function name="partbymonth" class="io.mycat.route.function.PartitionByMonth">
		<property name="dateFormat">yyyy-MM-dd</property>
		<property name="sBeginDate">2015-01-01</property>
	</function>

	<function name="rang-mod" cl
