
eclipse+webservice開發例項
1:首先版本對應Axis2-1.6. 對應tomcat也應該是1.6;版本對應Axis2-1.7對應tomcat也應該是1.7並且專案版本為3.0
參考部落格http://blog.csdn.net/xw13106209/article/details/7049614/ 非常感謝
下面是具體的釋出流程
1.1下載對應的Axis2版本
網址http://axis.apache.org/axis2/java/core/download.cgi ,選擇Standard Binary Distribution的zip包,解壓縮得到的目錄名axis2-1.4.1,目錄內的檔案結構如下:1.2.開發前配置:
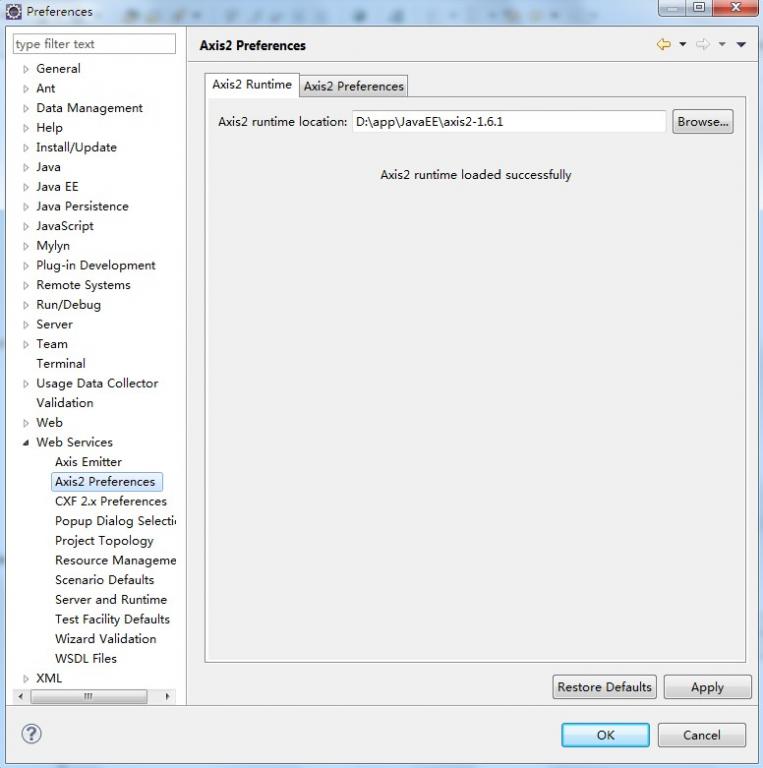
在Eclipse的選單欄中,Window --> Preferences --> Web Service --> Axis2 Perferences,在Axis2 runtime location中選擇Axis2解壓縮包的位置,設定好後,點"OK"即行。(如圖)
1.3開發服務
(1)新建一個Java Project,命名為"WebServiceTest1"
(2)新建一個class,命名為"CalculateService",完整程式碼如下:
- package edu.sjtu.webservice;
- /**
- * 計算器運算
- * @author rongxinhua
- */
- publicclass CalculateService {
- //加法
- publicfloat plus(float x, float y) {
- return x + y;
- }
- //減法
- publicfloat minus(float x, float y) {
- return x - y;
- }
- //乘法
- publicfloat multiply(float x, float y) {
- return x * y;
- }
- //除法
- publicfloat divide(float x, float y) {
- if(y!=0)
- {
- return x / y;
- }
- else
- return -1;
- }
- }
1.4配置
在Web Service對話方塊中,將Web Service type中的滑塊,調到"start service“的位置,將Client type中的滑塊調到"Test client"的位置。
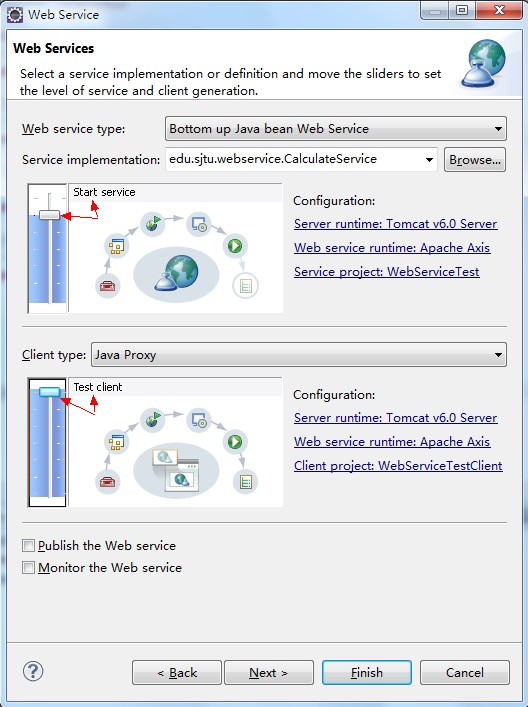
(6)在Web Service type滑塊圖的右邊有個"Configuration",點選它下面的選項,進入Service Deployment Configuration物件框,在這裡選擇相應的Server(我這裡用Tomcat6.0)和Web Service runtime(選擇Apache Axis2),如下圖:
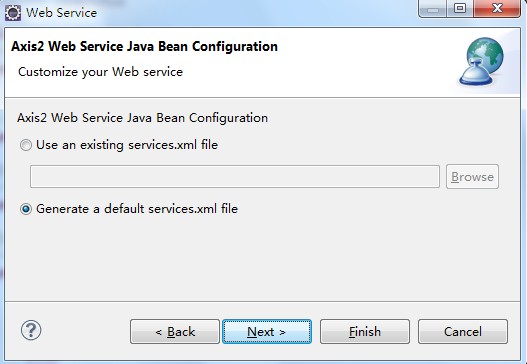
(7)點OK後,則返回到Web Service對話方塊,同理,Client type中的滑塊右邊也有"Configuration",也要進行相應的置,步驟同上。完成後,Next --> next即行。進入到Axis2 Web Service Java Bean Configuration,我們選擇Generate a default services.xml,如下圖所示:
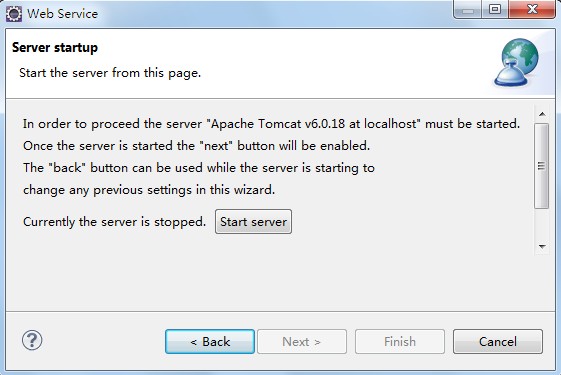
(8)到了Server startup對話方塊,有個按鍵"start server"(如下圖),點選它,則可啟動Tomcat伺服器了。
1.5等啟完後,點選"next -- > next",一切預設即行,最後,點選完成。最後,出現如下介面:(Web Service Explorer),我們在這裡便可測試我們的Web服務。
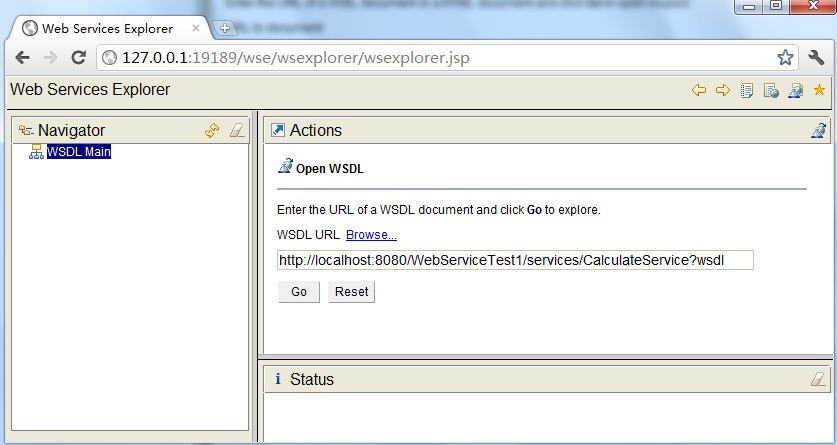
注:在瀏覽器中開啟Web Service Explorer(有時候在eclipse中關閉了webservice explorer,可以用這種方法開啟)
首先登入地址:http://127.0.0.1:19189/wse/wsexplorer/wsexplorer.jsp。然後在網頁右上角選擇Web Service Exoplorer標籤。然後輸入WSDL地址:http://localhost:8080/WebServiceTest1/services/CalculateService?wsdl 。這個wsdl地址就是我們剛才釋出服務的那個wsdl。點選go,如下圖所示:
然後就可以看到如下介面了:
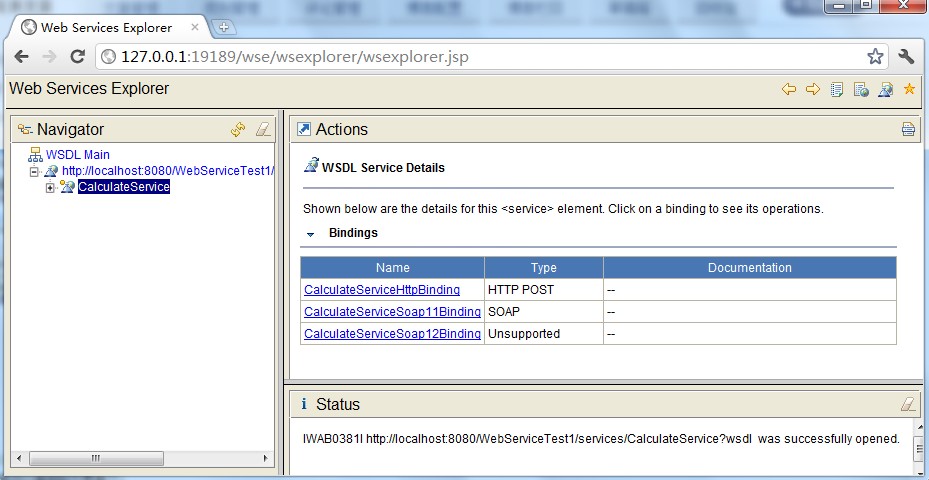
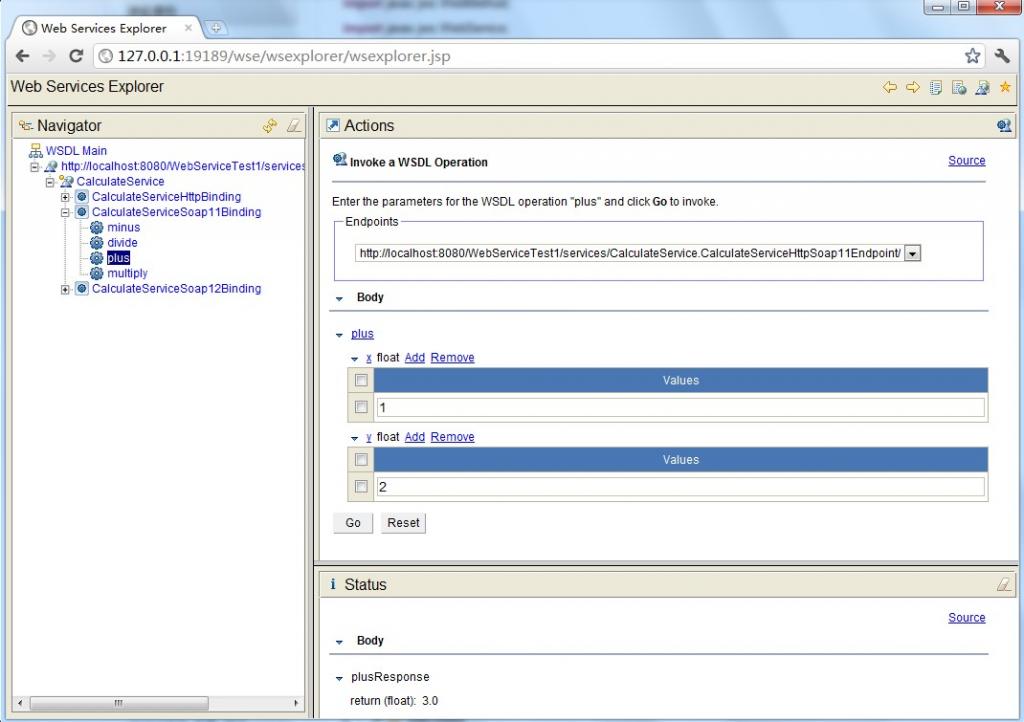
(10)測試比較簡單,例如,我們選擇一個"plus"的Operation(必須是CalculateServiceSoap11Binding),出現下圖,在x的輸入框中輸入1,在y的輸入框中輸入2,點選"go",便會在status欄中顯示結果3.0。其他方法的測試也類似。結果如上圖所示。
2.5.CalculateService客戶端呼叫程式
前面我們已經定義好了加減乘除的方法並將這些方法釋出為服務,那麼現在要做的就是呼叫這些服務即可。客戶端呼叫程式如下程式碼所示:CalculateServiceTest.java- package edu.sjtu.webservice.test;
- import javax.xml.namespace.QName;
- import org.apache.axis2.AxisFault;
- import org.apache.axis2.addressing.EndpointReference;
- import org.apache.axis2.client.Options;
- import org.apache.axis2.rpc.client.RPCServiceClient;
- publicclass CalculateServiceTest {
- /**
- * @param args
- * @throws AxisFault
- */
- publicstaticvoid main(String[] args) throws AxisFault {
- // TODO Auto-generated method stub
- // 使用RPC方式呼叫WebService
- RPCServiceClient serviceClient = new RPCServiceClient();
- Options options = serviceClient.getOptions();
- // 指定呼叫WebService的URL
- EndpointReference targetEPR = new EndpointReference(
- "http://localhost:8080/WebServiceTest1/services/CalculateService");
- options.setTo(targetEPR);
- // 指定要呼叫的計算機器中的方法及WSDL檔案的名稱空間:edu.sjtu.webservice。
- QName opAddEntry = new QName("http://webservice.sjtu.edu","plus");//加法
- QName opAddEntryminus = new QName("http://webservice.sjtu.edu","minus");//減法
- QName opAddEntrymultiply = new QName("http://webservice.sjtu.edu","multiply");//乘法
- QName opAddEntrydivide = new QName("http://webservice.sjtu.edu","divide");//除法
- // 指定plus方法的引數值為兩個,分別是加數和被加數
- Object[] opAddEntryArgs = new Object[] { 1,2 };
- // 指定plus方法返回值的資料型別的Class物件
- Class[] classes = new Class[] { float.class };
- // 呼叫plus方法並輸出該方法的返回值
- System.out.println(serviceClient.invokeBlocking(opAddEntry,opAddEntryArgs, classes)[0]);
- System.out.println(serviceClient.invokeBlocking(opAddEntryminus,opAddEntryArgs, classes)[0]);
- System.out.println(serviceClient.invokeBlocking(opAddEntrymultiply,opAddEntryArgs, classes)[0]);
- System.out.println(serviceClient.invokeBlocking(opAddEntrydivide,opAddEntryArgs, classes)[0]);
- }
- }