OpenCV學習(十一)之隨機數生成器RNG
阿新 • • 發佈:2019-01-02
OpenCV中C++的RNG類可以壓縮一個64位的i整數並可以得到scalar和array的隨機數。目前的版本支援均勻分佈隨機數和Gaussian分佈隨機數。隨機數的產生採用的是Multiply-With-Carry演算法和Ziggurat演算法。其建構函式的初始化可以傳入一個64位的整型引數作為隨機數產生器的初值。next可以取出下一個隨機數,uniform函式可以返回指定範圍的隨機數,gaussian函式返回一個高斯隨機數,fill則用隨機數填充矩陣等等。
以下測試程式分別測試了RNG類中各個函式的用法以及解釋了各個引數的意思,重點都在註釋裡。此外測試程式後半部分也大概介紹了c版本的隨機數產生器,如cvRNG、cvRandArr、cvRandInt、cvRandReal等。由於理解還能力有限,個別函式還是不太清楚。
實驗環境:VS2010 + OpenCV2.4.9.0
以下是結果:各個輸出的變數名相互對應#include <iostream> #include "cv.h" #include "highgui.h" using namespace cv; using namespace std; int main(int argc,char** argv) { RNG rng; // always produces 0 //RNG::uniform(int,int) //因為只會去整數,所以只產生0 double a = rng.uniform(0,1); //produces double from[0,1) double a1 = rng.uniform((double)0,(double)1); //produces float from[0,1) double b = rng.uniform(0.f,1.f); //produces double from[0,1) double c = rng.uniform(0.,1.); //may cause compiler error because of ambiguity: //RNG:: uniform(0,(int)0.999999) ? or RNG::unigorm((double)0,0.999999) //double d = rng.uniform(0,0.999999);所以先註釋起來吧 O(∩_∩)O cout << "a = " << a << endl; cout << "a1 = " << a1 << endl; cout << "b = " << b << endl; cout << "c = " << c << endl; //cout << "d = " << d << endl; /*-------- returns the next random number sampled from the Gaussian distribution------- * double RNG:: gaussian( double sigma) * sigma – standard deviation(標準差) of the distribution ------------------------------------------------------------------------------------*/ double g = rng.gaussian(2); cout << "g = " << g << endl; /*-------- returns the next random number(還不理解這個“下一個”是指什麼?) ------------------- * unsigned int RNG:: next() * The method updates the state using the MWC algorithm and returns the next 32-bit random number ------------------------------------------------------------------------------------*/ int n = rng.next(); cout << "n = " << n << endl; /*-------- RNG::operator T returns the next random number of the specified type --------- * RNG:: operator uchar() * RNG:: operator schar() * RNG:: operator ushort() * RNG:: operator short int() * RNG:: operator int() * RNG:: operator unsigned int() * RNG:: operator float() * RNG:: operator double() * 返回指定型別的下一個隨機數。對於int型,返回可用資料類型範圍內的隨機數,對於float型, 返回[0,1)範圍的隨機數 ------------------------------------------------------------------------------------*/ int n1 = rng.operator int(); cout << "n1 = " << n1 << endl; float f = rng.operator float(); cout << "f = " << f << endl; /*-------- RNG::operator () returns the next random number ----------------------- * unsigned int RNG:: operator() () == RNG::next() 兩個函式相同 * unsigned int RNG:: operator() (unsigned int N) 注意括號 * return the result in the range [0,N) ------------------------------------------------------------------------------------*/ int o = rng.operator ()(); int o1 = rng.operator() (50); cout << "o = " << o << endl << "o1 = " << o1 << endl; /*---------------------- fills arrays with random numbers.------------------------ * void RNG:: fill( InputOutputArray mat, int distType, InputArray a, InputArray b, bool saturateRange=false )函式原型 * mat – 2D or N-dimensional matrix; currently matrices with more than 4 channels are not supported by the methods, use Mat::reshape() as a possible workaround 說明了輸入矩陣的形式,目前尚不支援4通道以上的矩陣,如果超過了,需要呼叫reshape()函式 進行變更 * distribution type, RNG::UNIFORM or RNG::NORMAL 分佈的型別(均勻或高斯) * a – first distribution parameter; in case of the uniform distribution, this is an inclusive lower boundary, in case of the normal distribution, this is a mean value 當為均勻分佈時,a為下界(閉區間),當為高斯分佈時,表示均值 * b – second distribution parameter; in case of the uniform distribution, this is a non-inclusive upper boundary, in case of the normal distribution, this is a standard deviation (diagonal of the standard deviation matrix or the full standard deviation matrix) 當為均勻分佈時,a為上界(開區間),當為高斯分佈時,表示標準差 * saturateRange – pre-saturation flag; for uniform distribution only; if true, the method will first convert a and b to the acceptable value range (according to the mat datatype) and then will generate uniformly distributed random numbers within the range [saturate(a), saturate(b)) , if saturateRange=false, the method will generate uniformly distributed random numbers in the original range [a, b) and then will saturate them, it means, for example, that theRNG().fill(mat_8u, RNG::UNIFORM, -DBL_MAX, DBL_MAX) will likely produce array mostly filled with 0’s and 255’s, since the range (0, 255) is significantly smaller than [-DBL_MAX, DBL_MAX) 意思是:此變數只針對均勻分佈有效。當為真的時候,會先把產生隨機數的範圍變換到資料型別的範圍, 再產生隨機數;如果為假,會先產生隨機數,再進行截斷到資料型別的有效區間。請看以下fillM1和 fillM2的例子並觀察結果 ------------------------------------------------------------------------------------*/ Mat_<int>fillM(3,3); rng.fill(fillM,RNG::UNIFORM,1,1000); cout << "filM = " << fillM << endl << endl; Mat fillM1(3,3,CV_8U); rng.fill(fillM1,RNG::UNIFORM,1,1000,TRUE); cout << "filM1 = " << fillM1 << endl << endl; //fillM1產生的資料都在[0,,255)內,且小於255; //fillM2產生的資料雖然也在同樣範圍內,但是由於用了截斷操作,所以很多資料都是255, //因為CV_8U的有效範圍就是0~255 //所以我認為最好的方式就是事先想好需要的資料型別和範圍,再設定為FALSE(預設值) Mat fillM2(3,3,CV_8U); rng.fill(fillM2,RNG::UNIFORM,1,1000,FALSE); cout << "filM2 = " << fillM2 << endl << endl; /*------- uniformly-distributed random number or an array of random numbers---- * randu(dst, low, high) * dst – output array of random numbers; * low – inclusive lower boundary of the generated random numbers; * high - exclusive upper boundary of the generated random numbers; -----------------------------------------------------------------------------*/ Mat_<int>randuM(3,3); randu(randuM,Scalar(0),Scalar(255)); cout << "randuM = " << randuM << endl << endl; /*---------------normally distributed random numbers------------------- * randn(dst, mean, stddev)(也叫高斯分佈) * dst – output array of random numbers; the array must be pre-allocated and have 1 to 4 channels; * mean(均值) – mean value (expectation) of the generated random numbers * stddev - standard deviation(標準差) of the generated random numbers; it can be either a vector (in which case a diagonal standard deviation matrix is assumed) or a square matrix -----------------------------------------------------------------------------*/ Mat_<int>randnM(3,3); randn(randnM,0,1); cout << "randnM = " << randnM << endl << endl; /*-----------------Shuffles the array elements randomly(產生隨機打亂的矩陣)--------------- * randShuffle( InputOutputArray dst, double iterFactor=1., RNG* rng=0 ) * dst - input/output numerical 1D array; * iterFactor - scale factor that determines the number of random swap operations; * rng - optional random number generator used for shuffling; if it is zero, theRNG()() is used instead; * The function randShuffle shuffles the specified 1D array by randomly choosing pairs of elements and swapping them. The number of such swap operations will be dst.rows*dst.cols*iterFactor -----------------------------------------------------------------------------*/ Mat_<int>randShufM(4,1); randShuffle(randShufM,1,0); cout << "randShufM = " << randShufM << endl << endl; //還不太會用... /*------------------------下面介紹一下C版的隨機數產生器的相關函式---------------*/ /*------- initializes a random number generator state(初始化隨機數生成器狀態)----- * CvRNG cvRNG( int64 seed=-1) 函式原型 * seed – 64-bit value used to initiate a random sequence 64-bit的值用來初始化隨機序列; 函式 cvRNG 初始化隨機數生成器並返回其狀態。 指向這個狀態的指標可以傳遞給函式 cvRandInt, cvRandReal 和 cvRandArr; 在通常的實現中使用一個 multiply-with-carry generator C++版本中的RNG已經代替了CvRNG -----------------------------------------------------------------------------*/ //CvRNG rng1 = cvRNG(-1); CvRNG cvRNG; /*------- fills an array with random numbers and updates the RNG state------- * void cvRandArr( CvRNG* rng, CvArr* arr, int dist_type, CvScalar param1, CvScalar param2)函式原型 * rng – CvRNG state initialized by RNG()被 cvRNG 初始化的 RNG 狀態 * arr – The destination array * dist_type – Distribution type - CV_RAND_UNI uniform distribution - CV_RAND_NORMAL normal or Gaussian distribution * param1 – The first parameter of the distribution. In the case of a uniform distribution it is the inclusive lower boundary of the random numbers range. In the case of a normal distribution it is the mean value of the random numbers 如果是均勻分佈它是隨機數範圍的閉下邊界;如果是正態分佈它是隨機數的平均值 * param2 – The second parameter of the distribution. In the case of a uniform distribution it is the exclusive upper boundary of the random numbers range. In the case of a normal distribution it is the standard deviation of the random numbers 如果是均勻分佈它是隨機數範圍的開上邊界;如果是正態分佈它是隨機數的標準差 -----------------------------------------------------------------------------*/ CvMat* cvM = cvCreateMat(3,3,CV_16U); cvRandArr(&cvRNG,cvM,CV_RAND_UNI,cvScalarAll(0),cvScalarAll(255)); cout << "cvM = " << cvM << endl << endl; //這裡輸出有點奇怪,明明定義的是矩陣,卻輸出的一串數字,不理解? /*------- returns a 32-bit unsigned integer and updates RNG------- * unsigned int cvRandInt( CvRNG* rng)函式原型 * rng – CvRNG state initialized by RNG() 函式 cvRandInt 返回均勻分佈的隨機 32-bit 無符號整型值並更新 RNG 狀態; 它和 C 執行庫裡面的 rand() 函式十分相似,但是它產生的總是一個 32-bit 數而 rand() 返回一個 0 到 RAND_MAX(它是 2**16 或者 2**32, 依賴於操作平臺)之間的數 -----------------------------------------------------------------------------*/ int cvInt = cvRandInt(&cvRNG); cout << "cvInt = " << cvInt << endl; /*------- returns a floating-point random number and updates RNG.------- * double cvRandReal( CvRNG* rng)函式原型 * rng – RNG state initialized by RNG() 函式 cvRandReal 返回均勻分佈的隨機浮點數,範圍在 0~1 之間 (不包括1) -----------------------------------------------------------------------------*/ double cvDouble = cvRandReal(&cvRNG); cout << "cvDouble = " << cvDouble << endl; system("pause"); return 0; }
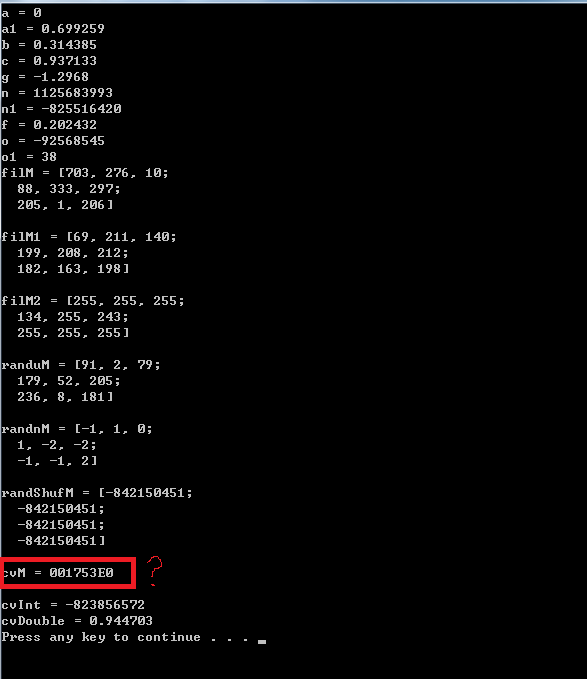
同時也可以看到fillM1和fillM2之間的區別。
以下給出RNG類在OpenCV中原始碼:
/*!
   Random Number Generator
   The class implements RNG using Multiply-with-Carry algorithm
*/
class CV_EXPORTS RNG
{
public:
    enum { UNIFORM=0, NORMAL=1 };


RNG();//預設建構函式
// inline RNG::RNG() { state = 0xffffffff; }

RNG(uint64 state);//帶引數的建構函式,接受一個64位無符號的值。
//inline RNG::RNG(uint64 _state) { state = _state ? _state : 0xffffffff; }


//! updates the state and returns the next 32-bit unsigned integer random number
    unsigned next();
/*
inline unsigned RNG::next()
{
    state = (uint64)(unsigned)state*CV_RNG_COEFF + (unsigned)(state >> 32);
    return (unsigned)state;
}
#define CV_RNG_COEFF 4164903690U
用兩個很大的無符號數相乘,乘積結果要轉換為64位無符號數,轉換的時候兩個乘數應該向高精度看起,所以應該也先轉換為64位再相乘。把state右移32位得到一個數,把這兩個數相加。函式返回一個32位的無符號數,其值為截斷前面求得的和。
*/

//以下幾個函式是從類到uchar.schar,ushort,short,usinged的顯示轉換函式
operator uchar();//返回一個8位無符號型別的隨機數,把next返回的數截斷
//inline RNG::operator uchar() { return (uchar)next(); }

operator schar();//返回一個8為有符號型別的隨機數。???會產生負數嗎,返回的也是截斷的next返回值。莫非是截斷後得到的最高位作為符號位,這樣也可能是隨機的。???
//inline RNG::operator schar() { return (schar)next(); }

operator ushort();//返回一個無符號16為整數
//inline RNG::operator ushort() { return (ushort)next(); }

operator short();//返回一個有符號16為整數
// inline RNG::operator short() { return (short)next(); }


operator unsigned();//返回一個無符號32為整數
// inline RNG::operator unsigned() { return next(); }


//! returns a random integer sampled uniformly from [0, N).
unsigned operator ()(unsigned N);//過載括號操作符,帶引數。在(0,N)之間返回一個整數,呼叫uniform成員函式
//inline unsigned RNG::operator ()(unsigned N) {return (unsigned)uniform(0,N);}


unsigned operator ()();//過載括號操作符,無引數。直接返回next結果。
// inline unsigned RNG::operator ()() {return next();}


//放在這個位置有點奇怪,為什麼不和前邊同類放一起呢?放回一個帶符//號32為整數
operator int();
// inline RNG::operator int() { return (int)next(); }

//返回一個float型(具體多少位看平臺)數。
operator float();
// inline RNG::operator float() { return next()*2.3283064365386962890625e-10f; }

//兩個數按位或一下
operator double();
/*
inline RNG::operator double()
{
    unsigned t = next();
    return (((uint64)t << 32) | next())*5.4210108624275221700372640043497e-20;
}*/


//! returns uniformly distributed integer random number from [a,b) range
int uniform(int a, int b);//[a,b)內隨機產生一個int型值,均勻分佈
// inline int RNG::uniform(int a, int b) { return a == b ? a : (int)(next()%(b - a) + a); }


//! returns uniformly distributed floating-point random number from [a,b) range
float uniform(float a, float b); //[a,b)內隨機產生一個float型值,均勻分佈
// inline float RNG::uniform(float a, float b) { return ((float)*this)*(b - a) + a; }


//! returns uniformly distributed double-precision floating-point random number from [a,b) range
double uniform(double a, double b); //[a,b)內隨機產生一個double型值,均勻分佈
// inline double RNG::uniform(double a, double b) { return ((double)*this)*(b - a) + a; }

void fill( InputOutputArray mat, int distType, InputArray a, InputArray b, bool saturateRange=false );//這個函式實現很長,暫時略過。

//! returns Gaussian random variate with mean zero.
double gaussian(double sigma);//返回均值為0的高斯隨機變數,
/*double RNG::gaussian(double sigma)
{
    float temp;
    randn_0_1_32f( &temp, 1, &state );
    return temp*sigma;
}*/


uint64 state;//種子,next中需要這樣一個初始值
};
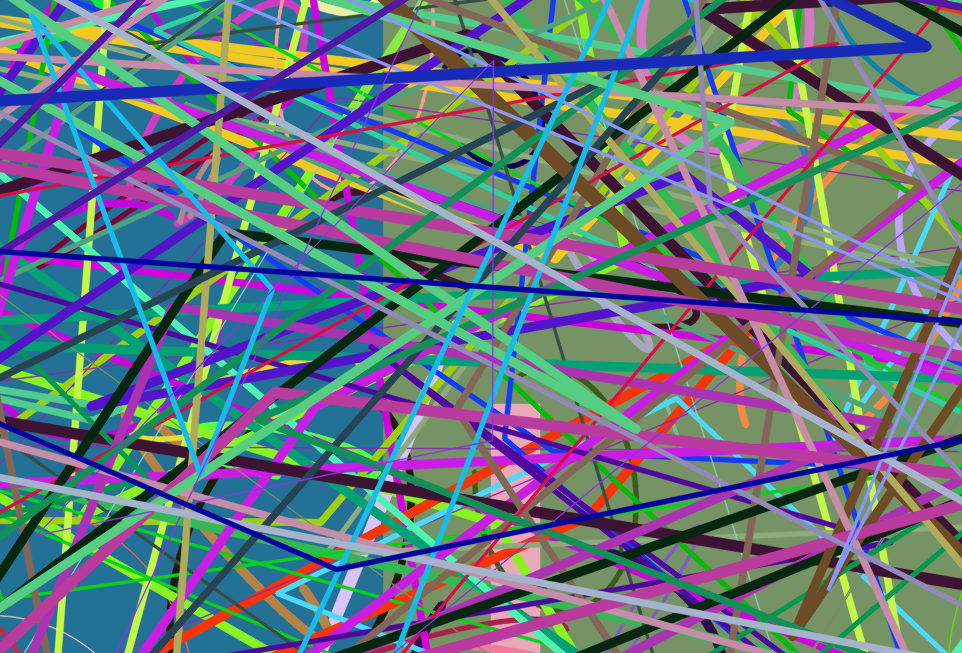
以下是一個以RNG的例子,畫隨機直線和在影象中新增字元:
#include <iostream>
#include "cv.h"
#include "highgui.h"

using namespace std;
using namespace cv;

const char wndName[] = "randDraw";
const int randNumber = 100;

static Scalar randomColor(RNG& rng)
{
	int rColor = (unsigned)rng;
	//顏色是用RGB三通道表示,因此上面函式中顏色引數的型別都是Scalar型別
	//將隨機數的值取出分別作為RGB三個通道的顏色值
	return Scalar(rColor & 0xFF,(rColor >> 8) & 0xFF,(rColor >> 16) & 0xFF);
}

int main(int argc,char** argv)
{
	 //抗鋸齒,平滑線
	//改為8就不是咯~
	int lineType = CV_AA;
	int width = 1000;
	int height = 700;
	int x1 = - width/2;
	int x2 = 3 * width/2;
	int y1 = - height/2;
	int y2 = 3 * height/2;
	const int DELAY = 10;

	//0xFFFFFFFF表示初始的隨機值
	//RNG rng(0xFFFFFFFF);
	RNG rng;
	Mat image = Mat::zeros(height,width,CV_8UC3);
	imshow(wndName,image);
	waitKey(DELAY);

	for(int i = 0;i < randNumber;i++)
	{
		Point pt1;
		Point pt2;
		pt1.x = rng.uniform(x1,x2);
		pt1.y = rng.uniform(y1,y2);
		pt2.x = rng.uniform(x1,x2);
		pt2.y = rng.uniform(y1,y2);
		/*----------------------draws a line segment connecting two points-----------
		*	void line( Mat& img, Point pt1, Point pt2, const Scalar& color,
						int thickness=1, int lineType=8, int shift=0)函式原型
		*	lineType – Type of the line:
						– 8 (or omitted) - 8-connected line.
						– 4 - 4-connected line.
						– CV_AA - antialiased line.
		-----------------------------------------------------------------------------*/
		line(image,pt1,pt2,randomColor(rng),rng.uniform(1,10),lineType);
	}
	imshow(wndName,image);
	waitKey(0);

	for(int i = 0;i < randNumber;i++)
	{
		Point org;
		org.x = rng.uniform(x1,x2);
		org.y = rng.uniform(y1,y2);

		/*-------------------------draws a text string--------------------------------
		*	void putText(Mat& img, const string& text, Point org, int fontFace,
						double fontScale, Scalar color,int thickness=1,
							int lineType=8, bool bottomLeftOrigin=false )函式原型
		*	img – image
		*	text – Text string to be drawn
		*	org – Bottom-left corner of the text string in the image.
		*	font – CvFont structure initialized using InitFont() C版本的引數
		*	fontFace – Font type. One of FONT_HERSHEY_SIMPLEX, FONT_HERSHEY_PLAIN,
						FONT_HERSHEY_DUPLEX, FONT_HERSHEY_COMPLEX, FONT_HERSHEY_TRIPLEX,
						FONT_HERSHEY_COMPLEX_SMALL, FONT_HERSHEY_SCRIPT_SIMPLEX, or
						FONT_HERSHEY_SCRIPT_COMPLEX, where each of the font ID’s can be
						combined with FONT_HERSHEY_ITALIC to get the slanted letters
		*	fontScale – Font scale factor that is multiplied by the font-specific base size
		*	color – Text color
		*	thickness – Thickness of the lines used to draw a text
		*	lineType – Line type. See the line for details
		*	bottomLeftOrigin – When true, the image data origin is at the bottom-left corner;
			Otherwise, it is at the top-left corner.如果為真,影象原點在左下角,否則在左上角
		-----------------------------------------------------------------------------*/
		putText(image,"OpenCV",org,rng.uniform(0,8),rng.uniform(0,10)*0.5 + 0.1,
			randomColor(rng),rng.uniform(1,10),lineType,FALSE);
	}

	imshow(wndName,image);
	waitKey(0);
	return 0;
}


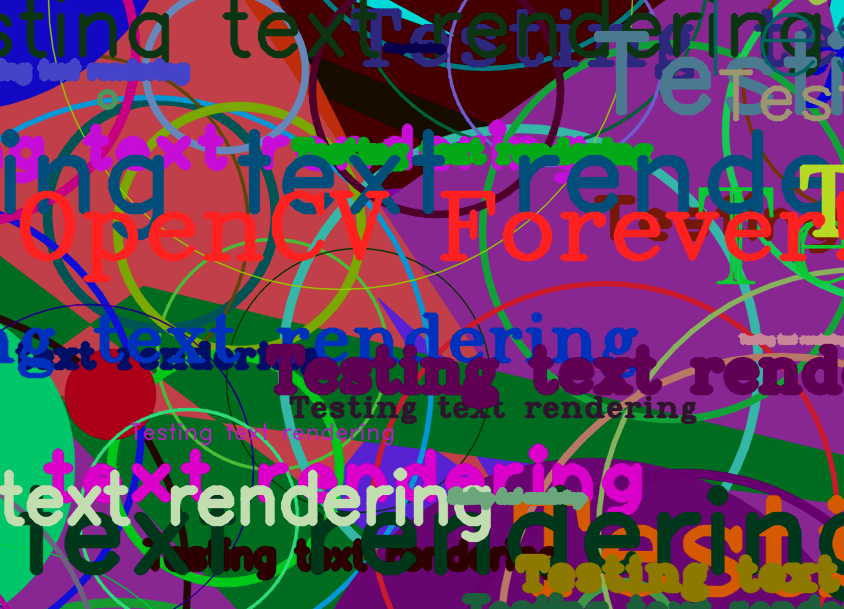
最後,再列出一個OpenCV自帶Demo,我稍微對函式進行了註釋。主要是為了練習使用隨機數生成器和如何使用OpenCV畫圖。
#include <iostream>
#include "cv.h"
#include "highgui.h"

using namespace std;
using namespace cv;

static void help()
{
	cout << "This program demonstrates OpenCV drawing and text output functions" << endl
		<< "Usage:" << endl
		<<"./drawing" << endl;
}

static Scalar randomColor(RNG& rng)
{
	int iColor = unsigned(rng);
	//255 = 0xFF
	return Scalar(iColor & 255,(iColor >> 8) & 255,(iColor >> 16) & 255);
}

int main(int argc,char** argv)
{
	help();
	char wndName[] = "Drawing Demo";
	const int randomNumber = 100;
	const int DELAY = 10;
	int lineType = CV_AA;
	int height = 700;
	int width = 1000;
	int x1 = - width/2;
	int x2 = 3 * width/2;
	int y1 = - height/2;
	int y2 = 3 * height/2;
	RNG rng(0xFFFFFFFF);

	Mat image = Mat::zeros(height,width,CV_8UC3);
	imshow(wndName,image);
	waitKey(DELAY);

	//draw line
	for(int i = 0;i < randomNumber;i++)
	{
		Point pt1,pt2;
		pt1.x = rng.uniform(x1,x2);
		pt1.y = rng.uniform(y1,y2);
		pt2.x = rng.uniform(x1,x2);
		pt2.y = rng.uniform(y1,y2);
		line(image,pt1,pt2,randomColor(rng),rng.uniform(1,10),lineType);
		imshow(wndName,image);
		if(waitKey(DELAY) >= 0)
			return 0;
	}

	//draw rectangle
	for(int i = 0;i < randomNumber;i++)
	{
		Point pt1,pt2;
		pt1.x = rng.uniform(x1,x2);
		pt1.y = rng.uniform(y1,y2);
		pt2.x = rng.uniform(x1,x2);
		pt2.y = rng.uniform(y1,y2);
		int thickness = rng.uniform(-3,10);

		/*----------------------draws a simple, thick, or filled up-right rectangle-----------
		*	C++: void rectangle(Mat& img, Point pt1, Point pt2, const Scalar& color,
								int thickness=1, int lineType=8,int shift=0)
		*	C++: void rectangle(Mat& img, Rect rec, const Scalar& color, int thickness=1,
								int lineType=8, int shift=0)
		*	img – image
		*	pt1 – Vertex of the rectangle
		*	pt2 – Vertex of the rectangle opposite to pt1
		*	rec – Alternative specification of the drawn rectangle
		*	color – Rectangle color or brightness (grayscale image)
		*	thickness – Thickness of lines that make up the rectangle. Negative values,
			like CV_FILLED, mean that the function has to draw a filled rectangle
		*	lineType – Type of the line. See the line() description
		*	shift – Number of fractional bits in the point coordinates
		-----------------------------------------------------------------------------*/
		rectangle(image,pt1,pt2,randomColor(rng),MAX(thickness,-1),lineType);
		imshow(wndName,image);
		if(waitKey(DELAY) >= 0)
			return 0;
	}


	//draw ellipse
	for(int i = 0; i < randomNumber;i++)
	{
		Point center;
		center.x = rng.uniform(x1,x2);
		center.y = rng.uniform(y1,y2);
		Size axes;
		axes.width = rng.uniform(0,200);
		axes.height = rng.uniform(0,200);
		double angle = rng.uniform(0,180);

		/*---------draws a simple or thick elliptic arc or fills an ellipse sector---------
		*	C++: void ellipse(Mat& img, Point center, Size axes, double angle,
								double startAngle,double endAngle,const Scalar& color,
								int thickness=1, int lineType=8, int shift=0)
		*	C++: void ellipse(Mat& img, const RotatedRect& box, const Scalar& color,
								int thickness=1, int lineType=8)
		*	img – image
		*	center – Center of the ellipse 橢圓中心
		*	axes – Half of the size of the ellipse main axes 橢圓長軸的一半
		*	angle – Ellipse rotation angle in degrees 橢圓旋轉的角度
		*	startAngle – Starting angle of the elliptic arc in degrees 弧度開始的角度
		*	endAngle – Ending angle of the elliptic arc in degrees 弧度結束的角度
		*	box – Alternative ellipse representation via RotatedRect or CvBox2D
			This means that the function draws an ellipse inscribed in the rotated rectangle
		*	color – Ellipse color
		*	thickness – Thickness of the ellipse arc outline, if positive. Otherwise, this indicates that a
			filled ellipse sector is to be drawn
		*	lineType – Type of the ellipse boundary. See the line() description
		*	shift – Number of fractional bits in the coordinates of the center and values of axes
		-----------------------------------------------------------------------------*/
		ellipse(image,center,axes,angle,angle - 100,angle + 200,randomColor(rng),rng.uniform(1,8),lineType);
		imshow(wndName,image);
		if(waitKey(DELAY) >= 0)
			return 0;
	}

	//draw polylines
	for(int i = 0;i < randomNumber;i++)
	{
		Point pt[2][3];
		pt[0][0].x = rng.uniform(x1,x2);
		pt[0][0].y = rng.uniform(y1,y2);
		pt[0][1].x = rng.uniform(x1,x2);
		pt[0][1].y = rng.uniform(y1,y2);
		pt[0][2].x = rng.uniform(x1,x2);
		pt[0][2].y = rng.uniform(y1,y2);
		pt[1][0].x = rng.uniform(x1,x2);
		pt[1][0].y = rng.uniform(y1,y2);
		pt[1][1].x = rng.uniform(x1,x2);
		pt[1][1].y = rng.uniform(y1,y2);
		pt[1][2].x = rng.uniform(x1,x2);
		pt[1][2].y = rng.uniform(y1,y2);
		const Point* ppt[2] = {pt[0],pt[1]};
		int npt[] = {3,3};

		/*-------------------draws several polygonal curves----------------------------
		*	C++: void polylines(Mat& img, const Point** pts, const int* npts, int ncontours,
									bool isClosed, const Scalar& color, int thickness=1,
										int lineType=8, int shift=0 )
		*	C++: void polylines(InputOutputArray img, InputArrayOfArrays pts, bool isClosed,
							const Scalar& color,int thickness=1, int lineType=8, int shift=0 )
		*	img – image
		*	pts – Array of polygonal curves 多邊形曲線陣列
		*	npts – Array of polygon vertex counters 頂點陣列
		*	ncontours – Number of curves 曲線數量
		*	isClosed – Flag indicating whether the drawn polylines are closed or not
						If they are closed,the function draws a line from the last vertex
						of each curve to its first vertex 標誌曲線是否閉合
		*	color – Polyline color
		*	thickness – Thickness of the polyline edges
		*	lineType – Type of the line segments. See the line() description
		*	shift – Number of fractional bits in the vertex coordinates
		-----------------------------------------------------------------------------*/
		polylines(image,ppt,npt,2,TRUE,randomColor(rng),rng.uniform(1,10),lineType);
		imshow(wndName,image);
		if(waitKey(DELAY) >= 0)
			return 0;
	}

	//draw polygons with filled area
	for(int i = 0;i < randomNumber;i++)
	{
		Point pt[2][3];
		pt[0][0].x = rng.uniform(x1, x2);
		pt[0][0].y = rng.uniform(y1, y2);
		pt[0][1].x = rng.uniform(x1, x2);
		pt[0][1].y = rng.uniform(y1, y2);
		pt[0][2].x = rng.uniform(x1, x2);
		pt[0][2].y = rng.uniform(y1, y2);
		pt[1][0].x = rng.uniform(x1, x2);
		pt[1][0].y = rng.uniform(y1, y2);
		pt[1][1].x = rng.uniform(x1, x2);
		pt[1][1].y = rng.uniform(y1, y2);
		pt[1][2].x = rng.uniform(x1, x2);
		pt[1][2].y = rng.uniform(y1, y2);
		const Point* ppt[2] = {pt[0], pt[1]};
		int npt[] = {3, 3};

		/*--------------fills the area bounded by one or more polygons---------------
		*	C++: void fillPoly( Mat& img, const Point** pts, const int* npts, int ncontours,
						const Scalar& color, int lineType=8, int shift=0, Point offset=Point() )
		*	img – image
		*	pts – Array of polygons where each polygon is represented as an array of points
		*	npts – Array of polygon vertex counters
		*	ncontours – Number of contours that bind the filled region
		*	color – Polygon color
		*	lineType – Type of the polygon boundaries. See the line() description
		*	shift – Number of fractional bits in the vertex coordinates
		*	offset – Optional offset of all points of the contours
		-----------------------------------------------------------------------------*/
		fillPoly(image, ppt, npt, 2, randomColor(rng), lineType);
		imshow(wndName, image);
		if(waitKey(DELAY) >= 0)
			return 0;
	}

	//draw circle
	for(int i = 0;i < randomNumber;i++)
	{
		Point center;
		center.x = rng.uniform(x1,x2);
		center.y = rng.uniform(y1,y2);

		/*-----------------------------draw a circle----------------------------------
		*	C++: void circle(Mat& img, Point center, int radius, const Scalar& color,
								int thickness=1, int lineType=8,int shift=0)
		*	img – Image where the circle is drawn
		*	center – Center of the circle
		*	radius – Radius of the circle
		*	color – Circle color
		*	thickness – Thickness of the circle outline, if positive.
						Negative thickness means that a
		*	filled circle is to be drawn
		*	lineType – Type of the circle boundary. See the line() description
		*	shift – Number of fractional bits in the coordinates of the center and
			in the radius value
		-----------------------------------------------------------------------------*/
		circle(image,center,rng.uniform(0,300),randomColor(rng),rng.uniform(-1,9),lineType);
		imshow(wndName,image);
		if(waitKey(DELAY) >= 0)
			return 0;
	}

	//put text on the image
	for(int i = 0;i < randomNumber;i++)
	{
		Point org;
		org.x = rng.uniform(x1,x2);
		org.y = rng.uniform(y1,y2);
		putText(image,"Testing text rendering",org,rng.uniform(0,8)/*font type*/,
				rng.uniform(0,100)*0.05 + 0.1/*font scale*/,
					randomColor(rng),rng.uniform(1,10)/*thickness*/,lineType);
		imshow(wndName,image);
		if(waitKey(DELAY) >= 0)
			return 0;
	}

	/*------------------calculates the width and height of a text string--------------
	*	C++: Size getTextSize( const string& text, int fontFace, double fontScale,
								int thickness, int* baseLine)
	*	text – Input text string
	*	fontFace – Font to use. See the putText() for details
	*	fontScale – Font scale. See the putText() for details
	*	thickness – Thickness of lines used to render the text
	*	baseLine – Output parameter - y-coordinate of the baseline relative
					to the bottom-most text	point.
	--------------------------------------------------------------------------------------*/
	//string text = " OpenCV Forever!" ;
	//int fontFace = FONT_HERSHEY_COMPLEX;
	//double fontScale = 2;
	//int thickness = 3;
	//int baseline=0;
	//baseline += thickness;
	//Size textSize = getTextSize(text, fontFace,
	//						fontScale, thickness, &baseline);

	Size textSize = getTextSize("OpenCV Forever!",FONT_HERSHEY_COMPLEX,3,5,0);
	Point org((width - textSize.width)/2,(height - textSize.height)/2);

	Mat image2;
	for(int i = 0;i < 255;i += 2)
	{
		image2 = image - Scalar::all(i);
		putText(image2,"OpenCV Forever!",org,FONT_HERSHEY_COMPLEX,
			3,Scalar(i,i,255),5,lineType);

		imshow(wndName,image2);
		if(waitKey(DELAY) >= 0)
			return 0;
	}

	waitKey();
	return 0;
}
測試結果很有意思。頓時讓我對OpenCV又愛上了幾分。。。