
超簡單的自定義ImageView,支援圓角和直角
1、需求:ImageView顯示的圖片,上方的兩個角是圓角,下方的兩個角是直角。
2、這篇文章推薦了三種方式,我選擇第三種ClipPath方式,這種方式很精簡。
3、先來總結下自定義ImageView需要實現的功能:
①四個角的度數均要支援自定義
②可以在xml佈局當中新增自定義的度數
4、需求明確了,接下來就是實現了
①先自定義一個ImageView,繼承自AppCompatImageView,實現它的構造方法;建立一個init()方法,保證構造方法裡面都會呼叫。ps:這裡沒有繼承自ImageView,是因為官方推薦使用AppCompatImageView。
②在onLayout方法裡面獲取到ImageView的width和height
③在onDraw()方法裡面對Carvas進行裁剪。ps: 這裡裁剪的弧度是12px.
public class CustomRoundAngleImageView extends AppCompatImageView {
float width, height;
public CustomRoundAngleImageView(Context context) {
this(context, null);
init(context, null);
}
public CustomRoundAngleImageView(Context context, AttributeSet attrs) {
this 測試下效果:
<com.xxx.view.CustomRoundAngleImageView
android:id="@+id/iv_avatar"
android:layout_width="100dp"
android:layout_height="100dp"
android:layout_marginBottom="50dp"
android:layout_marginTop="50dp"
android:scaleType="centerCrop"
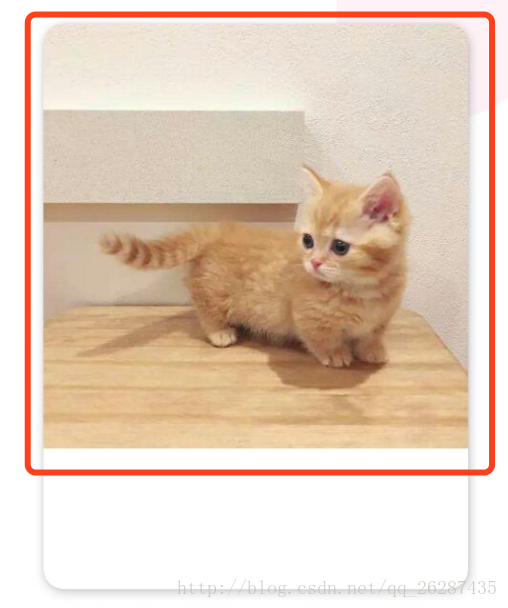
tools:src="@mipmap/ic_launcher"/>String avatarUrl = "https://timgsa.baidu.com/timg?image&quality=80&size=b9999_10000&sec=1516644385815&di=c0552674db9f07a5f889d7c0980e33db&imgtype=0&src=http%3A%2F%2Fimg.mp.itc.cn%2Fupload%2F20170529%2F83d3ce719e9d4c0a8f1cd033ecac3692_th.jpg”;
Glide.with(this).load(avatarUrl).into(ivAvatar);效果如下所示:

④接下來,我們需要讓四個角的度數支援自定義,並且支援在xml中設定
先將四個角度對應的自定義樣式定義了:下方定義的值依次對應的是預設的度數、左上、右上、右下、左下。
如果使用者沒有設定左上、右上、右下、左下的值,那麼四個角的值就去radius的。radius的值預設為0,也就是直角。
attrs.xml中:
<declare-styleable name="Custom_Round_Image_View">
    <attr name="radius" format="dimension"/>
    <attr name="left_top_radius" format="dimension"/>
    <attr name="right_top_radius" format="dimension"/>
    <attr name="right_bottom_radius" format="dimension"/>
    <attr name="left_bottom_radius" format="dimension"/>
</declare-styleable>
獲取到使用者定義在xml裡面的資料,只需要修改剛才定義的init()方法即可
private int defaultRadius = 0;
private int radius;
private int leftTopRadius;
private int rightTopRadius;
private int rightBottomRadius;
private int leftBottomRadius;

private void init(Context context, AttributeSet attrs) {
    if (Build.VERSION.SDK_INT < 18) {
        setLayerType(View.LAYER_TYPE_SOFTWARE, null);
    }
    // 讀取配置
    TypedArray array = context.obtainStyledAttributes(attrs, R.styleable.Custom_Round_Image_View);
    radius = array.getDimensionPixelOffset(R.styleable.Custom_Round_Image_View_radius, defaultRadius);
    leftTopRadius = array.getDimensionPixelOffset(R.styleable.Custom_Round_Image_View_left_top_radius, defaultRadius);
    rightTopRadius = array.getDimensionPixelOffset(R.styleable.Custom_Round_Image_View_right_top_radius, defaultRadius);
    rightBottomRadius = array.getDimensionPixelOffset(R.styleable.Custom_Round_Image_View_right_bottom_radius, defaultRadius);
    leftBottomRadius = array.getDimensionPixelOffset(R.styleable.Custom_Round_Image_View_left_bottom_radius, defaultRadius);

    LogUtils.e("radius --> " + radius);

    //如果四個角的值沒有設定,那麼就使用通用的radius的值。
    if (defaultRadius == leftTopRadius) {
        leftTopRadius = radius;
    }
    if (defaultRadius == rightTopRadius) {
        rightTopRadius = radius;
    }
    if (defaultRadius == rightBottomRadius) {
        rightBottomRadius = radius;
    }
    if (defaultRadius == leftBottomRadius) {
        leftBottomRadius = radius;
    }
    array.recycle();
}
上邊這段程式碼較清晰,就是獲取到使用者設定的四個角上的值,如果沒有,就使用radius的值代替。
接下來就是如何使用獲取到的資料了。
在onDraw()方法中:
@Override
    protected void onDraw(Canvas canvas) {
        //這裡做下判斷,只有圖片的寬高大於設定的圓角距離的時候才進行裁剪
        int maxLeft = Math.max(leftTopRadius, leftBottomRadius);
        int maxRight = Math.max(rightTopRadius, rightBottomRadius);
        int minWidth = maxLeft + maxRight;
        int maxTop = Math.max(leftTopRadius, rightTopRadius);
        int maxBottom = Math.max(leftBottomRadius, rightBottomRadius);
        int minHeight = maxTop + maxBottom;
        if (width >= minWidth && height > minHeight) {
            Path path = new Path();
            //四個角:右上,右下,左下,左上
            path.moveTo(leftTopRadius, 0);
            path.lineTo(width - rightTopRadius, 0);
            path.quadTo(width, 0, width, rightTopRadius);

            path.lineTo(width, height - rightBottomRadius);
            path.quadTo(width, height, width - rightBottomRadius, height);

            path.lineTo(leftBottomRadius, height);
            path.quadTo(0, height, 0, height - leftBottomRadius);

            path.lineTo(0, leftTopRadius);
            path.quadTo(0, 0, leftTopRadius, 0);

            canvas.clipPath(path);
        }
        super.onDraw(canvas);
    }
需要說明的是,在onDraw()方法中進行了寬度和高度判斷,判斷的依據是使用者設定的角度值的和是小於等於ImageView的寬度或高度的,這樣就可以避免很奇怪的體驗。
5、程式碼封裝完了,接下來是測試效果了。
<com.xxx.view.CustomRoundAngleImageView
    android:id="@+id/iv_avatar6"
    android:layout_width="100dp"
    android:layout_height="100dp"
    android:layout_marginTop="50dp"
    android:scaleType="centerCrop"
    tools:src="@mipmap/ic_launcher"/>

<com.xxx.view.CustomRoundAngleImageView
    android:id="@+id/iv_avatar7"
    android:layout_width="100dp"
    android:layout_height="100dp"
    android:layout_marginTop="50dp"
    android:scaleType="centerCrop"
    roundiv:radius="10dp"
    tools:src="@mipmap/ic_launcher"/>

<com.xxx.view.CustomRoundAngleImageView
    android:id="@+id/iv_avatar8"
    android:layout_width="100dp"
    android:layout_height="100dp"
    android:layout_marginTop="50dp"
    android:scaleType="centerCrop"
    roundiv:left_bottom_radius="10dp"
    roundiv:left_top_radius="10dp"
    roundiv:right_bottom_radius="10dp"
    roundiv:right_top_radius="10dp"
    tools:src="@mipmap/ic_launcher"/>

<com.xxx.view.CustomRoundAngleImageView
    android:id="@+id/iv_avatar9"
    android:layout_width="100dp"
    android:layout_height="100dp"
    android:layout_marginTop="50dp"
    android:scaleType="centerCrop"
    roundiv:radius="20dp"
    roundiv:right_bottom_radius="10dp"
    roundiv:right_top_radius="10dp"
    tools:src="@mipmap/ic_launcher"/>

<com.xxx.view.CustomRoundAngleImageView
    android:id="@+id/iv_avatar10"
    android:layout_width="100dp"
    android:layout_height="100dp"
    android:layout_marginBottom="10dp"
    android:layout_marginTop="50dp"
    android:scaleType="centerCrop"
    roundiv:left_top_radius="10dp"
    roundiv:right_top_radius="10dp"
    tools:src="@mipmap/ic_launcher"/>
String avatarUrl = "https://timgsa.baidu.com/timg?image&quality=80&size=b9999_10000&sec=1516644385815&di=c0552674db9f07a5f889d7c0980e33db&imgtype=0&src=http%3A%2F%2Fimg.mp.itc.cn%2Fupload%2F20170529%2F83d3ce719e9d4c0a8f1cd033ecac3692_th.jpg";
Glide.with(this).load(avatarUrl).into(ivAvatar6);
Glide.with(this).load(avatarUrl).into(ivAvatar7);
Glide.with(this).load(avatarUrl).into(ivAvatar8);
Glide.with(this).load(avatarUrl).into(ivAvatar9);
Glide.with(this).load(avatarUrl).into(ivAvatar10);效果如下:
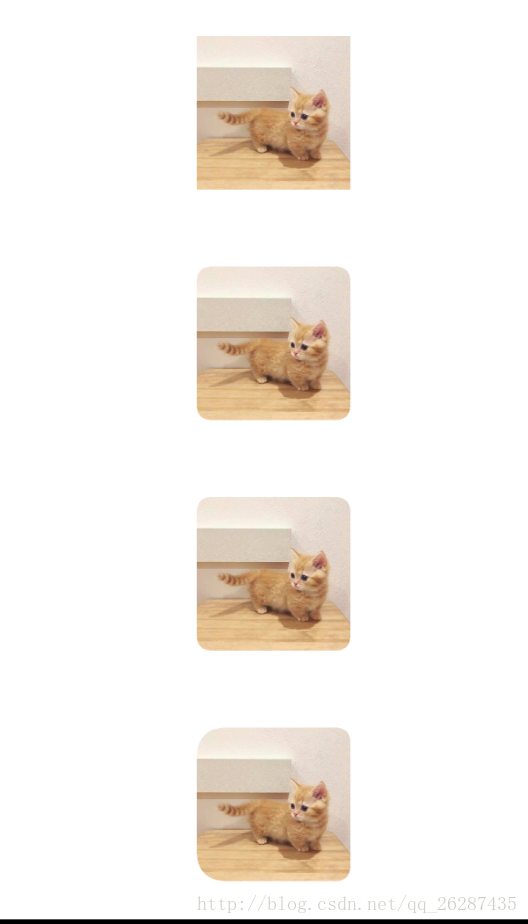
從上往下看,第一個沒設定任何有關角度的屬性,所以就是直角;
第二個設定了radius=10dp,並且沒有設定四個角單獨的度數,所以四個角的度數都是radius的度數,就是圖中的四個圓角
第三個單獨設定了四個角的度數,均為10dp,跟單獨設定radius=10dp的效果一樣。
第四個設定了radius=20dp,並且還單獨設定了右上、右下的度數為10dp,左上、左下的度數沒有單獨設定,會取radius的數值。
第五個這是了左上和右上的度數為10dp,沒有設定radius的值,因此預設radius的值為0,顯示就是直角。如圖上面兩個角是圓角,下方兩個角是直角。
最後,再附上一個使用說明:
/**
 * Desc:    可以自己設定角度的ImageView
 * 參考:https://www.jianshu.com/p/626dbd93207d
 * <com.xxx.xxx.common.view.CustomRoundAngleImageView
        android:id="@+id/iv_avatar"
        android:layout_width="100dp"
        android:layout_height="100dp"
        android:layout_marginTop="50dp"
        android:scaleType="centerCrop"
        roundiv:left_bottom_radius="10dp"
        roundiv:radius="10dp"
        roundiv:left_top_radius="10dp"
        roundiv:right_bottom_radius="10dp"
        roundiv:right_top_radius="10dp"
        tools:src="@mipmap/ic_launcher"/>
 * 所有角度預設值均為0,即直角。
 * 左上、右上、右下、左下四個角的度數的值分別對應的是
 * 左上:left_top_radius
 * 右上:right_top_radius
 * 右下:right_bottom_radius
 * 左下:left_bottom_radius
 * 如果四個角度的度數一致,推薦使用radius,在不使用上述四個引數的時候,它的值會作為預設    值。
 * tips: 使用時儘量保證ImageView的寬高大於設定的圓角度數,避免不必要的錯誤。
 */