CentOS 中安裝 mysql 5.7+
阿新 • • 發佈:2019-01-02
參考:https://www.cnblogs.com/jimboi/p/6405560.html
1.下載rpm檔案
wget https://dev.mysql.com/get/mysql57-community-release-el6-9.noarch.rpm
[[email protected] /]# wget https://dev.mysql.com/get/mysql57-community-release-el6-9.noarch.rpm--2019-01-02 18:11:58-- https://dev.mysql.com/get/mysql57-community-release-el6-9.noarch.rpm正在解析主機 dev.mysql.com... 137.254.60.11 正在連線 dev.mysql.com|137.254.60.11|:443... 已連線。 已發出 HTTP 請求,正在等待迴應... 302 Found 位置:https://repo.mysql.com//mysql57-community-release-el6-9.noarch.rpm [跟隨至新的 URL] --2019-01-02 18:12:03-- https://repo.mysql.com//mysql57-community-release-el6-9.noarch.rpm 正在解析主機 repo.mysql.com... 23.76.232.185 正在連線 repo.mysql.com|23.76.232.185|:443... 已連線。 已發出 HTTP 請求,正在等待迴應... 200 OK 長度:9216 (9.0K) [application/x-redhat-package-manager] 正在儲存至: “mysql57-community-release-el6-9.noarch.rpm” 100%[===================================================>] 9,216 --.-K/s in 0s 2019-01-02 18:12:04 (52.9MB/s) - 已儲存 “mysql57-community-release-el6-9.noarch.rpm” [9216/9216])
2.安裝rpm包
rpm -Uvh mysql57-community-release-el6-9.noarch.rpm
[[email protected] /]# rpm -Uvh mysql57-community-release-el6-9.noarch.rpm
warning: mysql57-community-release-el6-9.noarch.rpm: Header V3 DSA/SHA1 Signature, key ID 5072e1f5: NOKEY
Preparing...                ########################################### [100%]
   1:mysql57-community-relea########################################### [100%]
安裝成功後,會在/etc/yum.repos.d/下面多幾個mysql的包
[[email protected] /]#  cd /etc/yum.repos.d/
[[email protected] yum.repos.d]# ll
總用量 40
-rw-r--r--. 1 root root 1991 5月  19 2016 CentOS-Base.repo
-rw-r--r--. 1 root root  647 5月  19 2016 CentOS-Debuginfo.repo
-rw-r--r--. 1 root root  289 5月  19 2016 CentOS-fasttrack.repo
-rw-r--r--. 1 root root  630 5月  19 2016 CentOS-Media.repo
-rw-r--r--. 1 root root 6259 5月  19 2016 CentOS-Vault.repo
-rw-r--r--. 1 root root  957 11月  5 2012 epel.repo
-rw-r--r--. 1 root root 1056 11月  5 2012 epel-testing.repo
-rw-r--r--. 1 root root 1414 9月  12 2016 mysql-community.repo
-rw-r--r--. 1 root root 1440 9月  12 2016 mysql-community-source.repo
3.安裝mysql (此過程需要時間)
yum install mysql-community-server
[[email protected] /]# yum install mysql-community-server
已載入外掛:fastestmirror, refresh-packagekit, security
設定安裝程序
Loading mirror speeds from cached hostfile
epel/metalink                                                         | 7.5 kB     00:00
 * base: mirrors.cqu.edu.cn
 * epel: mirrors.huaweicloud.com
 * extras: mirror.bit.edu.cn
 * updates: mirrors.zju.edu.cn
base                                                                  | 3.7 kB     00:00
epel                                                                  | 3.2 kB     00:00
epel/primary                                                          | 3.2 MB     00:02
epel                                                                             12507/12507
extras                                                                | 3.4 kB     00:00
mysql-connectors-community                                            | 2.5 kB     00:00
mysql-connectors-community/primary_db                                 |  27 kB     00:00
mysql-tools-community                                                 | 2.5 kB     00:00
mysql-tools-community/primary_db                                      |  45 kB     00:00
mysql57-community                                                     | 2.5 kB     00:00
mysql57-community/primary_db                                          | 164 kB     00:00
updates                                                               | 3.4 kB     00:00
解決依賴關係
--> 執行事務檢查
---> Package mysql-community-server.x86_64 0:5.7.24-1.el6 will be 安裝
--> 處理依賴關係 mysql-community-common(x86-64) = 5.7.24-1.el6,它被軟體包 mysql-community-server-5.7.24-1.el6.x86_64 需要
--> 處理依賴關係 mysql-community-client(x86-64) >= 5.7.9,它被軟體包 mysql-community-server-5.7.24-1.el6.x86_64 需要
--> 執行事務檢查
---> Package mysql-community-client.x86_64 0:5.7.24-1.el6 will be 安裝
--> 處理依賴關係 mysql-community-libs(x86-64) >= 5.7.9,它被軟體包 mysql-community-client-5.7.24-1.el6.x86_64 需要
---> Package mysql-community-common.x86_64 0:5.7.24-1.el6 will be 安裝
--> 執行事務檢查
---> Package mysql-community-libs.x86_64 0:5.7.24-1.el6 will be obsoleting
---> Package mysql-libs.x86_64 0:5.1.73-7.el6 will be 取代
--> 處理依賴關係 libmysqlclient.so.16()(64bit),它被軟體包 2:postfix-2.6.6-6.el6_7.1.x86_64 需要
--> 處理依賴關係 libmysqlclient.so.16(libmysqlclient_16)(64bit),它被軟體包 2:postfix-2.6.6-6.el6_7.1.x86_64 需要
--> 執行事務檢查
---> Package mysql-community-libs-compat.x86_64 0:5.7.24-1.el6 will be obsoleting
---> Package postfix.x86_64 2:2.6.6-6.el6_7.1 will be 升級
---> Package postfix.x86_64 2:2.6.6-8.el6 will be an update
--> 完成依賴關係計算

依賴關係解決

=============================================================================================
 軟體包                          架構       版本                 倉庫                   大小
=============================================================================================
正在安裝:
 mysql-community-libs            x86_64     5.7.24-1.el6         mysql57-community     2.1 M
     replacing  mysql-libs.x86_64 5.1.73-7.el6
 mysql-community-libs-compat     x86_64     5.7.24-1.el6         mysql57-community     1.6 M
     replacing  mysql-libs.x86_64 5.1.73-7.el6
 mysql-community-server          x86_64     5.7.24-1.el6         mysql57-community     153 M
為依賴而安裝:
 mysql-community-client          x86_64     5.7.24-1.el6         mysql57-community      23 M
 mysql-community-common          x86_64     5.7.24-1.el6         mysql57-community     332 k
為依賴而更新:
 postfix                         x86_64     2:2.6.6-8.el6        base                  2.0 M

事務概要
=============================================================================================
Install       5 Package(s)
Upgrade       1 Package(s)

總下載量:182 M
確定嗎?[y/N]:y
下載軟體包:
(1/6): mysql-community-client-5.7.24-1.el6.x86_64.rpm                 |  23 MB     00:42
(2/6): mysql-community-common-5.7.24-1.el6.x86_64.rpm                 | 332 kB     00:00
(3/6): mysql-community-libs-5.7.24-1.el6.x86_64.rpm                   | 2.1 MB     00:03
(4/6): mysql-community-libs-compat-5.7.24-1.el6.x86_64.rpm            | 1.6 MB     00:02
(5/6): mysql-community-server-5.7.24-1.el6.x86_64.rpm                 | 153 MB     04:41
(6/6): postfix-2.6.6-8.el6.x86_64.rpm                                 | 2.0 MB     00:01
---------------------------------------------------------------------------------------------
總計                                                         559 kB/s | 182 MB     05:33
warning: rpmts_HdrFromFdno: Header V3 DSA/SHA1 Signature, key ID 5072e1f5: NOKEY
Retrieving key from file:///etc/pki/rpm-gpg/RPM-GPG-KEY-mysql
Importing GPG key 0x5072E1F5:
 Userid : MySQL Release Engineering <[email protected]>
 Package: mysql57-community-release-el6-9.noarch (installed)
 From   : /etc/pki/rpm-gpg/RPM-GPG-KEY-mysql
確定嗎?[y/N]:y
執行 rpm_check_debug
執行事務測試
事務測試成功
執行事務
Warning: RPMDB altered outside of yum.
  正在安裝   : mysql-community-common-5.7.24-1.el6.x86_64                                1/8
  正在安裝   : mysql-community-libs-5.7.24-1.el6.x86_64                                  2/8
  正在安裝   : mysql-community-client-5.7.24-1.el6.x86_64                                3/8
  正在安裝   : mysql-community-libs-compat-5.7.24-1.el6.x86_64                           4/8
  正在升級   : 2:postfix-2.6.6-8.el6.x86_64                                              5/8
  正在安裝   : mysql-community-server-5.7.24-1.el6.x86_64                                6/8
  清理       : 2:postfix-2.6.6-6.el6_7.1.x86_64                                          7/8
  正在刪除   : mysql-libs-5.1.73-7.el6.x86_64                                            8/8
  Verifying  : 2:postfix-2.6.6-8.el6.x86_64                                              1/8
  Verifying  : mysql-community-common-5.7.24-1.el6.x86_64                                2/8
  Verifying  : mysql-community-server-5.7.24-1.el6.x86_64                                3/8
  Verifying  : mysql-community-client-5.7.24-1.el6.x86_64                                4/8
  Verifying  : mysql-community-libs-compat-5.7.24-1.el6.x86_64                           5/8
  Verifying  : mysql-community-libs-5.7.24-1.el6.x86_64                                  6/8
  Verifying  : mysql-libs-5.1.73-7.el6.x86_64                                            7/8
  Verifying  : 2:postfix-2.6.6-6.el6_7.1.x86_64                                          8/8

已安裝:
  mysql-community-libs.x86_64 0:5.7.24-1.el6
  mysql-community-libs-compat.x86_64 0:5.7.24-1.el6
  mysql-community-server.x86_64 0:5.7.24-1.el6

作為依賴被安裝:
  mysql-community-client.x86_64 0:5.7.24-1.el6  mysql-community-common.x86_64 0:5.7.24-1.el6

作為依賴被升級:
  postfix.x86_64 2:2.6.6-8.el6

替代:
  mysql-libs.x86_64 0:5.1.73-7.el6

完畢!
4.開啟mysql服務
[[email protected] /]# service mysqld start
初始化 MySQL 資料庫:                                      [失敗]
[[email protected] /]# service mysqld start
正在啟動 mysqld:                                          [確定] //正常啟動
5.mysql安裝完成會建立臨時預設的超級使用者,密碼儲存在/var/log/mysqld.log,命令檢視密碼:
grep 'temporary password' /var/log/mysqld.log
[[email protected] /]# grep 'temporary password' /var/log/mysqld.log
2019-01-02T10:37:02.765238Z 1 [Note] A temporary password is generated for [email protected]: 7?0?dyl3Uduj       (密碼)
6.使用預設使用者'root'@'localhost'登入資料庫並且修改密碼:
[[email protected] /]# mysql -u root -p
[[email protected] /]#  mysql -u root -p
Enter password: (上面的密碼)
Welcome to the MySQL monitor.  Commands end with ; or \g.
Your MySQL connection id is 3
Server version: 5.7.24

Copyright (c) 2000, 2018, Oracle and/or its affiliates. All rights reserved.

Oracle is a registered trademark of Oracle Corporation and/or its
affiliates. Other names may be trademarks of their respective
owners.

Type 'help;' or '\h' for help. Type '\c' to clear the current input statement.
修改密碼:
mysql> ALTER USER 'root'@'localhost' IDENTIFIED BY '123456';
Query OK, 0 rows affected (0.00 sec)
注意:如果出現錯誤提示:

ERROR 1819 (HY000): Your password does not satisfy the current policy requirements

這個是因為密碼過於簡單,密碼必須符合長度,包含數字、大寫小寫字母、特殊字元。
7.開啟遠端連線
      1).設定防火牆iptables開放3306介面
      在/etc/sysconfig下面有個iptables檔案,在倒數第二行新增埠就可以
在控制檯輸入:
iptables -I INPUT -p tcp --dport 3306 -j ACCEPT

[[email protected] /]# iptables -I INPUT -p tcp --dport 3306 -j ACCEPT
2).然後進行儲存:
[[email protected] /]# service iptables save
iptables:將防火牆規則儲存到 /etc/sysconfig/iptables:     [確定]
  更新防火牆規則:service iptables restart
  刪除:iptables -D INPUT -p tcp --dport 3306 -j ACCEPT

8.修改mysql許可權,將localhost修改為%
  1).登入mysql
mysql -u root -p
2).登入到 mysql 這個表
mysql> use mysql;
Reading table information for completion of table and column names
You can turn off this feature to get a quicker startup with -A

Database changed
3)..將root的host修改為%
mysql> update user set host = '%' where user ='root';
Query OK, 1 row affected (0.01 sec)
Rows matched: 1  Changed: 1  Warnings: 0
4).重新載入許可權
mysql> flush privileges;
Query OK, 0 rows affected (0.00 sec)
5).輸入:
mysql> select host,user from user where user='root';
+------+------+
| host | user |
+------+------+
| %    | root |
+------+------+
1 row in set (0.00 sec)
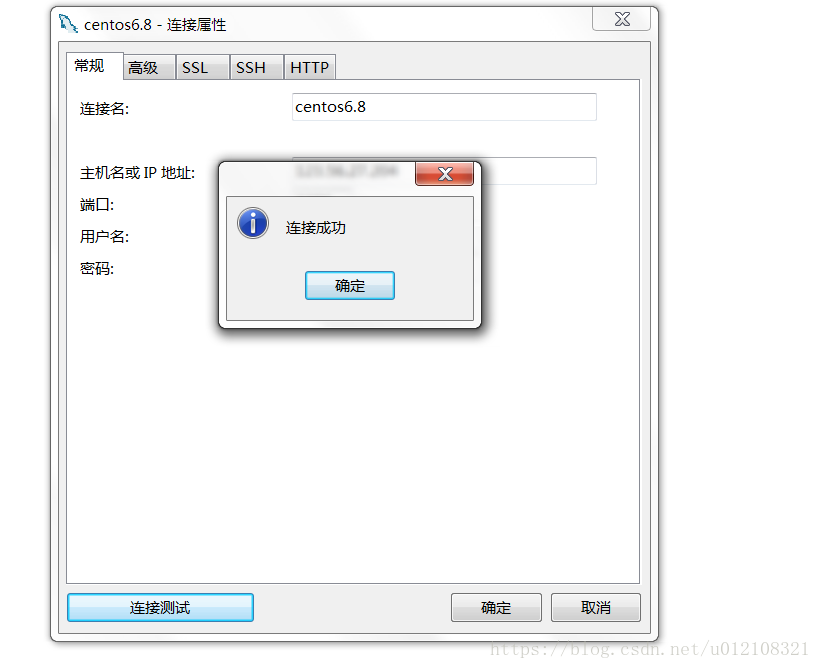
9.Navicat 遠端連線

