Android中自定義ProgressBar的樣式
阿新 • • 發佈:2019-01-03
- 如果想快速獲取水平進度條顯示操作,直接進入第四步和第六步操作就可以了!!
- 首先可以去sdk中檢視
- sdk1\platforms\android-23\data\res\values,中的styles中查詢原始碼
- progressbar
<style name="Widget.ProgressBar.Horizontal">
//這裡的indeterminateOnly 是否顯示進度條:true意思不顯示,false顯示
<item name="indeterminateOnly">false</item>
<item name="progressDrawable" - drawable檔案下建立一個progressbar_drawable.xml
- 這裡的animated-rotate:是旋轉的動畫,時間不寫就是預設的100
- progressbar_img這裡就是進度條的圖片,自己隨便搞!!!
- pivotX/Y :50%代表自身旋轉
<animated-rotate xmlns:android="http://schemas.android.com/apk/res/android" - 然後再progressbar的控制元件中引用
- 覆蓋indeterminateDrawable:引用自己定義的progressbar_drawable.xml檔案
<ProgressBar
            android:id="@+id/pb_loading"
            android:layout_width="wrap_content"
            android:layout_height="wrap_content"
            android:layout_gravity="center"
 android:indeterminateDrawable="@drawable/progressbar_drawable"
/>- 下面來介紹自定義水平線的 有進度的進度條
- 看完後你就明白為嘛自己定義的進度條設定高度了,但是進度條裡面的進度顯示沒有變化!!!
- 第一步:來看android原本樣式的進度條
<style name="Widget.ProgressBar.Horizontal">
        <item name="android:indeterminateOnly">false</item>
        <item name="android:progressDrawable">@android:drawable/progress_horizontal</item>
        <item name="android:indeterminateDrawable">@android:drawable/progress_indeterminate_horizontal</item>
        <item name="android:minHeight">20dip</item>
        <item name="android:maxHeight">20dip</item>
</style>- 第二步:看indeterminateDrawable這個屬性
- 這個是設定進度條的動畫效果的,設定圖片來輪播,就是動畫效果的,看下原始碼 。。這個想自己搞了可以設定一下
<animation-list
        xmlns:android="http://schemas.android.com/apk/res/android"
        android:oneshot="false">
    <item android:drawable="@drawable/progressbar_indeterminate1" android:duration="200" />
    <item android:drawable="@drawable/progressbar_indeterminate2" android:duration="200" />
    <item android:drawable="@drawable/progressbar_indeterminate3" android:duration="200" />
</animation-list>
- 第三步:那個maxHeight 高度已經定死了,所以你設定高度的時候是不能讓進度變高的,這個也可以不用管
- 第四步:progressDrawable 這個就是主要的了,通過這個就可以給你進度條設定高度了
- 先來看下原始碼(原始碼不可怕,有的拿來用就行,初級的我們不用看懂…當然我也不懂0.0),其實可以拿來自己用的,改改東西就行了——
- 這個是圖層,這個是在drawable裡面的xxx.xml中建立的
- 快速祕籍,直接在drawable中建立xml檔案,複製下面程式碼
<layer-list xmlns:android="http://schemas.android.com/apk/res/android">

    <item android:id="@android:id/background">
        <shape>
            <corners android:radius="5dip" />
            <gradient
                    android:startColor="#ff9d9e9d"
                    android:centerColor="#ff5a5d5a"
                    android:centerY="0.75"
                    android:endColor="#ff747674"
                    android:angle="270"
            />
        </shape>
    </item>

    <item android:id="@android:id/secondaryProgress">
        <clip>
            <shape>
                <corners android:radius="5dip" />
                <gradient
                        android:startColor="#80ffd300"
                        android:centerColor="#80ffb600"
                        android:centerY="0.75"
                        android:endColor="#a0ffcb00"
                        android:angle="270"
                />
            </shape>
        </clip>
    </item>

    <item android:id="@android:id/progress">
        <clip>
            <shape>
                <corners android:radius="5dip" />
                <gradient
                        android:startColor="#ffffd300"
                        android:centerColor="#ffffb600"
                        android:centerY="0.75"
                        android:endColor="#ffffcb00"
                        android:angle="270"
                />
            </shape>
        </clip>
    </item>

</layer-list>- 第五步:這裡面有3個item
- item1:是最底層的總進度顏色顯示
- item2:是緩衝的進度的顏色顯示
- item3:是正在進行的進度的顏色顯示
- 這就類似於FrameLayout 的佈局,最下面的item顯示在介面的上面!!
- item裡面的內容,自己需要用的時候只需要改下顏色就可!!
- 第六步:在佈局中呼叫
- style:這個肯定要加,水平顯示的
- progressDrawable:直接把上面的圖層檔案拿到這裡這個就是最主要的操作了,有了這個就可以設定高度了!
- 快速祕籍,在佈局中progressDrawable屬性引用上面複製進去的xml檔案,就可以設定高度了!
<ProgressBar
        android:id="@+id/pb_loading"
        android:layout_width="match_parent"
        android:layout_height="30dp"
        style="?android:attr/progressBarStyleHorizontal"
             android:progressDrawable="@drawable/progressbar_custom"
        android:progress="50"
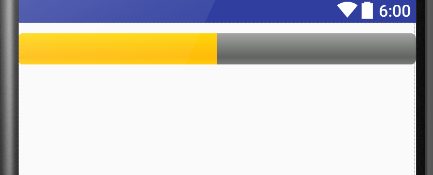
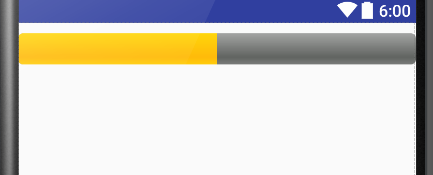
/>- 這樣就是結果了!
- 如果想更改顏色,就進去圖層檔案中吧顏色該下就行了
下面是自定義進度條是將上面第四步進行修改的操作,將裡面的顏色改成自己想要的圖片樣式
first:準備進度條的圖片
second:在drawable中建立xml檔案,裡面還是圖層樣式
- 注意 裡面的3個item的id一定要寫的給我的一樣,因為android會找著3個名字來顯示進度條,如果不一致,進度條會建立失敗的!!
<layer-list xmlns:android="http://schemas.android.com/apk/res/android">

    <item android:id="@android:id/background">
        <bitmap android:src="@drawable/progress_item2"
                android:gravity="center" />
    </item>

    <item android:id="@android:id/secondaryProgress">
        <bitmap android:src="@drawable/progress_item1"
                android:gravity="center" />
    </item>

    <item android:id="@android:id/progress" >
        <bitmap android:src="@drawable/progress_item1"
                android:gravity="center" />
    </item>
</layer-list>- Third:還是在佈局中選擇progressDrawable屬性設定進去
<ProgressBar
        android:id="@+id/pb_loading"
        android:layout_width="match_parent"
        android:layout_height="30dp"
        style="?android:attr/progressBarStyleHorizontal"
        android:progressDrawable="@drawable/progressbar_custom"
        android:progress="50"
        android:layout_marginTop="10dp"
/>- end:圖片就是我們下面第二個顯示的,第一個是原生的0.0


