RecyclerView更全解析之
1.概述
昨天跟自己群裡的人嘮嗑的時候發現還有人在用Eclipse,我相信可能還是有很多人在用ListView,這裡介紹一個已經出來的n年了的控制元件RecyclerView,實現ListView,GridView,瀑布流的效果。還可以輕鬆的實現一些複雜的功能,如QQ的拖動排序,側滑刪除等等。
2.概述
最終我們肯定要用到專案中,因為我覺得所有寫的東西都必須封裝好下次開發可以直接用到專案中。但是首先得要熟悉該控制元件才行。可以選擇去google官方瞭解RecyclerView,但要翻牆。
據官方的介紹,該控制元件用於在有限的視窗中展示大量資料集,其實這樣功能的控制元件我們並不陌生,例如:ListView、GridView。
那麼有了ListView、GridView為什麼還需要RecyclerView這樣的控制元件呢?整體上看RecyclerView架構,提供了一種插拔式的體驗,高度的解耦,異常的靈活,通過設定它提供的不同LayoutManager,ItemDecoration , ItemAnimator實現令人瞠目的效果。
1.你想要控制其顯示的方式,請通過佈局管理器LayoutManager,ListView–>GridView–>瀑布流 只需要一行程式碼;
2.你想要控制Item間的間隔(可繪製),請通過ItemDecoration(這個比較蛋疼) ;
3.你想要控制Item增刪的動畫,請通過ItemAnimator;
4.你想要控制點選、長按事件,請自己寫(擦,這點尼瑪)。
3.基本使用
首先我們需要新增RecyclerView的依賴包,在build.gradle中新增依賴:
compile 'com.android.support:recyclerview-v7:24.0.0' 和ListView一樣通過設定Adapter()給他繫結資料來源,但在這之前必須設定setLayoutManager()這個方法是用來設定顯示效果的(這樣我們就可以通過設定佈局管理顯示不同的效果:ListView、GridView、瀑布流等等)。
// 設定recyclerView的佈局管理
// LinearLayoutManager -> ListView風格 3.1 Adapter編寫
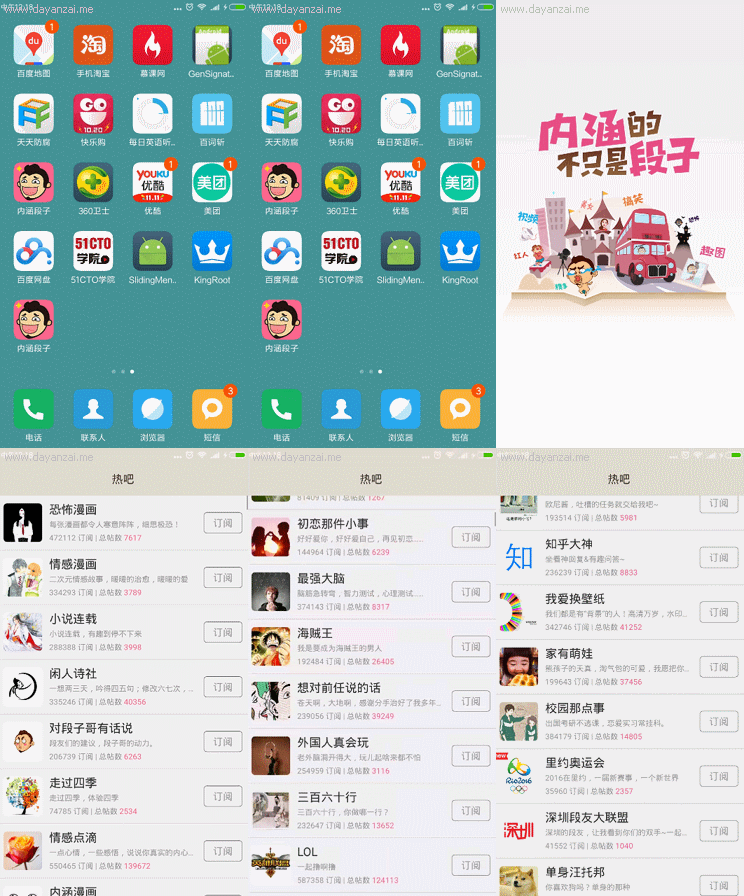
接下來我們先去後臺伺服器請求資料,然後我們來編寫Adapter,我們直接使用Okhttp獲取伺服器資料,在這裡就不多說了,我們主要看Adapter怎麼寫。在ListView和GridView中我們可以不用ViewHolder,反正沒人打我,只是資料特別多可能會崩潰而已;但是在RecyclerView中就不一樣了它強制我們使用ViewHolder:
/**
 * Created by Darren on 2016/12/27.
 * Email: 240336124@qq.com
 * Description: 熱吧訂閱列表的Adapter
 */
public class CategoryListAdapter extends RecyclerView.Adapter<CategoryListAdapter.ViewHolder> {

    private List<ChannelListResult.DataBean.CategoriesBean.CategoryListBean> mList;
    private Context mContext;
    private LayoutInflater mInflater;

    public CategoryListAdapter(Context context, List<ChannelListResult.DataBean.CategoriesBean.CategoryListBean> list) {
        this.mContext = context;
        this.mList = list;
        this.mInflater = LayoutInflater.from(mContext);
    }

    /**
     * 建立條目ViewHolder
     *
     * @param parent   RecyclerView
     * @param viewType view的型別可以用來顯示多列表佈局等等
     * @return
     */
    @Override
    public ViewHolder onCreateViewHolder(ViewGroup parent, int viewType) {
        // 建立條目
        View itemView = mInflater.inflate(R.layout.channel_list_item, parent, false);
        // 建立ViewHolder
        ViewHolder viewHolder = new ViewHolder(itemView);
        return viewHolder;
    }

    /**
     * 繫結ViewHolder設定資料
     *
     * @param holder
     * @param position 當前位置
     */
    @Override
    public void onBindViewHolder(ViewHolder holder, int position) {
        // 設定繫結資料
        ChannelListResult.DataBean.CategoriesBean.CategoryListBean item = mList.get(position);
        holder.nameTv.setText(item.getName());
        holder.channelTopicTv.setText(item.getIntro());
        String str = item.getSubscribe_count() + " 訂閱 | " +
                "總帖數 <font color='#FF678D'>" + item.getTotal_updates() + "</font>";
        holder.channelUpdateInfo.setText(Html.fromHtml(str));
        // 是否是最新
        if (item.isIs_recommend()) {
            holder.recommendLabel.setVisibility(View.VISIBLE);
        } else {
            holder.recommendLabel.setVisibility(View.GONE);
        }
        // 載入圖片
        Glide.with(mContext).load(item.getIcon_url()).centerCrop().into(holder.channelIconIv);
    }

    /**
     * 總共有多少條資料
     */
    @Override
    public int getItemCount() {
        return mList.size();
    }

    /**
     * RecyclerView的Adapter需要一個ViewHolder必須要extends RecyclerView.ViewHolder
     */
    public static class ViewHolder extends RecyclerView.ViewHolder {
        public TextView nameTv;
        public TextView channelTopicTv;
        public TextView channelUpdateInfo;
        public View recommendLabel;
        public ImageView channelIconIv;

        public ViewHolder(View itemView) {
            super(itemView);
            // 在建立的時候利用傳遞過來的View去findViewById
            nameTv = (TextView) itemView.findViewById(R.id.channel_text);
            channelTopicTv = (TextView) itemView.findViewById(R.id.channel_topic);
            channelUpdateInfo = (TextView) itemView.findViewById(R.id.channel_update_info);
            recommendLabel = itemView.findViewById(R.id.recommend_label);
            channelIconIv = (ImageView) itemView.findViewById(R.id.channel_icon);
        }
    }
}
3.2 分隔線定製
對於分隔線這個也比較蛋疼,你會發現RecyclerView並沒有支援divider這樣的屬性。那麼怎麼辦,你可以在建立item佈局的時候直接寫在佈局中,當然了這種方式不夠優雅,我們早就說了可以自由的去定製它。
既然比較麻煩那麼我們可以去github上面下載一個:DividerItemDecoration來參考一下。我這裡就直接來寫一個效果,大家也可以找找別人的部落格看看。
分割線我們利用RecyclerView的addItemDecoration(ItemDecoration fromHtml) 新建一個類來看看到底是什麼:
/**
 * Created by Darren on 2016/12/27.
 * Email: [email protected]
 * Description: RecyclerView 分割線定製
 */
public class CategoryItemDecoration extends RecyclerView.ItemDecoration {
    @Override
    public void onDraw(Canvas c, RecyclerView parent, RecyclerView.State state) {

    }

    @Override
    public void getItemOffsets(Rect outRect, View view, RecyclerView parent, RecyclerView.State state) {

    }
}
有兩個方法getItemOffsets()這裡我一般指定偏移量就可以了,就是分割線佔多少高度,或者說是畫在什麼位置,你總的給我留出位置來;
onDraw()我們可以直接去繪製,繪製什麼都可以因為有Canvas ,但一般都是繪製Drawable,這裡不多說具體看視訊吧。
/**
 * Created by Darren on 2016/12/27.
 * Email: [email protected]
 * Description: RecyclerView 分割線定製
 */
public class CategoryItemDecoration extends RecyclerView.ItemDecoration {
    private Paint mPaint;

    public CategoryItemDecoration(int color) {
        // 直接繪製顏色  只是用來測試
        mPaint = new Paint();
        mPaint.setColor(color);
        mPaint.setAntiAlias(true);
    }

    @Override
    public void onDraw(Canvas c, RecyclerView parent, RecyclerView.State state) {
        int childCount = parent.getChildCount();
        // 獲取需要繪製的區域
        Rect rect = new Rect();
        rect.left = parent.getPaddingLeft();
        rect.right = parent.getWidth() - parent.getPaddingRight();
        for (int i = 0; i < childCount; i++) {
            View childView = parent.getChildAt(i);
            rect.top = childView.getBottom();
            rect.bottom = rect.top + 20;
            // 直接利用Canvas去繪製一個矩形 在留出來的地方
            c.drawRect(rect, mPaint);
        }
    }

    @Override
    public void getItemOffsets(Rect outRect, View view, RecyclerView parent, RecyclerView.State state) {
        // 在每個子View的下面留出20px來畫分割線
        outRect.bottom += 20;
    }
}
看一下效果
這只是用來測試一下,並不是我們所需要的效果,只是說一下這兩個方法都可以幹什麼就是你想怎麼弄分割線就怎麼弄。我們一般會使用Drawable去畫,所以我們必須調整成我們最終的效果,程式碼其實基本一致。
/**
 * Created by Darren on 2016/12/27.
 * Email: [email protected]
 * Description: RecyclerView 分割線定製
 */
public class CategoryItemDecoration extends RecyclerView.ItemDecoration {
    private Drawable mDivider;

    public CategoryItemDecoration(Drawable divider) {
        // 利用Drawable繪製分割線
        mDivider = divider;
    }

    @Override
    public void onDraw(Canvas canvas, RecyclerView parent, RecyclerView.State state) {
        int childCount = parent.getChildCount();
        // 計算需要繪製的區域
        Rect rect = new Rect();
        rect.left = parent.getPaddingLeft();
        rect.right = parent.getWidth() - parent.getPaddingRight();
        for (int i = 0; i < childCount; i++) {
            View childView = parent.getChildAt(i);
            rect.top = childView.getBottom();
            rect.bottom = rect.top + mDivider.getIntrinsicHeight();
            // 直接利用Canvas去繪製
            mDivider.draw(canvas);
        }
    }

    @Override
    public void getItemOffsets(Rect outRect, View view, RecyclerView parent, RecyclerView.State state) {
        // 在每個子View的下面留出來畫分割線
        outRect.bottom += mDivider.getIntrinsicHeight();
    }
}
接下來我們就可以在drawable,下面新建一個xxx.xml的分割線檔案了
<?xml version="1.0" encoding="utf-8"?>
<shape xmlns:android="http://schemas.android.com/apk/res/android">
    <size android:height="0.5dp"   />
    <solid android:color="@color/list_item_divider" />
</shape>
基本沒什麼效果因為分割線比較小0.5dp,仔細看還是看得出來的,最後宣告一下因為整個專案涉及到一鍵更換面板,那麼恭喜恭喜這樣做並沒什麼卵用,我們還是得直接寫在item佈局中,而不是用程式碼設定分割線。
3.3 RecyclerView分割線原始碼解析
估計很大一部分的哥們在開發的時候都是使用的第三方的分割線,基本上都類似,一般都是利用系統自帶的一個屬性 android.R.attrs.listDriver我們直接獲取這個屬性的Drawable去繪製,那麼這裡我們分析一下原始碼去了解一些RecyclerView到底是怎樣新增分割線的。
一萬一千多行程式碼我們就只挑關鍵的方法:measureChild(),onDraw() , soeasy()
    // 只挑關鍵程式碼 一萬一千多行太多了
    /**
    * Measure a child view using standard measurement policy, taking the padding
    * of the parent RecyclerView and any added item decorations into account.
    *
    * <p>If the RecyclerView can be scrolled in either dimension the caller may
    * pass 0 as the widthUsed or heightUsed parameters as they will be irrelevant.</p>
    *
    * @param child Child view to measure
    * @param widthUsed Width in pixels currently consumed by other views, if relevant
    * @param heightUsed Height in pixels currently consumed by other views, if relevant
    */
    public void measureChild(View child, int widthUsed, int heightUsed) {
        final LayoutParams lp = (LayoutParams) child.getLayoutParams();
        // 關鍵看這個方法 --> getItemDecorInsetsForChild
        final Rect insets = mRecyclerView.getItemDecorInsetsForChild(child);
        widthUsed += insets.left + insets.right;
        heightUsed += insets.top + insets.bottom;
        // 考慮分割線返回的Rect
        final int widthSpec = getChildMeasureSpec(getWidth(), getWidthMode(),
            getPaddingLeft() + getPaddingRight() + widthUsed, lp.width,
            canScrollHorizontally());
        final int heightSpec = getChildMeasureSpec(getHeight(), getHeightMode(),
            getPaddingTop() + getPaddingBottom() + heightUsed, lp.height,
            canScrollVertically());
        if (shouldMeasureChild(child, widthSpec, heightSpec, lp)) {
            child.measure(widthSpec, heightSpec);
        }
    }

    /**
    *  獲取分割線裝飾的Rect
    **/
    Rect getItemDecorInsetsForChild(View child) {
        final LayoutParams lp = (LayoutParams) child.getLayoutParams();
        if (!lp.mInsetsDirty) {
            return lp.mDecorInsets;
        }

        if (mState.isPreLayout() && (lp.isItemChanged() || lp.isViewInvalid())) {
            // changed/invalid items should not be updated until they are rebound.
            return lp.mDecorInsets;
        }
        final Rect insets = lp.mDecorInsets;
        insets.set(0, 0, 0, 0);
        final int decorCount = mItemDecorations.size();
        for (int i = 0; i < decorCount; i++) {
            mTempRect.set(0, 0, 0, 0);
            // getItemOffsets()還是比較熟悉,獲取分割線返回的佔用位置
            mItemDecorations.get(i).getItemOffsets(mTempRect, child, this, mState);
            // 開始累加佔用位置
            insets.left += mTempRect.left;
            insets.top += mTempRect.top;
            insets.right += mTempRect.right;
            insets.bottom += mTempRect.bottom;
        }
        lp.mInsetsDirty = false;
        // 返回分割線的Rect
        return insets;
    }

    // onDraw()方法異常簡單,自己體會一下吧
    @Override
    public void onDraw(Canvas c) {
        super.onDraw(c);

        final int count = mItemDecorations.size();
        for (int i = 0; i < count; i++) {
            // 回調出去直接在getItemOffsets留出分割線位置的基礎上直接繪製
            mItemDecorations.get(i).onDraw(c, this, mState);
        }
    }
3.4 長按和點選事件
這個是第二坑,第一坑就是上面的,後面還會有第三坑,RecyclerView並沒有方法可以setOnItemClickListener()。我們只能在Adapter裡面去寫介面了,但是想想我們會有很多Adapter的每個都單獨的去寫會不會很麻煩。這個不用擔心後面我們會寫萬能的Adapter,後面也會去自定義RecyclerView,目前只能這麼弄了,修改修改Adapter:
/**
 * Created by Darren on 2016/12/27.
 * Email: [email protected]
 * Description: 熱吧訂閱列表的Adapter
 */
public class CategoryListAdapter extends RecyclerView.Adapter<CategoryListAdapter.ViewHolder> {

    // 省略之前的程式碼 ......

    /**
     * 繫結ViewHolder設定資料
     *
     * @param holder
     * @param position 當前位置
     */
    @Override
    public void onBindViewHolder(ViewHolder holder, final int position) {
        // 省略之前的程式碼 ......

        // 設定點選和長按事件
        if (mItemClickListener != null) {
            holder.itemView.setOnClickListener(new View.OnClickListener() {
                @Override
                public void onClick(View v) {
                    mItemClickListener.onItemClick(position);
                }
            });
        }
        if (mLongClickListener != null) {
            holder.itemView.setOnLongClickListener(new View.OnLongClickListener() {
                @Override
                public boolean onLongClick(View v) {
                    return mLongClickListener.onLongClick(position);
                }
            });
        }
    }

    // 省略之前的程式碼 ......


    /***************
     * 給條目設定點選和長按事件
     *********************/
    public OnItemClickListener mItemClickListener;
    public OnLongClickListener mLongClickListener;

    public void setOnItemClickListener(OnItemClickListener itemClickListener) {
        this.mItemClickListener = itemClickListener;
    }

    public void setOnLongClickListener(OnLongClickListener longClickListener) {
        this.mLongClickListener = longClickListener;
    }

    public interface OnItemClickListener {
        public void onItemClick(int position);
    }

    public interface OnLongClickListener {
        public boolean onLongClick(int position);
    }
}
估計有些不想接觸新事物的哥們會覺得,哪裡好用。他們都說好我覺得也好用著用著就好了因為公司的人都在用我不用也沒辦法。下一期我們還是解析RecyclerView可能會要更好用一些.


