"Android 螢幕適配"-Android面試必問"精華技能點"彙總
阿新 • • 發佈:2019-01-05
目錄:
1. 螢幕適配的方式都有哪些?
1.1 方式之-dp
1.1.1 名詞解釋:
解析度
480*800,1280*720,表示畫素點的總和
px(pix)-畫素
是螢幕裡的最小單元
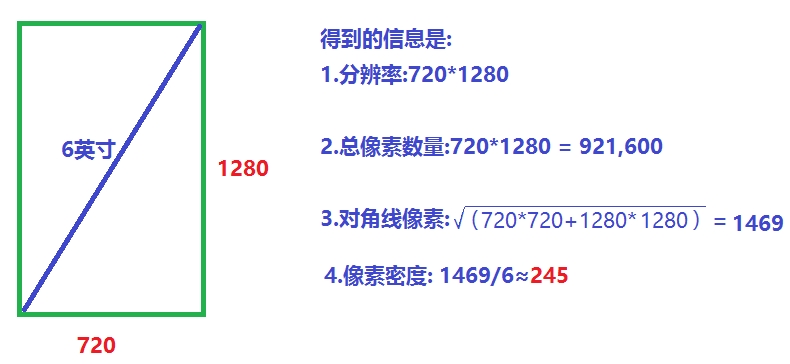
dpi-畫素密度
- 每英寸螢幕具有的畫素數量,畫素密度越大,細節越豐富
- 公式:畫素密度 = √{(長度畫素數^2+寬度畫素數^2)}/ 螢幕尺寸
- 尺寸單位為:英寸;螢幕尺寸為:對角線長度(如下圖)
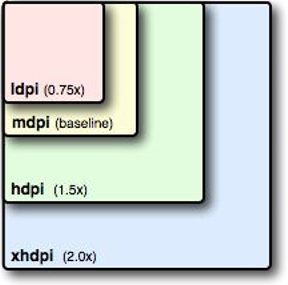
1.1.2 res資料夾下的目錄分類
(如圖)
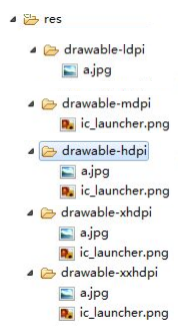
應用查詢圖片的順序:
先從自己開始(沒有)->逐個就往高的找(沒有)->就往比自己低的找
1.1.3 Android中的畫素密度/解析度/dp和px的關係
| 型別 | dip | 解析度 | dp和px比例 |
|---|---|---|---|
| ldip | 120 | 240*320 | 1dp = 0.75px |
| mdip(標準) | 160 | 320*480 | 1dp = 1px |
| hdip | 240 | 480*800 | 1dp = 1.75px |
| xhdip | 320 | 720*1280 | 1dp = 2px |
| xxhdip | 480 | 1080*1920 | 1dp = 3px |
比例圖如下:
- 由上面的標準mdip,那麼如果在320*480的手機上,只需要dp就等效於px,因為1:1
- 我們在程式碼運算過程中經常要做dp和px的互換,根據上面的比例特點.我們只需通過獲取資源.獲取螢幕解析度.獲取比例即可
/*
density 解析度 dp和px的轉換
ldip 120 240*320 1dp = 0.75px
mdip 160 320*480 1dp = 1px
hdip 240 480*800 1dp = 1.5px
xhdip 320 720*1280 1dp = 2px
xxhdip 480 1080*1920 1dp = 3px
px和dip的轉換,只需獲取比例值即可;得出dp和px
參考標準的mhdip,額算出其他:pixels=dips*(density/160)
如果是240*320的求得density肯定是1;
1.獲取比例值-自動根據當前的手機獲取比例值
(不同解析度得到的不同,比如我的模擬器720*1280返回2)
(PS:傳入dp得px:乘以比例即可;傳入px得dp:除以比例即可),寫成工具類
2.四捨五入
*/ 1.1.4佈局裡的160dp和180dp的
160dp:
- 設定一個按鈕的寬度為160dp,在320*480解析度的機器裡,那麼正好是一半(因為1:1)
- 在240*320的機器裡,正好也顯示一半,因為(1:0.75),160dp = 120px
- 在480*800的機器裡,也是一半,因為(1:1.5).160dp = 240px
- 所以在以上三種解析度下設定多少dp是等效的,歸為一檔.
    <Button
        android:background="#ff0000"
        android:layout_width="60dp"
        android:layout_height="wrap_content"/>
    <Button
        android:background="#00ff00"
        android:layout_width="100dp"
        android:layout_height="wrap_content"/>
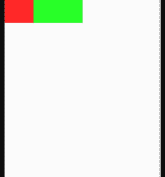
三種分辨率同樣的程式碼都顯示這樣的效果:
180dp:
- 如果將上面的160dp,放到720*1280或者1920 *1080,那麼得到的效果和以上機器是不同的
- 設定180dp寬度的按鈕,在這兩者裡面的效果是一樣的
- 因為:720*1280(比例是:1:2)所以180dp = 360px,就是一半
- 1920*1080(比例是:1:3)所以180dp = 540px,也是一半
- 所以這兩種解析度下設定的dp是等效的,也是一檔
    <Button
        android:background="#ff0000"
        android:layout_width="80dp"
        android:layout_height="wrap_content"/>
    <Button
        android:background="#00ff00"
        android:layout_width="100dp"
        android:layout_height="wrap_content"/>
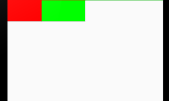
兩種解析度下都顯示同樣效果
2.方式之-dimens(尺寸)
- (PS:根據上一節的160dp和180dp的講解,我們現在通過自動dimens解決自動適配問題)
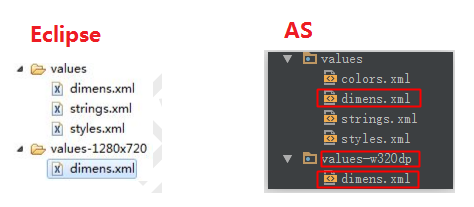
- 1.在res目錄下有預設的values資料夾和dimens.xml檔案
- 2.為了自動適配1280 *720和1920 *1080解析度,我們分邊建立各自的資料夾
- values-1280x720(eclipase寫法),Android Studio寫成values-w320dp
- values-1280x720(eclipase寫法),Android Studio寫成values-w320dp
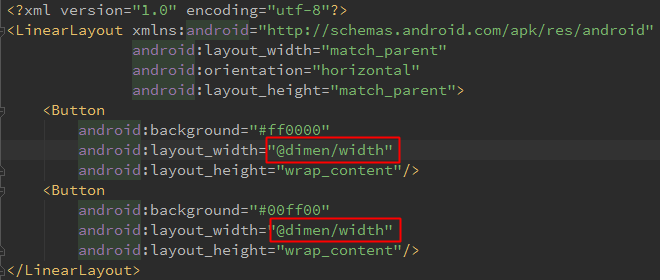
3.把剛才的dimens.xml複製一份到目標資料夾
- 預設的dimens.xml寫成160dp,移到新檔案的定義成180dp;
- 預設的dimens.xml寫成160dp,移到新檔案的定義成180dp;
4.最後在佈局檔案中寫單位大小時,用@dimens/width即可,自動根據螢幕靈活呼叫
(PS:因為有預設的和指定各種解析度(另外寫1920*1080的,雖然和720等效,但是還是要寫,否則他就用預設的了)的資料夾,所以找不到指定的就用預設的)
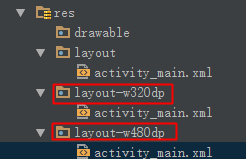
3.方式之-layout
- 原理和上述情況一樣,些不同的layout,會根據解析度自動找到合適的layout
4.方式之-程式碼適配
- 需求:通過程式碼設定,讓一個TextView的寬和高都為螢幕的一半;
- 初始:佈局是預設的包裹,如下:
<RelativeLayout xmlns:android="http://schemas.android.com/apk/res/android"
                xmlns:tools="http://schemas.android.com/tools"
                android:layout_width="match_parent"
                android:layout_height="match_parent"
                tools:context=".MainActivity">
    <!-- 現在是預設的包裹 -->
    <TextView
        android:id="@+id/tv"
        android:layout_width="wrap_content"
        android:layout_height="wrap_content"
        android:background="#e18080"
        android:text="hello_world"/>
</RelativeLayout>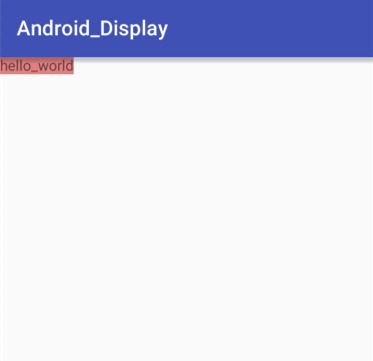
* 步驟:
* 1.獲取tv控制元件
* 2.獲取當前機器的解析度.
* 3.新建一個和跟佈局一樣(根是線性就線性,是關係就設定關係)的引數,構造傳入長和寬(解析度的一半)
* 4.再讓tv控制元件設定引數即可.
*程式碼如下:
public class MainActivity extends AppCompatActivity {

    @Override
    protected void onCreate(Bundle savedInstanceState) {
        super.onCreate(savedInstanceState);
        setContentView(R.layout.activity_main);
        //1.
        TextView tv = (TextView) findViewById(R.id.tv);
        //2.
        int height = getWindowManager().getDefaultDisplay().getHeight();
        int width = getWindowManager().getDefaultDisplay().getWidth();
        //3.
        RelativeLayout.LayoutParams params = new RelativeLayout.LayoutParams((int) ((float)width/2+0.5), (int) ((float)height/2+0.5));
        //4.
        tv.setLayoutParams(params);
    }
}
效果:
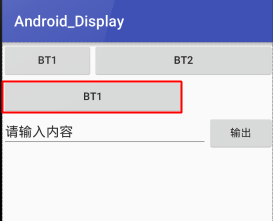
5.方式之-weight權重
(PS:必須是線性佈局)
1.多個相對的標準權重
如果是橫向:把高度設定為0dp
如果是豎向:把寬度設定為0dp
然後色字不同控制元件所佔的權重
    <Button
        android:layout_weight="1"
        android:text="bt1"
        android:layout_width="0dp"
        android:layout_height="wrap_content"/>
    <Button
        android:text="bt2"
        android:layout_weight="2"
        android:layout_width="0dp"
        android:layout_height="wrap_content"/>
 </LinearLayout>
效果:
2.單個相對父佈局的權重
- 1.設定父佈局的總權重:SumWeight
- 2.設定自己的所佔的權重即可
<LinearLayout
    android:weightSum="3"
    android:layout_width="match_parent"
    android:layout_height="wrap_content"
    android:orientation="horizontal">
    <Button
        android:layout_weight="2"
        android:layout_width="0dp"
        android:layout_height="wrap_content"
        android:text="bt1"/>
</LinearLayout>
效果:
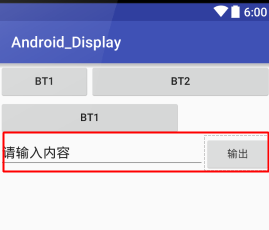
3.自動權重
- 想讓前面的完全填充,並且設定權重
- 然後後面的用包裹即可
<LinearLayout
    android:layout_width="match_parent"
    android:layout_height="wrap_content"
    android:orientation="horizontal">
    <EditText
        android:text="請輸入內容"
        android:layout_weight="1"
        android:layout_width="match_parent"
        android:layout_height="wrap_content"/>
    <Button
        android:layout_width="wrap_content"
        android:layout_height="wrap_content"
        android:text="輸出"/>
</LinearLayout>
效果如下:
二.螢幕適配的處理技巧都有哪些?
橫豎屏的切換
(正常情況下,每次橫豎屏切換都會導致Activity的重新建立)
- 1.在活動銷燬前儲存活動狀態(重寫onSaveInstanceState方法),可以參考前面我們講的思維.
@Override
protected void onCreate(Bundle savedInstanceState) {
    super.onCreate(savedInstanceState);
    setContentView(R.layout.activity_main);
    //切換屏幕後獲取資訊
    if (savedInstanceState != null) {
        System.out.println(savedInstanceState.get("height")+"-------");
        System.out.println(savedInstanceState.get("width")+"-------");
    }
}
    //儲存資訊
    @Override
    protected void onSaveInstanceState(Bundle outState) {
        outState.putInt("height", 100);
        outState.putInt("width", 50);
        super.onSaveInstanceState(outState);
    }
2.在清單檔案把方向寫死:
- android:screenOrientation=”portrait”(landscape是橫向,portrait是縱向)
3.如果不想重新讓Activity呼叫,就設定配置更改
在清單檔案設定三個引數:
方向|按鍵隱藏|螢幕尺寸
android:configChanges="orientation|keyboardHidden|screenSize"
- 另外重寫Activity裡的更改方法
-
- 如果切換橫豎屏,之後重新呼叫這個方法
@Override
public void onConfigurationChanged(Configuration newConfig) {
    super.onConfigurationChanged(newConfig);
    if (this.getResources().getConfiguration().orientation == Configuration.ORIENTATION_LANDSCAPE) {
        //橫向就幹嘛 TODO
    }
    else if(this.getResources().getConfiguration().orientation == Configuration.ORIENTATION_PORTRAIT){
        //豎向就幹嘛 TODO
    }
}
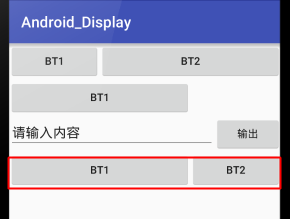
權重的反比例
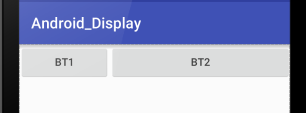
經過改善一般我們都是設定0dp,然後使用權重,佔多少就佔用多少部分
如果反比例,比如按鈕A權重是1,按鈕B是2,那麼就反過來了,程式碼和效果圖如下.
就是不用0dp,而改用填充
        <Button
            android:layout_width="match_parent"
            android:layout_height="wrap_content"
            android:layout_weight="1"
            android:text="bt1"/>

        <Button
            android:layout_width="match_parent"
            android:layout_height="wrap_content"
            android:layout_weight="2"
            android:text="bt2"/>
    </LinearLayout>
