
Selenium自動化測試——識別驗證碼
阿新 • • 發佈:2019-01-05
由於在筆者在進行自動化測試的過程中,每次登入時第一步都需要人眼識別驗證碼,將它作為引數傳給後臺再寫到前端頁面上。為了以後擴充套件可以自動化的功能,並優化自動化指令碼,因此開始在指令碼中增加了識別驗證碼的功能。
識別驗證碼主要分為三步:
1、擷取當前顯示驗證碼的螢幕圖片
2、剪裁螢幕圖片得到驗證碼圖片
3、呼叫tess4j庫識別驗證碼
接下來筆者將按照上述步驟實現識別驗證碼的功能。
前置條件:
IDE:Eclipse
Project Manager:Maven
一、在開始之前,首先要在Maven中引入tess4j:
Step 1 : 開啟pom.xml,進入標籤頁Dependencies
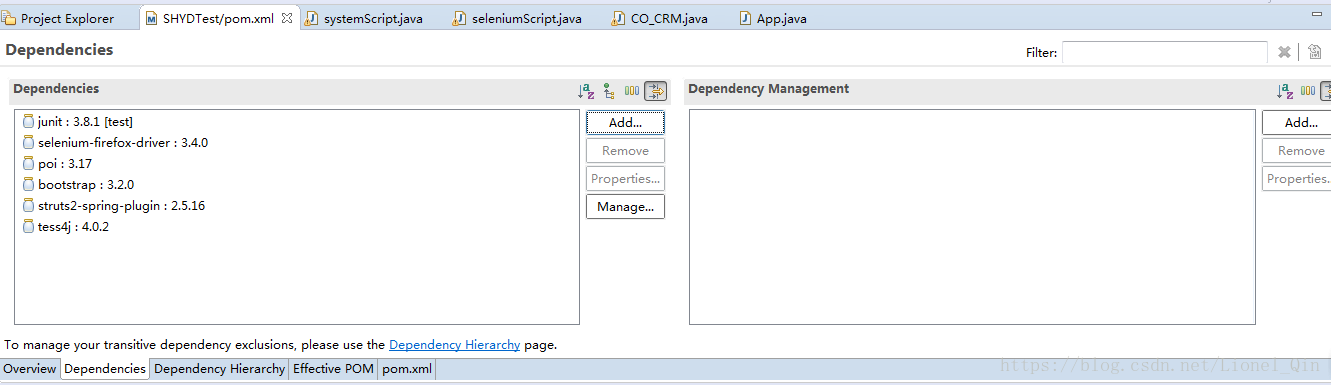
Step 2 : 點選“Add”,在庫名稱中輸入“tess4j”

Step 3 : 在搜尋到的結果中選擇tess4j,點選“OK”,並點選儲存。等待專案建立完成即可。
二、擷取整個螢幕,並儲存到相應的資料夾
截圖方法:
public void robotSnapshot(String type,String path) {
		try{
			BufferedImage img = new Robot().createScreenCapture(new Rectangle(Toolkit.getDefaultToolkit().getScreenSize()));
	        ImageIO.write(img, type, new File(path));
		}catch(Exception e){
			e.printStackTrace();
			System.out.println("Snapshot has problem");
		}
type: 表示截圖的檔案型別,可以填寫png,jpg等
path: 表示檔案儲存路徑,需要給路徑加上字尾
三、裁剪螢幕圖片
裁剪方法:
x1 : 選擇區域左上角的x座標public void cut(int x1, int y1, int width, int height, String sourcePath, String descpath) { FileInputStream is = null; ImageInputStream iis = null; try { is = new FileInputStream(sourcePath); String fileSuffix = sourcePath.substring(sourcePath .lastIndexOf(".") + 1); Iterator<ImageReader> it = ImageIO .getImageReadersByFormatName(fileSuffix); ImageReader reader = it.next(); iis = ImageIO.createImageInputStream(is); reader.setInput(iis, true); ImageReadParam param = reader.getDefaultReadParam(); Rectangle rect = new Rectangle(x1, y1, width, height); param.setSourceRegion(rect); BufferedImage bi = reader.read(0, param); ImageIO.write(bi, fileSuffix, new File(descpath)); } catch (Exception ex) { ex.printStackTrace(); } finally { if (is != null) { try { is.close(); } catch (IOException e) { e.printStackTrace(); } is = null; } if (iis != null) { try { iis.close(); } catch (IOException e) { e.printStackTrace(); } iis = null; } } }
y1 : 選擇區域左上角的y座標
width : 選擇區域的寬度
height : 選擇區域的高度
sourcePath : 源圖片路徑
descpath : 裁切後圖片的儲存路徑
四、呼叫tess4j
呼叫方式:
		File imageFile = new File(descpath);
		//呼叫Tesseract
		ITesseract instance = new Tesseract();
                instance.setDatapath("C:\\maven-project\\auto_shyd\\tessdata");
		String verifycode = null;
		try {
			verifycode = instance.doOCR(imageFile);
		} catch (TesseractException e1) {
		e1.printStackTrace();
		}
		verifycode = verifycode.replaceAll("[^a-z^A-Z^0-9]", "");//替換大小寫及數字
		System.out.println("Verify code is :" + verifycode);
1.需要將C:\Users\Administrator\.m2\repository\net\sourceforge\tess4j\tess4j\4.0.2 路徑下的jar包中的資料夾tessdata解壓出來,解壓後的檔案位置即
instance.setDatapath()設定的路徑位置。
2.descpath即為驗證碼圖片的路徑
小結
在本次實現識別驗證碼功能的過程中,本意是想通過直接獲取tessdata的路徑,作為語言包的路徑:
                URL url = ClassLoader.getSystemResource("tessdata");
		String tesspath = url.getPath().substring(6);
		//進行讀取,預設是英文,如果要使用中文包,加上instance.setLanguage("chi_sim");
		//尚未解決打不開tessdata的問題,只能將檔案移出至專案資料夾,作為預設路徑,如有需要請修改
		instance.setDatapath(tesspath);
但是由於編譯過程中,一直提示無法開啟該路徑,只好將tessdata解壓出來。