
龍芯3A2000上移植NASA WorldWind指南
http://www.loongson.cn/news/company/467.html
一、初識NASA WORLDWIND
NASA World Wind是NASA(美國)國家航空和宇宙航行局聯合出品,類似Earthview 3D的鳥瞰工具,更加權威而且完全免費。通過這套程式的3D引擎,可以讓你從外太空看見地球上的任何一個角落。
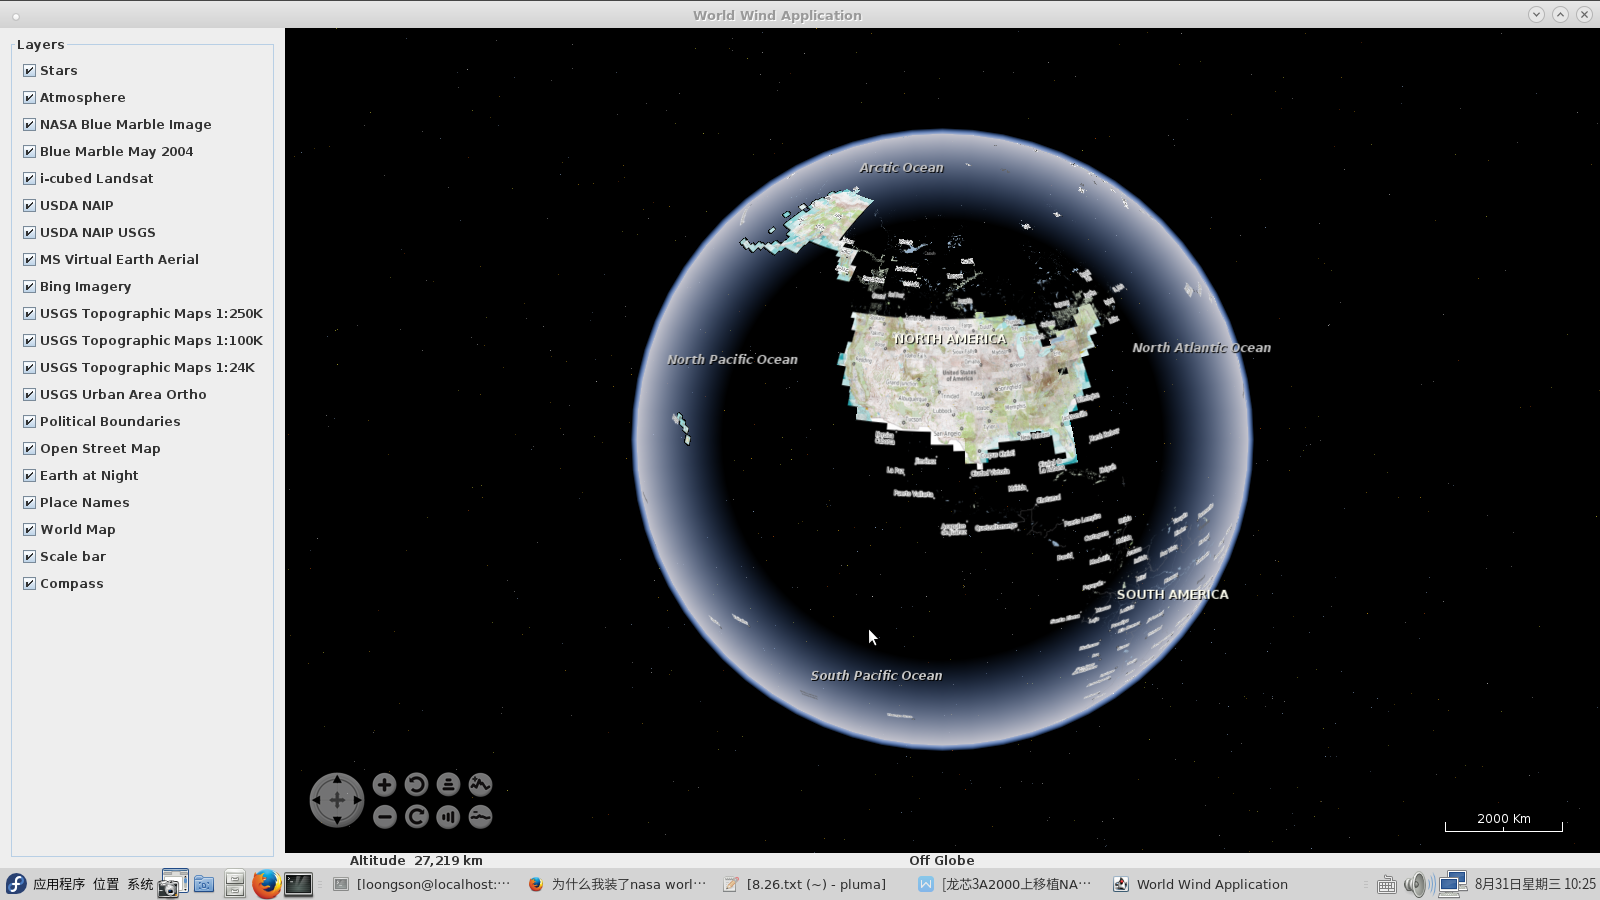
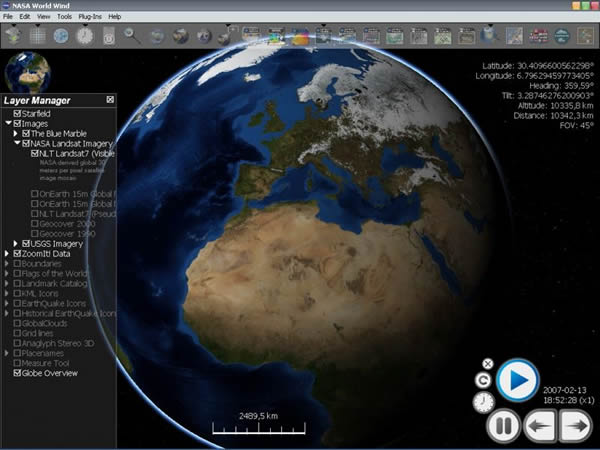
worldwind主介面
有“天眼”之稱的一款軟體是否可以在龍芯平臺上執行呢?經過修改、除錯、編譯,筆者終於成功的在龍芯3A2000上運行了worldwind。下面來看看移植過程。
二、下載worldwind
首先介紹下和worliwind相關的兩外兩個軟體包gluegen和jogl。
gluegen是自動生成的java和JNI程式碼,呼叫C庫的工具,可以繫結底層API,如java本地介面(JNI)和 AWT本地介面(jawt)。
jogl是Java對OpenGL繫結的開源專案並設計為採用Java開發的應用程式,還提供了眾多3D圖形庫,如:AWT、Swing和SWT widget,以及自定義視窗工具nativewindow。
為了不讓大家走彎路,筆者先簡單的介紹下載包的版本。筆者下載的worldwind是2.0.0版本,REDME.txt文件上介紹支援Java SDK1.5.0以上版本。需下載1.5版本的gluegen和jogl包。
● worldwind下載路徑:
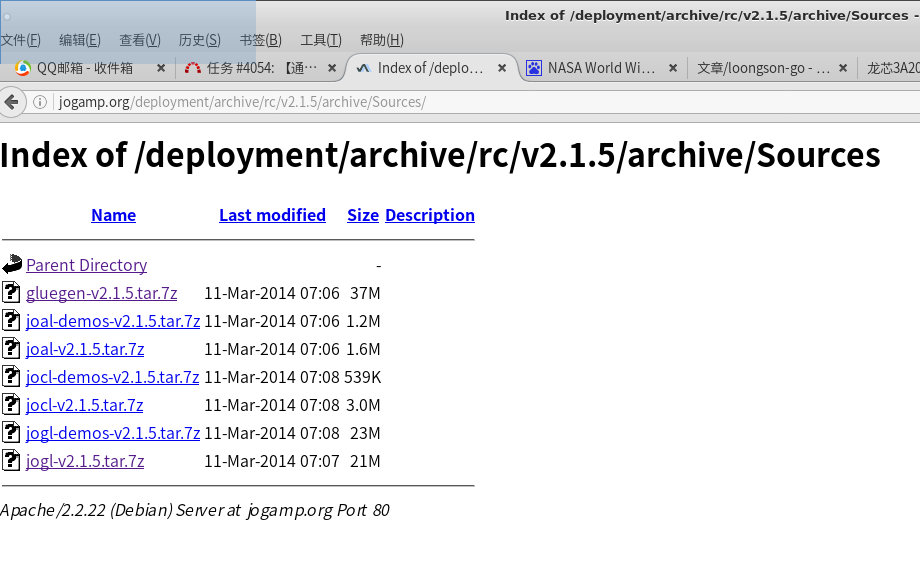
● gluegen和jogl下載路徑:http://jogamp.org/deployment/archive/rc/v2.1.5/archive/Sources/
點選gluegen-v2.1.5.tar.7z和jogl-v2.1.5.tar.7z即可下載。
三、編譯環境
筆者使用的電腦是龍芯3A2000,系統是Loongnix-Fedora21。
系統下載地址: http://www.loongnix.org
四、編譯原始碼
筆者詳細的述說這三個軟體包裡需要修改的地方。
第一步:首先編譯gluegen
1.進入gluegen軟體包,查詢build.xml檔案。(記得將解壓後的檔名修改為gluegen)
| [[email protected] gluegen]$find . -name build.xml ./test/TestOneJar_InJar/jogamp01/build.xml ./test/junit/com/jogamp/gluegen/build.xml ./make/build.xml |
修改 ./make/build.xml檔案,搜尋mips,新增如下程式碼:
在328行新增如下程式碼:
| + <target name="declare.linux.mips64el" if="isLinuxMips64el"> + <echo message="Linux.mips64el" /> + <property name="compiler.cfg.id" value="compiler.cfg.linux" /> + <property name="linker.cfg.id" value="linker.cfg.linux.mips64el" /> + </target> |
在360行後面加上程式碼:
| + declare.linux.mips64el, |
2.進入gluegen軟體包,查詢PlatformPropsImpl.java檔案。
| [[email protected] gluegen]$ find . -name PlatformPropsImpl.java ./src/java/jogamp/common/os/PlatformPropsImpl.java |
修改PlatformPropsImpl.java檔案,查詢mips,在301行新增如下程式碼:
| + else if( archLower.equals("mips64") ) { // android gaoquan + return CPUType.MIPS_64; + } else if( archLower.equals("mips64el") ) { // android gaoquan + return CPUType.MIPS_64el; + } |
3.修改PlatformPropsImpl.java檔案。
在./src/java/jogamp/common/os/PlatformPropsImpl.java檔案的getOSAndArch()方法下,新增分支,程式碼如下:
| case IA64: _os_and_arch = "ia64"; break; + case MIPS_64el: + os_and_arch = "mips64el"; + break; case SPARCV9_64: _os_and_arch = "sparcv9"; break; |
4.修改MachineDescriptionRuntime.java檔案。
在./src/java/jogamp/common/os/MachineDescriptionRuntime.java檔案的isCPUArch32Bit()方法下,新增分支,程式碼如下:
| private static boolean isCPUArch32Bit(final Platform.CPUType cpuType) throws RuntimeException { switch( cpuType ) { case X86_32: ........... + case MIPS_64el: return false; |
5.進入gluegen軟體包,查詢./make/gluegen-cpptasks-base.xml檔案,此檔案修改的程式碼有些多。在gluegen-cpptasks-base.xml中搜索mipsel,在380行新增程式碼:
在gluegen-cpptasks-base.xml中搜索mipsel,在380行新增程式碼:
| <condition property="isLinuxMipsel"> <and> <istrue value="${isLinux}" /> <os arch="mipsel" /> </and> </condition> + <condition property="mipsel"> + <os arch="mipsel" /> + </condition> + <condition property="isLinuxMips64el"> + <and> + <istrue value="${isLinux}" /> + <os arch="mips64el" /> + </and> + </condition> + <condition property="mips64el"> + <os arch="mips64el" /> + </condition> <condition property="isLinuxPpc"> |
580行新增程式碼:
| <echo message="LinuxMipsel=${isLinuxMipsel}" /> + <echo message="LinuxMips64el=${isLinuxMips64el}" /> <echo message="LinuxPpc=${isLinuxPpc}" /> |
650行新增程式碼:
| <target name="gluegen.cpptasks.detect.os.linux.mipsel" unless="gluegen.cpptasks.detected.os.2" if="isLinuxMipsel"> <property name="os.and.arch" value="linux-mipsel" /> </target> + <target name="gluegen.cpptasks.detect.os.linux.mips64el" unless="gluegen.cpptasks.detected.os.2" if="isLinuxMips64el"> + <property name="os.and.arch" value="linux-mips64el" /> + </target> <target name="gluegen.cpptasks.detect.os.linux.ppc" unless="gluegen.cpptasks.detected.os.2" if="isLinuxPpc"> <property name="os.and.arch" value="linux-ppc" /> </target> |
682行新增程式碼
| + gluegen.cpptasks.detect.os.linux.mips64el, |
1192行新增程式碼:
| <linker id="linker.cfg.linux.mipsel" name="${gcc.compat.compiler}"> </linker> + <linker id="linker.cfg.linux.mips64el" name="${gcc.compat.compiler}"> + </linker> <linker id="linker.cfg.linux.ppc" name="${gcc.compat.compiler}"> </linker> |
1413行新增程式碼:
| <target name="gluegen.cpptasks.declare.compiler.linux.mipsel" if="isLinuxMipsel"> <echo message="Linux.Mipsel" /> <property name="compiler.cfg.id.base" value="compiler.cfg.linux" /> <property name="linker.cfg.id.base" value="linker.cfg.linux" /> <property name="java.lib.dir.platform" value="${java.home.dir}/jre/lib/mipsel" /> </target> + <target name="gluegen.cpptasks.declare.compiler.linux.mips64el" if="isLinuxMips64el"> + <echo message="Linux.Mips64el" /> + <property name="compiler.cfg.id.base" value="compiler.cfg.linux" /> + <property name="linker.cfg.id.base" value="linker.cfg.linux" /> + <property name="java.lib.dir.platform" value="${java.home.dir}/jre/lib/mips64el" /> + </target> <target name="gluegen.cpptasks.declare.compiler.linux.ppc" if="isLinuxPpc"> <echo message="Linux.Ppc" /> <property name="compiler.cfg.id.base" value="compiler.cfg.linux" /> <property name="linker.cfg.id.base" value="linker.cfg.linux" /> <property name="java.lib.dir.platform" value="${java.home.dir}/jre/lib/ppc" /> </target> |
1449行新增程式碼:
| + gluegen.cpptasks.declare.compiler.linux.mipsel, |
6.在build-test.xml檔案中搜索java.build,在164行新增如下程式碼:
| + <!-- + <target name="android.package" depends="java.generate,java.build,native.build" if="isAndroid"> + --> + <target name="android.package" depends="java.generate,native.build" if="isAndroid"> + <aapt.signed assetsdir="resources/assets-test" |
7.最後在make目錄下,使用ant來編譯:
| gluegen.build.check.aapt: android.package: developer-src-zip: [zip] Building zip: /home/loongson/jogl/gluegen/build/gluegen-java-src.zip developer-zip-archive: all: BUILD SUCCESSFUL |
gluegen軟體包終於編譯成功了!
* 最後記得將build目錄下的 .jar 檔案拷貝到worldwind下
第二步:編譯jogl軟體包
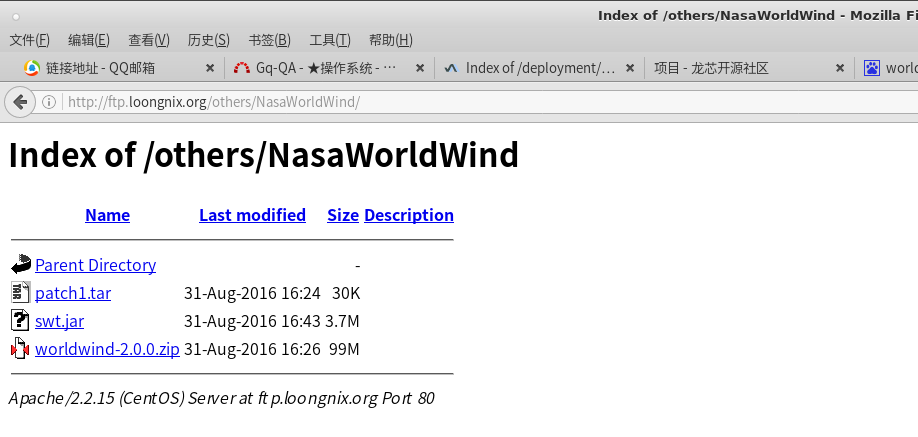
1.下載swt.jar檔案(http://ftp.loongnix.org/others/NasaWorldWind/),拷貝到swt目錄下(jogl-v2.1.5/make/lib/swt/)
2.進入jogl-v2.15軟體包,在./make/build-nativewindow.xml檔案中進行修改。
| <target name="c.configure.linux.mipsel" if="isLinuxMipsel"> <echo message="Linux.MIPSEL" /> <property name="compiler.cfg.id" value="compiler.cfg.linux" /> <property name="linker.cfg.id.oswin" value="linker.cfg.linux.nativewindow.x11" /> </target> + <target name="c.configure.linux.mips64el" if="isLinuxMips64el"> + <echo message="Linux.MIPS64EL" /> + <property name="compiler.cfg.id" value="compiler.cfg.linux" /> + <property name="linker.cfg.id.oswin" value="linker.cfg.linux.nativewindow.x11" /> + </target> <target name="c.configure.linux.ppc" if="isLinuxPpc"> .......... + c.configure.linux.mipsel,c.configure.linux.mips64el,c.configure.linux.ppc |
3.修改build-common.xml檔案,新增如下程式碼:
| <condition property="swt.jar" value="${project.root}/make/lib/swt/gtk-linux-x86/swt-debug.jar"> <istrue value="${isAndroid}" /> <!-- FIXME JAU .. hack --> </condition> + <condition property="swt.jar" value="${project.root}/make/lib/swt/gtk-linux-mips64el/swt.jar"> + <istrue value="${isLinuxMips64el}" /> <!-- FIXME JAU .. hack --> + </condition> <property name="swt-cocoa-macosx-x86_64.jar" value="${project.root}/make/lib/swt/cocoa-macosx-x86_64/swt-debug.jar"/> |
4.修改build-jogl.xml檔案,新增如下程式碼:
| <target name="c.configure.linux.mipsel" if="isLinuxMipsel"> <echo message="Linux.MIPSEL" /> <property name="compiler.cfg.id" value="compiler.cfg.linux" /> <property name="linker.cfg.id.os" value="linker.cfg.linux.jogl.x11" /> </target> + <target name="c.configure.linux.mips64el" if="isLinuxMipsel"> + <echo message="Linux.MIPSEL" /> + <property name="compiler.cfg.id" value="compiler.cfg.linux" /> + <property name="linker.cfg.id.os" value="linker.cfg.linux.jogl.x11" /> + </target> + c.configure.linux.mipsel,c.configure.linux.mips64el,c.configure.linux.ppc |
5.修改build-newt.xml檔案,新增如下程式碼:
| + <target name="c.configure.linux.mips64el" if="isLinuxMips64el"> + <echo message="Linux.mips64el" /> + <property name="compiler.cfg.id" value="compiler.cfg.linux" /> + <condition property="linker.cfg.id.oswin" value="linker.cfg.linux.newt.x11" + else="linker.cfg.linux"> + <isset property="isX11" /> + </condition> + <echo message="linker.cfg.id.oswin ${linker.cfg.id.oswin}" /> + </target> + c.configure.linux.mipsel,c.configure.linux.mips64el,c.configure.linux.ppc |
6.在make目錄下,使用ant來編譯:
| all: BUILD SUCCESSFUL Total time: 3 minutes 1 second |
終於編譯成功了!
* 記得將jogl下的jogl-all.jar、nativewindow-natives-linux-mips64el.jar、jogl-all-natives-linux-mips64el.jar,拷貝到worldwind下
第三步:在worldwind下,執行提供的用例。
| [[email protected] worldwind-2.0.0]$ chmod +x run-demo.bash [[email protected] worldwind-2.0.0]$ ./run-demo.bash gov.nasa.worldwindx.examples.ApplicationTemplate |
最終worldwind終於執行起來了!3A2000下拖動頁面基本流暢。
為了能夠更流暢的檢視地圖,可以遮蔽終端的輸入:
| [[email protected] worldwind-2.0.0]$ ./run-demo.bash gov.nasa.worldwindx.examples.ApplicationTemplate &>/dev/null |
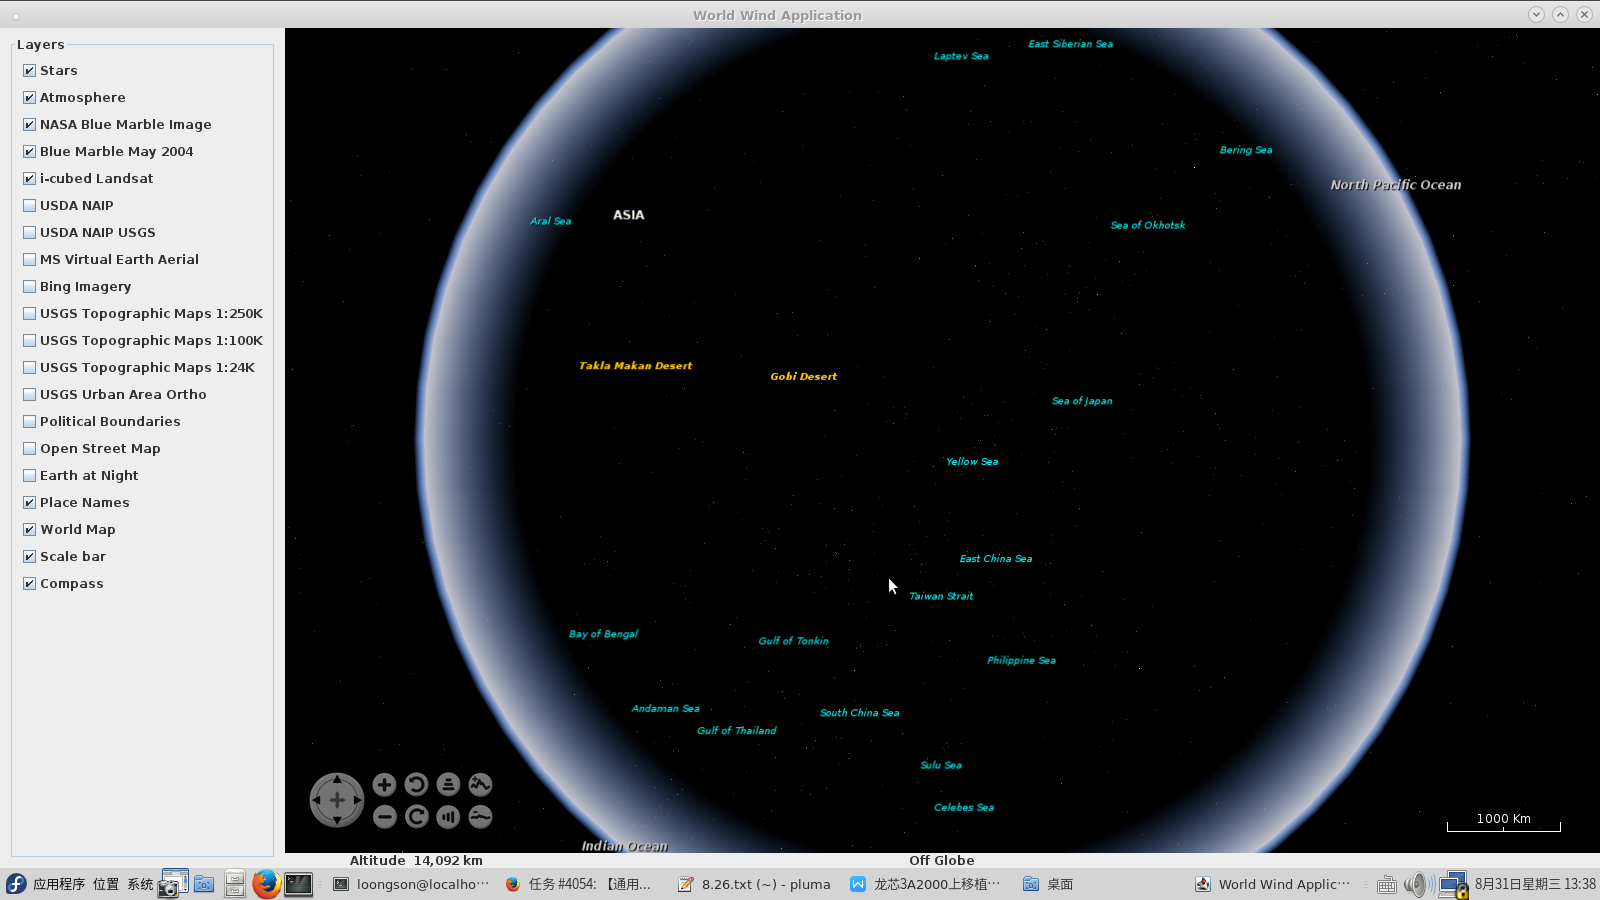
1000km高空下的地球

北京城市地圖
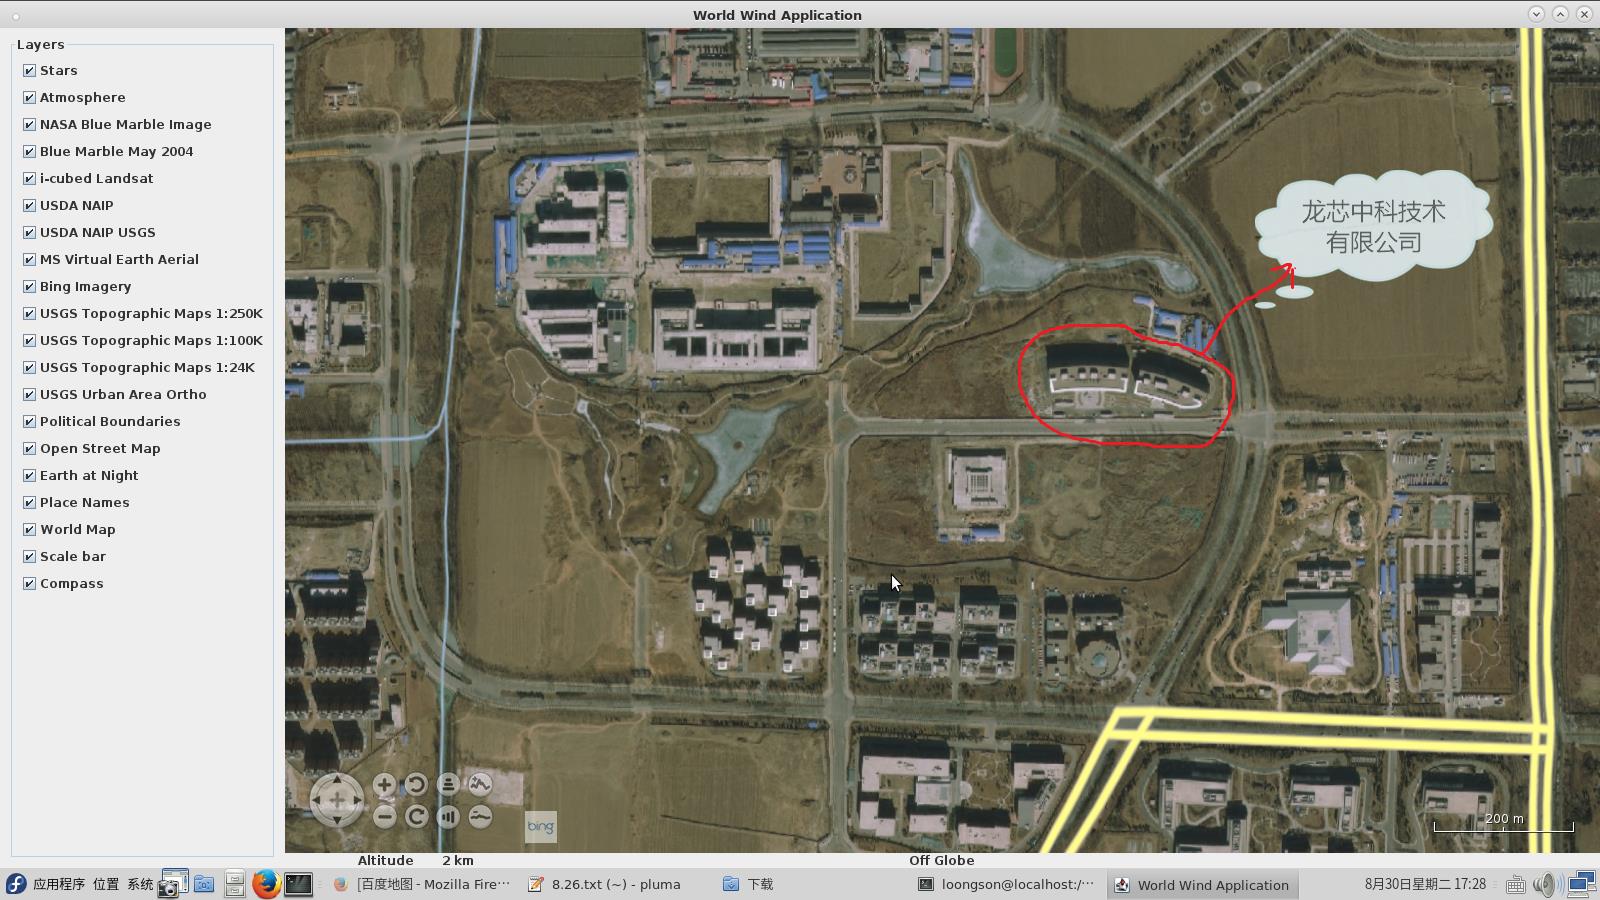
龍芯公司
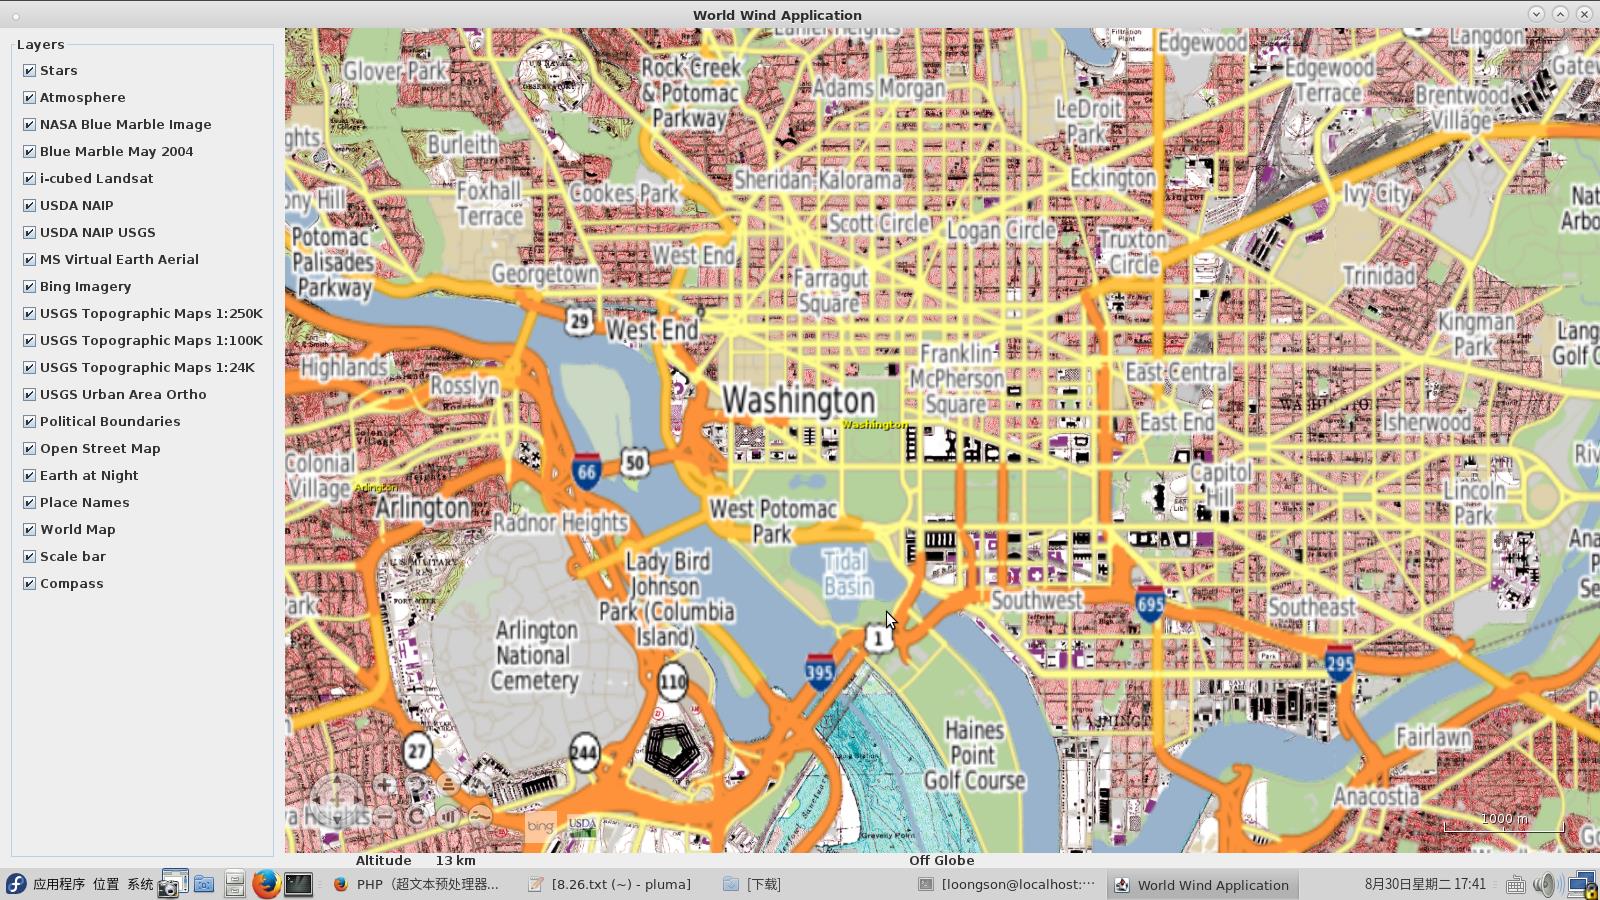
華盛頓城市路線圖
worldwind官方網站上提供更多精美例項,大家一起欣賞下。

五、如果您覺得要修改的程式碼太多,不方便。筆者為你提供了更簡單的方法。
1. 下載http://ftp.loongnix.org/others/NasaWorldWind/ 裡面有patch檔案,還有使用說明。根據說明來修改三個軟體包,最後在worldwind目錄裡輸入
./run-demo.bash gov.nasa.worldwindx.examples.ApplicationTemplate
