
Android Interpolator屬性動畫解析
Interpolator的用法
Interpolator這個東西很難進行翻譯,直譯過來的話是補間器的意思,它的主要作用是可以控制動畫的變化速率,比如去實現一種非線性運動的動畫效果。那麼什麼叫做非線性運動的動畫效果呢?就是說動畫改變的速率不是一成不變的,像加速運動以及減速運動都屬於非線性運動。
不過Interpolator並不是屬性動畫中新增的技術,實際上從Android 1.0版本開始就一直存在Interpolator介面了,而之前的補間動畫當然也是支援這個功能的。只不過在屬性動畫中新增了一個TimeInterpolator介面,這個介面是用於相容之前的Interpolator的,這使得所有過去的Interpolator實現類都可以直接拿過來放到屬性動畫當中使用,那麼我們來看一下現在TimeInterpolator介面的所有實現類,如下圖所示:

可以看到,TimeInterpolator介面已經有非常多的實現類了,這些都是Android系統內建好的並且我們可以直接使用的Interpolator。每個Interpolator都有它各自的實現效果,比如說AccelerateInterpolator就是一個加速運動的Interpolator,而DecelerateInterpolator就是一個減速運動的Interpolator。
使用屬性動畫時,系統預設的Interpolator其實就是一個先加速後減速的Interpolator,對應的實現類就是AccelerateDecelerateInterpolator。
當然,我們也可以很輕鬆地修改這一預設屬性,將它替換成任意一個系統內建好的Interpolator。就拿“中”篇文章中的程式碼來舉例吧,MyAnimView中的startAnimation()方法是開啟動畫效果的入口,這裡我們對Point物件的座標稍做一下修改,讓它變成一種垂直掉落的效果,程式碼如下所示:
private void startAnimation() {
Point startPoint = new Point(getWidth() / 2, RADIUS);
Point endPoint = new Point(getWidth() / 2, getHeight() - RADIUS);
ValueAnimator anim = ValueAnimator.ofObject(new PointEvaluator(), startPoint, endPoint);
anim.addUpdateListener(new ValueAnimator.AnimatorUpdateListener() {
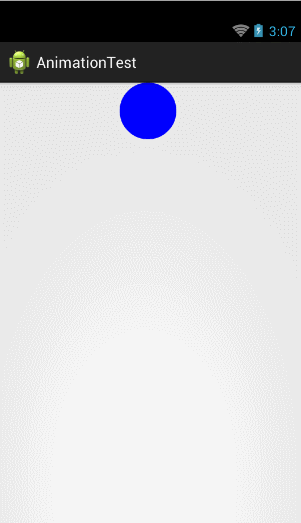
@Override 這裡呼叫了setInterpolator()方法,然後傳入了一個AccelerateInterpolator的例項,注意AccelerateInterpolator的構建函式可以接收一個float型別的引數,這個引數是用於控制加速度的。現在執行一下程式碼,效果如下圖所示:
效果還是非常不錯的。那麼這裡我們只是選了幾個系統實現好的Interpolator,由於內建Interpolator非常多,就不一一進行講解了,大家可以自己去使用一下其它的幾種Interpolator來看一看效果。
但是,只會用一下系統提供好的Interpolator,我們顯然對自己的要求就太低了,既然是學習屬性動畫的高階用法,那麼自然要將它研究透了。下面我們就來看一下Interpolator的內部實現機制是什麼樣的,並且來嘗試寫一個自定義的Interpolator。
首先看一下TimeInterpolator的介面定義,程式碼如下所示:
/**
 * A time interpolator defines the rate of change of an animation. This allows animations
 * to have non-linear motion, such as acceleration and deceleration.
 */
public interface TimeInterpolator {

    /**
     * Maps a value representing the elapsed fraction of an animation to a value that represents
     * the interpolated fraction. This interpolated value is then multiplied by the change in
     * value of an animation to derive the animated value at the current elapsed animation time.
     *
     * @param input A value between 0 and 1.0 indicating our current point
     *        in the animation where 0 represents the start and 1.0 represents
     *        the end
     * @return The interpolation value. This value can be more than 1.0 for
     *         interpolators which overshoot their targets, or less than 0 for
     *         interpolators that undershoot their targets.
     */
    float getInterpolation(float input);
}
介面還是非常簡單的,只有一個getInterpolation()方法。大家有興趣可以通過註釋來對這個介面進行詳解的瞭解,這裡我就簡單解釋一下,getInterpolation()方法中接收一個input引數,這個引數的值會隨著動畫的執行而不斷變化,不過它的變化是非常有規律的,就是根據設定的動畫時長勻速增加,變化範圍是0到1。也就是說當動畫一開始的時候input的值是0,到動畫結束的時候input的值是1,而中間的值則是隨著動畫執行的時長在0到1之間變化的。
input的值是由系統經過計算後傳入到getInterpolation()方法中的,然後我們可以自己實現getInterpolation()方法中的演算法,根據input的值來計算出一個返回值,而這個返回值就是fraction了。
因此,最簡單的情況就是input值和fraction值是相同的,這種情況由於input值是勻速增加的,因而fraction的值也是勻速增加的,所以動畫的運動情況也是勻速的。系統中內建的LinearInterpolator就是一種勻速運動的Interpolator,那麼我們來看一下它的原始碼是怎麼實現的:
/**
 * An interpolator where the rate of change is constant
 */
@HasNativeInterpolator
public class LinearInterpolator extends BaseInterpolator implements NativeInterpolatorFactory {

    public LinearInterpolator() {
    }

    public LinearInterpolator(Context context, AttributeSet attrs) {
    }

    public float getInterpolation(float input) {
        return input;
    }

    /** @hide */
    @Override
    public long createNativeInterpolator() {
        return NativeInterpolatorFactoryHelper.createLinearInterpolator();
    }
}
這裡我們只看getInterpolation()方法,這個方法沒有任何邏輯,就是把引數中傳遞的input值直接返回了,因此fraction的值就是等於input的值的,這就是勻速運動的Interpolator的實現方式。
當然這是最簡單的一種Interpolator的實現了,我們再來看一個稍微複雜一點的。既然現在大家都知道了系統在預設情況下使用的是AccelerateDecelerateInterpolator,那我們就來看一下它的原始碼吧,如下所示:
/**
 * An interpolator where the rate of change starts and ends slowly but
 * accelerates through the middle.
 *
 */
@HasNativeInterpolator
public class AccelerateDecelerateInterpolator implements Interpolator, NativeInterpolatorFactory {
    public AccelerateDecelerateInterpolator() {
    }

    @SuppressWarnings({"UnusedDeclaration"})
    public AccelerateDecelerateInterpolator(Context context, AttributeSet attrs) {
    }

    public float getInterpolation(float input) {
        return (float)(Math.cos((input + 1) * Math.PI) / 2.0f) + 0.5f;
    }

    /** @hide */
    @Override
    public long createNativeInterpolator() {
        return NativeInterpolatorFactoryHelper.createAccelerateDecelerateInterpolator();
    }
}
程式碼雖然沒有變長很多,但是getInterpolation()方法中的邏輯已經明顯變複雜了,不再是簡單地將引數中的input進行返回,而是進行了一個較為複雜的數學運算。那這裡我們來分析一下它的演算法實現,可以看到,演算法中主要使用了餘弦函式,由於input的取值範圍是0到1,那麼cos函式中的取值範圍就是π到2π。而cos(π)的結果是-1,cos(2π)的結果是1,那麼這個值再除以2加上0.5之後,getInterpolation()方法最終返回的結果值還是在0到1之間。只不過經過了餘弦運算之後,最終的結果不再是勻速增加的了,而是經歷了一個先加速後減速的過程。
通過分析LinearInterpolator和AccelerateDecelerateInterpolator的原始碼,我們已經對Interpolator的內部實現機制有了比較清楚的認識了,那麼接下來我們就開始嘗試編寫一個自定義的Interpolator。
編寫自定義Interpolator最主要的難度都是在於數學計算方面的,由於我數學並不是很好,因此這裡也就寫一個簡單點的Interpolator來給大家演示一下。既然屬性動畫預設的Interpolator是先加速後減速的一種方式,這裡我們就對它進行一個簡單的修改,讓它變成先減速後加速的方式。新建DecelerateAccelerateInterpolator類,讓它實現TimeInterpolator介面,程式碼如下所示:
public class DecelerateAccelerateInterpolator implements TimeInterpolator{

    @Override
    public float getInterpolation(float input) {
        float result;
        if (input <= 0.5) {
            result = (float) (Math.sin(Math.PI * input)) / 2;
        } else {
            result = (float) (2 - Math.sin(Math.PI * input)) / 2;
        }
        return result;
    }

}
這段程式碼是使用正弦函式來實現先減速後加速的功能的,因為正弦函式初始弧度的變化值非常大,剛好和餘弦函式是相反的,而隨著弧度的增加,正弦函式的變化值也會逐漸變小,這樣也就實現了減速的效果。當弧度大於π/2之後,整個過程相反了過來,現在正弦函式的弧度變化值非常小,漸漸隨著弧度繼續增加,變化值越來越大,弧度到π時結束,這樣從0過度到π,也就實現了先減速後加速的效果。
我們將DecelerateAccelerateInterpolator在程式碼中進行替換,如下所示:
private void startAnimation() {
    Point startPoint = new Point(getWidth() / 2, RADIUS);
    Point endPoint = new Point(getWidth() / 2, getHeight() - RADIUS);
    ValueAnimator anim = ValueAnimator.ofObject(new PointEvaluator(), startPoint, endPoint);
    anim.addUpdateListener(new ValueAnimator.AnimatorUpdateListener() {
        @Override
        public void onAnimationUpdate(ValueAnimator animation) {
            currentPoint = (Point) animation.getAnimatedValue();
            invalidate();
        }
    });
    anim.setInterpolator(new DecelerateAccelerateInterpolator());
    anim.setDuration(3000);
    anim.start();
}
就是將DecelerateAccelerateInterpolator的例項傳入到setInterpolator()方法當中。重新執行一下程式碼,效果如下圖

小球的運動確實是先減速後加速的效果,說明我們自定義的Interpolator已經可以正常工作了。通過這樣一個程度的學習,相信大家對屬性動畫Interpolator的理解和使用都達到了一個比較深刻的層次了。
ViewPropertyAnimator的用法
ViewPropertyAnimator其實算不上什麼高階技巧,它的用法格外的簡單,只不過和前面所學的所有屬性動畫的知識不同,它並不是在3.0系統當中引入的,而是在3.1系統當中附增的一個新的功能,因此這裡我們把它作為整個屬性動畫系列的收尾部分。
我們都知道,屬性動畫的機制已經不是再針對於View而進行設計的了,而是一種不斷地對值進行操作的機制,它可以將值賦值到指定物件的指定屬性上。但是,在絕大多數情況下,我相信大家主要都還是對View進行動畫操作的。Android開發團隊也是意識到了這一點,沒有為View的動畫操作提供一種更加便捷的用法確實是有點太不人性化了,於是在Android 3.1系統當中補充了ViewPropertyAnimator這個機制。
那我們先來回顧一下之前的用法吧,比如我們想要讓一個TextView從常規狀態變成透明狀態,就可以這樣寫:
ObjectAnimator animator = ObjectAnimator.ofFloat(textview, "alpha", 0f);
animator.start();
我們要將操作的view、屬性、變化的值都一起傳入到ObjectAnimator.ofFloat()方法當中,雖然看上去也沒寫幾行程式碼,但這不太像是我們平時使用的面向物件的思維。
那麼下面我們就來看一下如何使用ViewPropertyAnimator來實現同樣的效果,ViewPropertyAnimator提供了更加易懂、更加面向物件的API,如下所示:
textview.animate().alpha(0f); 不過textview.animate()這個方法是怎麼回事呢?animate()方法就是在Android 3.1系統上新增的一個方法,這個方法的返回值是一個ViewPropertyAnimator物件,也就是說拿到這個物件之後我們就可以呼叫它的各種方法來實現動畫效果了,這裡我們呼叫了alpha()方法並轉入0,表示將當前的textview變成透明狀態。
怎麼樣?比起使用ObjectAnimator,ViewPropertyAnimator的用法明顯更加簡單易懂吧。除此之外,ViewPropertyAnimator還可以很輕鬆地將多個動畫組合到一起,比如我們想要讓textview運動到500,500這個座標點上,就可以這樣寫:
textview.animate().x(500).y(500); 可以看出,ViewPropertyAnimator是支援連綴用法的,我們想讓textview移動到橫座標500這個位置上時呼叫了x(500)這個方法,然後讓textview移動到縱座標500這個位置上時呼叫了y(500)這個方法,將所有想要組合的動畫通過這種連綴的方式拼接起來,這樣全部動畫就都會一起被執行。
那麼怎樣去設定動畫的執行時長呢?很簡單,也是通過連綴的方式設定即可,比如我們想要讓動畫執行5秒鐘,就可以這樣寫:
textview.animate().x(500).y(500).setDuration(5000); 除了用法之外,關於ViewPropertyAnimator有幾個細節還是值得大家注意一下的:
整個ViewPropertyAnimator的功能都是建立在View類新增的animate()方法之上的,這個方法會建立並返回一個ViewPropertyAnimator的例項,之後的呼叫的所有方法,設定的所有屬性都是通過這個例項完成的。
大家注意到,在使用ViewPropertyAnimator時,我們自始至終沒有呼叫過start()方法,這是因為新的介面中使用了隱式啟動動畫的功能,只要我們將動畫定義完成之後,動畫就會自動啟動。並且這個機制對於組合動畫也同樣有效,只要我們不斷地連綴新的方法,那麼動畫就不會立刻執行,等到所有在ViewPropertyAnimator上設定的方法都執行完畢後,動畫就會自動啟動。當然如果不想使用這一預設機制的話,我們也可以顯式地呼叫start()方法來啟動動畫。
ViewPropertyAnimator的所有介面都是使用連綴的語法來設計的,每個方法的返回值都是它自身的例項,因此呼叫完一個方法之後可以直接連綴呼叫它的另一個方法,這樣把所有的功能都串接起來,我們甚至可以僅通過一行程式碼就完成任意複雜度的動畫功能。
寫了一個Demo裡面用到了,[下載連結](http://download.csdn.net/download/u011467537/10152219)