實驗一 第一個Android程式和Activity生命週期
阿新 • • 發佈:2019-01-07
實驗一 第一個Android程式和Activity生命週期
實驗目的
生成執行第一個Android程式,熟悉瞭解Android手機開發平臺的基本構成和使用方法,熟悉Android應用程式專案的基本檔案目錄結構,瞭解開發環境提供的各種工具的基本用法。
在Activity中過載下9種事件函式,在呼叫不同函式時使用LogCat在Eclipse的控制檯中輸出呼叫日誌。掌握Activity在啟動、停止和銷燬等不同階段,9種過載函式的呼叫順序,並掌握Android除錯工具LogCat的使用方法
實驗要求
-
用工程嚮導生成第一個Android程式,並在模擬器上執行
注意在新建應用的選擇SDK版本時選API 18

-
熟悉Android應用程式的基本檔案結構
-
瞭解使用開發環境各種工具的基本用法
-
在程式中增加生命週期函式,並輸出log,可以參考課本的示例程式,根據logcat的輸出結果,分析程式的執行流程。注意分析以下幾種情況:
a. 程式正常啟動和關閉
b. 程式執行中,切換到其他程式
c. 程式執行中,有簡訊和電話呼入

工程程式碼
專案工程結構圖
activity_xml:
<?xml version= MainActivity:
package com.example.wyx.exp_1;

import android.support.v7.app.AppCompatActivity;
import android.os.Bundle;
import android.util.Log;

public class MainActivity extends AppCompatActivity {

    private static String TAG = "LIFTCYCLE";
    @Override  //完全生命週期開始時被呼叫,初始化Activity
    public void onCreate(Bundle savedInstanceState) {
        super.onCreate(savedInstanceState);
        setContentView(R.layout.activity_main);
        Log.i(TAG, "(1) onCreate()");
    }

    @Override  //可視生命週期開始時被呼叫,對使用者介面進行必要的更改
    public void onStart() {
        super.onStart();
        Log.i(TAG, "(2) onStart()");
    }

    @Override  //在onStart()後被呼叫,用於恢復onSaveInstanceState()儲存的使用者介面資訊
    public void onRestoreInstanceState(Bundle savedInstanceState) {
        super.onRestoreInstanceState(savedInstanceState);
        Log.i(TAG, "(3) onRestoreInstanceState()");
    }

    @Override  //在活動生命週期開始時被呼叫,恢復被onPause()停止的用於介面更新的資源
    public void onResume() {
        super.onResume();
        Log.i(TAG, "(4) onResume()");
    }

    @Override  // 在onResume()後被呼叫,儲存介面資訊
    public void onSaveInstanceState(Bundle savedInstanceState) {
        super.onSaveInstanceState(savedInstanceState);
        Log.i(TAG, "(5) onSaveInstanceState()");
    }

    @Override  //在重新進入可視生命週期前被呼叫,載入介面所需要的更改資訊
    public void onRestart() {
        super.onRestart();
        Log.i(TAG, "(6) onRestart()");
    }

    @Override  //在活動生命週期結束時被呼叫,用來儲存持久的資料或釋放佔用的資源
    public void onPause() {
        super.onPause();
        Log.i(TAG, "(7) onPause()");
    }
    @Override //在可視生命週期結束時被呼叫,一般用來儲存持久的資料或釋放佔用的資源
    public void onStop() {
        super.onStop();
        Log.i(TAG, "(8) onStop()");
    }

    @Override //在完全生命週期結束時被呼叫,釋放資源,包括執行緒、資料連線等
    public void onDestroy() {
        super.onDestroy();
        Log.i(TAG, "(9) onDestroy()");
    }
    }
AndroidManifest:
<?xml version="1.0" encoding="utf-8"?>
<manifest xmlns:android="http://schemas.android.com/apk/res/android"
    package="com.example.wyx.exp_1">

    <application
        android:allowBackup="true"
        android:icon="@mipmap/ic_launcher"
        android:label="@string/app_name"
        android:roundIcon="@mipmap/ic_launcher_round"
        android:supportsRtl="true"
        android:theme="@style/AppTheme">
        <activity android:name=".MainActivity">
            <intent-filter>
                <action android:name="android.intent.action.MAIN" />

                <category android:name="android.intent.category.LAUNCHER" />
            </intent-filter>
        </activity>
    </application>

</manifest>
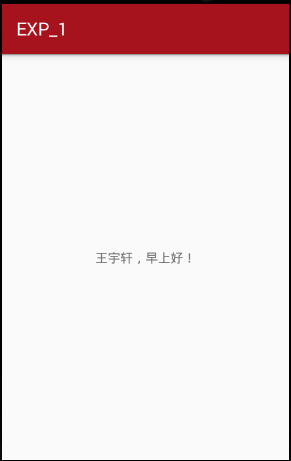
實現效果


