
第9步 spring 配置 springmvc配置
spring配置
有5個網址 springboot
再講一遍 spring的學習最好的方法是執行 官方demo 學習它裡面的配置 。
我們不可能一下子理解spring裡面的原始碼
spring配置直接複製好了 視訊老師也是從官方demo中複製過來的


直接複製
********************************************************************************************************************************************
1.首先講web.xml
<?xml version="1.0" encoding="UTF-8"?>
<web-app xmlns:xsi="http://www.w3.org/2001/XMLSchema-instance"
         xmlns="http://java.sun.com/xml/ns/javaee"
         xsi:schemaLocation="http://java.sun.com/xml/ns/javaee http://java.sun.com/xml/ns/javaee/web-app_2_5.xsd"
         id="WebApp_ID" version="2.5">

    <display-name>Archetype Created Web Application</display-name>


    <!-- CharacterEncodingFilter  配置過濾器 為了轉碼用的 -->
    <filter>
        <filter-name>characterEncodingFilter</filter-name>
        <filter-class>org.springframework.web.filter.CharacterEncodingFilter</filter-class>
        <init-param>
            <param-name>encoding</param-name>
            <param-value>UTF-8</param-value>
        </init-param>
        <init-param>
            <param-name>forceEncoding</param-name>
            <param-value>true</param-value>
        </init-param>
    </filter>
    <filter-mapping>
        <filter-name>characterEncodingFilter</filter-name>
        <!--  /*  攔截所有請求 走CharacterEncodingFilter
             我們就不用再寫轉utf-8這種了
           過濾所有的請求    -->
        <url-pattern>/*</url-pattern>
    </filter-mapping>


    <listener>
        <!--     web容器啟動和關閉的監聽器   只是監聽web容器的啟動和關閉     -->
        <listener-class>org.springframework.web.context.request.RequestContextListener</listener-class>
    </listener>


    <listener>
        <!--  ContextLoaderListener   web容器和spring容器進行整合進行監聽     -->
        <listener-class>org.springframework.web.context.ContextLoaderListener</listener-class>
    </listener>
    <context-param>
        <param-name>contextConfigLocation</param-name>
        <param-value>
            <!--    指向spring配置檔案    -->
            classpath:applicationContext.xml
            <!--   ContextLoaderListener 會 通過applicationContext.xml、
                   將spring容器和web容器進行整合
             -->
        </param-value>
    </context-param>


    <servlet>
        <!--DispatcherServlet    配置spring-mvc   -->
        <servlet-name>dispatcher</servlet-name>
        <servlet-class>org.springframework.web.servlet.DispatcherServlet</servlet-class>


        <!--  指定SpringMVC的檔案  不寫是   預設dispatcher-servlet.xml名字   -->
        <!--<init-param>-->
            <!--<param-name>contextConfigLocation</param-name>-->
            <!--<param-value>/WEB-INF/spring-mvc.xml</param-value>-->
            <!--<param-value>/WEB-INF/xxxx.xml (叫什麼名字都可以)</param-value>-->
        <!--</init-param>-->


        <!--   servlet的配置  當大於等於0 就在容器啟動時初始化這個servlet
        小於0或不指定 只有請求時才初始化servlet-->
        <load-on-startup>1</load-on-startup>
    </servlet>


    <servlet-mapping>
        <!-- DispatcherServlet  dispatcher 引用上面的springmvc配置 攔截所有的*.do   -->
        <servlet-name>dispatcher</servlet-name>
        <!--  springmvc 將所有的*.do進行攔截 -->
        <url-pattern>*.do</url-pattern>
    </servlet-mapping>


    <!--NFDFlightDataTaskListener 監聽器-->
    <!--<listener>-->
        <!--<listener-class>com.zjyouth.utils.NFDFlightDataTaskListener</listener-class>-->
    <!--</listener>-->

</web-app>
********************************************************************************************************************************************
1.首先講web.xml
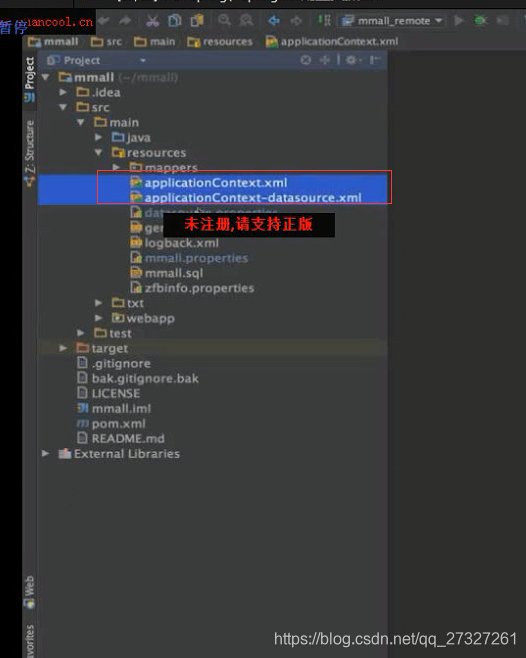
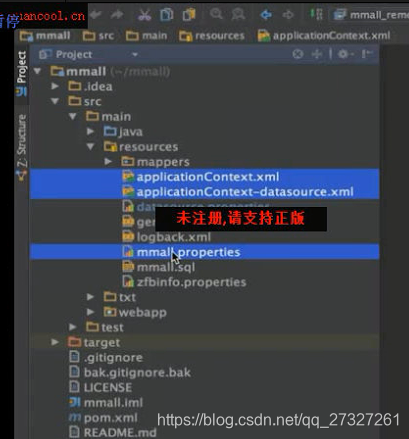
2.再講一下spring容器的主配置 applicationContext.xml
<?xml version="1.0" encoding="UTF-8"?>
<beans xmlns="http://www.springframework.org/schema/beans"
       xmlns:xsi="http://www.w3.org/2001/XMLSchema-instance" xmlns:aop="http://www.springframework.org/schema/aop"
       xmlns:tx="http://www.springframework.org/schema/tx" xmlns:jdbc="http://www.springframework.org/schema/jdbc"
       xmlns:context="http://www.springframework.org/schema/context"
       xmlns:task="http://www.springframework.org/schema/task"

       xsi:schemaLocation="
        http://www.springframework.org/schema/task
     http://www.springframework.org/schema/task/spring-task-3.0.xsd
     http://www.springframework.org/schema/context http://www.springframework.org/schema/context/spring-context.xsd
     http://www.springframework.org/schema/beans http://www.springframework.org/schema/beans/spring-beans.xsd
     http://www.springframework.org/schema/tx http://www.springframework.org/schema/tx/spring-tx.xsd
     http://www.springframework.org/schema/aop http://www.springframework.org/schema/aop/spring-aop.xsd">


    <!--    spring容器的主配置   -->


    <!--      掃描com.zjyouth下的一些註解 可以很方便的進行注入
    <context:component-scan base-package="com.zjyouth" annotation-config="true"/>
  -->
    <context:component-scan base-package="com.zjut" annotation-config="true"/>

    <!-- 定時 -->
    <context:component-scan base-package="com.zjyouth.*" />
    <task:executor id="executor" pool-size="5" />
    <task:scheduler id="scheduler" pool-size="10" />
    <task:annotation-driven executor="executor" scheduler="scheduler" />


    <!--    <context:annotation-config/>-->


    <!--
            在使用spectj註解實現springAOP:
            1.需要使用@Aspect註解來標註切面
            2.可以使用@before,@afterRuning,@around,@afterThrowning註解,來標註通知
            3.必須有切入點point-cut,使用@pointcut(execution(""))註解來標註切入點
            4.在aop.xml中,需要有
            https://blog.csdn.net/qq_37761074/article/details/72859266
            Spring配置- - -<aop:aspectj-autoproxy />
            2017年11月01日 11:54:08 閱讀數:488更多
            個人分類: 日記
            版權宣告:本文為博主原創文章,未經博主允許不得轉載。 https://blog.csdn.net/ke_zhang_123/article/details/78412536
            <aop:aspectj-autoproxy proxy-target-class="true"/> 基於類的動態代理(依賴於CGlib庫)
            通過配置織入@Aspectj切面
    -->
    <!--  aop的配置   spring配置文分成多個檔案   datasource.xml   -->
    <aop:aspectj-autoproxy/>


    <!--   spring配置檔案  dataSource分出來的子檔案  -->
    <import resource="applicationContext-datasource.xml"/>


</beans>
********************************************************************************************************************************************
1.首先講web.xml
2.再講一下spring容器的主配置 applicationContext.xml
3.spring配置檔案 dataSource分出來的子檔案 applicationContext-datasource.xml
<?xml version="1.0" encoding="UTF-8"?>
<beans xmlns="http://www.springframework.org/schema/beans"
       xmlns:xsi="http://www.w3.org/2001/XMLSchema-instance" xmlns:aop="http://www.springframework.org/schema/aop"
       xmlns:tx="http://www.springframework.org/schema/tx" xmlns:jdbc="http://www.springframework.org/schema/jdbc"
       xmlns:context="http://www.springframework.org/schema/context"
       xsi:schemaLocation="
     http://www.springframework.org/schema/context http://www.springframework.org/schema/context/spring-context.xsd
     http://www.springframework.org/schema/beans http://www.springframework.org/schema/beans/spring-beans.xsd
     http://www.springframework.org/schema/tx http://www.springframework.org/schema/tx/spring-tx.xsd
     http://www.springframework.org/schema/aop http://www.springframework.org/schema/aop/spring-aop.xsd">

    <!--    spring容器的自配置檔案   -->
    <!--      掃描com.zjyouth下的所有註解
 <context:component-scan base-package="com.zjyouth" annotation-config="true"/>
  -->
    <context:component-scan base-package="com.zjut" annotation-config="true"/>


    <!--  將常量分離出來  分出1個檔案  -->
    <bean id="propertyConfigurer"
          class="org.springframework.beans.factory.config.PropertyPlaceholderConfigurer">
        <property name="order" value="2"/>
        <property name="ignoreUnresolvablePlaceholders" value="true"/>
        <property name="locations">
            <list>
                <!--  將常量分離出來  分出1個檔案    -->
                <value>classpath:datasource.properties</value>
            </list>
        </property>
        <!--     指定字符集   -->
        <property name="fileEncoding" value="utf-8"/>
    </bean>


    <!--   dbcp資料庫連線池配置    使用dbcp資料庫連線池   -->
    <bean id="dataSource" class="org.apache.commons.dbcp.BasicDataSource" destroy-method="close">
        <property name="driverClassName" value="${db.driverClassName}"/>
        <property name="url" value="${db.url}"/>
        <property name="username" value="${db.username}"/>
        <property name="password" value="${db.password}"/>
        <!-- 連線池啟動時的初始值 -->
        <property name="initialSize" value="${db.initialSize}"/>
        <!-- 連線池的最大值 -->
        <property name="maxActive" value="${db.maxActive}"/>
        <!-- 最大空閒值.當經過一個高峰時間後,連線池可以慢慢將已經用不到的連線慢慢釋放一部分,一直減少到maxIdle為止 -->
        <property name="maxIdle" value="${db.maxIdle}"/>
        <!-- 最小空閒值.當空閒的連線數少於閥值時,連線池就會預申請去一些連線,以免洪峰來時來不及申請 -->
        <property name="minIdle" value="${db.minIdle}"/>
        <!-- 最大建立連線等待時間。如果超過此時間將接到異常。設為-1表示無限制 -->
        <property name="maxWait" value="${db.maxWait}"/>
        <!--#給出一條簡單的sql語句進行驗證 -->
         <!--<property name="validationQuery" value="select getdate()" />-->
        <property name="defaultAutoCommit" value="${db.defaultAutoCommit}"/>
        <!-- 回收被遺棄的(一般是忘了釋放的)資料庫連線到連線池中 -->
         <!--<property name="removeAbandoned" value="true" />-->
        <!-- 資料庫連線過多長時間不用將被視為被遺棄而收回連線池中 -->
         <!--<property name="removeAbandonedTimeout" value="120" />-->
        <!-- #連線的超時時間,預設為半小時。 -->
        <property name="minEvictableIdleTimeMillis" value="${db.minEvictableIdleTimeMillis}"/>

        <!--# 失效檢查執行緒執行時間間隔,要小於MySQL預設-->
        <property name="timeBetweenEvictionRunsMillis" value="40000"/>
        <!--# 檢查連線是否有效-->
        <property name="testWhileIdle" value="true"/>
        <!--# 檢查連線有效性的SQL語句-->
        <property name="validationQuery" value="SELECT 1 FROM dual"/>
    </bean>


    <!--   這個配置重要 是mybatis的sqlSesstion的bean   -->
    <bean id="sqlSessionFactory" class="org.mybatis.spring.SqlSessionFactoryBean">
        <!--    ref="dataSource"  指的是上面dpcp資料庫連線池     -->
        <property name="dataSource" ref="dataSource"/>
        <!--  這個就能讀取到mybatis的所有的實現  -->
        <property name="mapperLocations" value="classpath*:mappers/*Mapper.xml"></property>

        <!-- 分頁外掛   在加上 pom中配置jar  mybatis的分頁外掛就配置好了  -->
        <property name="plugins">
            <array>
                <bean class="com.github.pagehelper.PageHelper">
                    <property name="properties">
                        <value>
                            <!--  指明一下方言是mysql   -->
                            dialect=mysql
                        </value>
                    </property>
                </bean>
            </array>
        </property>

    </bean>

    <!--   mybatis 掃描包的方式    -->
    <!--    mybatis的一個掃描   會掃描dao層  對service層提供介面  這個配置很重要
      -->
    <bean name="mapperScannerConfigurer" class="org.mybatis.spring.mapper.MapperScannerConfigurer">
        <!-- (空格刪一些不然報錯) <property name="basePackage" value="com.zjyouth.dao"/> -->
        <property name="basePackage" value="com.zjut.rtcf.dao"/>
    </bean>


    <!--  spring事務管理的配置     -->
    <!-- 使用@Transactional進行宣告式事務管理需要宣告下面這行 -->
    <tx:annotation-driven transaction-manager="transactionManager" proxy-target-class="true" />
    <!-- 事務管理 -->
    <bean id="transactionManager" class="org.springframework.jdbc.datasource.DataSourceTransactionManager">
       <!--  資料庫連線池 dbcp   -->
        <property name="dataSource" ref="dataSource"/>
        <!-- 提交事務失敗 出錯是否回滾  true 回滾  -->
        <property name="rollbackOnCommitFailure" value="true"/>
    </bean>


</beans>
spring配置講完了
********************************************************************************************************************************************
1.首先講web.xml
2.再講一下spring容器的主配置 applicationContext.xml
3.spring配置檔案 dataSource分出來的子檔案 applicationContext-datasource.xml spring配置講完了
4.再講一下spring mvc配置 dispatcher-servlet.xml (名字可以在web.xml裡面修改)
<?xml version="1.0" encoding="UTF-8"?>
<beans xmlns="http://www.springframework.org/schema/beans"
       xmlns:xsi="http://www.w3.org/2001/XMLSchema-instance" xmlns:p="http://www.springframework.org/schema/p"
       xmlns:context="http://www.springframework.org/schema/context"
       xmlns:mvc="http://www.springframework.org/schema/mvc" xmlns:aop="http://www.springframework.org/schema/aop"
       xsi:schemaLocation="http://www.springframework.org/schema/beans http://www.springframework.org/schema/beans/spring-beans.xsd
   http://www.springframework.org/schema/context http://www.springframework.org/schema/context/spring-context.xsd
   http://www.springframework.org/schema/mvc
   http://www.springframework.org/schema/mvc/spring-mvc.xsd">

    <!--   springmvc配置檔案 這個是預設的名字  dispatcher-servlet.xml    -->


    <!--   掃描controller註解
    <context:component-scan base-package="com.zjyouth" annotation-config="true"/>
    -->
    <context:component-scan base-package="com.zjut.rtcf" annotation-config="true"/>

    <mvc:annotation-driven>
        <mvc:message-converters>
            <bean class="org.springframework.http.converter.StringHttpMessageConverter">
                <property name="supportedMediaTypes">
                    <list>
                        <!--  配置字符集  -->
                        <value>text/plain;charset=UTF-8</value>
                        <value>text/html;charset=UTF-8</value>
                    </list>
                </property>
            </bean>
            <!--  @ResponseBody  註解將物件資料直接轉換為json資料  -->
            <!--   SpringMVC自動進行反序列化的時候 的配置類  Jackson配置類  -->
            <bean class="org.springframework.http.converter.json.MappingJacksonHttpMessageConverter">
                <!--  返回物件的時候  返回的可以是null    通過配置就過濾這個   本專案使用預設配置就不要了 -->
                <!--<property name="objectMapper">-->
                    <!--<bean class="org.codehaus.jackson.map.ObjectMapper">-->
                        <!--<property name="serializationInclusion" value="NON_EMPTY"/>-->
                    <!--</bean>-->
                <!--</property>-->
                <property name="supportedMediaTypes">
                    <list>
                        <!--  字符集    -->
                        <value>application/json;charset=UTF-8</value>
                    </list>
                </property>
            </bean>
        </mvc:message-converters>
    </mvc:annotation-driven>


    <!--       -->
    <!-- 檔案上傳   直接使用SpringMVC提供的multipart這個工具就好了   -->
    <bean id="multipartResolver" class="org.springframework.web.multipart.commons.CommonsMultipartResolver">
        <property name="maxUploadSize" value="10485760"/> <!--   單位位元組   上傳的最大位元組10m  -->
        <property name="maxInMemorySize" value="4096" />    <!-- 單位位元組   最大記憶體4M  塊的大小 -->
        <property name="defaultEncoding" value="UTF-8"></property>  <!--   預設編碼    -->
    </bean>


     <!--  SpringMVC配置講完了   -->

</beans>
********************************************************************************************************************************************