
Linux 基礎 之 pxe 系統安裝 (網線安裝系統)
一、PXE簡介
PXE(preboot execute environment,預啟動執行環境)是由Intel公司開發的最新技術,工作於Client/Server的網路模式,支援工作站通過網路從遠端伺服器下載映像,並由此支援通過網路啟動作業系統,在啟動過程中,終端要求伺服器分配IP地址,再用TFTP(trivial file transfer protocol)或MTFTP(multicast trivial file transfer protocol)協議下載一個啟動軟體包到本機記憶體中執行,由這個啟動軟體包完成終端(客戶端)基本軟體設定,從而引導預先安裝在伺服器中的終端作業系統。PXE可以引導多種作業系統,如:
二、網線安裝步驟
一、搭建dhcp環境
[[email protected] ~]# hostnamectl set-hostname pxe-server.westos.com
![]()
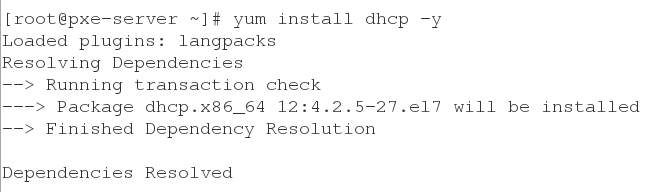
安裝dhcp
[[email protected] ~]# yum install dhcp -y
[[email protected] ~]# cp /usr/share/doc/dhcp-4.2.5/dhcpd.conf.example /etc/dhcp/dhcpd.conf

[[email protected] ~]# vim /etc/dhcp/dhcpd.conf
![]()
option domain-name "westos.com";
option domain-name-servers 172.25.254.102;
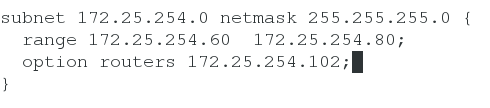
subnet 172.25.254.0 netmask 255.255.255.0 {
range 172.25.254.60 172.25.254.80;
option routers 172.25.254.102;
}
![]()
[[email protected] ~]# systemctl restart dhcpd
![]()
二、配置讀取引導檔案
安裝軟體
[[email protected] ~]# yum install syslinux tftp-server -y


[[email protected] ~]# cp /usr/share/syslinux/pxelinux.0 /var/lib/tftpboot/
![]()
[[email protected] ~]# vim /etc/xinetd.d/tftp
![]()

[[email protected] ~]# chkconfig --list![]()

[[email protected] ~]# systemctl restart xinetd.service![]()
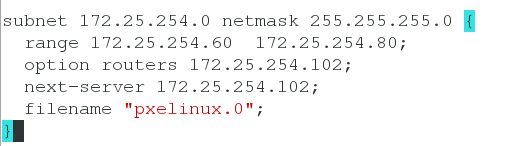
[[email protected] ~]# vim /etc/dhcp/dhcpd.conf
![]()
next-server 172.25.254.102;
filename "pxelinux.0";
[[email protected] ~]# systemctl restart dhcpd.service

三、配置介面
[[email protected] ~]# cd /var/lib/tftpboot/
[[email protected] tftpboot]# ls
pxelinux.0
[[email protected] tftpboot]# mkdir pxelinux.cfg
[[email protected] tftpboot]# ls
pxelinux.0 pxelinux.cfg
[[email protected] tftpboot]# cd pxelinux.cfg/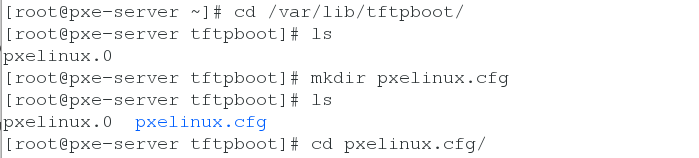
![]()
[[email protected] pxelinux.cfg]# ls
isolinux.cfg
[[email protected] pxelinux.cfg]# mv isolinux.cfg default
[[email protected] pxelinux.cfg]# ls
default

[[email protected] pxelinux.cfg]# cd ..
[[email protected] tftpboot]# ls
pxelinux.0 pxelinux.cfg
[[email protected] tftpboot]# pwd
/var/lib/tftpboot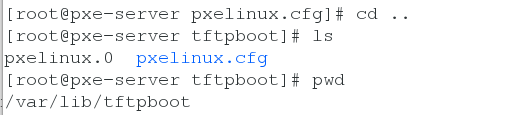

[[email protected] tftpboot]# ls
編輯配置檔案修改 時間 標題
[[email protected] tftpboot]# vim pxelinux.cfg/default![]()

[[email protected] tftpboot]# systemctl start dhcpd
[[email protected] tftpboot]# systemctl status dhcpd

四、配置進行自動安裝
[[email protected] tftpboot]# cd pxelinux.cfg/
[[email protected] pxelinux.cfg]# ls
default
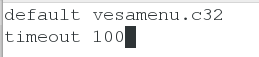
[[email protected] pxelinux.cfg]# vim default
2 timeout 100
61 label linux
62 menu label AUTOMAC INSTALL linux
63 menu default
64 kernel vmlinuz
65 append initrd=initrd.img repo=http://172.25.254.3/test ks= http://172.25.254.102/ks.cfg

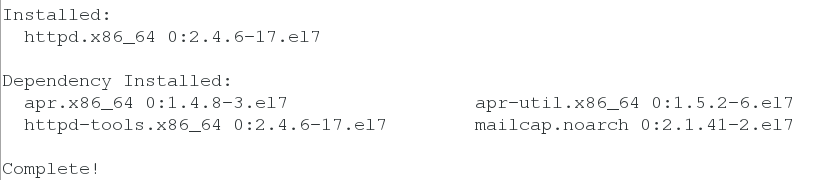
[[email protected] ~]# yum install httpd -y 安裝http

[[email protected] ~]# yum install system-config-kickstart.noarch
[[email protected] ~]# systemctl start httpd
![]()
[[email protected] ~]# system-config-kickstart
![]()


[[email protected] ~]# cd /var/www/html/
[[email protected] html]# vim ks.cfg
寫入:
timezone Asia/Shanghai
![]()
%packages
@base
@core
@fonts
@gnome-desktop
@input-methods
@x11
vnc
lftp
%end
%post
cat > /etc/yum.repos.d/yum.repo <<EOF
[rhel7.3]
name=rhel7.3
baseurl=http://172.25.254.3/test
gpgcheck=0
EOF
%end

[[email protected] html]# ksvalidator ks.cfg
![]()
[[email protected] html]# systemctl restart xinetd.service
[[email protected] html]# systemctl restart dhcpd.service
![]()
五、測試:建立虛擬機器網路引導 開啟自動安裝虛擬機器

