
UIAutomator2.0 簡介
UIAutomator2.0 出來有一段時間了。
我們就看一句話
Most importantly, UIAutomator is now based on Android Instrumentation
Instrumentation 終於把 UIAutomator 納入了他的麾下。
UIAutomator2.0 出來之後,投入使用的似乎不多,官方的文件也不多,而且還有錯。 不過各個測試框架也在積極擁抱變化,比如 Appium,Selendroid。最快的極客學院也推出了
UIAutomator2.0 的教程。當然我們 TesterHome 也有同學上了一把,比如在 Android studio 上運用 UI Automator 執行自動化測試
不過各個測試框架也在積極擁抱變化,比如 Appium,Selendroid。最快的極客學院也推出了
UIAutomator2.0 的教程。當然我們 TesterHome 也有同學上了一把,比如在 Android studio 上運用 UI Automator 執行自動化測試
事實上,Google 提供的 Android Testing Support Library 變化的挺多的,比如全面擁抱 Junit 4.0,力薦使用 AndroidJUnitRunner,然後使用 Android Studio IDE 等等。反正不僅在開發端,在測試端,Google 也在做一些標準和統一,然後讓我們忘記之前的 monkeyrunner, instruments,只剩下:
- AndroidJUnitRunner: JUnit 4-compatible test runner for Android
- Espresso: UI testing framework; suitable for functional UI testing within an app
- UI Automator: UI testing framework; suitable for cross-app functional UI testing across system and installed apps
廢話時間結束。
如何寫一個 UIAutomator2.0 的工程?
在這之前,我是這樣寫 UIAutomator 的, 參見如何使用和除錯 android UIAutomator ?。我記性不好,就算現在寫,也會翻翻自己的文章。我試著也使用 maven 來配置,不過失敗告終。因為在 maven 庫裡面,找不到
com.android.support.test.*
建立一個 android 工程
對於 Instrumentation 大家應該都熟知,如何寫一個 Instrumentation 工程,百度一搜一大把,大家模仿網上教程的時候用點心,別抄成個二百五。UIAutomator2.0 是基於 Instrumentation,所以基本上,和 Instrumentation 一樣,它也有一個測試應用的概念。我們開啟 AS,建立一個空應用,比如我的:
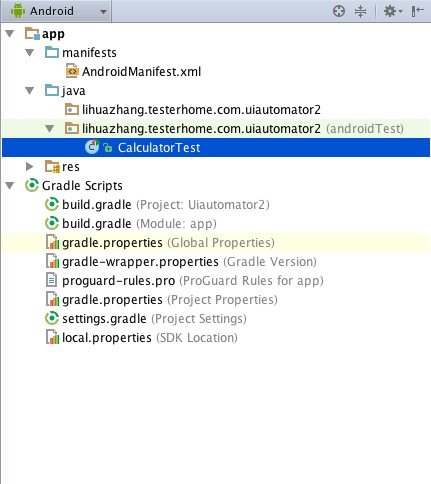
提示:Gradle 載入可能有點慢,自備 vpn 會來的快一點。
新增依賴和測試程式碼
-
先在 build.grade 裡面新增依賴。
apply plugin: 'com.android.application'

android {
    compileSdkVersion 23
    buildToolsVersion "23.0.1"

    defaultConfig {
        applicationId "lihuazhang.testerhome.com.uiautomator2"
        minSdkVersion 19
        targetSdkVersion 23
        versionCode 1
        versionName "1.0"
        testInstrumentationRunner "android.support.test.runner.AndroidJUnitRunner" # 這是我新增的
    }
    buildTypes {
        release {
            minifyEnabled false
            proguardFiles getDefaultProguardFile('proguard-android.txt'), 'proguard-rules.pro'
        }
    }
}

dependencies {
    compile fileTree(dir: 'libs', include: ['*.jar'])
    compile 'com.android.support:appcompat-v7:23.1.0'

    # 這以下是我新增的
    androidTestCompile 'com.android.support:support-annotations:23.1.0'
    androidTestCompile 'com.android.support.test:runner:0.4'
    // Set this dependency to use JUnit 4 rules
    androidTestCompile 'com.android.support.test:rules:0.4'
    // Set this dependency to build and run Espresso tests
    androidTestCompile 'com.android.support.test.espresso:espresso-core:2.2.1'
    // Set this dependency to build and run UI Automator tests
    androidTestCompile 'com.android.support.test.uiautomator:uiautomator-v18:2.1.2'

}
在 androidTest 下面新增測試程式碼
package lihuazhang.testerhome.com.uiautomator2;

import android.content.Intent;
import android.content.pm.PackageManager;
import android.content.pm.ResolveInfo;
import android.support.test.InstrumentationRegistry;
import android.support.test.filters.SdkSuppress;
import android.support.test.runner.AndroidJUnit4;
import android.support.test.uiautomator.By;
import android.support.test.uiautomator.UiDevice;
import android.support.test.uiautomator.UiObject2;
import android.support.test.uiautomator.Until;

import org.junit.Before;
import org.junit.Test;
import org.junit.runner.RunWith;

import static org.hamcrest.core.IsNull.notNullValue;
import static org.junit.Assert.assertEquals;
import static org.junit.Assert.assertThat;

/**
 * Created by lihuazhang on 15/11/8.
 */

@RunWith(AndroidJUnit4.class)
@SdkSuppress(minSdkVersion = 18)
public class CalculatorTest {
    private UiDevice mDevice;
    private static final int LAUNCH_TIMEOUT = 5000;
    private final String BASIC_SAMPLE_PACKAGE = "com.android.calculator2";

    @Before
    public void setUp() {
        // Initialize UiDevice instance
        mDevice = UiDevice.getInstance(InstrumentationRegistry.getInstrumentation());

        // Start from the home screen
        mDevice.pressHome();

        // Wait for launcher
        final String launcherPackage = getLauncherPackageName();
        assertThat(launcherPackage, notNullValue());
        mDevice.wait(Until.hasObject(By.pkg(launcherPackage).depth(0)), LAUNCH_TIMEOUT);
}
@Test
public void checkPreconditions() {
assertThat(mDevice, notNullValue());
}
@Test
public void calculatorTest() {
mDevice.findObject(By.desc("應用")).click();
mDevice.wait(Until.hasObject(By.desc("計算器")), LAUNCH_TIMEOUT);
mDevice.findObject(By.desc("計算器")).click();
UiObject2 button7 = mDevice.wait(Until.findObject(By.res("com.android.calculator2", "digit_7")), 500);
UiObject2 buttonX = mDevice.wait(Until.findObject(By.res("com.android.calculator2", "op_mul")), 500);
UiObject2 button6 = mDevice.wait(Until.findObject(By.res("com.android.calculator2", "digit_6")), 500);
UiObject2 buttonEqual = mDevice.wait(Until.findObject(By.res("com.android.calculator2", "eq")), 500);
UiObject2 output = mDevice.wait(Until.findObject(By.res("com.android.calculator2", "result")), 500);
button7.click();
buttonX.click();
button6.click();
buttonEqual.click();
assertEquals(output.getText(), "42");
}
private String getLauncherPackageName() {
// Create launcher Intent
final Intent intent = new Intent(Intent.ACTION_MAIN);
intent.addCategory(Intent.CATEGORY_HOME);
// Use PackageManager to get the launcher package name
PackageManager pm = InstrumentationRegistry.getContext().getPackageManager();
ResolveInfo resolveInfo = pm.resolveActivity(intent, PackageManager.MATCH_DEFAULT_ONLY);
return resolveInfo.activityInfo.packageName;
}
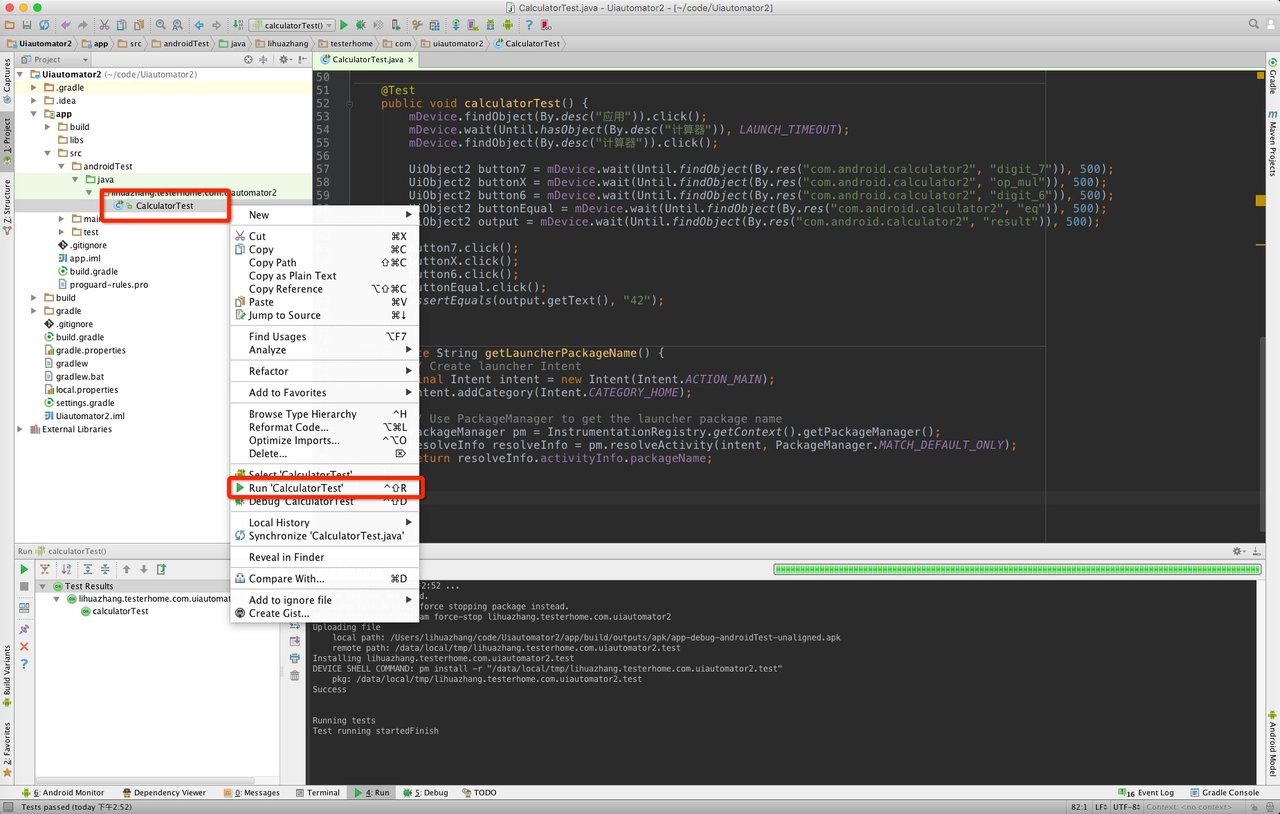
}執行
執行很簡單,右擊測試檔案,點選執行即可。
如果在命令列的話,直接執行 ./gradlew cC

這個時候,我們開啟 adb shell:

那既然是 instrumentation,其實我們可以使用這樣的命令來執行。
➜  connected  adb shell am instrument -w lihuazhang.testerhome.com.uiautomator2.test/android.support.test.runner.AndroidJUnitRunner

lihuazhang.testerhome.com.uiautomator2.CalculatorTest:..

Time: 7.014

OK (2 tests)
我沒找到 uiautomator 1.0 的 nohup 形式,不知道其他人知道不。
報告
感謝 @carl 的提醒,漂亮的報告還是需要的。./gradlew cC 生成的報告在 Uiautomator2/app/build/reports/androidTests/connected 位置。
注意點
-
不要繼承
InstrumentationTestCaseThis class is deprecated. It is no longer necessary to extend UiAutomatorTestCase. You can use getInstance(Instrumentation) from any test class as long as you have access to an Instrumentation instance.
既然
UiAutomatorTestCase都不用繼承了,更別提InstrumentationTestCase了。官方文件裡部分程式碼還在繼承InstrumentationTestCase,當然不會引起啥錯誤,但是在命令列使用gradle cC的時候,測試用例不會被執行。
更新下,@carl 說他是繼承了InstrumentationTestCase的,所以我又試驗了下。gradle cC 執行的時候報錯: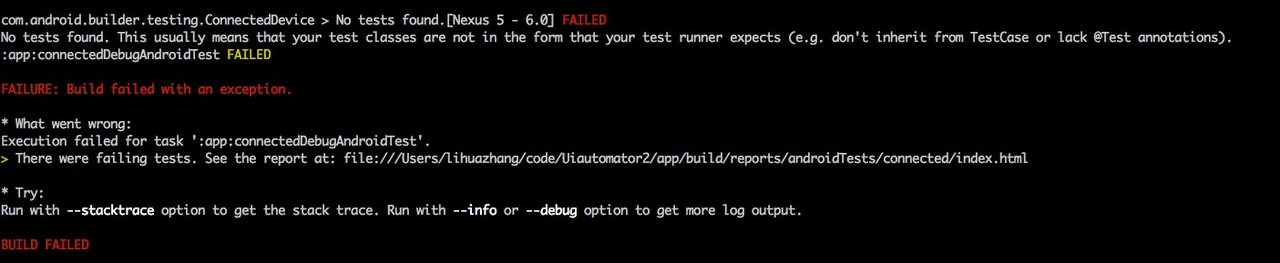
-
mDevice.wait(Until.findObject(By.res("com.android.calculator2", "digit_7")), 500);必要的等待還是需要的。眾所周知,UI 自動化,如果不加入必要的等待策略,那麼很難保證測試用例的魯棒性。 -
我在執行測試用例的時候,使用的 Genymotion 模擬器,但是發現了一些問題,比如這個計算器的用例在 Genymotion 中無法通過。
-
遇到此類異常
UiAutomationService andr[email protected]52c58464already registered!,先看看裝置上是否有 uiautomator 在執行,有的話殺之。 -
在程式碼裡的 System.out.println 是會輸出在 logcat 的日誌裡。此外執行資訊也會出現在 logcat 中。
相關推薦
UIAutomator2.0 簡介
UIAutomator2.0 出來有一段時間了。 我們就看一句話 Most importantly, UIAutomator is now based on Android Instrumentation Instrumentation 終於把 UIAutomato
IOS 網絡淺析-(十一 三方 AFNetworking3.0簡介)
上傳 三方 ogre filename manage lock end 上傳文件 resource AFNetworking3.0是目前最新的版本,本來打算介紹一下2.6,但是想想2.6名不久矣,就決定不介紹了,有興趣的小夥伴可以上網查一查。下面我就開始進入正題了。 目前
UiAutomator2.0升級填坑記
新建 意思 原來 也有 sha ogl selector 輸入文字 apk UiAutomator2.0升級填坑記 SkySeraph May. 28th 2017 Email:[email protected]/* */ 更多精彩請直接訪問SkyS
UiAutomator1.0 與 UiAutomator2.0
developer clas 之前 logcat -s obj 自動 evel 進行 在使用2.0之前,對android自動化框架也做過一些了解《Android 自動化測試框架》。使用UiAutomator2.0也有一段時間,這裏將1.0與2.0進行一個對比總結。
一個RtspServer的設計與實現和RTSP2.0簡介
前段時間著手實現了一個RTSP Server,能夠正常實現多路RTSP流的直播播放,因專案需要,只做了對H.264和AAC編碼的支援,但是相信其他編碼的實現基本邏輯也是想通的。這裡我把主要設計和思考過程,以及實現框架分享一下。因為關注的是直播,這裡只討論RTSP直播協議。 RT
DataX3.0簡介
DataX3.0離線同步工具介紹 一. DataX3.0概覽 DataX 是一個異構資料來源離線同步工具,致力於實現包括關係型資料庫(MySQL、Oracle等)、HDFS、Hive、ODPS、HBase、FTP等各種異構資料來源之間穩定高效的資料同步功能。 (這是一個單機多工的ET
UiAutomator2.0遍歷控制元件
使用過UiAutomator1.0的人應該有非常痛的痛點,那就是在遍歷View樹時非常麻煩或者說做不到,百度上找到的基本上是這麼用的: UiScrollable list = new UiScrollable(new UiSelector().resourceI
eShopOnContainers 看微服務③:Identity Service OAuth 2.0 簡介 OpenID Connect 簡介 Identity Server 4 eShopOnContainers 知多少[3]:Identity microservice
引言 通常,服務所公開的資源和 API 必須僅限受信任的特定使用者和客戶端訪問。那進行 API 級別信任決策的第一步就是身份認證——確定使用者身份是否可靠。 在微服務場景中,身份認證通常統一處理。一般有兩種實現形式: 基於API 閘道器中心化認證:要求客戶端必須都通過閘道器訪問微服務。(這就要求
第64節:Java中的Spring Boot 2.0簡介筆記
Java中的Spring Boot 2.0簡介筆記 spring boot簡介 依賴java8的執行環境 多模組專案 打包和執行 spring boot是由spring framework構建的,spring framework是javaee的框架,spring framework->
Uiautomator2.0生成測試報告
最近學習uiautomator2.0,原來可以直接生成測試報告,同時也比較美觀,下面請看。 在Android Studio中新建 一個專案 在app/下的build.gradle下,dependencies中增加對Uiautomator的支援: { ... andr
UiAutomator2.0 - 與AccessibilityService的關聯
目錄 一、Android中的 Accessibility 二、UiAutomator2.0 與 AccessibilityService 三、驗證與 AccessibilityService的關聯 Accessibility:無障礙,又稱輔助性功能. AccessibilityServi
UiAutomator2.0 - Toast資訊的驗證
目錄 問題:在做UI自動化測試時,偶爾會碰到 Toast 這種提示資訊(如圖),通過Uiautomatorviewer 無法獲該類控制元件的資訊。所以無法驗證,該條case不能實現。然後就沒然後了... 思考:在《UiAutomator2.0 - 與AccessibilityService的關聯》實驗後
UiAutomator2.0的四種離線方式
Uiautomator2.0擁有多用例需要整合測試的情況下,我們往往需要考慮如何離線執行多用例 1、手機root,並開發對應app,由app執行調起U2的多命令來實現 2、取得手機rom的系統簽名,並給調起命令的app進行簽名後,由app執行調起U2的多命令來實現 如果以上兩種方式不
Uiautomator2.0 啟動測試命令時傳參和取參
在使用Uiautomator2.0過程中,有時候因業務需求,從啟動命令中獲取即時引數更便於跑測試。 本文提供Uiautomator2.0(以下簡稱U2)一個如何從啟動命令中傳遞引數,以及在指令碼中如何獲取引數。 1、首先看下U2啟動命令中的幫助文件提示 (-e
UIAutomator2.0詳解(UIDevice篇----獲取控制元件)
UIDevice提供了3個獲取控制元件的方法,和一個判斷控制元件是否存在的方法。 public UiObject findObject(UiSelector selector) public UiObject2 findObject(BySelector
Elasticsearch 5.0 簡介(medcl微信直播實錄)
大家好,非常高興能在這裡給大家分享,感謝InfoQ提供的這個微信的平臺,首先簡單自我介紹一下,我叫曾勇,是Elastic的工程師。 Elastic將在今年秋季的時候釋出一個Elasticsearch V5.0的大版本,這次的微信分享將給大家介紹一下5.0版裡面
UIAutomator2.0詳解(UIDevice篇----獲取UIDevice物件)
UIAutomator2.0在UIDevice類中,提供了兩個靜態方法,用於獲取UIDevice物件。 (1)static UIDevice getInstance() (2)static UIDevice getInstance(Instrumentati
Spring security oauth2.0簡介
Spring security OAuth2.0簡介 在開始之前,特別強調一下OAuth和SSO的區別: OAuth主要用來解決系統和系統間的身份認證問題,比如A、B、C三個獨立部署的微服務系統均以REST對外提供服務,現在為A系統增加一些限制
UIAutomator2.0詳解(UIDevice篇----waitForWindowUpdate)
書接上文(waitForIdle),我們繼續UIDevice的wait方式總結。本篇將著重講說waitForWindowUpdate方法。 public boolean waitForWindowUpdate(final String packageNam
開源Web報表製作工具OpenReports3.0簡介
OpenReports是一個靈活、強大和易於使用的開源web報表製作工具。OpenReports提供基於的瀏覽器,引數驅動,動態生成報表和靈活的報表預定的能力。 OpenReports支援各種各樣的開放來源報表引擎,包括JasperReports、J