JSON 解析 + listView + AsyncTask 的結合使用做個菜譜應用(總結)
最近學的,現在來總結一下,也有幾天沒看了,所謂三天不練手生。所以還是得經常總結,複習複習。
步驟大致分為3步,詳細步驟在寫到的時候說明
1. json地址:http://api.1ccf.com/cook/list?page=1&limit=20,
圖片地址:”http://www.1ccf.com/” + 圖片id
2. 解析用到的json-jar包,我使用的是fastjson-1.1.34.android
3.開發思路:
a.佈局檔案
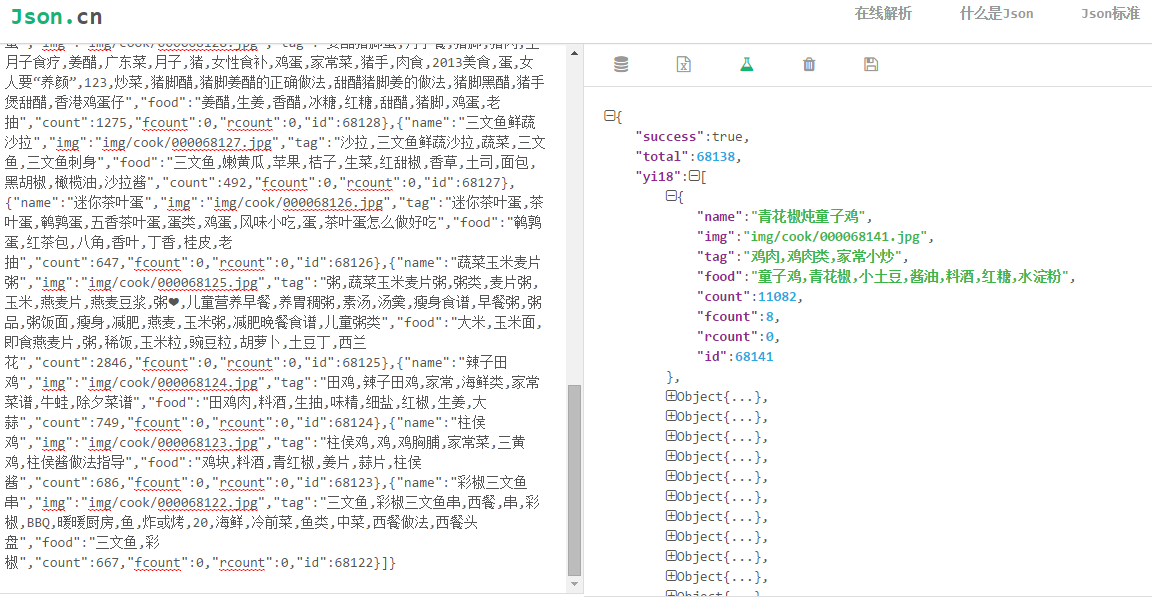
b.分析json資料格式-推薦json.cn線上格式化json,很給力,很清晰

c.Activity程式碼編寫
- 現在開始畫布局:
activity_main.xml
<LinearLayout xmlns:android="http://schemas.android.com/apk/res/android"
xmlns:tools="http://schemas.android.com/tools"
android:layout_width="match_parent"
android:layout_height="match_parent"
tools:context=".MainActivity">
<ListView
android:id listview_item.xml
<?xml version="1.0" encoding="utf-8"?>
<LinearLayout xmlns:android="http://schemas.android.com/apk/res/android"
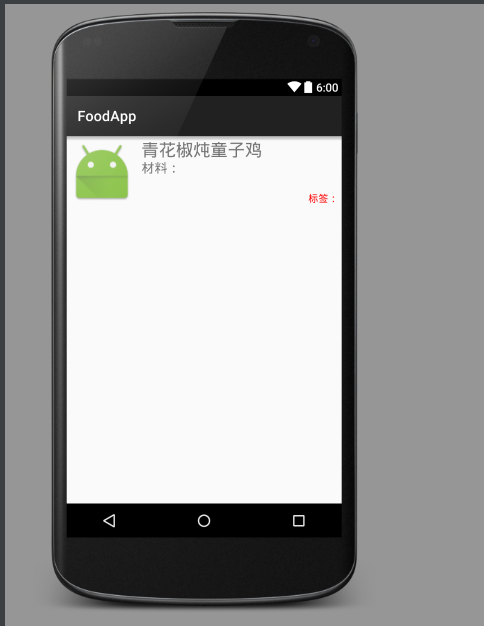
android:layout_width 效果圖(佈局醜不能怪我,藝術細菌為0.):
- 然後開始寫程式碼吧。
Food.java
public class Food {
    private String id;
    private String name;
    private String img;
    private String tag;
    private String food;
    private String count;
    private String fcount;
    private String rcount;

    <!-- getter,setter -->
}
MainActivity.java
listview的主要思路:
1. 尋找元件
2. 建立資料來源
3. 建立介面卡
4. 設定介面卡
圍繞這四點展開
部分程式碼:
class DataAsyncTask extends AsyncTask
資料來源下載並解析:
protected List<Food> doInBackground(String... params) {
            InputStream in = null;
            ByteArrayOutputStream baos = null;
            try {
                URL url = new URL(params[0]);
               // params為execute方法中的引數
                HttpURLConnection conn =
                (HttpURLConnection) url.openConnection();
                conn.connect();
                if (conn.getResponseCode()== 200) { // 成功下載資料
                    in = conn.getInputStream();
                    baos = new ByteArrayOutputStream();
                    byte[] b = new byte[1024];
                    int len;
                    while ((len = in.read(b)) != -1) {
                        baos.write(b, 0, len);
                    }
                    baos.flush();
                    byte[] bytes = baos.toByteArray();
                    String data = new String(bytes, 0, bytes.length);   // 下載到的未解析的json資料
                    /* fastjson 解析data資料 */
                    JSONObject object = JSONObject.parseObject(data);
                    JSONArray array = object.getJSONArray("yi18");
                    Food food = JSONArray.parseObject(array.toString(), Food.class);
                    list.add(food);
                    return list;
                }
            } catch (MalformedURLException e) {
                e.printStackTrace();
            } catch (IOException e) {
                e.printStackTrace();
            } finally { // 關閉流
                if (in != null) {
                    try {
                        in.close();
                    } catch (IOException e) {
                        e.printStackTrace();
                    }
                }
                if (baos != null) {
                    try {
                        baos.close();
                    } catch (IOException e) {
                        e.printStackTrace();
                    }
                }
            }
            return null;
        }
重點部分程式碼
/**
 * Created by 黃裕軍 on 2015/9/20.
 */
public class ListViewAdapter extends BaseAdapter {
    private Context context;
    private List<Food> data = new ArrayList<>();
    private LayoutInflater inflater;

    public ListViewAdapter(Context context) {
        this.context = context;
        inflater = LayoutInflater.from(context);
    }

    /**
     * 新增資料
     * @param list
     */
    public void addData(List<Food> list){
        this.data.addAll(list);
        notifyDataSetChanged(); // 通知介面卡資料有更新
    }

    @Override
    public View getView(int position, View convertView, ViewGroup parent) {
        MyViewHolder holder;
        if (convertView == null) {  // 優化:複用convertView 減少view的建立
            holder = new MyViewHolder(); // 優化:減少元件的findViewById的次數
            convertView = inflater.inflate(R.layout.listview_item,null);
            holder.food = (TextView) convertView.findViewById(R.id.listview_item_tv_food);
            holder.name = (TextView) convertView.findViewById(R.id.listview_item_tv_name);
            holder.tag = (TextView) convertView.findViewById(R.id.listview_item_tv_tag);
            holder.image = (ImageView) convertView.findViewById(R.id.listview_item_iv);
            convertView.setTag(holder);
        } else {
            holder = (MyViewHolder) convertView.getTag();
        }
        Food food = data.get(position);
        holder.food.setText(food.getFood());
        holder.name.setText(food.getName());
        holder.tag.setText(food.getTag());
        holder.image.setImageResource(R.mipmap.ic_launcher);// 圖片載入完成之前的預設圖片
        holder.image.setTag("http://www.1ccf.com/" + food.getImg()); // 圖片要另外下載,設定好圖片對應的圖片,以免出現圖片閃動多次
        new ImageAsyncTask(holder.image).execute("http://www.1ccf.com/" + food.getImg());
        return convertView;
    }

    class MyViewHolder{
        TextView name;
        TextView tag;
        TextView food;
        ImageView image;
    }
圖片下載的程式碼,和資料來源的下載差不多,所以不做註釋了
/**
     * 圖片下載執行緒
     */
    class ImageAsyncTask extends AsyncTask<String,Void,Bitmap>{
        private ImageView iv;
        private String path;
        public ImageAsyncTask(ImageView iv) {
            this.iv = iv;
        }

        @Override
        protected Bitmap doInBackground(String... params) {
            InputStream in = null;
            ByteArrayOutputStream baos = null;
            path = params[0];
            try {
                URL url = new URL(path);
                HttpURLConnection conn = (HttpURLConnection) url.openConnection();
                conn.connect();;
                if (conn.getResponseCode() == 200) {
                    in = conn.getInputStream();
                    baos = new ByteArrayOutputStream();
                    byte[] b = new byte[1024];
                    int len;
                    while ((len = in.read(b)) != -1) {
                        baos.write(b, 0, len);
                    }
                    baos.flush();
                    byte[] bytes = baos.toByteArray();
                    Bitmap bitmap = BitmapFactory.decodeByteArray(bytes, 0, bytes.length);
                    return bitmap;
                }
            } catch (MalformedURLException e) {
                e.printStackTrace();
            } catch (IOException e) {
                e.printStackTrace();
            } finally {
                if (in != null) {
                    try{
                        in.close();
                    } catch(IOException e){
                        e.printStackTrace();
                    }
                }
                if (baos!= null) {
                    try{
                        baos.close();
                    } catch(IOException e){
                        e.printStackTrace();
                    }
                }
            }
            return null;
        }

        @Override
        protected void onPostExecute(Bitmap bitmap) {
            // 圖片不為空,並且圖片地址等於iv的對應地址
            if (bitmap != null && path.equals(iv.getTag().toString())) {
                iv.setImageBitmap(bitmap);
            }
        }
    }
分頁加上之後就差不多了
現在是沒有加上快取的,所以當一個listview消失後要重新下載圖片
可以用快取來繼續優化
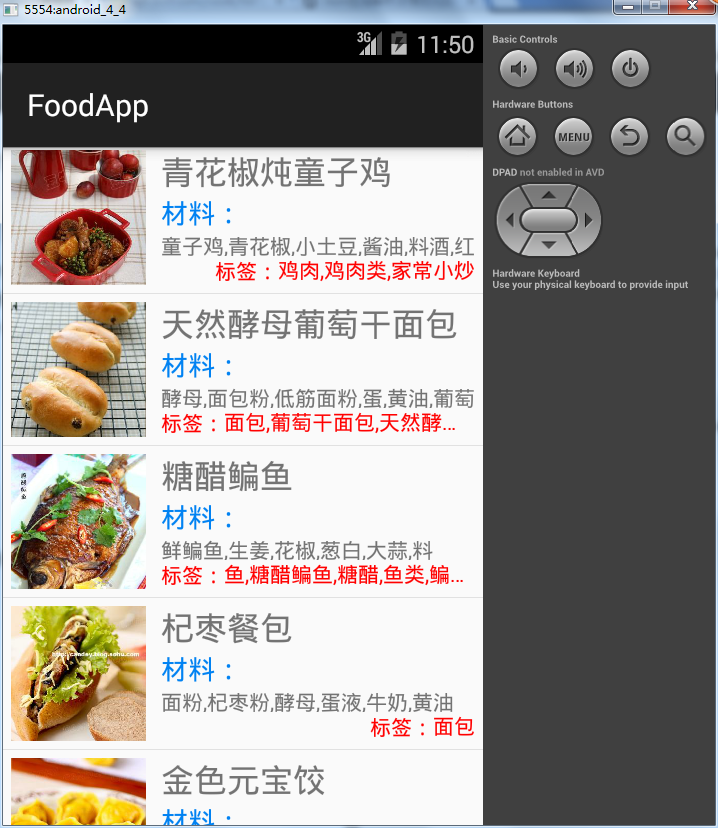
完成後的效果:
相關推薦
JSON 解析 + listView + AsyncTask 的結合使用做個菜譜應用(總結)
最近學的,現在來總結一下,也有幾天沒看了,所謂三天不練手生。所以還是得經常總結,複習複習。 步驟大致分為3步,詳細步驟在寫到的時候說明 1. json地址:http://api.1ccf.com/cook/list?page=1&limit=20,
android studio 使用HttpConnection用json解析listView 加圖片
ArrayList<User.DataBean> arrayList = new ArrayList<User.DataBean>(); private MyAdapter myAdapter; @Nullable @Override
Android解析HTML網頁數據 第一個方法Jsoup(一)
原生 日誌 href attr mage connect auto htm baidu 最近發現一些無聊的東西,就是抓取網頁上的數據,然後使用安卓原生代碼顯示出來,或者說借用網頁數據,用自定義的View顯示。 借助jsoup-1.10.2.jar庫,獲取並解析數據。(Jso
專案啟動的圖案模板(做個有趣的碼農)
個人用於SpringBoot的啟動圖案。 複製的話直接點選“程式碼段”的右上角複製即可。完美應用! 佛祖 //////////////////////////////////////////////////////////////////// //
Android 基於google Zxing實現二維碼、條形碼掃描,仿微信二維碼掃描效果(現在正做個掃描App、收藏)
瞭解二維碼這個東西還是從微信中,當時微信推出二維碼掃描功能,自己感覺挺新穎的,從一張圖片中掃一下竟然能直接加好友,不可思議啊,那時候還不瞭解二維碼,呵呵,然後做專案的時候,老闆說要加上二維碼掃描功能,然後自己的屁顛屁顛的去百度,google啥的,發現很多朋友都
visual c++ ADO連線SQL Server(自己做個例子熟悉該方法)
BOOL CADOTest1Dlg::OnInitDialog() { CDialog::OnInitDialog(); HRESULT hr; try { hr = m_pConnection.CreateInstance("ADODB.Connection");///建立Connection物
js 解析json 常用方法 --前端與後端的互動(前端)
(1)前端js解析前端json資料: one: javascript定義json物件變數: var jsonobject={};//可以不使用宣告,推薦宣告一下,嚴格一些,最好使用嚴格模式 賦值json物件的key-value值: jsonobject[key]=v
3. 定義10個位元組的鍵盤緩衝區,然後鍵盤輸入字元填滿該緩衝區,做如下工作: (1)分別將輸入鍵盤緩衝區的字元按數字,小寫字母,大寫字母,其他字元進行計數; 分別將這些計數值顯示出來。 (2)分別將這
mov ah,9 int 21h mov ah,10 lea dx,buf int 21h lea dx,srlf mov ah,9 int 21h mov bx,-1 mov cx,10 lopt: add bx,1 mov al,buf[b
用Python做個小網站(MVC架構)
1. 基本結構,採用 MVC 模式。 控制器(controller)負責轉發請求,對請求進行處理檢視 (View): 介面設計人員進行圖形介面設計。模型 (Model): 程式設計師編寫程式應有的功能(
socket.io+angular.js+express.js做個聊天應用(三)
track xtran styles javascrip lin 應用 nag ive oct 版權聲明:本文為博主原創
socket.io+angular.js+express.js做個聊天應用(二)
text vertica cer htm javascrip right detail 轉載 fill 版權聲明:本文為
小程序初體驗:手把手教你寫出第一個小程序(一)
輸入框 個人 創建 公測 快速 nsh 成功 too 調用 本文筆者將根據quick start中的範例代碼,帶大家簡單地剖析一下小程序的運行方式,並介紹小程序開發中一些通用的特性,帶著大家一步步寫出自己的小程序。 適用對象:前端初學者,對小程序開發感興趣者 tip
解析xml的4種方法詳解(轉)
項目 目標 源碼 更多 news 大量 優秀 大型 頻繁 http://blog.csdn.net/jzhf2012/article/details/8532873 1. 介紹 1)DOM(JAXP Crimson解析器) DOM是用與平臺和語言無關的方式表
把多個Excel文件合並到一個Excel文件的多個工作表(Sheet)裏
ger xlsx eww 右擊 對話 如果 work excel 對話框 實現的功能是把多個Excel文件的第一個工作表(Sheet)合並到一個Excel文件的多個工作表裏,並且新工作表的名稱等於原Excel文件的文件名。開發環境Excel2007,但是Excel
F5 BIG-IP 不用Virtual Servers 做NAT映射(單向)映射(方法一)
f5 big-ip 不用virtual servers 做nat映射本人主要做為配置備份 背景說明:F5做為網絡負載使用,兩條鏈路,分別為聯通與電信內部服務用NGINX服務做轉發,提供服務,地址為192.168.1.100,使用端口為20000映射外網地址為10.10.10.1(實際地址不為此),端口為200
基於樹莓派(Raspberry Pi)平臺的MQ-2煙霧報警系統以及結合Zabbix監控的實現(一)
Raspberry Pi Zabbix和嵌入式系統的結合 Python3 樹莓派和MQ-2氣體檢測 一、前期準備 達成目標: 利用Rapberry Pi 驅動MQ-2煙霧報警模塊,對信息進行采集和提取,而後Zabbix監控系統來收集和處理信息采集到的信息。
node.js express+ejs引擎構建第一個項目(一)
sta com 如果 node.js install 安裝 exp expr inf express+ejs初始化項目命令: express -t ejs projetName 目錄結構如下: 安裝依賴: npm install 安裝依賴後,啟動項目:
運維工程師必會的109個Linux命令(4)
linux 小強測試品牌 測試幫日記 點擊鏈接加入QQ群 522720170(免費公開課、視頻應有盡有):https://jq.qq.com/?_wv=1027&k=5C08ATe1 進程管理1.1 crontab1.1.1 功能說明設置計時器。1.1.2 語法crontab [-u &l
Appium之連續啟動多個應用(APP)
windows 其它 aps dst ren 技術分享 多個 info 快速 我們知道Appium應用啟動時自帶的caps可以先行啟動某個應用(基於appPackage和appActivity),那麽如何用其連續啟動多個應用呢? 這裏就需要用到start_activity
ajax遇到的兩個小bug(一)
字符 過去 方案 ima 錯誤 復選框 兩個 中項 技術分享 1.公司的一個因子系數配置頁面,可以勾選中多個復選框進行刪除,刪除後保存操作軌跡表。但不知道之前是誰這樣寫的 此挖坑人,對於選中的多個復選框循環調用後臺方法,但是這些請求都請求後臺了,執行完畢的先後順序並沒有保


