
spring4.0之二:@Configuration的使用
從Spring3.0,@Configuration用於定義配置類,可替換xml配置檔案,被註解的類內部包含有一個或多個被@Bean註解的方法,這些方法將會被AnnotationConfigApplicationContext或AnnotationConfigWebApplicationContext類進行掃描,並用於構建bean定義,初始化Spring容器。
注意:@Configuration註解的配置類有如下要求:
- @Configuration不可以是final型別;
- @Configuration不可以是匿名類;
- 巢狀的configuration必須是靜態類。
一、用@Configuration載入spring
1.1、@Configuration配置spring並啟動spring容器
1.2、@Configuration啟動容器
1.3、@Configuration啟動容器[email protected]註冊Bean
1.4、使用 AnnotationConfigApplicationContext 註冊 AppContext 類的兩種方法
1.5、配置Web應用程式(web.xml中配置AnnotationConfigApplicationContext)
二、組合多個配置類
2.1、在@configuration中引入spring的xml配置檔案
2.2、在@configuration中引入其它註解配置
2.3、@configuration巢狀(巢狀的Configuration必須是靜態類)
三、@EnableXXX註解
四、@Profile邏輯組配置
五、使用外部變數
一、@Configuation載入Spring方法
1.1、@Configuration配置spring並啟動spring容器
@Configuration標註在類上,相當於把該類作為spring的xml配置檔案中的<beans>,作用為:配置spring容器(應用上下文)
package com.dxz.demo.configuration; import org.springframework.context.annotation.Configuration; @Configuration public class TestConfiguration {public TestConfiguration() { System.out.println("TestConfiguration容器啟動初始化。。。"); } }
相當於:
<?xml version="1.0" encoding="UTF-8"?>
<beans xmlns="http://www.springframework.org/schema/beans" xmlns:xsi="http://www.w3.org/2001/XMLSchema-instance"
    xmlns:context="http://www.springframework.org/schema/context" xmlns:jdbc="http://www.springframework.org/schema/jdbc"
    xmlns:jee="http://www.springframework.org/schema/jee" xmlns:tx="http://www.springframework.org/schema/tx"
    xmlns:util="http://www.springframework.org/schema/util" xmlns:task="http://www.springframework.org/schema/task" xsi:schemaLocation="
        http://www.springframework.org/schema/beans http://www.springframework.org/schema/beans/spring-beans-4.0.xsd
        http://www.springframework.org/schema/context http://www.springframework.org/schema/context/spring-context-4.0.xsd
        http://www.springframework.org/schema/jdbc http://www.springframework.org/schema/jdbc/spring-jdbc-4.0.xsd
        http://www.springframework.org/schema/jee http://www.springframework.org/schema/jee/spring-jee-4.0.xsd
        http://www.springframework.org/schema/tx http://www.springframework.org/schema/tx/spring-tx-4.0.xsd
        http://www.springframework.org/schema/util http://www.springframework.org/schema/util/spring-util-4.0.xsd
        http://www.springframework.org/schema/task http://www.springframework.org/schema/task/spring-task-4.0.xsd" default-lazy-init="false">


</beans>
主方法進行測試:
package com.dxz.demo.configuration;

import org.springframework.context.ApplicationContext;
import org.springframework.context.annotation.AnnotationConfigApplicationContext;

public class TestMain {
    public static void main(String[] args) {

        // @Configuration註解的spring容器載入方式,用AnnotationConfigApplicationContext替換ClassPathXmlApplicationContext
        ApplicationContext context = new AnnotationConfigApplicationContext(TestConfiguration.class);

        // 如果載入spring-context.xml檔案:
        // ApplicationContext context = new
        // ClassPathXmlApplicationContext("spring-context.xml");
    }
}
從執行主方法結果可以看出,spring容器已經啟動了:

1.2、@Configuration啟動容器[email protected]註冊Bean,@Bean下管理bean的生命週期
@Bean標註在方法上(返回某個例項的方法),等價於spring的xml配置檔案中的<bean>,作用為:註冊bean物件
bean類:
package com.dxz.demo.configuration;

public class TestBean {

    private String username;
    private String url;
    private String password;

    public void sayHello() {
        System.out.println("TestBean sayHello...");
    }

    public String toString() {
        return "username:" + this.username + ",url:" + this.url + ",password:" + this.password;
    }

    public void start() {
        System.out.println("TestBean 初始化。。。");
    }

    public void cleanUp() {
        System.out.println("TestBean 銷燬。。。");
    }
}
配置類:
package com.dxz.demo.configuration;

import org.springframework.context.annotation.Bean;
import org.springframework.context.annotation.Configuration;
import org.springframework.context.annotation.Scope;

@Configuration
public class TestConfiguration {
    public TestConfiguration() {
        System.out.println("TestConfiguration容器啟動初始化。。。");
    }

    // @Bean註解註冊bean,同時可以指定初始化和銷燬方法
    // @Bean(name="testBean",initMethod="start",destroyMethod="cleanUp")
    @Bean
    @Scope("prototype")
    public TestBean testBean() {
        return new TestBean();
    }
}
主方法測試類:
package com.dxz.demo.configuration;

import org.springframework.context.ApplicationContext;
import org.springframework.context.annotation.AnnotationConfigApplicationContext;

public class TestMain {
    public static void main(String[] args) {

        // @Configuration註解的spring容器載入方式,用AnnotationConfigApplicationContext替換ClassPathXmlApplicationContext
        ApplicationContext context = new AnnotationConfigApplicationContext(TestConfiguration.class);

        // 如果載入spring-context.xml檔案:
        // ApplicationContext context = new
        // ClassPathXmlApplicationContext("spring-context.xml");

         //獲取bean
        TestBean tb = (TestBean) context.getBean("testBean");
        tb.sayHello();
    }
}
結果:

注:
(1)、@Bean註解在返回例項的方法上,如果未通過@Bean指定bean的名稱,則預設與標註的方法名相同;
(2)、@Bean註解預設作用域為單例singleton作用域,可通過@Scope(“prototype”)設定為原型作用域;
(3)、既然@Bean的作用是註冊bean物件,那麼完全可以使用@Component、@Controller、@Service、@Ripository等註解註冊bean,當然需要配置@ComponentScan註解進行自動掃描。
@Bean下管理bean的生命週期
可以使用基於 Java 的配置來管理 bean 的生命週期。@Bean 支援兩種屬性,即 initMethod 和destroyMethod,這些屬性可用於定義生命週期方法。在例項化 bean 或即將銷燬它時,容器便可呼叫生命週期方法。生命週期方法也稱為回撥方法,因為它將由容器呼叫。使用 @Bean 註釋註冊的 bean 也支援 JSR-250 規定的標準 @PostConstruct 和 @PreDestroy 註釋。如果您正在使用 XML 方法來定義 bean,那麼就應該使用 bean 元素來定義生命週期回撥方法。以下程式碼顯示了在 XML 配置中通常使用 bean 元素定義回撥的方法。
@Configuration
@ComponentScan(basePackages = "com.dxz.demo.configuration")
public class TestConfiguration {
    public TestConfiguration() {
        System.out.println("TestConfiguration容器啟動初始化。。。");
    }

    //@Bean註解註冊bean,同時可以指定初始化和銷燬方法
    @Bean(name="testBean",initMethod="start",destroyMethod="cleanUp")
    @Scope("prototype")
    public TestBean testBean() {
        return new TestBean();
    }
}
啟動類:
public class TestMain {
    public static void main(String[] args) {

        ApplicationContext context = new AnnotationConfigApplicationContext(TestConfiguration.class);

        TestBean tb = (TestBean) context.getBean("testBean");
        tb.sayHello();
        System.out.println(tb);

        TestBean tb2 = (TestBean) context.getBean("testBean");
        tb2.sayHello();
        System.out.println(tb2);
    }
}
結果:

分析:
結果中的1:表明initMethod生效
結果中的2:表明@Scope("prototype")生效
1.3、@Configuration啟動容器[email protected]註冊Bean
bean類:
package com.dxz.demo.configuration;

import org.springframework.stereotype.Component;

//添加註冊bean的註解
@Component
public class TestBean {

    private String username;
    private String url;
    private String password;

    public void sayHello() {
        System.out.println("TestBean sayHello...");
    }

    public String toString() {
        return "username:" + this.username + ",url:" + this.url + ",password:" + this.password;
    }

    public void start() {
        System.out.println("TestBean 初始化。。。");
    }

    public void cleanUp() {
        System.out.println("TestBean 銷燬。。。");
    }
}
配置類:
package com.dxz.demo.configuration;

import org.springframework.context.annotation.Bean;
import org.springframework.context.annotation.ComponentScan;
import org.springframework.context.annotation.Configuration;
import org.springframework.context.annotation.Scope;

@Configuration
//新增自動掃描註解,basePackages為TestBean包路徑
@ComponentScan(basePackages = "com.dxz.demo.configuration")
public class TestConfiguration {
    public TestConfiguration() {
        System.out.println("TestConfiguration容器啟動初始化。。。");
    }

    /*// @Bean註解註冊bean,同時可以指定初始化和銷燬方法
    // @Bean(name="testNean",initMethod="start",destroyMethod="cleanUp")
    @Bean
    @Scope("prototype")
    public TestBean testBean() {
        return new TestBean();
    }*/
}
主方法測試獲取bean物件:
package com.dxz.demo.configuration;

import org.springframework.context.ApplicationContext;
import org.springframework.context.annotation.AnnotationConfigApplicationContext;

public class TestMain {
    public static void main(String[] args) {

        // @Configuration註解的spring容器載入方式,用AnnotationConfigApplicationContext替換ClassPathXmlApplicationContext
        ApplicationContext context = new AnnotationConfigApplicationContext(TestConfiguration.class);

        // 如果載入spring-context.xml檔案:
        // ApplicationContext context = new
        // ClassPathXmlApplicationContext("spring-context.xml");

         //獲取bean
        TestBean tb = (TestBean) context.getBean("testBean");
        tb.sayHello();
    }
}
sayHello()方法都被正常呼叫。

1.4、使用 AnnotationConfigApplicationContext 註冊 AppContext 類的兩種方法
1.4.1、 配置類的註冊方式是將其傳遞給 AnnotationConfigApplicationContext 建構函式
public static void main(String[] args) {

        // @Configuration註解的spring容器載入方式,用AnnotationConfigApplicationContext替換ClassPathXmlApplicationContext
        ApplicationContext context = new AnnotationConfigApplicationContext(TestConfiguration.class);

        //獲取bean
        TestBean tb = (TestBean) context.getBean("testBean");
        tb.sayHello();
    }
1.4.2、 AnnotationConfigApplicationContext 的register 方法傳入配置類來註冊配置類
public static void main(String[] args) {
  ApplicationContext ctx = new AnnotationConfigApplicationContext();
  ctx.register(AppContext.class)
}
1.5、配置Web應用程式(web.xml中配置AnnotationConfigApplicationContext)
過去,您通常要利用 XmlWebApplicationContext 上下文來配置 Spring Web 應用程式,即在 Web 部署描述符檔案 web.xml 中指定外部 XML 上下文檔案的路徑。XMLWebApplicationContext 是 Web 應用程式使用的預設上下文類。以下程式碼描述了 web.xml 中指向將由 ContextLoaderListener 監聽器類載入的外部 XML 上下文檔案的元素。
<web-app>
    <context-param>
        <param-name>contextConfigLocation</param-name>
        <param-value>/WEB-INF/applicationContext.xml</param-value>
    </context-param>
    <listener>
        <listener-class>
            org.springframework.web.context.ContextLoaderListener
        </listener-class>
    </listener>
    <servlet>
    <servlet-name>sampleServlet</servlet-name>
    <servlet-class>
        org.springframework.web.servlet.DispatcherServlet
    </servlet-class>
    </servlet>

...
</web-app>
現在,您要將 web.xml 中的上述程式碼更改為使用 AnnotationConfigApplicationContext 類。切記,XmlWebApplicationContext 是 Spring 為 Web 應用程式使用的預設上下文實現,因此您永遠不必在您的web.xml 檔案中顯式指定這個上下文類。現在,您將使用基於 Java 的配置,因此在配置 Web 應用程式時,需要在web.xml 檔案中指定 AnnotationConfigApplicationContext 類。上述程式碼將修改如下:
<web-app>
    <context-param>
        <param-name>contextClass</param-name>
        <param-value>
            org.springframework.web.context.
            support.AnnotationConfigWebApplicationContext
        </param-value>
    </context-param>
    <context-param>
        <param-name>contextConfigLocation</param-name>
        <param-value>
            demo.AppContext
        </param-value>
    </context-param>
    <listener>
        <listener-class>
            org.springframework.web.context.ContextLoaderListener
        </listener-class>
    </listener>
    <servlet>
    <servlet-name>sampleServlet</servlet-name>
    <servlet-class>
        org.springframework.web.servlet.DispatcherServlet
    </servlet-class>
    <init-param>
        <param-name>contextClass</param-name>
        <param-value>
            org.springframework.web.context.
            support.AnnotationConfigWebApplicationContext
        </param-value>
    </init-param>
    </servlet>

...
</web-app>
以上修改後的 web.xml 現在定義了 AnnotationConfigWebApplicationContext 上下文類,並將其作為上下文引數和 servlet 元素的一部分。上下文配置位置現在指向 AppContext 配置類。這非常簡單。下一節將演示 bean 的生命週期回撥和範圍的實現。
1.6、@Configuation總結
@Configuation等價於<Beans></Beans>
@Bean等價於<Bean></Bean>
@ComponentScan等價於<context:component-scan base-package="com.dxz.demo"/>
二、組合多個配置類
2.1、在@configuration中引入spring的xml配置檔案
package com.dxz.demo.configuration2;

import org.springframework.context.annotation.Configuration;
import org.springframework.context.annotation.ImportResource;

@Configuration
@ImportResource("classpath:applicationContext-configuration.xml")
public class WebConfig {
}
bean類:
package com.dxz.demo.configuration2;

public class TestBean2 {
    private String username;
    private String url;
    private String password;

    public void sayHello() {
        System.out.println("TestBean2 sayHello...");
    }

    public String toString() {
        return "TestBean2 username:" + this.username + ",url:" + this.url + ",password:" + this.password;
    }

    public void start() {
        System.out.println("TestBean2 初始化。。。");
    }

    public void cleanUp() {
        System.out.println("TestBean2 銷燬。。。");
    }
}
測試類:
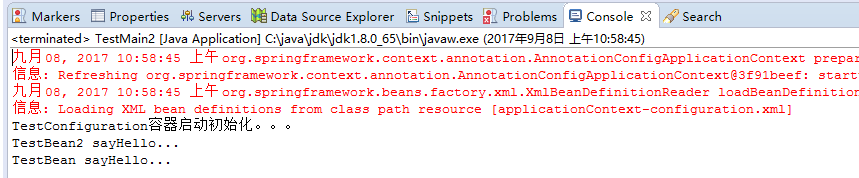
package com.dxz.demo.configuration2;

import org.springframework.context.ApplicationContext;
import org.springframework.context.annotation.AnnotationConfigApplicationContext;

public class TestMain2 {
    public static void main(String[] args) {

        // @Configuration註解的spring容器載入方式,用AnnotationConfigApplicationContext替換ClassPathXmlApplicationContext
        ApplicationContext context = new AnnotationConfigApplicationContext(WebConfig.class);

        // 如果載入spring-context.xml檔案:
        // ApplicationContext context = new
        // ClassPathXmlApplicationContext("spring-context.xml");

        // 獲取bean
        TestBean2 tb = (TestBean2) context.getBean("testBean2");
        tb.sayHello();
    }
}
結果:

2.2、在@configuration中引入其它註解配置
package com.dxz.demo.configuration2;

import org.springframework.context.annotation.Configuration;
import org.springframework.context.annotation.Import;
import org.springframework.context.annotation.ImportResource;

import com.dxz.demo.configuration.TestConfiguration;

@Configuration
@ImportResource("classpath:applicationContext-configuration.xml")
@Import(TestConfiguration.class)
public class WebConfig {
}
測試類:
package com.dxz.demo.configuration2;

import org.springframework.context.ApplicationContext;
import org.springframework.context.annotation.AnnotationConfigApplicationContext;

import com.dxz.demo.configuration.TestBean;

public class TestMain2 {
    public static void main(String[] args) {

        // @Configuration註解的spring容器載入方式,用AnnotationConfigApplicationContext替換ClassPathXmlApplicationContext
        ApplicationContext context = new AnnotationConfigApplicationContext(WebConfig.class);

        // 如果載入spring-context.xml檔案:
        // ApplicationContext context = new
        // ClassPathXmlApplicationContext("spring-context.xml");

        // 獲取bean
        TestBean2 tb2 = (TestBean2) context.getBean("testBean2");
        tb2.sayHello();

        TestBean tb = (TestBean) context.getBean("testBean");
        tb.sayHello();
    }
}
結果:
2.3、@configuration巢狀(巢狀的Configuration必須是靜態類)
通過配置類巢狀的配置類,達到組合多個配置類的目的。但注意內部類必須是靜態類。
上程式碼:
package com.dxz.demo.configuration3;

import org.springframework.stereotype.Component;

@Component
public class TestBean {

    private String username;
    private String url;
    private String password;

    public void sayHello() {
        System.out.println("TestBean sayHello...");
    }

    public String toString() {
        return "username:" + this.username + ",url:" + this.url + ",password:" + this.password;
    }

    public void start() {
        System.out.println("TestBean start");
    }

    public void cleanUp() {
        System.out.println("TestBean destory");
    }
}
package com.dxz.demo.configuration3;

public class DataSource {

    private String dbUser;
    private String dbPass;
    public String getDbUser() {
        return dbUser;
    }
    public void setDbUser(String dbUser) {
        this.dbUser = dbUser;
    }
    public String getDbPass() {
        return dbPass;
    }
    public void setDbPass(String dbPass) {
        this.dbPass = dbPass;
    }
    @Override
    public String toString() {
        return "DataSource [dbUser=" + dbUser + ", dbPass=" + dbPass + "]";
    }
}
配置類:
package com.dxz.demo.configuration3;

import org.springframework.context.annotation.Bean;
import org.springframework.context.annotation.ComponentScan;
import org.springframework.context.annotation.Configuration;

@Configuration
@ComponentScan(basePackages = "com.dxz.demo.configuration3")
public class TestConfiguration {
    public TestConfiguration() {
        System.out.println("TestConfiguration容器啟動初始化。。。");
    }

    @Configuration
    static class DatabaseConfig {
        @Bean
        DataSource dataSource() {
            return new DataSource();
        }
    }
}
啟動類:
package com.dxz.demo.configuration3;

import org.springframework.context.ApplicationContext;
import org.springframework.context.annotation.AnnotationConfigApplicationContext;

public class TestMain {
    public static void main(String[] args) {

        // @Configuration註解的spring容器載入方式,用AnnotationConfigApplicationContext替換ClassPathXmlApplicationContexts
        ApplicationContext context = new AnnotationConfigApplicationContext(TestConfiguration.class);

         //bean
        TestBean tb = (TestBean) context.getBean("testBean");
        tb.sayHello();

        DataSource ds = (DataSource) context.getBean("dataSource");
        System.out.println(ds);
    }
}
結果:
TestConfiguration容器啟動初始化。。。
TestBean sayHello...
DataSource [dbUser=null, dbPass=null]
3、@EnableXXX註解
配合@Configuration使用,包括 @EnableAsync, @EnableScheduling, @EnableTransactionManagement, @EnableAspectJAutoProxy, @EnableWebMvc。
4、@Profile邏輯組配置
5、使用外部變數
1、@PropertySource + Environment,通過@PropertySource註解將properties配置檔案中的值儲存到Spring的 Environment中,Environment介面提供方法去讀取配置檔案中的值,引數是properties檔案中定義的key值。
2、@PropertySource(PropertySourcesPlaceholderConfigurer)[email protected]
相關推薦
spring4.0之二:@Configuration的使用
從Spring3.0,@Configuration用於定義配置類,可替換xml配置檔案,被註解的類內部包含有一個或多個被@Bean註解的方法,這些方法將會被AnnotationConfigApplicationContext或AnnotationConfigWebApplicationContext類進行
spring4.0之三:@RestController
document extension cati PV 4.0 factor suggest TP req 使用這個特性,我們可以開發REST服務的時候不需要使用@Controller而專門的@RestController。 當你實現一個RESTful web serv
Spark2.0 特征提取、轉換、選擇之二:特征選擇、文本處理,以中文自然語言處理(情感分類)為例
true 方便 linear value taf 文檔 ota ati inter 特征選擇 RFormula RFormula是一個很方便,也很強大的Feature選擇(自由組合的)工具。 輸入string 進行獨熱編碼(見下面例子country) 輸入數值型轉換為dou
spring4.0 之 @Configuration註解
@Configuration@Configuration註解與spring-*.xml達到的目的是一樣的。@Configuration是為了完全的取消xml配置文件而改用註解。下面將對其進行對比說明: beans的加載方式 spring-.xml的加載方式:ClassPathXmlApplicationCon
spring4.1.8初始化原始碼學習三部曲之二:setConfigLocations方法
本章是學習spring4.1.8初始化原始碼的第二篇,前一章《spring4.1.8初始化原始碼學習三部曲之一:AbstractApplicationContext構造方法》對AbstractApplicationContext的初始化做了分析,本章我們聚焦
spring4.1.8擴充套件實戰之二:Aware介面揭祕
接下來通過分析spring原始碼,我們來看看典型的Aware子類有哪些,使用場景是什麼? 在spring容器初始化過程中,會執行AbstractApplicationContext類的prepareBeanFactory方法,這裡面會建立一個bean後置處理器
【U3D系統架構教程——開發篇】之二:Log日誌系統2.0
這篇文章由唐三胖ヾ(•ω•`)o網路整理總結,將告訴你如何開發一個高效率的日誌系統。 通過這篇文章,你可以知道 1)C#特性Condtional 2)開發2.0版的日誌系統 開篇介紹 通過上一章節的介紹,我們已經實現了重寫的日誌
C#基礎拾遺系列之二:使用ILSpy探索C#7.0新增功能點
第一部分: C#是一種通用的,型別安全的,面向物件的程式語言。有如下特點: (1)面向物件:c# 是面向物件的範例的一個豐富實現, 它包括封裝、繼承和多型性。C#面向物件的行為包括: 統一的型別系統 類與介面 屬性、方法、事件 (2)型別安全:C#還允許通過dynamic關鍵字動態
Ubuntu 18.04 安裝 Tensorflow 環境之二:安裝 CUDA 10.0
在前面裝好顯示卡驅動之後,在這一節,安裝 CUDA,由於更新換代,現在 NVIDIA 官網上已經是 CUDA 10 了。 安裝過程 1、在 官網 上下載 cuda_10.0.130_410.48_linux.run, 建議下載 .run 的檔案,大約2G,便於自己選擇性安
4.AngularJS四大特征之二: 雙向數據綁定
sco font int out grep 模型 多行文本 pan oot AngularJS四大特征之二: 雙向數據綁定 (1)方向一:把Model數據綁定到View上——此後不論何時只要Model發生了改變,則View中的呈現會立即隨之改變!實現方法: {{ }}、
linux學習之二:日常的基礎命令收集
幫助文檔 gedit 查看 日期 取整 style 位置 某月 linux 1、 ls 2、pwd 顯示當前目錄所在位置 3、date 日期時間 4、cal 日歷 默認顯示當前該月 cal 2012 :查看2012年的日歷 cal 月 年 : 查看某年某月
【只怕沒有幾個人能說清楚】系列之二:Unity中的特殊文件夾
物體 avi ebp time 編輯模式 tro hive 預覽 打包 參考:http://www.manew.com/thread-99292-1-1.html 1. 隱藏文件夾 以.開頭的文件夾會被忽略。在這種文件夾中的資源不會被導入,腳本不會被編譯。也不會出現
雙態運維分享之二: 服務型CMDB的消費場景
新增 iso20000 那種 .cn 關聯 通知 變更 不同 維護 近年來,CMDB在IT運維管理中的價值逐步得到認可,使用CMDB的期望值也日益增長。然而,CMDB實施和維護的高成本卻一直是建設者們的痛點。那麽今天,我們來探討一下如何通過消費來持續驅動CMDB的逐步完善。
UVM序列篇之二:sequence和item(上)
技術 一點 目標 idt 需要 開始 掛載 ron 前行 無論是自駕item,穿過sequencer交通站,通往終點driver,還是坐上sequence的大巴,一路沿途觀光,最終跟隨導遊停靠到風景點driver,在介紹如何駕駛item和sequence,遵守什麽交規,最終
Horizon7.1部署之二:Horizon Composer服務器安裝
vmware horizon composerHorizon Composer是個可選服務,如果計劃部署鏈接克隆桌面池(可以節省90%磁盤利用率),則需要安裝。我在windows2016上部署的Sql Server2016,ip是X.X.X.2,並在建立一個名為Horizon Composer的數據庫,防火墻
【2017-07-01】Linux應用開發工程師面試問題記錄之二:關於結構體的大小及內存對齊問題
偶數 而且 strong span net 但是 開發 f11 flag Tencent後臺服務器開發有一道題是計算一個結構體的sizeof的大小: struct strData { int m_Int; char m_Char; short m_Short; char
Linux時間子系統之二:Alarm Timer
數據 類型 oid mtime orm 分別是 type mon 超時 一、前言 嚴格來講Alarm Timer也算POSIX Timer一部分,包含兩種類型CLOCK_REALTIME_ALARM和CLOCK_BOOTTIME_ALARM。分別是在CLOCK_REALTI
Modbus庫開發筆記之二:Modbus消息幀的生成
不同的 command dwr 分別是 slave 識別碼 align 數據格式 .com 前面我們已經對Modbus的基本事務作了說明,也據此設計了我們將要實現的主從站的操作流程。這其中與Modbus直接相關的就是Modbus消息幀的生成。Modbus消息幀也是實現Mod
玩玩微信公眾號Java版之二:接收、處理及返回微信消息
log med iou set arch weixin b- rom data- 前面已經配置了微信服務器,那麽先開始最簡單的接收微信消息吧~ 可以用我們的微信號來直接進行測試,下面先看測試效果圖: 這是最基本的文本消息的接收、處理及返回,來看看是怎麽實現的
Halcon學習之二:攝像頭獲取圖像和相關參數
digg tail tours mage eight sta vision name pict 1、close_all_framegrabbers ( : : : ) 關閉所有圖像采集設備。 2、close_framegrabber ( : : AcqHand